
 Become a TechRadar Insider


-
 WWDC 2026Apple quietly kills off support for Intel Macs and MacBooks
It's an end of an era: Apple no longer supports any Mac with an Intel chip, as it quietly announces that macOS 27 Golden Gate will only work with devices with Apple silicon sold after 2020.
-
-
 WWDC 2026macOS 27 Golden Gate announced at WWDC 2026 - here's everything you need to know
Tim Cook's final WWDC keynote as Apple CEO included confirmation that macOS 27 Golden Gate is coming for Macs and MacBooks - but it won't be a revolutionary release.
-
 AirPods are finally getting a custom EQ in iOS 27, this is not a drill!
Nearly 10 years since AirPods launched, they finally getting a custom EQ
-
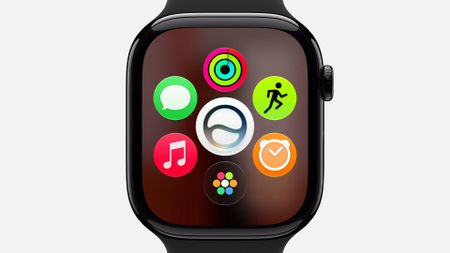 6 current-gen Apple Watches won't be able to run watchOS 27, including Ultra and SE models
Has your Apple Watch survived? These are all the models being cut off from a watchOS upgrade this year, and it's a much longer list than anticipated.
-
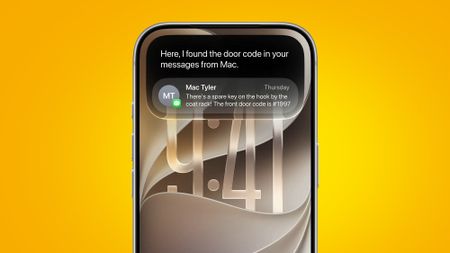
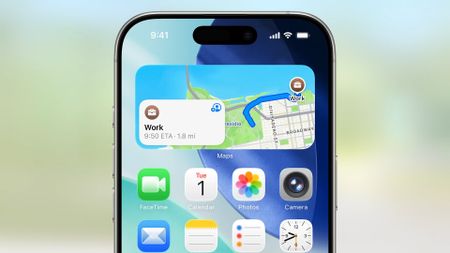
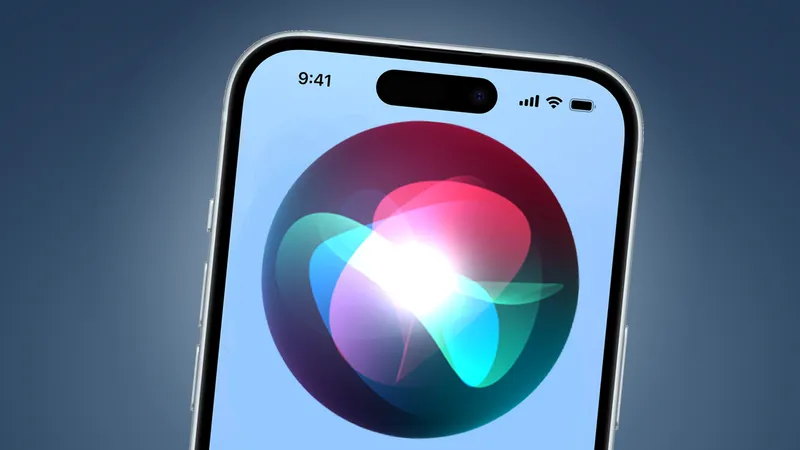
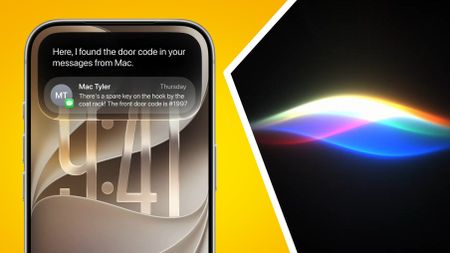
 Apple just gave 'Siri AI' its biggest upgrade ever — whether iPhone users asked for it or not
Apple's biggest Siri AI upgrade ever could transform the iPhone experience, but I’m not convinced more AI is what users want.
-


-
 Anker Soundcore Liberty 5 Pro review: feature-packed, great fitting earbuds — highly recommended
 -
-
 The Dyson Supersonic Travel is proof you don't have to sacrifice hair health on holiday
 -
 Shoks OpenDots 2 review: Comfortable, stable, long-lasting open-ear buds
 -
 The Dreame AirStyle Era is an Airwrap alternative that almost has it all
 -
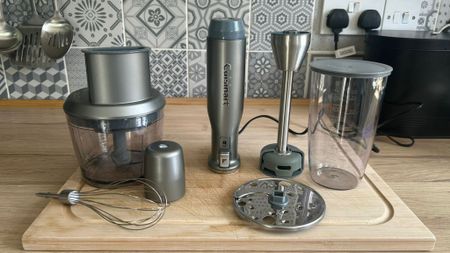 The Cuisinart Power Blend Immersion Blender is a powerful and versatile four-in-one appliance
 -
 Khadas Tea Pro Magnetic Headphone Amplifier review: a slim, stylish and punchy audio upgrade for phones and more
 -
 GameSir Pocket Taco review: this controller's a cool concept that can’t really stick the landing
-


How TechRadar tests

Product testing for the real world
You need to know that the device or service you’re about to spend money on works as advertised - and that it works in the real world.
- We test properly: objective and subjective testing
- We use experienced experts for our reviews
- We always offer 100 per cent unbiased, independent opinions
reviews
hours' testing
buying guides
-
 iOS 27 and Siri AI compatibility explained — here's which devices are supported
 -
-
 iOS 27 developer beta: a step-by-step installation guide
 -
 Forget Siri — these are the 5 things I actually want in iOS 27 at WWDC 2026
 -
 I asked Siri if it knew what to expect at WWDC 2026 and its answer was so predictably disappointing — I really hope Apple can fix this
 -
 The iPhone Ultra will finally make foldables mainstream — but not because of the hardware3 Comments
 -
 WWDC 2026: how to watch and what to expect
 -
 Nothing is proving that smartphones can still be chic, and I hope other Android manufacturers are paying attention
-


-
 NYT Wordle today — answer and my hints for game #1816, Tuesday, June 92693 Comments
 -
-
 NYT Strands hints and answers for Tuesday, June 9 (game #828)
 -
 Quordle hints and answers for Tuesday, June 9 (game #1597)
 -
 WWDC 2026Apple quietly kills off support for Intel Macs and MacBooks
 -
 How to download the macOS 27 Golden Gate developer beta
 -
WWDC 2026macOS 27 Golden Gate announced at WWDC 2026 — here's everything you need to know
-
 Dell's new XPS RTX Spark mini PC could prove a problem for the Mac Studio
-


-
 Apple just gave 'Siri AI' its biggest upgrade ever — whether iPhone users asked for it or not
Apple's biggest Siri AI upgrade ever could transform the iPhone experience, but I’m not convinced more AI is what users want.
-
-
 Apple’s Siri update may bring big changes to the HomePod mini and Apple TV
Siri will get an AI upgrade at Apple’s WWDC show today. Here’s how it could affect the Apple TV and HomePod mini.
-
 I connected Claude to Gmail, and it actually saved me some time
If you don't mind Claude having a shuffle around your inbox, it can quickly get up to speed with your way of working.
-
 New York could be the first state to temporarily ban large data centers
New York state has taken another step closer to stopping large data center development for the next year.
-
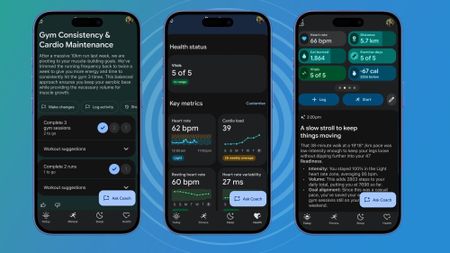 I've been using Google Health's new AI Coach for a week — here's 3 things I liked about the Fitbit Premium revamp (and 2 I really didn't)
Is Google Health's new AI coach worth your money? I put it to the test for a week to find out.
-


-
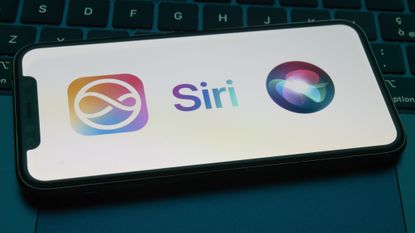
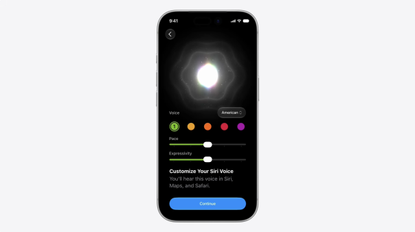 Apple's Siri AI adds voice customization but HomePod updates lag behind
Siri AI is packed to the brim with new AI features, bringing it up to speed with much of its competition. One feature, however, will take it leagues ahead in my home.
-
-
 iOS 27 and Siri AI compatibility explained — here's which devices are supported
Apple has confirmed the iPhones and iPads that will support iOS 27, Siri AI, and iPadOS 27.
-
6 current-gen Apple Watches won't be able to run watchOS 27, including Ultra and SE models
Has your Apple Watch survived? These are all the models being cut off from a watchOS upgrade this year, and it's a much longer list than anticipated.
-
Apple just gave 'Siri AI' its biggest upgrade ever — whether iPhone users asked for it or not
Apple's biggest Siri AI upgrade ever could transform the iPhone experience, but I’m not convinced more AI is what users want.
-
iOS 27 developer beta: a step-by-step installation guide
Registering as an iOS developer is easy, and it will grant you access to the iOS 27 developer beta.
-


-
 Sweet Magnolias season 5 release date and time on Netflix
Maddie's made the leap to life in New York City, but her girls are never far behind. With Serenity a distant memory, when does Sweet Magnolias season 5 arrive on Netflix?
-
-
 Cape Fear episode 3 release date and time on Apple TV
Can't wait for more Cape Fear? Me neither. Here's when episode 3 is arriving on Apple TV.
-
 Dutton Ranch episode 5 proves Beth and Beulah team up, according to fans
In Dutton Ranch episode 5, Beth propositioned Beulah in the most unexpected of ways — but fans think their potential team-up started with something that shouldn't have happened.
-
 New Rivals season 2 episodes delayed until November 2026, confirmed by Hulu
I was already infuriated with the second half of Rivals season 2 after what happened in episode 6, but now episodes will be even more delayed than first thought.
-
 ExclusiveTip Toe cast had to have a week off after filming brutal Channel 4 show ending
Episode 5 of new Channel 4 drama Tip Toe is now streaming on Channel 4 —and it's so brutal that Manchester council insisted an entire street be closed to the public.
-


-
-
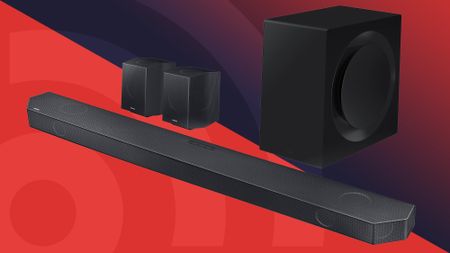 UpdatedThe best soundbars for all budgets
From budget-friendly bars to Dolby Atmos wonders, the best soundbars make it easy to get a serious TV audio upgrade.
-
 A new Sony OLED TV has leaked on the company’s website, and it could be a real hit
This budget Bravia OLED is likely to be more affordable and will be available in lots of different sizes.
-
 Why 2026 is the year for wireless home theater Dolby Atmos speakers to replace soundbars
Sponsored by Best Buy
Cutting the cables doesn't mean compromising your immersive Dolby Atmos audio. Here's why
-
 High End Vienna 2026 Best in Show awards: our favorite 11 speakers, streamers and more
From one of the best speakers in the world becoming even better, to a TV sound system that has genuine audiophile skills, to wireless speakers that look like alien invaders
-
 Here are the 4 new 4K Blu-rays I'm most excited to test in June 2026
June 2026 is another stacked month for 4k Blu-ray releases — I've picked four that I can't wait to get my hands on.
-
 Peacock will show the World Cup in Dolby Vision and Dolby Atmos with high-quality AC-4 streaming
Peacock will be the first major streamer to deploy Dolby's AC-4 audio codec in Telemundo's coverage of the 2026 World Cup
2 Comments -
 UpdatedThe best gaming TV for all budgets, all real-world tested by our experts
Our guide to finding the best gaming TV for your PS5, Xbox Series X, PC or even last-gen console that will suit all budgets.
-


-
-
 Anker Soundcore Liberty 5 Pro review: feature-packed, great fitting earbuds — highly recommended
The Anker Soundcore Liberty 5 Pro tick all my boxes, with a few stand-out features that even earned my mom's approval, too.
-
AirPods are finally getting a custom EQ in iOS 27, this is not a drill!
Nearly 10 years since AirPods launched, they finally getting a custom EQ
-
 The AirPods Max 2 are the 'best noise-cancelling iPhone headphones on the planet' — and they've just hit a new record-low price at Amazon
The AirPods Max 2 thoroughly impressed us when we tested them, and these stunning premium headphones have just hit a new record-low price.
-
Shoks OpenDots 2 review: Comfortable, stable, long-lasting open-ear buds
The Shokz OpenDots 2 are top-of-the-range open clip-on earbuds that deliver a stable, if perhaps not quite secure, fit and excellent sound.
-
 Spotify eyes live concert streaming to compete with YouTube
Spotify is looking to expand its video content, and now it wants to start broadcasting live concerts.
-
 Someone made a smart Sonos touchscreen music controller for just $20 / £16 — and it makes me miss the days when Sonos made its own iPod-like dedicated controller
Miss the days when Sonos Controllers were a thing? A Redditor has made his own, with just $20 / £16 and some technical know-how.
-
 The best noise cancelling headphones, all TechRadar tested
We've tested and selected the best noise cancelling headphones to keep the world out and your music in.
-


-
-
6 current-gen Apple Watches won't be able to run watchOS 27, including Ultra and SE models
Has your Apple Watch survived? These are all the models being cut off from a watchOS upgrade this year, and it's a much longer list than anticipated.
-
Shoks OpenDots 2 review: Comfortable, stable, long-lasting open-ear buds
The Shokz OpenDots 2 are top-of-the-range open clip-on earbuds that deliver a stable, if perhaps not quite secure, fit and excellent sound.
-
 One of Garmin's best watches just got a mega 50% discount at Amazon — get the Epix Pro (Gen 2) for its lowest-ever price
The Garmin Epix Pro (Gen 2) is one of the manufacturer's best watches and an excellent option for serious runners — it's now a massive 50% off at Amazon and back to its record-low price.
-

-
-
 Two affordable Viltrox primes land for Sony, Fujifilm and Nikon — including this reimagined classic
Viltrox has unveiled two new prime lenses for Sony, Fujifilm and Nikon APS-C cameras, the AF 75mm F1.8 EVO and AF 90mm F2.2 EVO.
-
 Forget the Kodak Charmera — this miniature digital camera is a lo-fi bargain
Canal Toys' Photo Creator series of cameras includes the Mini Digital Camera series 3, and it's a lo-fi bargain!
-
 This tiny E Ink frame might just be the world’s most charming fridge magnet
*Not suitable for oceans, skies, denim, blueberries, etc
-
 Panasonic Lumix L10 vs Fujifilm X100VI: which premium compact camera is best for you?
Does the Lumix L10 exceed the X100VI as the ultimate everyday camera?
-


-
-
The Dyson Supersonic Travel is proof you don't have to sacrifice hair health on holiday
Almost all of the Dyson power and performance for half the price in a third of the size
-
 Stay stylish with essential travel tech: hair dryers, cordless stylers, fans, and more
Look flawless, not frazzled on your summer vacation with my pick of the best beauty gadgets for travel.
-
 The viral TikTok hair hacks that are actually worth your time
Not all hair hacks are created equal so I've tested dozens to work out which are worth trying, or worth avoiding
-
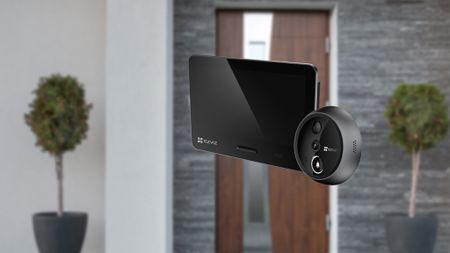 This clever camera turns the peephole in your front door into a smart security system
EZVIZ's new EP4 door camera looks like an excellent alternative to video doorbells, especially for rental properties
-


-
 UpdatedThe best soundbars for all budgets
 -
-
The best noise cancelling headphones, all TechRadar tested
-
 6 beautiful design-focused wireless speakers that look as good as they sound
Sponsored by Best Buy
-
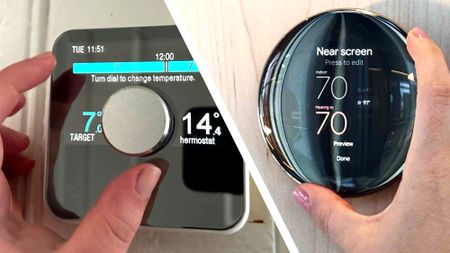 UpdatedThe best smart thermostat 2026: the easy way to make your heating more efficient
 -
 UpdatedThe best ultrawide monitors 2026
 -
UpdatedThe best gaming TV for all budgets, all real-world tested by our experts
-
 The best 32-inch TV: small screens for any budget
-


Why we're experts

We care passionately about tech
The TechRadar team has a life-long passion for the latest innovations – over 300 years of experience between us, in fact – and we’ve made it our mission to share that combined knowledge and expertise with you.
We’re here to provide an independent voice that cuts through all the noise to inspire, inform and entertain you; ensuring you get maximum enjoyment from your tech at all times. Technology is our passion, so let us be your expert guide.
years' experience
how-tos written
Apple events covered
-
-
The AirPods Max 2 are the 'best noise-cancelling iPhone headphones on the planet' — and they've just hit a new record-low price at Amazon
The AirPods Max 2 thoroughly impressed us when we tested them, and these stunning premium headphones have just hit a new record-low price.
-
 The Lenovo Legion Pro 7i features a 'gorgeous' OLED display, RTX 5080, and 32GB of RAM — and it's $950 cheaper after a surprise pre-Prime Day deal
Today's surprise pre-Prime Day deal at B&H addresses our main complaint with this machine — its price!
-
One of Garmin's best watches just got a mega 50% discount at Amazon — get the Epix Pro (Gen 2) for its lowest-ever price
The Garmin Epix Pro (Gen 2) is one of the manufacturer's best watches and an excellent option for serious runners — it's now a massive 50% off at Amazon and back to its record-low price.
-
 7 laptops we'd recommend to buy your Dad for Father's Day
If you're looking for a laptop deal, here are my personal picks ahead of this year's Father's Day - including all types of machines.
-
 Prep and save for America’s 250th birthday at Walmart — shop deals on grills, decor, games, patio furniture, and more
America's 250th Birthday is almost here, and Walmart has deals on everything you need to celebrate, including grills, decor, patio furniture, games, and more.
-
 7 Amazon Prime Day deals that get you up to $135 in free perks right now
Prime member? Don't forget to take full advantage of Amazon's freebies in the run-up to this year's Prime Day 2026.
-


-
-
 Sling TV promo codes for Jun 2026
SPONSORED With these Sling TV promo codes you can get discounted memberships and add access to extra channels for free on the streaming service.
-
 Trend Micro promo codes for Jun 2026 |
SPONSORED Find one of Trend Micro promo codes to lower the price of the brand's cybersecurity software, covering antivirus, identity protection & a VPN.
-
 LastPass coupons in Jun 2026 |
SPONSORED Use our LastPass coupons to save on the price of plans from the password manager software and manage your logins for less.
-
 Bitdefender Coupon Codes for Jun 2026 |
SPONSORED Use one of these tried & tested Bitdefender coupon codes to save on internet security, antivirus, VPN, and password management.
-
 Jackery discount codes for Jun 2026 |
SPONSORED Use one of Jackery discount codes to discount the brand's power stations & supplies, including solar generators, solar panels & accessories.
-
 Private Internet Access coupon codes for Jun 2026 |
SPONSORED These Private Internet Access coupon codes can lower the price of the brand's VPN and antivirus software plan to help protect you online.
-
 Dreame coupon codes for Jun 2026 |
SPONSORED Find Dreame coupon codes to add to your order to lower the price of handheld and robot vacuums, hair care and air purification devices and more.
-
 UGREEN coupons for Jun 2026 |
SPONSORED Browse these UGREEN coupons to get a discount on items such as power banks, hubs, chargers, docks and other tech & accessories.
-
 Network Solutions coupons for Jun 2026 |
SPONSORED Use one of these Network Solutions coupons at the checkout to lower the price of domains, web building & hosting, and online marketing services.
-


TechRadar's story

Our mission is unchanged
TechRadar was launched in January 2008 with the goal of helping regular people navigate the world of technology. It quickly grew to become the UK's biggest consumer technology site.
Expansions into the US and Australia followed in 2012 and we are now one of the biggest tech sites in the world.
- We've been covering tech since 2008
- 17 international editions from Mexico to New Zealand
- We're a globally respected brand worldwide
-
-
WWDC 2026Apple quietly kills off support for Intel Macs and MacBooks
It's an end of an era: Apple no longer supports any Mac with an Intel chip, as it quietly announces that macOS 27 Golden Gate will only work with devices with Apple silicon sold after 2020.
-
How to download the macOS 27 Golden Gate developer beta
Want to try the latest version of macOS
-
WWDC 2026macOS 27 Golden Gate announced at WWDC 2026 — here's everything you need to know
Tim Cook's final WWDC keynote as Apple CEO included confirmation that macOS 27 Golden Gate is coming for Macs and MacBooks — but it won't be a revolutionary release.
-
 Windows 11 search could soon get one of my most-wanted changes
Windows 11 search could soon get a vital change to make it more usable.
-

-
-
 NYT Connections hints and answers for Tuesday, June 9 (game #1094)
Looking for NYT Connections answers and hints? Here's all you need to know to solve today's game, plus my commentary on the puzzles.
-
 The best monitors for PS5 and PS5 Pro 2026: our top picks to make your PlayStation 5 games look their best
One of the best monitors for PS5 or PS5 Pro will help your games shine and run super smooth while also allowing for great PC integration.
-
NYT Connections hints and answers for Monday, June 8 (game #1093)
Looking for NYT Connections answers and hints? Here's all you need to know to solve today's game, plus my commentary on the puzzles.
-
 Scuf Omega review: a premium PS5 pad with a few frustrations
The Scuf Omega excels at providing a premium gaming experience, but I can’t help but lurch at the price and some of its design choices.
-


Between them, the TechRadar team have 300 years' experience in tech journalism. Here's why you should trust them.


-
-
 Apple pulls Russia's state-backed MAX app from App Store over sanctions compliance
 -
 X-VPN proves its privacy credentials with new independent no-logs audit
 -
 ‘It’s becoming more difficult finding stable VPNs’ – China increases crackdown on VPN usage
 -
 Russian Roskomnadzor accused of launching active DDoS attacks on VPN services — here's what we know so far
 -
 This $1.33 per month VPN is the most customizable option out there — perfect if you're after a secure connection tailored to your exact needs
 -
 Canada’s Bill C-22: Why Signal, Apple, and top VPNs are fighting the 'surveillance' law
 -
 IPVanish servers – all you need to know about the VPN provider's network
Sponsored by IPVanish
-


-
-
 WordPress users beware — experts claim sites are being hijacked using a critical flaw in popular Everest Forms Pro plugin
A popular WordPress plugin is once again being leveraged in website takeover attacks.
-
 Quote of the day by Mark Zuckerberg: "Move fast and break things. Unless you are breaking stuff, you are not moving fast enough" — on the nature of disruption
The Facebook co-founder has long run his company with a philosophy that promotes speed in innovation
-
 AMD CEO Dr Lisa Su praises AI promise, but says it is "still so so early in the process”
Lisa Su says AMD is working on improving compute, says "compute actually equates to intelligence".
-
 Exclusive‘Regulation by litigation is often overlooked as a regulatory tool’: Just how much responsibility should AI companies have on their users’ wellbeing?
AI chatbots have been likened to social media, leading to addiction and potentially worse. I explore how they could be regulated.
-


