How to use Surfshark VPN with your gaming console
Don't let bandwidth throttling and DDoS attacks slow you down – see why downloading Surfshark VPN can help

Whether you're a serious gamer or somebody who just dabbles, teaming up your console with a VPN could be one of the finest pairings since Sonic met Tails. And thanks to its mach 1 connection speeds, user-friendly interfaces and unique security features, Surfshark is high on the list of best gaming VPNs you can get right now.
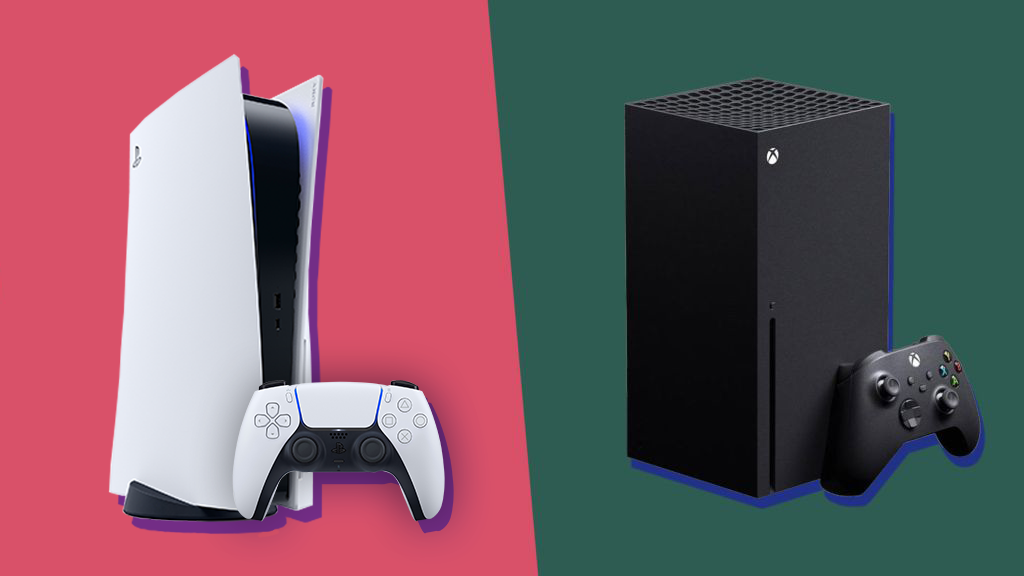
Search for Surfshark on your PlayStation or Xbox, however, and you'll soon discover no app is available. The same can be said for every other VPN as well.
That doesn't mean that you can't enjoy the benefits of Surfshark on your console. We'll show you two simple workarounds that will let you use Surfshark today and why a VPN is a useful tool for gamers.
Surfshark – was $2.19 now from $1.99 per month
The best cheap VPN (and the fastest!)
Surfshark proves you don’t need to spend a fortune on a reliable VPN:
💵 It’s the best cheap VPN on the market.
♾️ It has unlimited simultaneous connections
🍿 And quick enough to handle your 4K gaming sessions.
Intrigued? Try Surfshark today with a 7-day free trial and 30-day money-back guarantee.
Why use a VPN with my gaming console?
VPNs are almost as useful a tool in a gaming setup as a wireless gaming headset or the most comfortable gaming chair.
Here are a few reasons why:
- Avoid slowdowns: Some internet service providers (ISPs) throttle individual bandwidth after a certain amount of usage, resulting in laggy, glitchy online play. By spoofing your IP address, VPNs can help you get around this issue.
- Protection from DDoS attacks: Some gamers will do anything to get ahead! Distributed denial-of-service – or DDoS – attacks flood your network with traffic and, as a result, slow down your connection. Changing your IP address can camouflage you from such fiendish endeavors.
- Access different lobbies: Many popular online games like Call of Duty, Fortnite and League of Legends use skill-based matchmaking (SBMM), based on your location. Change your IP to one in a different country and you may find access to easier lobbies.
- Cheaper games: The price of games can differ around the planet. Make sure you're getting the right price by virtually relocating to your usual games console store.
- Stream international content: For many, their gaming console doubles up as a smart streaming device, with apps for Netflix, Prime Video and myriad other services. Relocate your IP address with a VPN and watch TV shows and live sports wherever you go.
Why is Surfshark a good VPN for using with gaming consoles?
It's little wonder that Surfshark appears in a prominent position in both of our guides to the best PS5 VPN and best Xbox VPN – it has pretty much all of the attributes you'd want.
For starters, there's the lightning performance that sped it to the front of the crowd during our latest round of testing.
Although it wasn't the only VPN that maxed out our 1 Gbps connection when using the WireGuard protocol, it backed this up with a seriously impressive 460 Mbps when using OpenVPN, beating the likes of NordVPN, ExpressVPN and the vast majority of the other competition.

All Surfshark servers have 10 Gbps ports, allowing as close to lag-free data transmission as you can currently get. And, of course, they are all blessed with 256-bit AES encryption to keep all of your traffic safe from prying eyes.
And if you're a serious gamer who is acutely concerned about DDoS protection, Surfshark's rotating IP helps ensure that wannabe attackers won't be able to pin you down.
How to use Surfshark VPN with your gaming console
Unlike laptops, smartphones, tablets and the majority of today's most popular streaming devices, gaming consoles don't carry dedicated VPN apps.
It's certainly inconvenient, but doesn't mean they can't be used with your PS5, Xbox or Wii. There are two straightforward ways you can make use of Surfshark VPN on your console...
The router method
Installing Surfshark VPN on your router requires quite a few fiddly steps, but will allow a faster, more secure connection on your console.
1. Download Surfshark VPN on your laptop or smartphone
As we say, you need to ignore the app store on your console, Instead, the first step is to head to the Surfshark website on another device.
From there, you can choose your Surfshark plan, with Surfshark One available for a little extra if you like the idea of an all encompassing cybersecurity plan.
Click to see all of the steps of this method▼
2. Find your router's IP address
To find out your IP address, either click through to our dedicated guide or follow the simple steps below:
On your PS5, go to Settings > Network > View Connection Status.
On your Xbox, go to Settings > General > Network settings > Advanced settings.
On Windows, go to Control Panel > Network > Network Connections > Select your Wi-Fi > Details.
On Macs, go to Control Panel > Network > Select your Wi-Fi > Details.
The number you're looking for is the eight-digit IPv4 address that looks something like 192.111.1.1.
3. Login to your router’s admin panel
Simply type your newly found IP address into your browser and, where prompted, enter your router's username and password.
4. Go to VPN settings
Every router type will vary here, but you can hunt around in the settings menus for VPN options. Sometimes these are found in an 'Advanced' menu or similar.
5. Follow Surfshark's online guidance
This is where we'll hand you over to Surfshark. The VPN provider offers specific instructions for a wide array of compatible routers.
Head to its dedicated instructions page here to find yours.
6. Connect and play!
Follow Surfshark's instructions to connect your router VPN and it will now give you security and IP spoofing for every device – including your gaming console – that's connected to the router.

Shared connection method – Windows
Sharing a VPN connection to your PS5/PS4 or Xbox One/X/S/360 from your Windows laptop or desktop is a good alternative if your router doesn't support VPN use.
1. Download Surfshark VPN on your Windows PC
Just like the router method, the first step is to head to the Surfshark website and choose your Surfshark plan. Once subscribed and you've downloaded the Windows client, you can begin the sharing process.
Click to see all of the steps of this method▼
2. Connect an Ethernet cable
You need to tether your PC to the console via an Ethernet cable.
Not a lot of modern laptops feature an Ethernet port, so you'll need an adaptor that lets you use a USB port instead if you wish to adopt this method.
3. Configure your Ethernet connection
This is a multi-step process in its own right.
Go to Control Panel > Network and Internet / View network status and tasks > Change adaptor settings.
This is where we're going to hand you off to Surfshark again and let it explain with diagrams what you need to look out for and press next. Head to this webpage and follow the instructions under the 'Configure the VPN adapter' sub-head.
4. Connect Surfshark
Fire up the Surfshark client on your PC and go to Settings > VPN Settings > Protocol.
Select OpenVPN (UDP) from the Protocol list.
Then turn on the VPN like you normally would. If there's a particular server location you want to connect to, now's the time to choose it.
5. Configure your console
With Surfshark up and running, the final step is to choose the appropriate steps on your Sony PlayStation. Note that you can forget this step if you're on Xbox – you're already good to go!
On your PS, head to Settings > Network Settings > Set Up Internet Connection.
If you're a PS5 user, select Set Up Wired Lan > Connect.
If you're a PS4 user, select Use a LAN Cable > Easy > Do Not Use Proxy Server.
Shared connection method – Mac
You can also sharing a VPN connection to your PlayStation from an Apple Mac, but this method isn't suitable for Xbox.
1. Download Surfshark VPN on your MacBook or iMac
Just like the router method, the first step is to head to the Surfshark website and choose your Surfshark plan. Once subscribed and you've downloaded the Mac client, you can begin the sharing process.
Click to see all of the steps of this method▼
2. Connect an Ethernet cable
You need to tether your Mac to the console via an Ethernet cable.
Modern MacBooks simply don't feature an Ethernet port, so you'll need an adaptor that lets you use a USB port instead if you wish to adopt this method.
3. Configure your Ethernet connection
On your Mac, go to System Settings > General > Sharing > Internet Sharing.
From there, choose Wi-Fi from the Share your connection from menu, and then Ethernet adapter from the To devices using menu.
Check that Internet Sharing is turned to on.
4. Configure your console
With Surfshark up and running, choose the appropriate steps on your Sony PlayStation.
Head to Settings > Network Settings > Set Up Internet Connection.
If you're a PS5 user, select Set Up Wired Lan > Connect.
If you're a PS4 user, select Use a LAN Cable > Easy > Do Not Use Proxy Server.
Sign up for breaking news, reviews, opinion, top tech deals, and more.
Adam was formerly the Content Director of Subscriptions and Services at Future, meaning that he oversaw many of the articles TechRadar produces about antivirus software, VPN, TV streaming, broadband and mobile phone contracts - from buying guides and deals news, to industry interest pieces and reviews. Adam has now dusted off his keyboard to write articles for the likes of TechRadar, T3 and Tom's Guide.


