Over the past few years, gamers have been treated to but a sample of in-game photography, a niche that’s grown increasingly more commonplace this generation.
This pronounced interest in taking high-quality, custom screenshots, of course, stems from social media and our innate desire to share experiences with others. To that end, we’ve seen “Photo Mode” emerge in games like Uncharted 4 and Infamous: Second Son on consoles, while PC players have ostensibly wound up settling for the short end of the stick.
Article continues belowNvidia debuted Ansel earlier this year as a more uniform Photo Mode solution that even pint-sized indie developers can implement with as few as 40 additional lines of code. In July, Nvidia Ansel support was first added to Mirror’s Edge Catalyst.
Nvidia has also confirmed Ansel support is on the way for The Division, LawBreakers, Paragon, No Man’s Sky and Unreal Tournament.
- Ark: Survival Evolved
- The Witcher 3: Wild Hunt
- The Witness
- Obduction
Nvidia has also confirmed Ansel support is on the way for The Division, LawBreakers, Paragon, No Man’s Sky and Unreal Tournament.

What is Nvidia Ansel?
Like Adobe Camera Raw for gaming, Nvidia Ansel bears a breadth of features to embellish the images captured while playing your favorite games using a GeForce GTX 680M or better graphics card (a complete list is available here).
- Many on our list of best graphics cards support Ansel
Post-processing effects, such as filters, brightness/contrast adjustments and color enhancements are all in place as expected. What’s more, with a Free Camera, you can freeze time, widen the field of view of your shot and take full control over the camera, whether you’re doing so with a controller or keyboard and mouse.
The most groundbreaking aspect of Nvidia Ansel, however, is the Super Resolution functionality. By leveraging your PC’s GPU power, you can render out exceptionally sharp images up to 61,440 x 34,560 pixels in size (if you stick around, we’ll even show you how to expand this threshold). Super Resolution images are not only ideal for cropping without a loss in quality, but they’re also great to have around to downsample for use as prints.
Lastly, Nvidia Ansel boasts support for 360-degree image capturing for use with VR headsets, PCs and Android devices. There’s a Stereo mode, too, in case you want 3D without the option of seeing what’s behind you. If you want both, Nvidia already thought of that and, consequently, included 360 stereo functionality as well.

How to get Nvidia Ansel
The process of acquiring Nvidia Ansel depends largely on the game you’re looking to use it with. So long as the game is supported, all you need to do is download the latest Game Ready driver through Nvidia’s GeForce Experience software or directly from the company’s website.
After that, make certain that the game itself is up to date by heading over to the digital distribution client from which your license originates (e.g. Steam, Origin or GOG Galaxy) and checking its properties. At this point, assuming you have a graphics card compatible with Nvidia Ansel, you should be good to get started taking images with its outstanding toolset.

How to activate and use Nvidia Ansel
With the prerequisites out of the way, it’s time to get started actually using Ansel. It may come as a surprise to anyone familiar with the burdens of PC gaming that, like many of the services Nvidia provides with its graphics cards, launching Ansel is fairly straightforward.
Simply open one of the supported titles from our list and press Alt + F2 to prompt the Nvidia Ansel menu screen.

Choose a filter and other adjustments
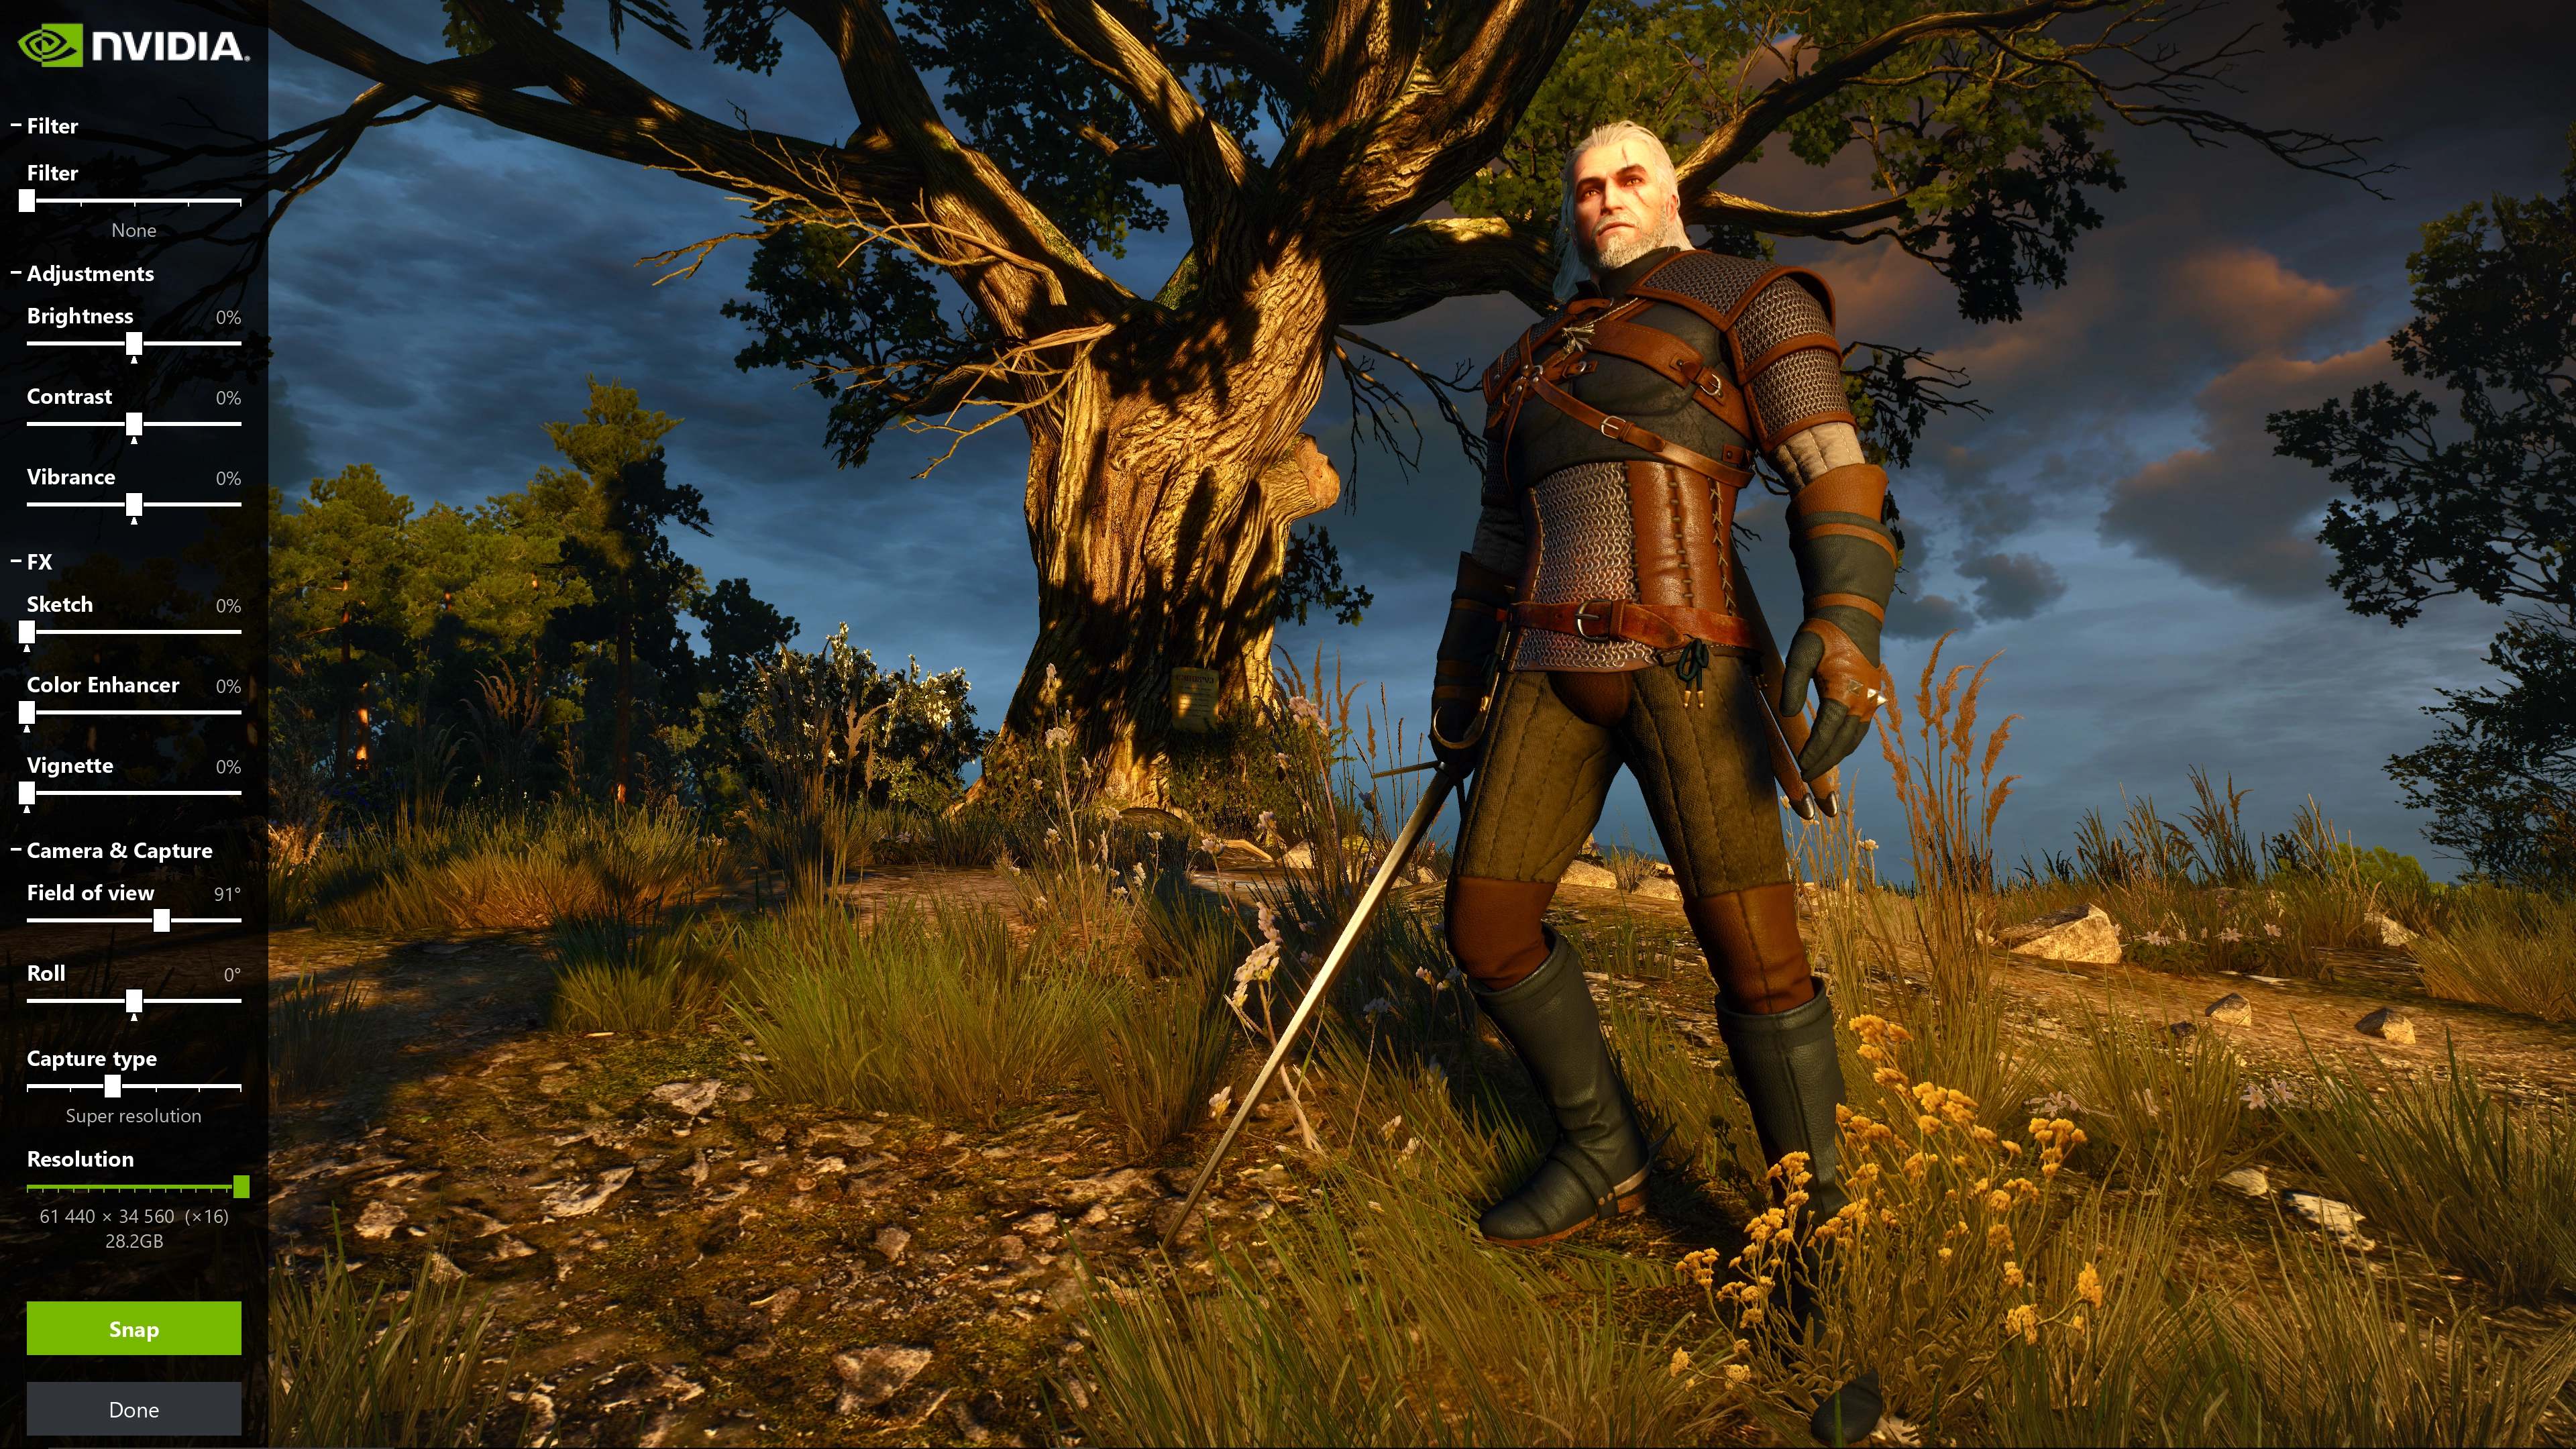
From the menu, there are a plethora of options to toggle through. From the top going down, there are four different filters to choose from: Black & White, Half-Tone, Retro and Sepia.
Beneath that is an Intensity slider that changes the impact of the filters, accompanied by brightness, contrast and vibrance adjustments as well as sketch, color enhancer and vignette effects.
Most of these are self-explanatory, but in case you were wondering, yes, Sketch looks every bit as janky as it sounds. Artifacts and all, it’s probably the least flattering change you can make in Nvidia Ansel.
Other than that, the rest of the effects are, at the very least, occasionally useful.

Change your angle
After fiddling with the rest of the settings, you can change the Field of View and Roll in the Camera & Capture section. Increasing the field of view allows for greater coverage in long-shots while fine-tuning the Roll actually rotates the image for dramatic effect.
This leads into the “Capture Type” and “Resolution” categories, both of which deal with the output properties of the image you create.

Choose your Capture Type
Under Capture Type, you’ll find six different options; namely Screenshot, EXR, Super Resolution, 360, Stereo and 360 stereo.
Screenshot, obviously, captures the frame in its native resolution. Whether that be 1080p, 4K or something in between depends on the specifications of your setup.
EXR, on the other hand, lets you export screenshots in Industrial Light & Magic’s OpenEXR format, allowing you to modify camera exposure, colors and levels using a third-party photo editing application. Anything from PhotoShop to Pixlr will suffice.
The 360, Stereo and 360 Stereo modes are all three designed for VR. As the name implies, 360 produces an image that can be viewed from all angles. Stereo, on the other hand, is designated to stereoscopic 3D screenshots.
As you probably guessed, 360 Stereo delivers the best of both worlds by putting out images that are both 3D and viewable in 360-degrees in Google Cardboard, on a PC or in a VR headset.

How to override Nvidia Ansel’s Super Resolution limits
There’s also a nifty trick to Nvidia Ansel that hasn’t garnered a lot of buzz yet. By default, the maximum Super Resolution is locked to 63K. Dig deep into the Ansel installation directory and you’ll hastily discover that it is in fact possible to alter this cap in addition to a handful of other preferences.
Naturally, the Ansel file directory is stored under C:\Program Files\NVIDIA Corporation\Ansel.
When you’ve found that, head over to the Tools folder and run “NvCameraConfiguration” as an administrator, cuing the Ansel Configuration Utility to open.
There you can modify the Max High Resolution, Max Spherical Resolution, Stereo Eye Separation and Camera Movement Speed.
Moreover, you can change the file format of both Super Resolution and 360-degree screenshots to lossless PNG. Meanwhile, the output directory can be modified for temporary, intermediate shots as well as final Snapshots.
If you don’t want your storage-sucking screenshots occupying the Videos folder of your local boot drive, this is the place to prevent that from happening.
Despite the limited catalog of currently supported titles, Nvidia Ansel is a nuanced means of producing beautiful in-game photography to share with friends. The main draw to this full-course meal is the ability to take screenshots with up to 16 times the pixels of 4K UHD (33 times that of 1,920 x 1,080; even more if you change the limit).
It’s not perfect by any means, but with more widespread adoption from developers, Ansel may even influence console makers to follow Nvidia’s footsteps in crafting a universal Photo Mode once and for all… Maybe not anytime soon, but we can dream, can’t we?
- These are the very best VR games
