Here we look at Photoshop Elements and show you how to process raw images in Elements' Adobe Camera Raw editor.

However, a lot of the colour and tonal information is thrown away when you shoot in JPEG, so you can end up adding noise or blocky compression artefacts to the shot if you do need to edit it later.
Article continues belowYou can retain the colour and tonal information that JPEGs discard by switching the file format on your camera to raw, and processing the shots in Adobe Camera Raw.
Adobe Camera Raw places all the most useful photo-fixing tools close to hand as sliders and icons, so editing is a very simple process - there's no need to rummage through lots of sub menus hunting for particular commands.

In this Photoshop Elements tutorial we'll show you how to set up Adobe Camera Raw to get the best possible pictures from your raw files.
You'll learn how to adjust a raw file's tonal range to give an image more contrast, how to boost the colour saturation of an image without creating over-saturated and unprintable colours, and you'll also learn how to remove unsightly sensor spots.
And finally, you'll learn how to give your processed shot more impact by sharpening those delicate details.
How to process raw images in Photoshop Elements: steps 1-2

01 Set the depth
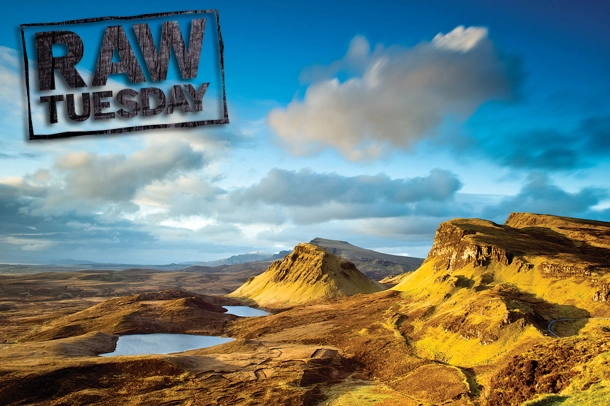
In Photoshop Elements, choose File>Open and browse to your start image. The image is a Digital Negative so it will open in Adobe Camera Raw. To squeeze as much colour and tonal information out of the file as possible set the Depth drop-down menu to 16 bits/channel.

02 Set the white balance
The shot's mountains look a little too warm. Because it's a raw file you can cool things down easily by dragging the Temperature slider left to 4900. You can counteract the image's slightly green hue by dragging Tint right to -1. This creates a Custom White balance setting.