TechRadar Verdict
A bigger, bolder range of preset effects would be good, but otherwise MacPhun's new photo-editing tool is really rather excellent. What's more, it works as a standalone app, as a Lightroom/Photoshop/Elements/Aperture plug-in, and even as an Apple Photos extension.
Pros
- +
Customisable workspaces/filters
- +
One-click preset effects
- +
Layers, masks and blend modes
Cons
- -
Needs more (and wilder!) presets
- -
Somewhat basic masking tools
- -
No built-in photo browsing
Why you can trust TechRadar We spend hours testing every product or service we review, so you can be sure you're buying the best. Find out more about how we test.
The bad news is that Luminar is a Mac-only application. The good news, for those who own a Mac, is that it’s cheap, fun and rather clever. You can use it as a simple standalone photo-editing tool, as a plug-in for Lightroom, Photoshop, Aperture and Elements and even as an editing extension for Apple Photos.
It comes in at $69 / £52 / AU$99 for new users or $59 / £44 / AU$84 for owners of existing MacPhun products. You can get it direct from the MacPhun Luminar website.
If you launch it as a standalone program you might easily feel underwhelmed by your first impressions. There’s no fancy startup screen, no application interface, just a window with a ‘Load Image’ button. You actually have to go and browse your hard disk for your photos, for heaven’s sake, though you can drag an image on to this window from a Finder window instead.
Instant effects
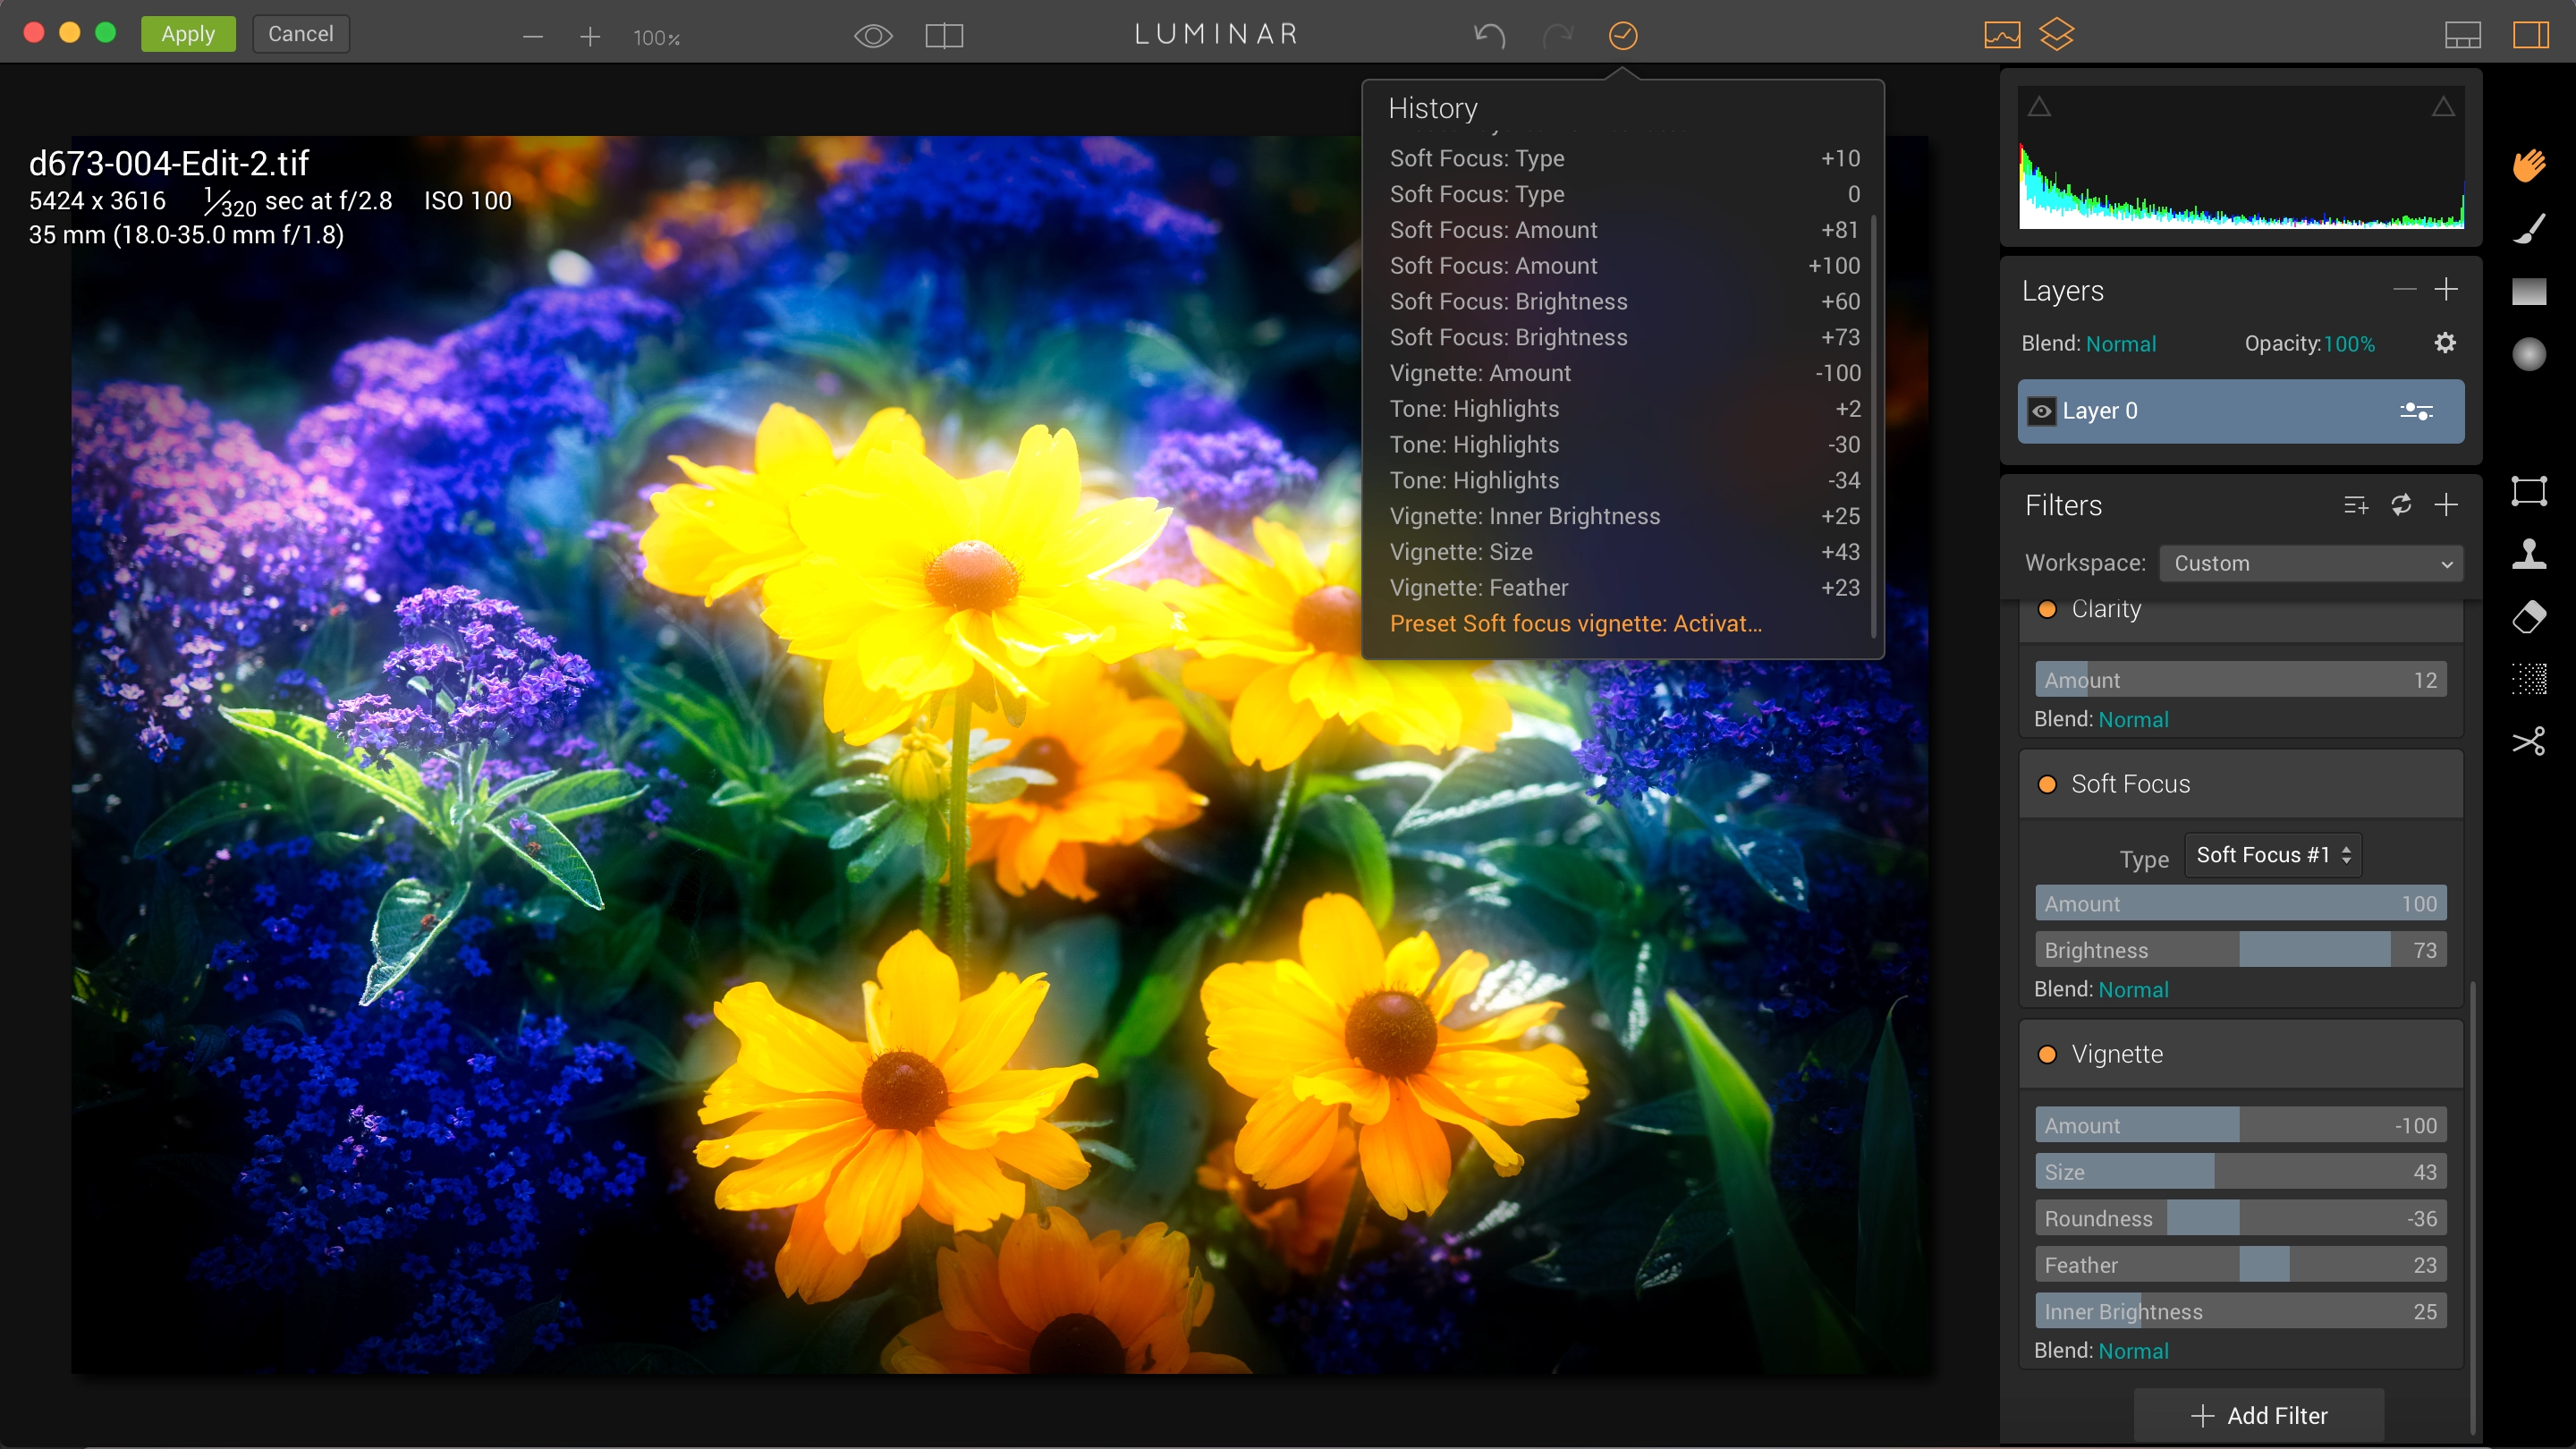
This is when the program launches for real. Your photo is opened in the main editing interface, with a filmstrip along the bottom of the screen showing thumbnails of your photo with an array of different single-click preset effects applied, and on the right there’s a vertical tools display with panels for the image histogram, layers and filter effects. There are also tool icons for masking, cropping, cloning and object removal.

So one way of using Luminar is as a simple effects tool. You open up your photo and skim through the preset effects to find one you like, then click it to apply it. The effects are organised into categories accessed by button at the far right end of the filmstrip – these include ‘Basic’, ‘Street’, ‘Outdoor’, ‘Portrait’, ‘Travel’ and ‘Dramatic’, plus a ‘User’ panel for preset effects you create yourself.
Once you’ve chosen a preset effect, the tools display on the right shows all the filters used to create the effect. There are lots of these, including ‘Adjustable Gradient’, ‘Color Balance’, ‘Clarity’, ‘Grain’ and a whole lot more. In fact, Luminar comes with 38 different filters, which can be used in a combination to create a huge range of different effects.
So it’s pretty easy to examine the filter settings for any presets you like, figure out how it’s been done and make adjustments to tweak the results. You can remove filters you don’t need, add new ones and then save what you’ve done as a new user preset.
Make your own workspace
Or you can take the next step and design your own from scratch. This is where MacPhun’s reference to Luminar’s ‘adaptive’ interface comes in. In effect, you can choose specific filters to create different workspaces for different jobs. Luminar comes with ready-made workspaces for black and white, landscape, portrait and street photography – each workspace is simply a specially chosen collection of filters for that particular genre.
For example, the B & W workspace contains Luminar’s B&W Conversion, Structure, Curves, Split Toning, Soft Glow, Texture Overlay, Vignette and Grain filters – all the tools you’re most likely to need for creative black and white.

It doesn’t even need to be this complicated. Luminar may look like a fancy special effects tool, but in amongst all those creative image filters are some common-sense everyday photo enhancement tools, including Curves adjustments, Color Balance, Sharpening and Structure. You can use Luminar as a regular photo enhancement tool, not just for special effects – just select ‘Clear’ from the Workspace menu to start with a clean slate, and then just add the filter(s) you want.

There’s a lot to explore here, and after a while you start to wonder if Luminar’s catalog of special effects presets really does justice to what these filter combinations can do.
Layers, masks and composite photos
Indeed, this is only the start, because Luminar also supports layers, layer masks and layer blending modes. You can use layers and masks to add filter effects to specific areas of the photo only, rather than the whole thing – it’s like using adjustment layers in Photoshop, but with a much wider range of effects to choose from. The masking tools are much simpler than Photoshop’s and rather like Lightroom’s, consisting of a brush, gradient and radial filter tools, but it’s enough to blend in localised adjustments smoothly and seamlessly.
Luminar isn’t finished yet. In addition to adjustment layers, it also supports image layers – you can add a new image as a new layer, resize and position it using Luminar’s Transform tool and then use the masking tools, blend modes and layer opacity control to produce complex, multi-layered image montages.

The deeper you dig into Luminar’s tools, the more you realise that underneath that simple, innocuous exterior is a serious image-editing application with real power. It even works directly with raw files – it doesn’t have the finesse of Lightroom for highlight recovery, for example, but it’s not bad.
Other features worth mentioning are the clone stamp tool, the content-aware erase tool and the denoise tool. It could take a while to figure out just what this program can do and where it could take you, and you almost get the impression that MacPhun hasn’t fully understood its potential either – the default presets are OK as far as they go, but it would be worth spending some time hand-crafting some really strong photographic looks.
Making a splash
Maybe MacPhun should take another look at Luminar’s first impressions, too. This is an impressive and innovative app, and maybe the first thing you see shouldn’t be a simple ‘Load Image’ splash screen. It’s simple to the point of being just too simple.

In fact Luminar works best as a plug-in for Lightroom or Apple Photos (it works as an extension). It has no image-organising tools of its own, so it’s much more logical to launch it from one of these apps rather than trying to locate your photos from a Finder window.
It’s good to see a software developer trying out a bold new take on a well-established software genre like photo editing. If Luminar has a problem it’s that it has far more power and potential than its first impressions suggest – but if that’s the worst thing we can say about it, then it looks like MacPhun could be on to something.
