How to personalize Windows 11
Make Windows 11 your own
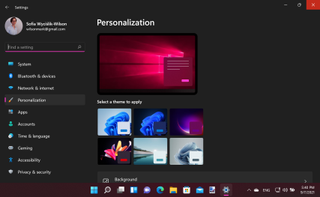
Windows 11 is a great-looking operating system, but that doesn't mean that its appearance can't be improved. Out of the box, there is little to complain about, but until you start to apply some personalizations, you know that millions of people have a desktop tat looks exactly the same.
Thankfully, it takes very little time and effort – and, pleasingly, no money! – to inject some personality into Windows 11, customizing the look of the operating system in various ways to make it your own.
Join us as we show you what you can achieve with Windows 11's built-in option – you might be surprised at just what's possible.
- How to download and install Windows 11 right now
- Google Chrome will look a lot like Windows 11
- Here's how you can bypass system requirements and install Windows 11
1. Apply a theme in Windows 11
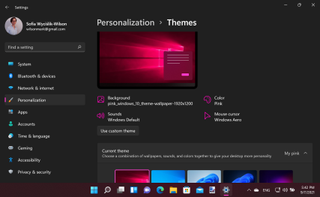
Perhaps the easiest way to completely change the look of Windows 11 is to apply a theme, and Microsoft has included a selectin for you to choose from.
Right-click and empty section of the desktop and select 'Personalize' and then move to the 'Themes' section (or you can open 'Settings' and head to Personalization > Themes and make a selection from the theme choices offered.
You can see a small preview of the visual changes a theme includes, but you can expect wider changes than the preview lets on. As well as changing your desktop image and the color scheme used throughout Windows, a theme can also change your cursor and apply a new sound scheme.
2. How to get more Windows 11 themes
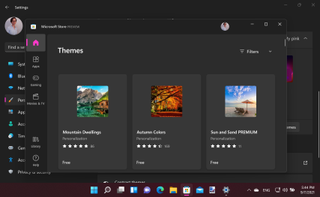
There are several built-in themes to choose from by default, but if you're struggling to find something you like, there are plenty more to download from the Microsoft Store.
Get daily insight, inspiration and deals in your inbox
Get the hottest deals available in your inbox plus news, reviews, opinion, analysis and more from the TechRadar team.
You can access these by click the 'Browse themes' button beneath the previews of the built-in themes; you'll be taken to the Store where you'll find a selection of free and paid-for options to choose from.
Once you've downloaded and installed a theme you like, you can apply it in the same way as one of the built-in one. Many themes include several desktop wallpapers, so you can browse through these two select the one you would like to use – or you can use something different as your background image if you prefer.
3. Personalize Windows 11
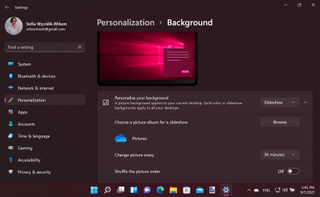
There are various options you can use when it comes to your desktop background, and these can be accessed by heading to Personalization > Background within Settings.
If you would like to use a single static image, select 'Picture' from the 'Personalize your background' drop-down menu, and then either make a selection from the 'Recent images' section, or click 'Browse photos' to select another.
If you select 'Slideshow' instead, you can have your desktop image change automatically. Click 'Browse', select a folder containing a few images and then use the 'Change picture every' menu to choose how long an image should be used as your background before changing.
4. Any color you like
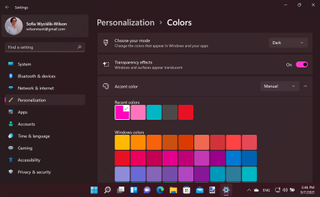
Move back to the main personalization section and click 'Colors' so you can start to tweak system color options – including dark mode.
Using the menu in the 'Choose your mode' section, you can choose between Light and Dark mode, or opt for Custom instead.
This lets you put different settings in place for Windows as a whole and for apps; many apps will let you specify dark or light mode, but this setting configures what happens by default.
You can also enable transparency settings, and choose an accent color that will be used to highlight area of the screen such as the borders around windows and applications.
5. Windows 11 Taskbar settings
The taskbar that appears at the bottom of your screen is home to not only the Start button, but also all manner of app shortcuts and system tray icons.
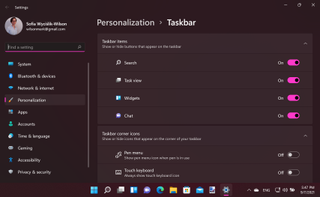
You spend a lot of time looking at and interacting with this key component of Windows, so it's important to tweak it to your liking. Right-click an empty section of the taskbar and select 'Taskbar settings'.
You can start by using the toggles into the Taskbar items to choose which icons should be display in the main portion of the taskbar. You can also use the toggles in the Taskbar corner icons to customize which icons appear in the right-hand corner of the taskbar by the clock.
6. More options
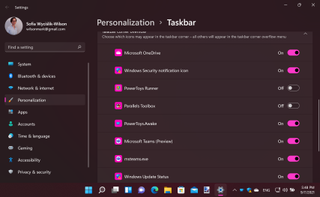
Move down to the Taskbar corner overflow section of Taskbar settings and you can further customize the right-hand side of the taskbar.
Using the various toggles that are shown here, you can choose which app icons are displayed down by the clock and which are relegated to the overflow menu. This takes them out of sight until you click the up arrow button to display the overflow menu.
It is a handy way to save space and reduce clutter by only having visible those icons which you find useful.
7. Change Taskbar location in Windows 11
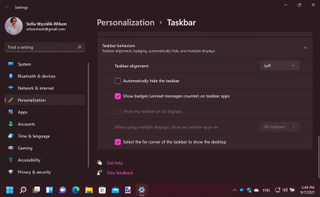
There are further options for you to consider in the Taskbar behaviors section, starting off with the Taskbar alignment setting. Using the drop-down menu here, you can opt to have the Start button moved over to the left of the screen as in previous version of Windows, or leave it centered as Microsoft intended for Windows 11.
In this section, you can also chose to have the taskbar hidden from view until you hover the mouse at the bottom of the screen, choose whether s the taskbar should be shown on all monitors (if you have a multiple display setup)
8. Hide desktop icons
Changing your background image is not the only change you can make to the desktop in Windows 11.
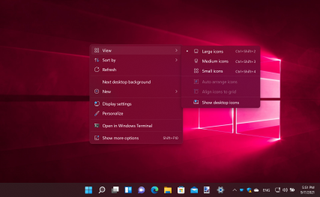
If you right-click and empty section of the desktop, the context menu that appear can be used to make various icon-related tweaks.
Look under the 'View' sub-menu, you can start by choosing the size at which desktop icons should be displayed. Beneath this, you can choose how icons should be arranged – either neatly snapped to an invisible grid, or left for freeform arrangement. Finally, you can use the 'Show desktop icons' option to toggle whether icons should be visible on the desktop or not.
9. Enable Night light in Windows 11
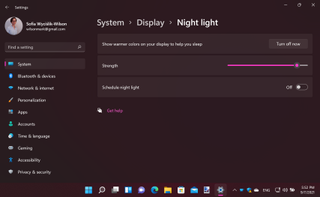
We have already looked at various ways you can customize Windows 11, including changing onscreen colors, but there is also the Night light setting which is very useful for not only change the appearance of your screen, but also reducing eye-strain.
Right-click an empty area of the desktop and select 'Display settings' and then move down to the 'Brightness & color' section.
Click the Night light section and click 'Turn on now' to switch your display to warmer colors that are gentle on the eye. You can use the slider to tweak the setting and the scheduling option to have Night light turn on and off at different times of day.
10. Customize the Windows 11 Start menu
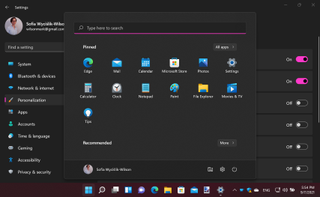
As well as the taskbar, the Start menu is something you will spend a lot of time using in Windows 11, so you should have it look and work in a way that suits you.
Right-click the Start button, select 'Settings', move to the 'Personalization' section and then click 'Start to the right'. You can use the three toggles that appear to choose whether or not to include recently added apps, most used apps and recently used items in the Start menu.
Below this, click the 'Folders' section and use the various toggles to choose which additional, handy shortcut should be included in the Start menu next to the power button for easy access to commonly used tools and locations.

Sofia is a tech journalist who's been writing about software, hardware and the web for nearly 25 years – but still looks as youthful as ever! After years writing for magazines, her life moved online and remains fueled by technology, music and nature.
Having written for websites and magazines since 2000, producing a wide range of reviews, guides, tutorials, brochures, newsletters and more, she continues to write for diverse audiences, from computing newbies to advanced users and business clients. Always willing to try something new, she loves sharing new discoveries with others.
Sofia lives and breathes Windows, Android, iOS, macOS and just about anything with a power button, but her particular areas of interest include security, tweaking and privacy. Her other loves include walking, music, her two Malamutes and, of course, her wife and daughter.
