iTunes 11 tips: the complete guide to iTunes on OS X
Faster, smarter and easier to use
Organising music and movies is essential. Here's how to do it better…
Use Smart Playlists
Smart Playlists are one of iTunes' best-kept secrets. Choose File > New > Smart Playlist and from the window add rules. Your first criterion might be Album Rating. Or BPM in the range 60-100, to display all downtempo music.
The more criteria you add, the more specific the list gets. There's a virtually infinite combination of things you can look for. You can also choose to limit the playlist to a certain number, and ticking Live Updating ensures the list refreshes itself.
Quickly create playlists
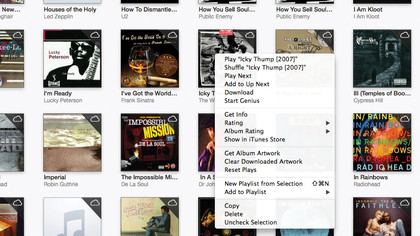
From any view in iTunes 11 you can select multiple items and create a new playlist containing those items by simply right-clicking and choosing New Playlist From Selection or pressing the apple key + alt + N. To select multiple non-continuous songs or videos, hold the apple key while clicking on them.
This works for albums in Album view as well, so you could create a playlist containing several albums. You can also click the Plus button at the bottom left corner under the sidebar to create a new playlist.
Tag your stuff

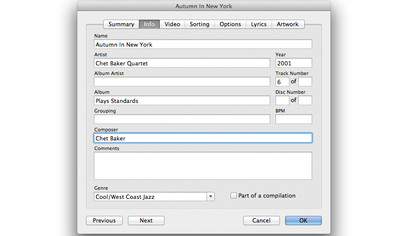
Anything purchased from iTunes will be tagged, but things you import yourself may not be. Choose a track or a group of tracks in iTunes and then select File > Get Info. In the resulting window you can add all kinds of metadata and artwork as well as making volume adjustments, adding EQ presets and choosing to skip tracks when shuffling.
Editing metadata for multiple items that have come from different albums, for example, is a good way to make and tag your own compilations. In iTunes 11 there's a new tag available for videos called Home Movie.
Sign up for breaking news, reviews, opinion, top tech deals, and more.
Use the contextual menu

Right-click on music or video in iTunes and you get a menu that provides access to useful commands such as Rate, Add to Playlist, Add to Up Next, Show in Finder, copy and delete. The Show in Playlist command is great for when you can't remember where you put a track. Show in iTunes Store jumps you directly to that artist's page on the Store.
Use the Up Next feature
Up Next is new in iTunes 11 and can be found by clicking on the icon to the right of the playback and track name display window. It shows which tracks are queued to play next, and you can jump straight to a track by clicking on it, delete tracks and re-order them.
It also makes you a bit of a DJ, since you can control playback without having to go into playlists. Create and edit temporary playlists, in effect, by managing the Up Next queue. Click on the clock icon in this window and you can see recently played tracks, as well as performing actions on them.
For any album or track in a playlist, right-click and choose Add To Up Next to place it into the queue. The new Remote app for iOS also supports Up Next, as does the latest Apple TV update.
Use two iTunes windows
In iTunes 11, go into the Preferences > Advanced section. Then tick the option that says Keep Miniplayer on Top of Other Windows. Go to Window and bring up the MiniPlayer from that menu. Now go fullscreen with the main iTunes window and the MiniPlayer will still float above it. You can have iTunes fullscreen on one monitor and the MiniPlayer floating as a controller on another screen.
Current page: Managing playlists
Prev Page Getting media into iTunes Next Page Managing your library