iTunes 11 tips: the complete guide to iTunes on OS X
Faster, smarter and easier to use
With music and movie collections getting bigger, it's good to get organised
Move an entire library
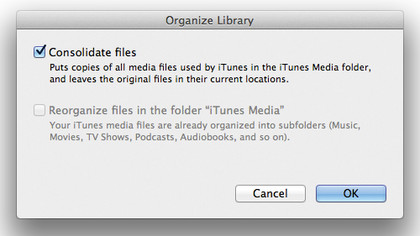
Even if your file management hasn't been the best, iTunes can still help you to clean everything up prior to moving a library. Go into Preferences > Advanced and make sure 'Copy when adding…' is enabled. Then choose File > Library > Organize Library. Tick the option to Consolidate Files, and also the Reorganize Files… box. This pulls any files currently located outside of the iTunes folder into it, and reorganises everything into correct subfolders. After doing this you may want to delete the external files, since they will have been duplicated. It's now safe to copy your Library folder to a different location or drive.
Store on an external drive
Hard-drive space is very precious, especially on your laptop or machines with smaller solid-state drives. However, you can easily offload your ever-expanding iTunes library to an external hard drive by simply dragging and dropping it from its default location in Macintosh HD > Users > Username > Music > iTunes to another drive.
Then in iTunes, go into Preferences > Advanced and in the iTunes Media Folder Location box, click Change and point the software at the new location. It's even possible to store the library on a networked drive, as long as it's mounted on your Mac.
One great tip is to connect a USB hard drive to your recent Airport Base Station or Time Capsule and use the Airport Disk feature to store the library there, out of sight.
Use keyboard shortcuts
iTunes 11 has some handy key shortcuts for switching library sections. Use the keys ç+1 through to ç+7 to toggle the view between the different media types. In order, they are music, movies, TV shows, podcasts, iTunes U, books and apps.
Maintain multiple libraries
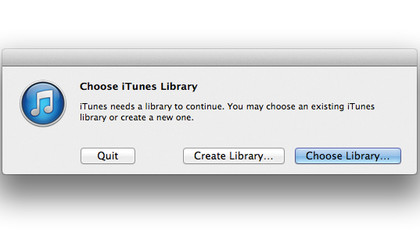
iTunes can be made to use different libraries, which is great if you want to use a smaller one on your laptop but a bigger one when at home. Hold down the alt key when starting iTunes and it will ask you to create a new library or choose an existing one. Using this trick you can create as many libraries as you want on different drives, then choose the relevant one when starting up.
Sign up for breaking news, reviews, opinion, top tech deals, and more.
Transfer between computers
If you have more than one Mac (or PC) at home you may want to transfer iTunes files between them. In iTunes' FIle menu, go to the Home Sharing submenu and turn on Home Sharing, which will require you to authorise with your Apple ID. Do the same on another Mac on your local network, and each library that has been shared should appear in the Shared section in iTunes.
Each computer must sign in with the same Apple ID. As well as streaming any music and video between these computers, you will also now be able to drag and drop to copy the same content between libraries. You can also have iTunes automatically import purchases made on one Mac to the libraries of others.
Home Sharing gets around the problem of having to sync mobile devices to one iTunes library at once by allowing you to share content between multiple libraries. It also works for streaming any of this data to Apple's devices around your home.
Delete inside your Library
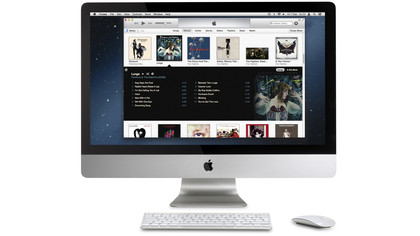
iTunes libraries can get a little unwieldy, not to mention the fact that they can use up your previous hard drive space. Also, you may not know that deleting something from a playlist does not delete it from the Library, so it will still hang around.
To delete stuff from the Library you can either right-click on it and choose 'Show' in Finder and delete the files from there or better still, go to the master Music or Movies lists at the top left of iTunes' sidebar view and filter using the search box to locate the data.
So you might search for an album name, then delete those files from the master Library list. This should prompt iTunes to ask you if you really want to delete the files to the Trash.
Share your photos
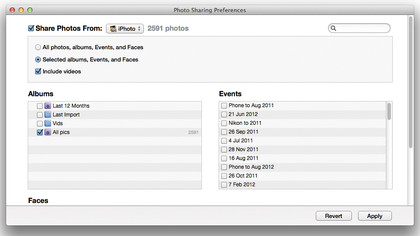
Photo sharing is one of iTunes' lesser known features, but it is still an incredibly useful one. To use it for yourself go into File > Home Sharing > Choose Photos to Share With Apple TV.
You will now have the option of enabling sharing from iPhoto or any folder, including options for specific playlists and even sharing videos. These will then be shared to any second or third generation Apple TV using Home Sharing. You can also set your Apple TV up to use photos from iPhoto as its screensaver.
Share your library
If you wanted to enable streaming over your local network without using Home Sharing, go to Preferences > Sharing. You can then choose playlists to share, with optional password protection if you wanted to keep your content secure.
This feature will enable others to stream but not copy music, and does not require any authorisation with your Apple ID, so is good for networks such as businesses and universities as well as shared houses. Should you wish, you also have the option to have tracks played over Home Sharing count towards play counts, or not.
Duplicate files found
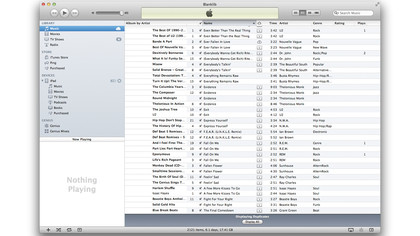
As your music collection grows duplicate files have a habit of popping up. In iTunes 10 there was a very handy Display Duplciates feature accessible from the File menu, which enabled you to prune redundant files from your library.
In iTunes 11 this has gone, but apparently this was an oversight, and Apple will re-introduce it in a future update, hopefully by the time you read this. Until then, what can you do? There are two scripts available online that will do the same tasks – Duplicates and Exact Duplicated. Get them from samsoft.org.uk/iTunes/scripts.asp#Duplicates