Windows 7: the complete guide

Windows 7 has both simplified and streamlined computing, making it as easy as possible to use your PC in productive ways instead of fiddling about behind the scenes trying to get from A to B.
But whether you've just upgraded to Windows 7 or have been using it for a few years, you might be surprised to learn what tips and tricks have eluded you in your quest for a better computing experience.
Throughout this article, we're going to reveal everything you need to grasp the fundamentals of using Windows.
We're not going to show you how to point the mouse and click, but we'll go over the key parts of using your computer and reveal a selection of useful techniques and tricks that can help you gain mastery over your computer instead of feeling like it's bending you to its will.
You'll discover how to navigate your computer more quickly using the new tools built into Windows 7 and learn the essential skills to protect your computer from data loss and threats to your security.
We'll reveal how to quickly fix problems using the Action Center and look at ways of keeping your PC in tip-top condition. You'll find out how Windows can help maintain your computer and optimise its performance so you spend less time twiddling your thumbs and more time getting on with what you want to do.
It's not just about Windows either – you'll also learn some useful tips and tricks for tapping into the new features found in Microsoft Office 2010 and master key internet skills like surfing the web and managing your emails.
Sign up for breaking news, reviews, opinion, top tech deals, and more.
You don't have to be a newcomer to benefit from this guide either – while there's a certain joy in being able to get up and running quickly with a new version of Windows, you may find you've missed out on some fundamental techniques that could save you time in the future.
Even if you think this guide won't teach you anything new, it's worth taking a little time to acquaint yourself with anything that might have escaped your attention.
Spend just 24 hours (not necessarily in one go!) learning the key skills of using Windows and it'll pay itself back many times over as you find yourself quickly finding the file or program you need, avoiding viruses and browsing the web more quickly. Go on, sit down, get a cup of tea and find out how to become more productive with your computer.
Master the Windows Interface
Windows 7 is full of different timesaving features. Discover how to tap into every single one of them
Most of your time in Windows is spent navigating your hard drive looking for programs, folders and files. Windows 7 introduces some handy time-saving tools to help you quickly find what you're looking for.
Many applications place shortcuts to themselves on the desktop, but a better place to keep them is the taskbar at the bottom of the screen, which is always visible.
Open the program in question and you'll see its icon appear in the taskbar. To place it here permanently, right-click the icon and choose 'Pin this program to taskbar'.
When you right-click a taskbar icon, you may see a jump list appear – this is basically a list of the most recently accessed documents in that program, giving you a quick and easy way to open them with just two clicks.
Roll your mouse over an item in the list and you'll see a pin icon appear. Click this and the document is permanently pinned to the top of the jump list, so it's always accessible when you need it.
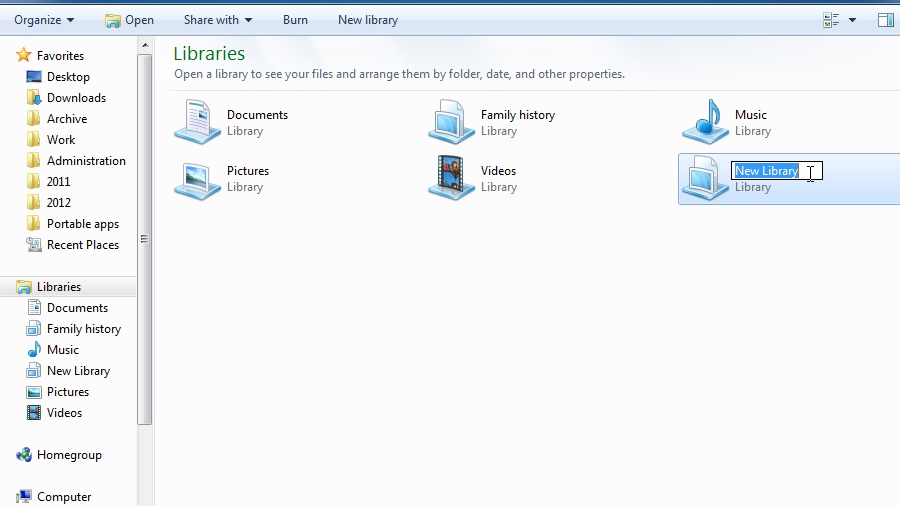
When browsing your hard drive, use the Search box to help you find content within the folder or drive that you're looking at. If you often find yourself revisiting the same folder, add it to the Favorites list on the left of the folder window. Simply click and drag the folder into the list where you want it placed, then let go when you see the 'Create link in Favorites' pop-up message appear. You'll also notice a section called Libraries, which are collections of related folders, grouped together for easy access. You can create your own easily – the step-by-step guide below reveals how.
Step-by-Step: Create and manage Libraries

1. Create a new library
Click 'Start > Computer' and click the 'Libraries' link in the navigation pane of the folder window. Click 'New Library' and give your Library a suitably descriptive name. Now right-click the Library and choose 'Properties' to start setting it up.

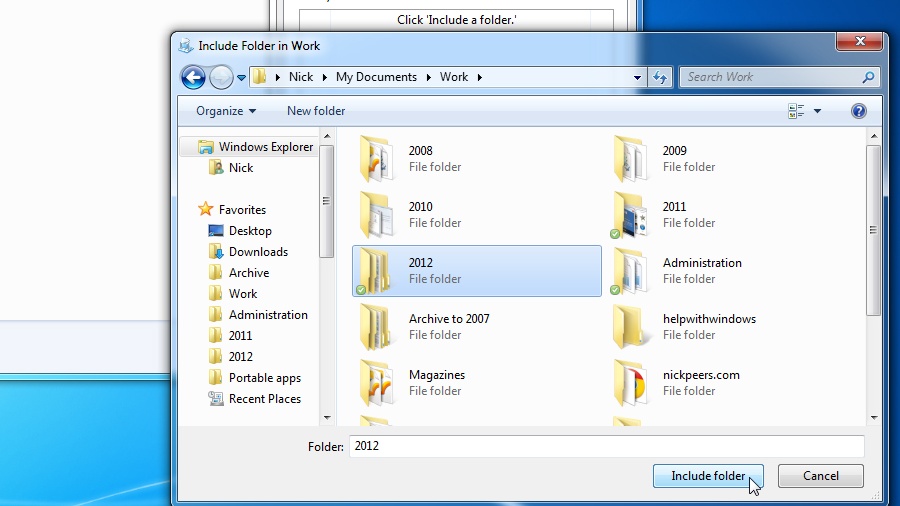
2. Add new locations to library
Click the 'Include a folder' button to find and select a folder to add to the library. Repeat this process for all the folders you wish to include in the Library. You can also remove unwanted folders by selecting them and clicking 'Remove'.

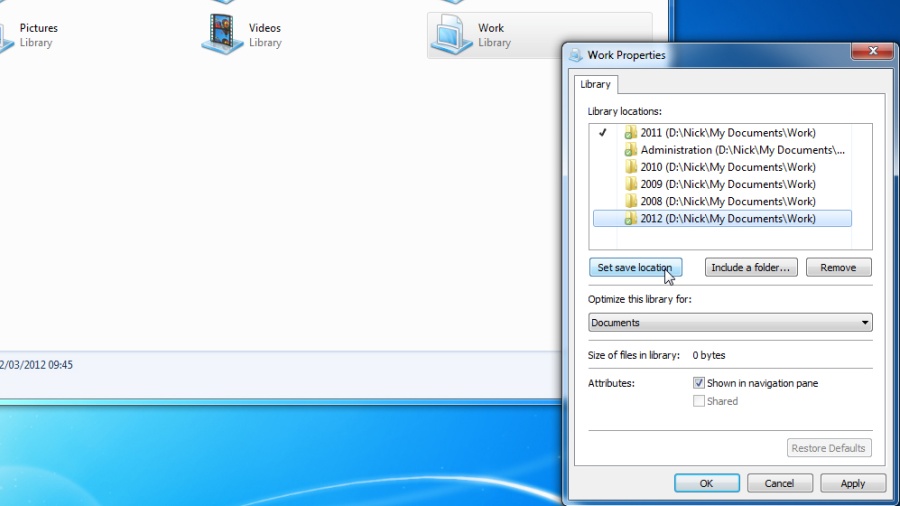
3. Customise library
Change the default 'Save to' location for the library by choosing the desired folder and clicking 'Set save location'. Drag and drop folders to rearrange them and pick the type of files found in the library from the 'Optimize this library' drop-down.