How to keep your PC switched on with Caffeine
Staying awake

Modern PCs and laptops are designed to be ultra energy efficient. This means that by default Windows 10 will activate a screensaver after a few minutes of inactivity, then power down your display.
This is a potential bother for users running critical apps. For instance, halfway through the latest video game you may not want to go through the rigmarole of wriggling the mouse and pressing keys at random to wake up your device.
Caffeine comes to the rescue by simulating a 'key up' event every minute. Once activated, Windows will act as though you are sitting in front of the keyboard even when you are away.
In this guide, you'll discover how to download and install this tiny utility as well as how to view and change your power settings.
1. Install Microsoft Visual Studio
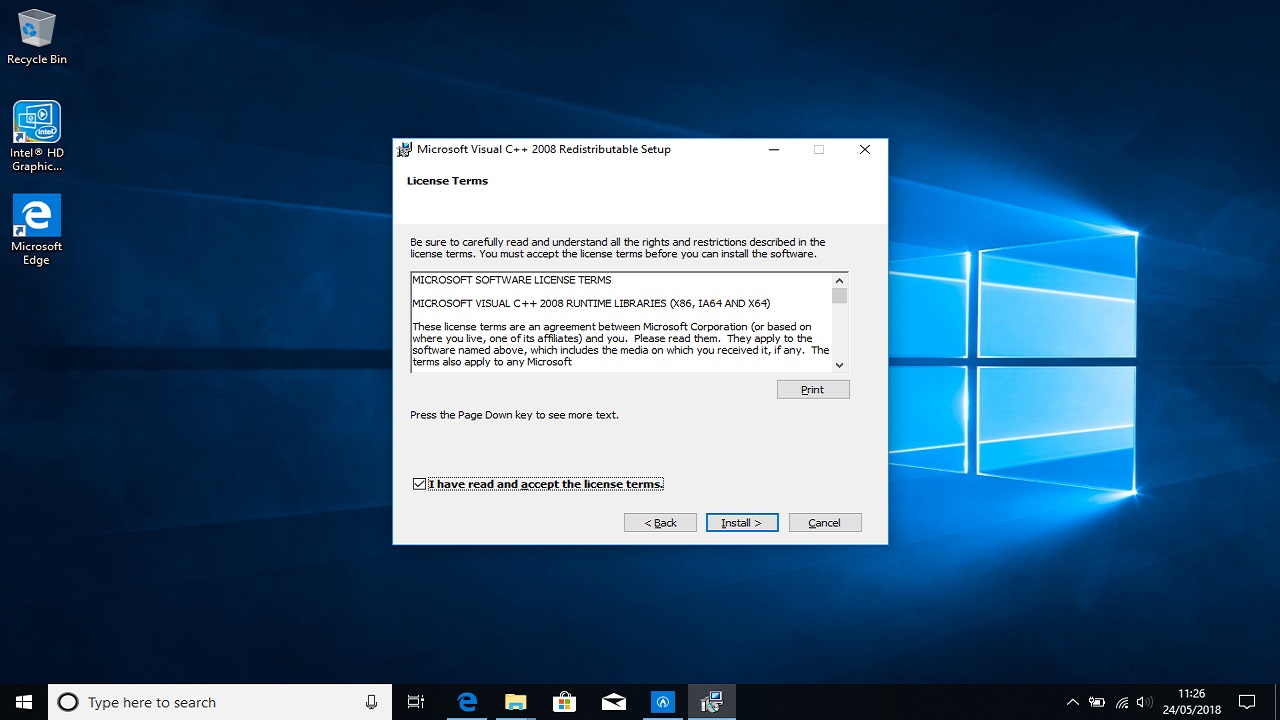
Caffeine is written using Microsoft Visual Studio, so in order to use it you must first install Microsoft Visual C++ 2008 Redistributable Package (x86) .
To do this, open your web browser and navigate tohttps://www.microsoft.com/en-us/download/details.aspx?id=10015.
Click the 'Download' button then choose 'Run' to begin installation. Click 'Yes' to allow the installer to make changes. Once the Setup Wizard launches click 'Next' to continue.
Sign up for breaking news, reviews, opinion, top tech deals, and more.
Check the box to agree to the terms and conditions then click 'Install'. Click 'Finish' once the installation is complete. Restart your PC before continuing.
2. Download and install Caffeine
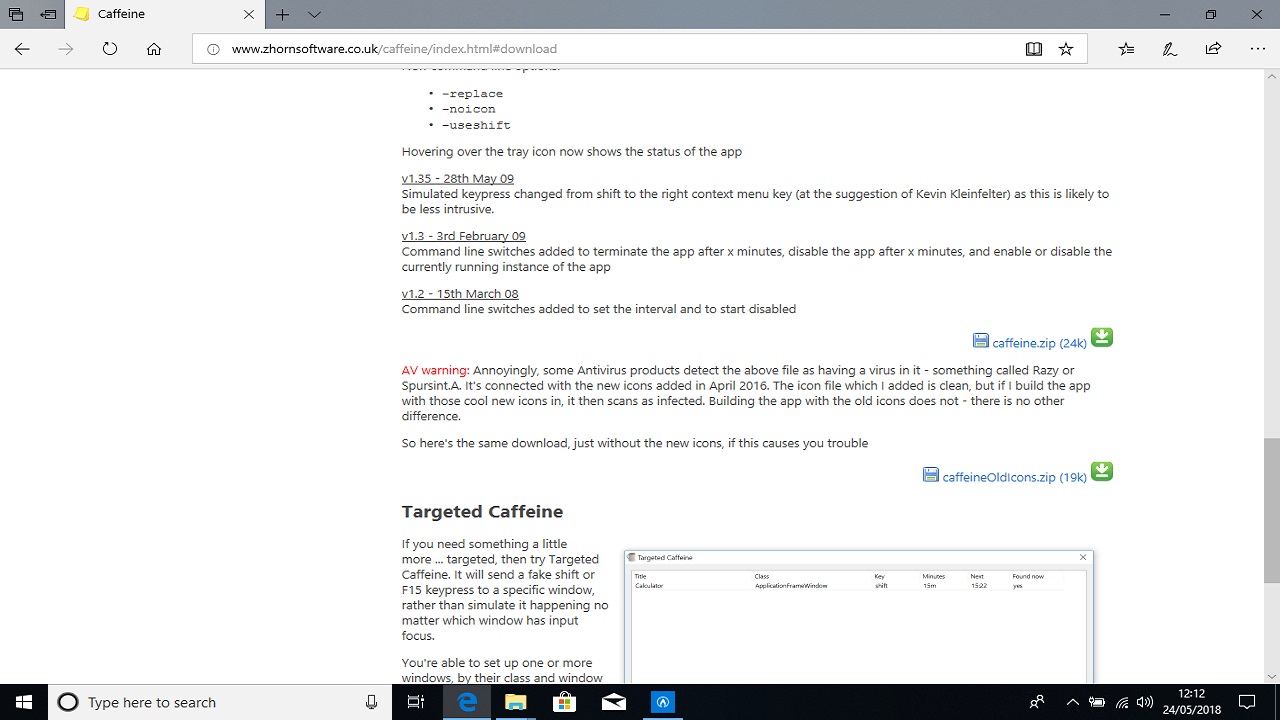
Open your web browser and navigate to the Caffeine download page. Scroll up and click the link marked 'caffeine.zip' to begin the download.
If you are using Microsoft Edge click 'Save' to copy Caffeine to your 'Downloads' folder. Next, click 'Open Folder' and find the file named 'caffeine.zip'. Left click once on the file to select it, then choose 'Extract' from the Explorer options at the top of the window. Select 'Extract All' then click 'Extract' to confirm.
Double-click the newly extracted file 'caffeine.exe' to launch Caffeine. The Caffeine icon will appear at the bottom-right of your screen.
3. Caffeine basics
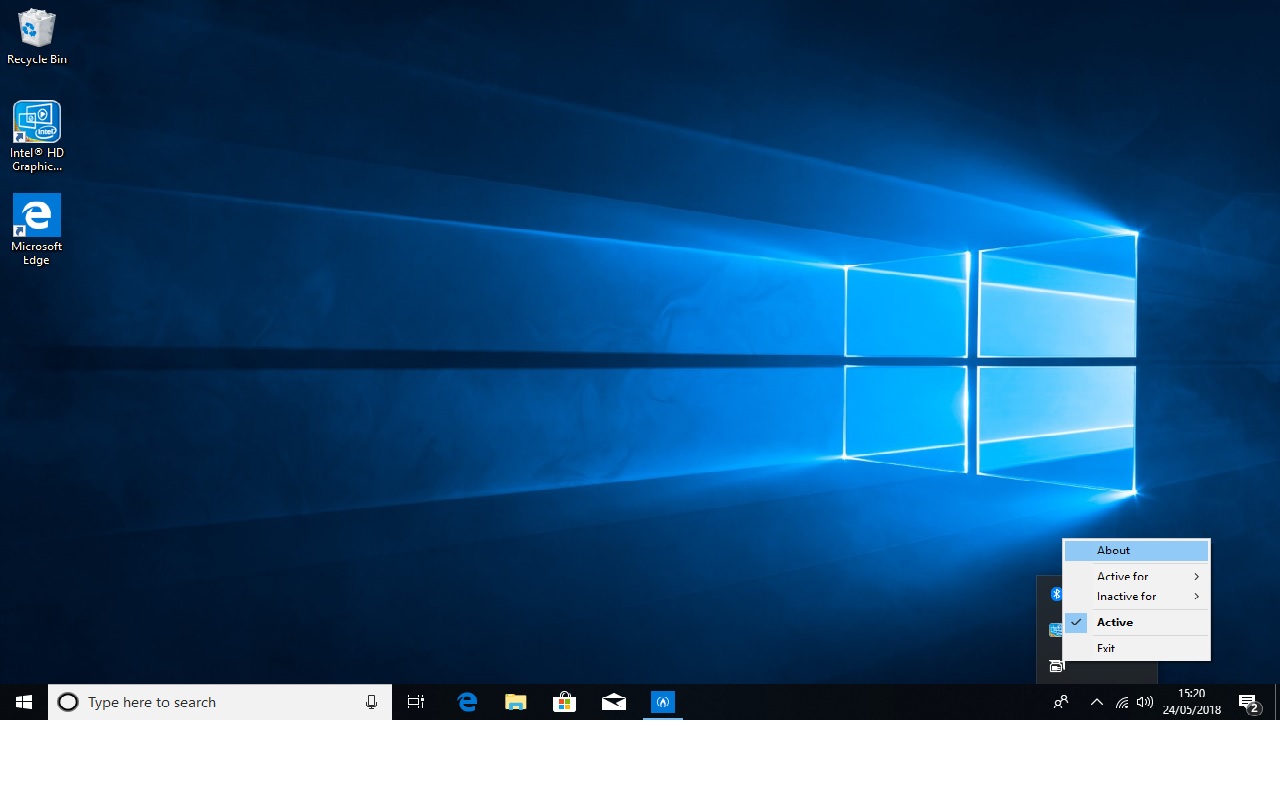
Caffeine is designed to be simple to use. Double-click the Caffeine icon at the bottom-right of the screen to activate/deactivate. If active, the coffee pot icon will appear to be full.
Right-click on the Caffeine icon for further configuration options. Keeping your computer screen on indefinitely can reduce performance and potentially damage your hardware.
Caffeine can be configured to stop working after a certain amount of time, after which your 'Power & Sleep settings' will return to their default values. To do this, hover your mouse over 'Active For' and choose from 1, 2, 4, 8 or 24 hours respectively.
You can also program Caffeine to kick in after an allotted amount of time. This can be useful if, for instance, you want to keep your screensaver settings but don't want your hard disk to power down. To get started, hover your mouse over 'Inactive for' and select the time period you need e.g. 4 hours.
4. Command Line options
If you want to extend Caffeine a little further, there are several useful command line options.
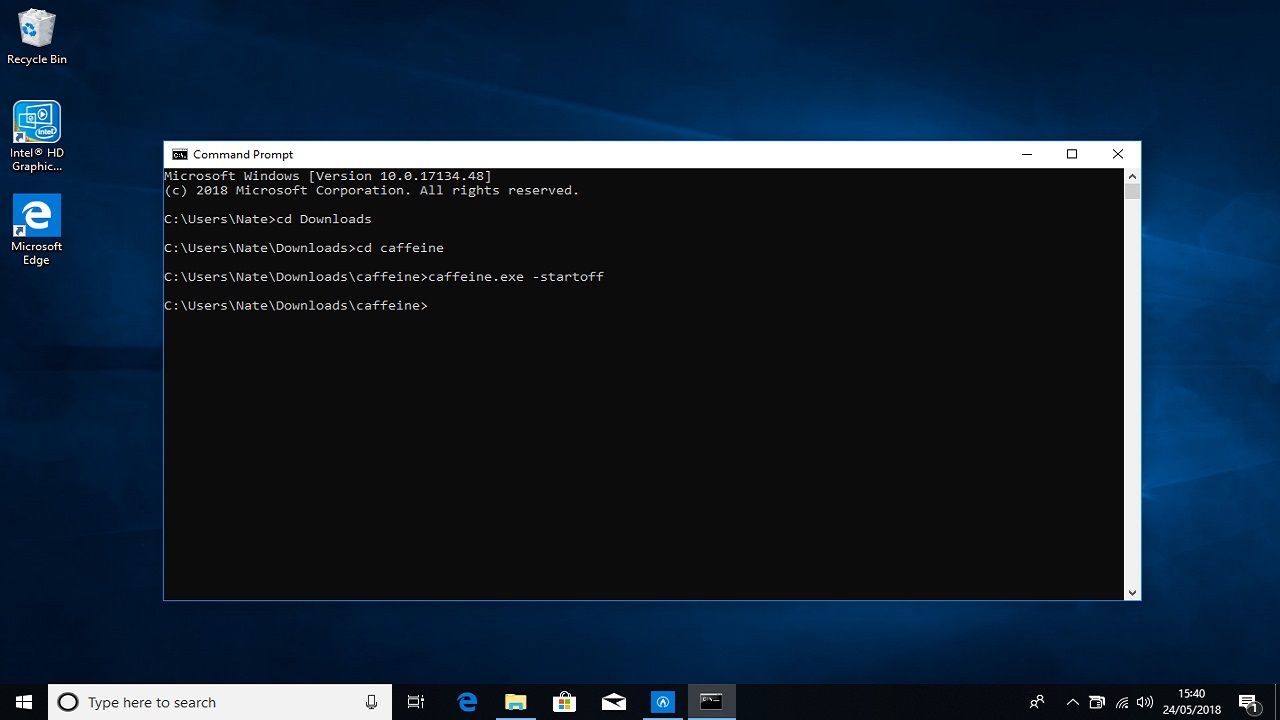
To make use of these, first select the search bar from the windows menu at the bottom left of the screen and type 'cmd'.
Next, click 'Command Prompt'. Use the cd command to navigate to the location of caffeine.exe e.g:
cd DownloadsHandy command line arguments include:
-startoffThis launches caffeine in inactive mode.
-allowssThis allows a screensaver but prevents your PC from entering sleep mode.
-exitafter:XWhere 'X' is, put a number of minutes you want caffeine to exit after. For a full list of command line options, right click the Caffeine icon and choose 'About'.
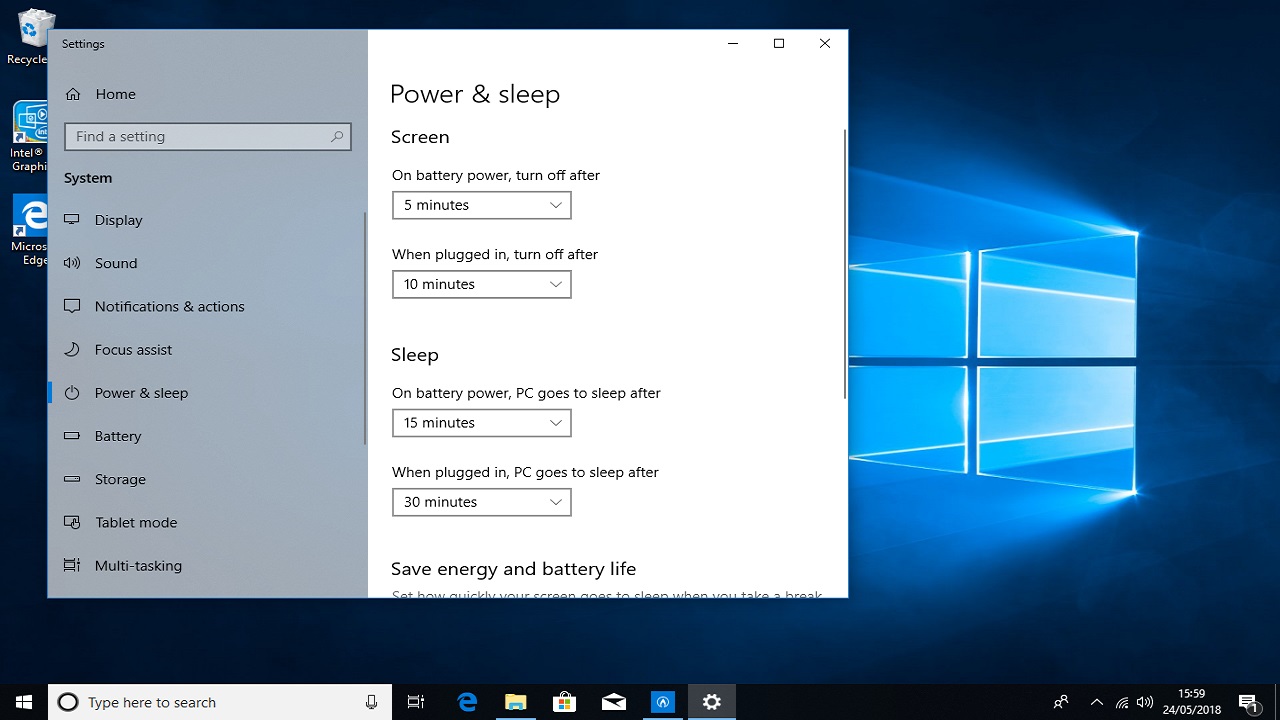
5. Configure Windows Power and Sleep settings
If you've configured Caffeine to activate or deactivate after a certain amount of time, you may wish to review your PC's power settings.
By default Windows 10 uses a balanced approach to energy saving to make sure you get the very best performance. This means that the screensaver will activate after ten minutes of inactivity. Your display goes to sleep after 30 minutes of non use.
To review and change these settings, select the search bar in the windows menu at the bottom left of the screen, type 'power' and choose 'Power & Sleep settings'. If you are using a portable device such as a laptop, you can configure separate settings for when your device is running on battery power.
Nate Drake is a tech journalist specializing in cybersecurity and retro tech. He broke out from his cubicle at Apple 6 years ago and now spends his days sipping Earl Grey tea & writing elegant copy.