
 Become a TechRadar Insider


Looking to create photo backup for Adobe Lightroom or Google Photos? We know, it's one of those jobs that we all want to keep putting off, because, let's face it there are more exciting things in life to be getting on with - like actually taking photos of all those amazing adventures. But, trust us, while it may take some initial time up front, it's well worth it in the long run.
Regardless of whether you have a bulging Adobe Photoshop Lightroom library or you're a hobbyist who relies on Google Photos cloud storage to hold all your images and videos, there's a long list of things that can go wrong that could see you lose all your treasured memories.
Whether it's a fire, theft, accidental damage or deletion, knowing how to build the ultimate photo backup for Adobe Lightroom or Google Photos could save you a world of pain down the line. Thankfully, with our 3-2-1 backup strategy you can rest easy knowing that your photos and videos will remain safe and sound no matter what unforeseen events may occur on two of the best photo storage and sharing sites.
We've made this guide simple and easy-to-follow to make the whole process as painless as possible. Alongside explaining a fool-proof backup strategy, we've also ensured that everything you need to know about the different hard drive types is all laid out for you to help make choosing one a walk in the park. From the best NAS hard drive and RAID to the best cloud backup services online and best cloud storage options, we'll show you the best ways to back up photos.
So, regardless of whether you're looking for premium performance or you're after a budget buy that will get the job done, you'll be able to sit back and relax with the peace of mind that all your precious photos will be safe and secure for life with our instructions on how to build photo backup for Adobe Lightroom or Google Photos (or even the best Lightroom alternatives and alternatives to Google Photos).
What is the 3-2-1 backup strategy?
The idea behind the 3-2-1 photo backup for Adobe Lightroom or Google Photos strategy is pretty simple. It states that you should have three copies of your images, videos and data, with two kept on local hard drives (for example, your computer and the best external hard drive), and a third that’s kept off-site, usually with one of the best photo cloud storage providers.
In a nutshell, this means that if your computer hard drive fails, you still have your second local backup and a cloud backup. And in the case of fire or a theft where you lose your computer equipment, you still have your data backed up to the cloud where it can be restored from.

Also, no cloud storage provider is immune to outages – so while cloud backups are an essential part of the 3-2-1 strategy, you'll still have your local backup available should your provider suffer an outage. Whether you’re a working professional or a keen amateur photographer, the 3-2-1 strategy is a no-brainer because it means that you’re highly unlikely to ever lose access to your images and data.
Backing up your raw and editing files is obvious, but you'll need to backup your Adobe Lightroom catalogue too, because this is where all of your edits are saved. And if you use Google Photos as your main image storage, this can also be combined into the 3-2-1 strategy by keeping a local backup on an external hard drive. We've highlighted some of the best examples of those in our 'best local photo backups' section below, but if you already have one you can skip down to the 'How to back up Google Photos to a hard drive' section using the menu on the left.
What is RAID?
RAID (Redundant Array of Independent Disks) is a system that can be found in some hard drives and NAS (Network Attached Storage) drives. It uses two or more HDDs or SSDs to provide performance increases when accessing data, or to provide redundancy in the case of disk failure.
The main three RAID configurations that apply to photographers and videographers are RAID 0, RAID 1 and JBOD (or 'Just a Bunch of Disks'). RAID 0 is where data is written across multiple disk drives, which increases performance. But since the data is written across multiple drives, there’s no redundancy if one of the drives fail.

RAID 1, on the other hand, writes data to one drive, which is then copied to the second disk drive in a configuration called mirroring. The downside of this configuration is that data access is slightly slower than RAID 0. JBOD allows the two or more drives to be used independently to increase storage capacity.
RAID configurations can be set up inside desktop computers, but it’s much more common to purchase external hard drives featuring two hard drives with RAID capabilities. A RAID system's extra disks shouldn't be considered as data backups, because issues like malware or accidental deletion can affect both disks in a RAID 1 setup, for example. But an external hard drive in a RAID configuration is a great option for those who require the highest level of data security – even if it doesn't negate the need for a cloud backup to maintain the 3-2-1 strategy.
Do I need RAID?
Having a RAID-configured external hard drive may seem overkill for some users implementing the 3-2-1 strategy, since you have the other two backups available. And most casual users are likely better off buying simple external hard-drives. RAID is generally more attractive to professionals who require the highest levels of data security because of the reputational damage that would come with data loss.
But whether you’re using a RAID configured external hard drive or a standard single external hard drive, you can take some of the hassle out of photo backup for Adobe Lightroom or Google Photos by using software that can be set up to automatically copy data from your computer hard drive to the external hard drive.

Mac users can use the free Apple Time Machine software that’s built into Mac OS, or third-party software such as Superduper which costs $27.95. The latter has many more features allowing you to customize your backups to your liking, while Windows users can use AOMEI Backupper (above) which comes in a free version that will be suitable for most users, as well as a ‘professional’ version with additional features that costs $49.95.
Local backups: DAS vs NAS
There are many hard drive options available these days catering to a wide range of use cases, and the two main options you’ll come across are DAS (Direct Attached Storage) and NAS (Networked Attached Storage).
A DAS hard drive is simply a standard hard drive that connects to your computer via a USB or Thunderbolt cable, while a NAS drive is plugged into the best wireless router for connection over a home network, along with the ability to connect to the drive when you’re away from home or the office.

NAS drives for photo storage are much more suited to professional photographers and Lightroom users who need to access their image library remotely, rather than amateurs and those who use Google Photos as their primary backup solution. NAS drives also provide the ability to use different RAID configurations, as well as simply housing multiple drives to hold data if you don’t require redundancy.
One lesser-known connection available with NAS drives is to use them as a DAS drive by connecting them directly to your computer with an Ethernet cable. This provides blisteringly fast transfer speeds and, when combined with a RAID 1 configuration, is a fantastic way to ensure redundancy.
Best local photo backups: single drives

It wasn’t all that long ago when the idea of being able to cram 5TB into a 2.5-inch hard drive was a pipedream. But with the Seagate Backup Plus 5TB we get just that alongside a highly attractive price point making this the perfect option for budget-conscious photographers.
At just 7.62 x 11.43 x 1.9cm and weighing in at just 247g, the Seagate Backup Plus is a portable hard drive that’s equally at home connected to a desktop or used on the move. It’s also Mac and Windows compatible, with the NFTS driver for Mac installed allowing the drive to be used on both systems without the need for reformatting.
The Seagate Backup Plus also comes with a free four-month subscription to Adobe Creative Cloud Photography plan and a 1-Year Data Recovery Warranty. The latter is certainly welcome and may be useful in some situations, but data recovery isn’t guaranteed, so using the drive within the 3-2-1 backup strategy remains highly recommended.

G-Technology hard drives are well-known for being high-quality external hard drives aimed at professional users. The sleek all-aluminum provides a stylish finish that matches any system, and although G-Technology hard drives are aimed at Mac users, they can also be used with Windows-based PCs.
The G-Drive Pro is a powered desktop option sporting a 3.5-inch 7200RPM Ultrastar disk drive and is available in 4TB, 6TB, 12TB and 18TB options. And with this fast drive, read/write speeds of up to 260MB/s are advertised but whether these are possible will always depend on the system the hard drive is being used with.
With everything you need to get up and running out of the box, the G-Drive Pro comes pre-formatted for Mac with immediate compatibility with Apple Time Machine. But they can be reformatted to work with Windows systems and feature both Thunderbolt 3 and USB 3.2 Gen1 connectivity making it a fantastic professional option.
Best local photo backups: dual/RAID drives

If data security is of utmost importance to you, the Western Digital My Book Duo is a cost-effective but highly-featured option offering a range of storage capacities from 4TB to a whopping 36TB. This includes two WD Red NAS drives which are designed for performance and reliability.
Other features include built-in 256-bit AES Hardware Encryption with WD Security software and USB 3.1 Gen1 connectivity. The My Book Duo is formatted for NFTS RAID 0 for Windows out of the box but can be reformatted for Mac with the ability to change the RAID configuration to RAID 1 or JBOD so there’s something for every workflow available.
Another useful feature is that this hard drive includes 2x USB 3.0 Type-A hub ports on the back that can be used for connecting other hard drives or even accessories such as card readers, a keyboard or mouse. This is useful for users of any type of computer but especially those with limited USB ports such as laptops and Mac Minis, for example.

Not all hard drives are made equally, and for those looking for a RAID option oozing with high-performance credentials, the LaCie 2Big RAID is a compelling option that will meet the needs of the most demanding creatives. Capacity options include 4, 8, 16, and 28TB so you can choose the option that finds a balance between budget and overall storage requirements.
With two easily swappable 7200RPM Seagate IronWolf Pro enterprise-class hard drives offering transfer speeds of up to 440MB/s, you can enjoy fast data transfers with drives that are designed for reliability and performance. The drives come pre-formatted to HFS+ RAID 0 for Mac, but the drives can be formatted for use with Windows-based PCs with RAID configuration options RAID 0, RAID 1 or JBOD for both systems available.
You also get a free one-month subscription to Adobe Creative Cloud with purchases of this hard drive. As well as Rescue Data Recovery Services from LaCie for the duration of the five-year warranty.
Best local photo backups: NAS drives

Most NAS drives come with two hard drives but keeping costs lower and aiming at home users, the WD My Cloud Home Personal Cloud provides an easy-to-use entry-level option. With storage capacities ranging from 2-8TB, it doesn’t offer the largest capacity available, but for most enthusiast users these will be more than adequate.
This hard drive connects directly to your WiFi router with connection to devices available through the My Cloud Home app on your Android or iOS smartphone, tablet or Mac and Windows-based computers. Data is accessible from anywhere, and photos from multiple phones and tablets can be synced to the My Cloud Home Personal automatically using the included software.
While the My Cloud Home Personal isn’t the most fully-featured NAS drive option and only features a single hard drive, it’s the perfect entry point for enthusiasts who require access to their images while on the move, with the ability to share photos and data with anyone by adding more users to the device.

For the most demanding creatives requiring a hard drive option that can be connected to remotely with the ability for multiple computers and devices to connect to it at the same time, the Synology DS420+ 4 Bay NAS Enclosure is ideal.
This is just the enclosure so you have to purchase the NAS hard drives separately which drives up cost, but on the plus side, this allows you to select the drives that meet your needs and budget. WD Red drives or Seagate IronWolf Pro hard drives would be the perfect partners for this enclosure, with the former being less expensive than the former.
For performance, the Synology DS420+ features a 2-core 2.0 GHz CPU, with bursts up to 2.9GHz and 2GB DDR4 RAM. Cache speeds can be further increased by up to 20x by installing SSDs in the M.2 SSD slots. Access to data from anywhere you have an Internet connection is achieved using the Synology Drive app/software for Windows, macOS, Linux, Android, and iOS. Plus, multiple RAID configurations allow you to choose the best option for you.
How to back up your Lightroom library to local storage
Backing up your Lightroom catalogue is an essential task, whether you import your images directly into the catalogue or import them from their saved location on your computer or external hard drive. For the latter, even if your original files are safely backed up using the 3-2-1 strategy, your Lightroom catalogue still holds all of your image ratings and raw processing.
There are two ways of going about backing up your Lightroom catalogue. The first is the manual approach of simply dragging and dropping the Lightroom folder onto your backup external hard drive. The easiest way to locate the folder is to go to Lightroom > Catalog Settings on a Mac or Edit > Catalog Settings on a PC and click on the Show button. Next, simply drag the folder to the save location on a different drive and you’re all done.

Alternatively, a more hassle-free backup can be achieved automatically using software such as Apple Time Machine or third-party backup software such as Superduper.
Windows users can use AOMEI Backupper or similar software where you can select files and/or HDDs to be backed up to an external hard drive. Handily, you can set your backups to take place on a certain schedule, and also line them up to be triggered by certain events like a system shutdown.
How to back up Google Photos to a hard drive
To download your Google Photos library, the easiest way to do it is to use the Google Takeout service that allows you to download and backup all of your Google data. If you only need to download your Google Photos library, click on Deselect all and then scroll down to Google Photos and check the box.
Click on the 'All photo albums included' button and you can deselect anything you don’t need to download from the list and then click OK. Next, scroll down to the bottom of the page, click on 'Next step' and you’ll be taken to a screen where you can choose to receive the download link in an email, add to Google Drive, Dropbox, OneDrive or Box.

You can also change the download file format from .zip to .tgz and change the maximum export size, to between 1GB to 50GB. A compressed file larger than the selected export size will result in photos being split between multiple files. You can also choose to export once or to schedule an export of your entire library every two months for one year.
To finish off, click on 'Create export' and a copy of the images in your Google Photos library will be created. The size of your library will dictate how long it takes for the copy to generate, but once complete you’ll receive a download link or the library will be backed up to another cloud storage service if you selected one of those options. Export links remain live for one week.
Best cloud photo backups
Off-site backups are essential to provide redundancy in the case of fire or theft at your main location. Traditionally, an off-site backup relied on photographers and videographers keeping hard drives at a friend or relatives’ house. This certainly remains an option, albeit an inconvenient one, because you have to retrieve your hard drive(s) every time you update the backup and then return it to the off-site location.
A much more convenient option, and one that in some cases will update automatically in the background as files change or are added to, is to use an online cloud service. These are subscription-based and the more advanced options include software that will either back up your entire computer hard drive and connected external drives, or you can specify which folders and drives should be backed up. In the case of hard drive failure or anything else, you can download your data from the cloud service.
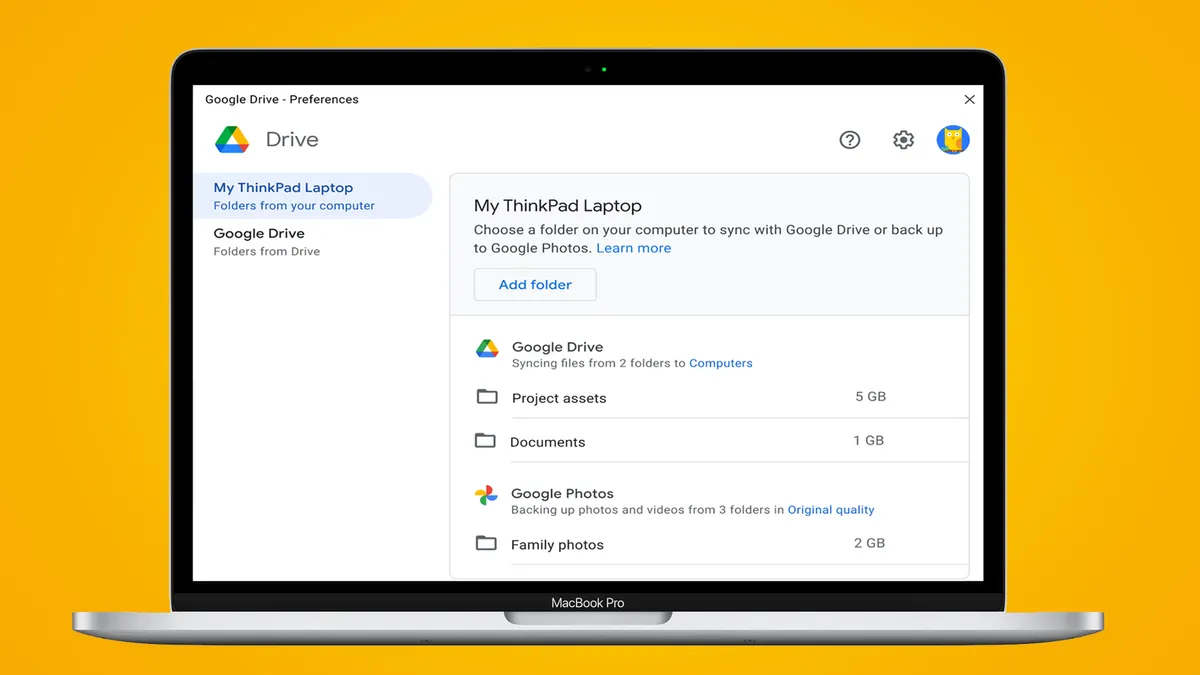
A simple to use cloud storage service that you may already be using, or have access to using your Google login, is Google Drive. Once you download Drive for desktop and install it on your computer, it will create a folder that will be synced with Google drive in the cloud and you can also specify other folders to backup through preferences.
The first 15GB of Google Drive storage is free with options to pay a monthly subscription to increase storage to 100GB, 200GB or 2TB. The downside with the largest storage option is that it costs more than Backblaze and iDrive, so if you require more cloud storage than 200GB these would be a better option.
To backup your Lightroom library, simply add the folder that contains your library by selecting Drive preferences and setting that folder to also be synced. Once uploaded, your Lightroom library will be synced to your Google account. Don’t forget to also backup the library to an external hard drive either manually or using automatic backup software.

Backblaze is an easy-to-use cloud backup option where you simply download the software, log in to your account and the contents of your computer hard drive and connected drives will automatically back up. There’s no data limit and no file size limit either, so you can rest assured that all important files can and will be backed up.
Other features include the ability to restore old versions of files for up to 30-days, locate a missing or stolen computer, share backed up files and use the Android and iOS app to view and share your files. The main downside of Backblaze is that you can only backup a single computer per personal backup account, but with unlimited storage it’s still a compelling option for anyone with huge photo and/or video libraries.
Since Backblaze backs up your entire computer, it will automatically include your Lightroom library if it’s on your computer hard drive or a connected external drive. One thing to consider is that it can take up to two months or more for large amounts of data to be backed up, so it’s worth taking the two-week free trial to get a head start.

iDrive is an interesting cloud backup service because while the number of computers and smart devices that can be connected and backed up is unlimited, the storage limit is 5TB. This is more than enough storage for many users, but for those with larger photo and video libraries Backblaze may be a better option. However, Backblaze only allows for one computer to be backed up per account. Once you’ve downloaded and installed the software after purchasing a subscription, the easy-to-use interface allows you to select what should be backed up.
iDrive allows you to select entire hard drives to backup or individual folders but these must, of course, not exceed 5TB. Once selected, these will sync in the background according to the schedule you choose while your computer is turned on. Other features include Android and iOS apps for viewing backups and backing up those devices, while deleted files are available until they're manually deleted or Archive Cleanup is used to match the storage allowance on the your account.
To backup your Lightroom catalogue you simply need to select either the disk drive or the folder where the catalogue is stored for it to be backed up. Then, according to the backup schedule you select, the library will be synced to the iDrive backup to give you peace of mind.
This article is part of TechRadar’s Tech Resolutions series, a motivating blast of encouragement showing you how to supercharge your new year with tech. Running from Sunday December 26 to Sunday January 2, our series will also reveal how we’re aiming to level-up our gadget lives in 2022. So whether you’re looking to become a Chromebook power-user, beat your takeaway obsession with the best air fryer, or use a smartwatch to propel you to new fitness heights, we’ll show you how to get your new year off to a flier. And when it all inevitably goes wrong, you can always blame the gadgets.
