
Want to create a photo book using snaps from your Google Photos library? In certain regions, Google’s cloud backup service makes it easy to order physical scrapbooks straight to your door. In just a few clicks, you can pick your favorite snaps, customize collages and arrange for the printed book to be delivered.
Google Photos is an excellent option for backing up your image library securely online. It’s easy to use, supports a whole host of different devices and features a range of smart tools for organizing, editing and sharing snaps stored in the cloud.
Google Photos isn’t a full-fat publishing tool, so don’t expect complete control over every aspect of your photo book. Equally, you might be able to find slightly cheaper options for printing and binding a collection of your snaps elsewhere, depending on where you live. But Google Photos makes it incredibly easy and relatively affordable to order straightforward photo books.
Eager to order a photo book using Google Photos? Our guide below takes you through all of the key steps in the ordering process. Provided you live in Europe or the US, you should find that it’s a cinch to curate your photo book and order it for delivery through Google Photos.
What books formats are available to order through Google Photos?
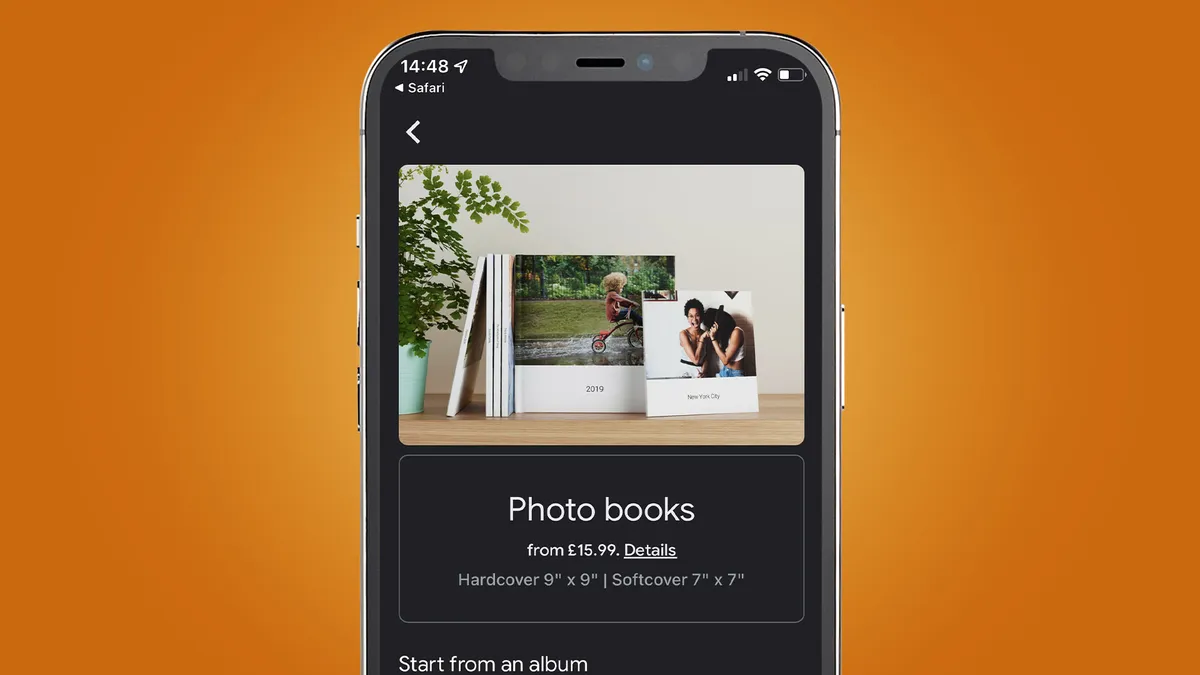
Google Photos allows you to order two styles of photo book. You can create a 7x7in square softcover book, or a 9x9in square hardcover book. Whichever format you opt for, the minimum number of pages is 20, while the maximum is 148.
Prices start at $14.99 / £15.99 / €14.99 for a 7in softcover book containing 20 pages, with each additional page costing $0.49 / £0.59 / €0.59. The 9in hardcover format starts at $29.99 / £25.99 / €24.99 for 20 pages, with every extra page priced at $0.99 / £0.79 / €0.79.

Economy shipping takes 6-8 business days and will set you back $9.99 / £6.99 / €5.99. Priority shipping is a slightly speedier option at 4-7 business days, costing $12.99 / £24.99. Euro pricing for priority shipping varies depending on your location within Europe.
Any hardcover book can have a spine title, while softcover books must have at least 48 pages in order to feature a spine title.
Preparing to create a photo book in Google Photos
Google Photos uses the images in your cloud library to create photo books. If you have snaps saved on your hard drive which you’d like to include in your photo book, you’ll need to upload these to your Google Photos library before you can include them. You can do this through the smartphone app or the web interface. For more information about backing up photos with Google's cloud service, check out our how to back up photos to Google Photos guide.
Rather than selecting individual images when creating your photo book, you might find it easier to pre-select images for inclusion by sorting them into an album. This will allow you to assemble images over time, then start your photo book only once you’ve got your snaps in one place. Helpfully, Google Photos offers the option to create a photo book from an album (see below). For further tips about creating albums, read our comprehensive guide on how to create and share albums in Google Photos.
How to start creating a photo book in Google Photos
You can create your photo book using the Google Photos app for iOS and Android. Alternatively, you can use the Google Photos web interface. In the app, tap the ‘Library’ tab in the bottom toolbar, then select ‘Print store’ from cards at the top. On the web, select ‘Photo books’ from the left sidebar menu. Alternatively, head to Google Photo books on either platform.
From here, you have a few choices. You can choose to pick your photos individually from your photo feed. If you’d like to do this, tap or click ‘Make a photo book’, then select up to 245 photos from your library to include in the printed photo book. Once you’ve made your selection, tap or click ‘Done’ in the top-right corner. Google Photos will take a moment to process the photos, before presenting you with the initial flat plan for your photo book.
Alternatively, you can elect to start your photo book from an album: this will bring in all of the images saved to a Google Photos album and use them as the basis of your book. From the photo books screen, click or tap the thumbnail of the album you’d like to use and, as above, the flat plan will appear.
Finally, in some cases, Google Photos may make suggest a photo book featuring a collection of images which it thinks are suitable. You might see ‘Best of Spring 2021’, for example. Select this and you’ll again see the draft book layout, ready for customization.
How to customize your photo book in Google Photos on the web
Once you’ve reached the layout stage of the creation process, it’s relatively intuitive to edit the arrangement, styling and captions of your snaps.
On the web, your draft is shown as a classic publishing flat plan. You can click and drag pages to rearrange them within the book. Click the sidebar icon in the top-right and you’ll see a simple preview of your book on the right, where you can similarly click and drag to re-arrange the pages.

In the main editor, hover over any image and you’ll see a stack of five icons appear on the right. The top three adjust the border around your image. The bottom icon allows you edit the caption (or you can hover over the caption, then click and type).
The fourth icon in that stack allows you to create a collage layout on a single page. Click this, select some snaps from your library, then click ‘Done’ in the top-right corner. You’ll find five layout options in the icon stack to try. Images within the collage can be rearrange by clicking and dragging.
Hover over any page and you’ll also see a little grey cross appear in the corner. Click this to remove the page entirely. To add new pages, click the ‘+’ button in the top toolbar. You can add either single-image pages or collage pages. You’ll then be able to select from your library to fill them.

Depending on the dimensions of a given image, its border may result in cropping – or you might choose to crop it yourself. If so, click the image in question, then click the ‘Crop’ tool that appears above. You can use the slider to tweak the zoom, then click and drag the image itself to position it.
Clicking on any image in your photo book will also reveal a button labelled ‘Replace’. Click this and you’ll can choose a different snap from your Google Photos library to swap it with. Images that are already featured in your book will be indicated with a little book icon, so you don’t risk doubling up.
All of these options also apply to the cover, which you’ll find at the top of the flat plan. Simply click the caption of your photo book’s cover thumbnail to edit the book’s title. Depending on the format of your book and the page count, this will also appear as the spine title.
How to customize your photo book in the Google Photos app
The editing process is similar in the app. Tap ‘Make a photo book’ and you’ll be presented with a feed to select your photos from. Once you’ve made your choice, you’ll see a flat plan like the one in the web interface.
Just like the web, you can drag pages around to re-arrange them: simply long-press on any page, hold down and drag it to the right position. Long-pressing also reveals a cross icon by every thumbnail, which you can tap to delete individual pages.

As with the web interface, you can add individual or collage pages by tapping the ‘+’ icon in the top-right corner of the Google Photos app. You’ll be asked to pick images from your library to fill these pages.
To edit individual pages in your photo book through the Google Photos app, simply tap on the relevant page in your flat plan. This will take you to an editing screen for that specific page, where you can carry out all the same edits as you can on the web. Swipe left and right and you’ll flick through the editing screens for each individual page in your book.

On these editing screens, there are two tabs: ‘Layout’ and ‘Edit’. On the ‘Layout’ tab, you’ll either see border options for a single-image page, or collage layout options on a collage page. On the ‘Edit’ tab, you’ll find options to replace the photo with a different one from your library, add a caption below the photo, or add additional photos to create a collage page. In the top-right, there’s also a trash can icon which deletes the page. When you’re done editing a page, tap the check icon in the top-left corner.
To edit the cover, either tap the cover page thumbnail at the top of the flat plan grid, or tap the tree dots icon in the top-right, then select ‘Change book cover’. Here, you can amend the title and replace the cover image.
Once you’re happy with the layout and look of your book, tap the blue button labelled ‘Next’ at the bottom of the screen.
How to finalize your photo book in Google Photos
If you’ve used low-resolution images anywhere in your photo book, you may see a warning from Google, prompting you to double-check your selection. If you’re happy with your choices – or you don’t see any warning – tapping or clicking ‘Next’ should present you with the option to select your photo book’s format (either 7in softcover or 9in hardcover).
Once you’ve chosen your preferred format, you’ll see a confirmation of the base price for your photo book, plus the cost of any extra pages that you’ve added. You’ll be able to select the quantity of books and even add a gift message, if your book has been prepared as a present.
If you’re happy with the price, select ‘Checkout’. Here, you’ll need to enter your deliver address and select a delivery option (either ‘Economy’ or ‘Priority’). Then simply input your payment information and select ‘Buy’ to complete your order.
Changed your mind? In certain regions, you have the option to cancel your photo book order from Google Photos within two hours of making your purchase. On the web, select ‘Print store’ or ‘Photo books’ from the left sidebar. In the app, go to ‘Library’, then select ‘Print store’ from the cards. Under ‘Past orders’, choose a photo book. Click ‘Cancel order’, then ‘Yes’ to confirm your instructions.
‘Past orders’ is also where you’ll find the option to buy the same book again – ideal if someone’s seen the first edition and wants it for themselves. Select a photo book, then ‘Order again’. If you’re happy to buy exactly the same book as before, click the three dots, then ‘Buy identical book’. Alternatively, if you’ve noticed a few things need tweaking, click ‘Order again’ and you can add or remove photos, as well as changing the format from softcover to hardcover (or vice versa).
