How to make a projector look as good as a 4K TV
Improve your projector’s picture using these 6 steps

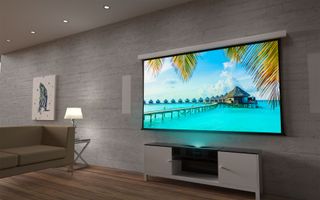
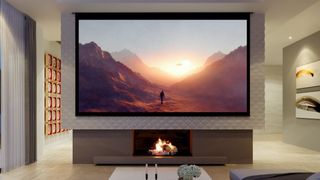
Anyone who owns a projector will tell you they are the optimal way to experience movies – even better than with the best 4K TVs. The main benefit is big image size: 120 inches is typical for most projection setups, though it’s possible to go even larger than that. For movie fans, getting to experience such an immersive image at home is addictive, and there can be no going back to a regular TV’s small screen (“small” in the projection world being anything under 100 inches).
When you consider the image size you get for the money, projectors also represent a great value. Sure, it’s possible to buy flat-panel TVs in the 85-inch and larger range, but those will cost more than high-quality 4K projectors, which can be had for $3,000 or less.
Along with movie viewing, projector-based setups are great for sports, where the expansive image lends itself to group viewing. Really, who wants to be crowded around a small screen when you could be comfortably spread out? The best projectors also provide motion processing features, and those can bring welcome clarity to fast-motion sports viewed on a big screen.
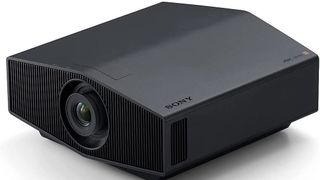
While the image size benefits of projectors are obvious, getting good picture quality out of a projection setup is much more challenging than with a regular 4K TV. It’s with that challenge in mind that we’ve assembled this list of steps to take to improve your projector’s performance, whether it’s one permanently mounted on the ceiling in a custom-built home cinema, or one that gets busted out for Friday movie night with temporary coffee table placement.

1. Control the light
Same as with flat-panel 4K TVs, it’s important to make sure that room lights are dimmed and windows draped when viewing with projectors. But in this case, that setup aspect is much more crucial. The light output from projectors is considerably less than what you get with a flat-panel TV, so when watching in a room with regular lighting, the image will look flat, with no depth to blacks and limited detail in highlights.
In general, the darker the room the better, with a complete blackout being ideal. Light dimmers and window shades can help quite a bit here, and they will also let you quickly return to “normal” lighting if it’s a multi-use space like a living room.
Get daily insight, inspiration and deals in your inbox
Get the hottest deals available in your inbox plus news, reviews, opinion, analysis and more from the TechRadar team.
2. Use a projection screen
While it may be tempting to just point the projector at an empty wall to save money, you’ll get much better results when using a separate projection screen. That’s because projection screens are coated with a special material designed to reflect light back at the viewer. (The amount of reflectivity is called ‘gain’ and typically ranges from 1 on up, with higher numbers indicating that the screen material is adding to the level of reflected light.)
Decent screens can be very cheap, starting at just a few hundred dollars. But if you have the money to spend, screen options are a sky is the limit proposition, with everything from models that retract from a hidden compartment in the ceiling to ones that automatically change aspect ratios according to the content you are viewing.
3. Use the right projection screen
There are different screens made for different viewing situations, with the most common one being a fixed frame with white material. That basic version will work for most setups, but you’ll also want to research the different available types.
Ambient light rejecting (ALR) screens feature a special coating that reflects light from the projector directly hitting the screen’s surface while filtering out light coming from the sides. This type is optimized for situations where you don’t want to completely black out the room, but instead have some level of ambient room lighting while viewing.
Ceiling light rejecting (CLR) screens are similar to ALR ones, but are designed to filter out overhead light. A specific variation on CLR screens is available for use with ultra short throw projectors, where the projector is postioned up close and just below the screen’s bottom edge. In this case, the screen material is optimized to reflect light hitting it from the projector positioned below while filtering out light coming from above.

4. Treat the wall behind the screen
The human eye is highly sensitive to contrast – the range between dark and bright – so you’ll get best results from your projection setup when the wall behind the screen is as dark and neutral as possible. That means no patterned wallpaper or bright, eye-catching paint colors like yellow or orange. A black wall will be ideal for projection, of course, but if your room design plans don’t allow for that, at least paint the wall a neutral gray or a dark color like red or blue, and the same goes for the rest of the room.
5. Use the Cinema picture mode
This advice will also apply for setting up any TV. The ‘Cinema’ picture preset on a projector will generally give you the best image quality when watching movies. That’s because the colors will be the most accurate, so what you’re seeing reflects what the director intended for you to see when watching at home. A Cinema preset should also disable motion processing, a feature that makes movies shot at 24 frames per second look like they were captured at the higher frame rate used for regular TV programs and sports.
While a Cinema preset will generally make pictures look darker, you can modify it by adjusting the projector’s contrast settings to make shadows look deeper and highlights brighter. The best 4K projectors will also provide an ‘iris control’, in some cases one that works dynamically to optimize picture contrast on a scene-by-scene or frame-by-frame basis.
Note that the situation is different for gaming, where color accuracy is less of an issue and both extra brightness and low input lag are preferred. In that case, you’ll do best to select your projector’s Game preset if available.
6. Use the highest quality source
When you’re blowing up pictures to a 100-inch or larger size, any flaws in the source will become apparent, especially when using a 4K resolution projector. It’s with a 4K model that you’ll most clearly see the difference between regular HD and Ultra HD discs played on the best 4K Ultra HD Blu-ray players, and the same will hold for streaming.
4K versions of The best streaming devices can be had for as little as $50 or even less, so you’ll want to upgrade to one of those for use with your projector. Ultra short throw and the best portable projectors offer built-in streaming apps, but they often use the Android TV platform, which is annoying at best. Both LG and Samsung offer projectors with built-in streaming using versions of the same smart platform found in their regular TVs, so those will be a superior built-in option.
Bonus tip: don’t rely on the projector’s built-in audio
While all projectors will provide some kind of built-in audio, it will have tiny, underpowered speakers that aren’t designed for reproducing movie soundtracks. Some ultra short throw and portable projectors have higher-quality onboard audio systems and are intended as an all-in-one solution. But long throw projectors (the ones that sit at the back of the room) are meant to be paired with an external audio setup.
The best AV receivers matched with a separate surround speaker system will give you the most movie-theater like sound experience. But some new projectors also feature a Bluetooth output for sending audio to a soundbar. Same as with screens, the sky is the limit when it comes to the complexity and quality of the audio part of your AV system, but it doesn’t necessarily have to be expensive.

Al Griffin has been writing about and reviewing A/V tech since the days LaserDiscs roamed the earth, and was previously the editor of Sound & Vision magazine.
When not reviewing the latest and greatest gear or watching movies at home, he can usually be found out and about on a bike.
