How to build a Steam Machine for less than the price of a PS4
Starting to build a PC is intimidating. You have a small mound of expensive components, each of which aren't really that hard to break. However, take your time and put things together carefully and even a tech novice can put together a Steam Machine in just a couple of hours.
Step 1: Opening up the case
The first thing to do is open up the case. In our mini ITX case there are easy screws at the back that release the top 'roof' of the case. Then it just slides off. Ours comes with the PSU fitted, taking out one step of the process.
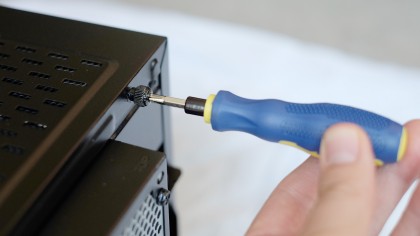
If you're not buying one of these combos, you want to look to get at least a 500W PSU in order to supply enough power for the dedicated graphics card. Even if your power supply does come included, we recommend unscrewing it and moving its mass of cables out of the way before starting to fit in any of the other components.
Step 2: First fittings
At this point we can should affix the CPU and its heatsink to the motherboard– one of the few parts you really need to make sure you get right. Doing so when the motherboard has already been put into the case can be fiddly.
The issue is the precision needed to mount the heat sink on the processor with insulating gel. This gel transfers the heat from the CPU to the heat sink, so that your computer doesn't burst into flames as soon as you run a game. If you buy a normal retail version of a processor, the gel should all be included, and pre-applied – our CPU also came with a heatsink. Score.
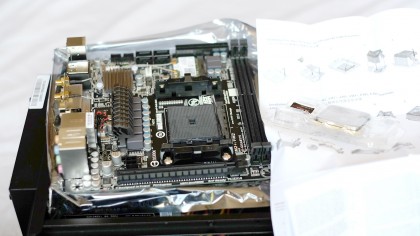
However, go OEM to save a few quid and you'll need to buy your own heatsink and your own gel. Try and make the Steam Machine without a heatsink or the heat transferral gel and you'll end up with a fried CPU.
Exactly how you mount the processor will depend on whether you use an Intel or AMD CPU, and your motherboard. But any processor is going to plonk into the big blank rectangular space on your motherboard.
Sign up for breaking news, reviews, opinion, top tech deals, and more.
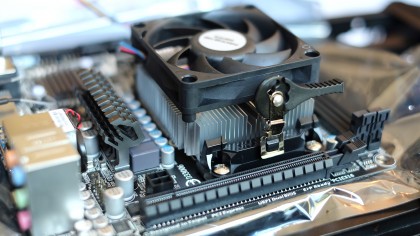
First you'll need to unlock a mounting arm by its processor slot and insert the CPU pins down. Then refasten the mounting arm to get the CPU in place. Now the important bit – the heat sink.
If you don't have a heat sink with pre-applied gel, you'll to put a thin trail of the stuff on the flat bottom of the heat sink and place it carefully on the CPU before clipping the heatsink to the mountings on the motherboard.
If you've made it this far, you should be fine from here on in. Scary bit over.
Step 3: Attaching the motherboard
Once the CPU is attached to the motherboard, we need to secure the motherboard to the case. With a smaller case like ours, the board will generally slide in and take up almost all of the width of the bottom panel of the case.
Before putting the motherboard in, though, first jam in the IO shield that should have been supplied with the board. This is the panel that goes into the back of the case, making holes for the various video and audio sockets you get on a motherboard.
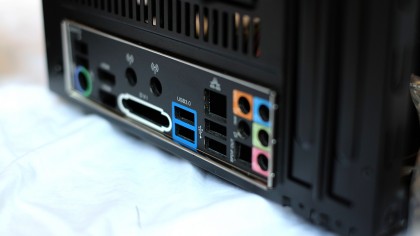
Next, line up the holes on the edge of the motherboard with those on the bottom of case, making sure all the ports line up on the back IO shield. Then screw that sucker in using the screws that (hopefully) came with your case.
Read the motherboard manual to make sure you use the right screws, though, or - like us - you might need to get out a spanner to unfasten them.
Step 4: Fitting the other components
Now we need to bung in the video card, the hard drive and the RAM. The RAM and video card simply slot into your motherboard while the hard drive fits onto the case, interfacing with the motherboard using a cable rather than a direct connection. Check your case's manual on how to attach the hard drive/SSD - double-sided tape is not the preferred method.
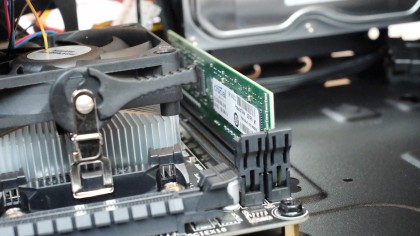
As long as you don't try and put the wrong component in the wrong slot and push with all your might, you can't really go wrong with this bit. If in doubt, check your motherboard manual.
Step 5: Cables, cables, cables
We said that sorting out the CPU was the most precarious part of making a Steam Machine, but fixing all the cables is the real fiddly bit. Once you've re-screwed in your power supply, your Steam OS box should now be a real mass of wires.
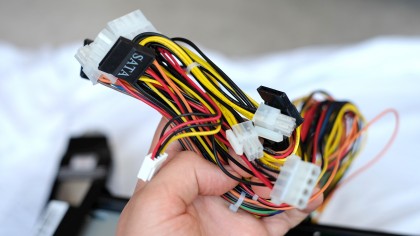
Move all the ones sprouting out of the front of the case out of the way, and deal with those of the power supply first. They plug into your motherboard and your hard drive - and the general rule to stick by is if it doesn't match the slot, don't try and put it in. There's a great big 12-block power plug for the motherboard, and smaller ones for the other components.
You also need to use the SATA cable that came with your HDD/SSD to hook up your storage with the motherboard, and do the same with an optical drive, if you went for one of those. We didn't, because – well – why would you need one in a SteamOS machine?
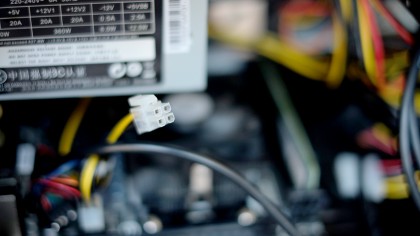
The rest of the cables let you use things like the power button and any extra audio sockets on the case. They're the fiddliest of the lot – little finger tentacles that are all too easy to lose in the mass of cabling inside the case. Each should be labelled with its function, so just match them up to the right little metal contacts on your motherboard. You'll almost definitely need the motherboard manual for that. Just don't panic.
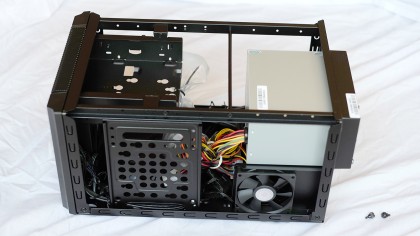
Finally, make sure your CPU heat sink's fan's power cable is attached to the motherboard, and that the case's fan is hooked up too. The last thing we want is the system overheating as soon as we turn it on.
Next, put the metal lid back on the case and cross your fingers.
Current page: Putting it together
Prev Page Getting the bits - part 2 Next Page How to install Steam OS
Andrew is a freelance journalist and has been writing and editing for some of the UK's top tech and lifestyle publications including TrustedReviews, Stuff, T3, TechRadar, Lifehacker and others.