Top 10 settings to put a personal touch on your Android phone
Make your Android work fit your preferences
Sign up for breaking news, reviews, opinion, top tech deals, and more.
You are now subscribed
Your newsletter sign-up was successful
Today’s Android phones are more customizable than ever before. While you could just use your phone with the default settings, you can get even more out of your Android experience by rummaging around the settings to optimize your phone for your use. Whether you just got a shiny new Android phone or want to spruce up the one you’ve been using for months, we delve into the top 10 Android phone settings to get the best performance, maximum privacy, and most personalized experience possible.
Most of these settings are available in some form on recent Android smartphones. Use the search bar in your phone’s settings if your phone doesn’t follow the conventions we cite here (we used a Samsung Galaxy S23 Ultra as a reference). Some of these settings are specific to Android 14, as noted below.
Let’s get into the best Android settings you should tweak now.
Review installed apps
Go to the “Apps” submenu under settings to view the apps installed on your device, and to see their respective settings and permissions. Even if you started fresh with a new phone and didn’t transfer apps from your prior device, it’s worth going through this exercise. It gives you a chance to review app permissions, and either disable apps or remove permissions if the app goes unused. You can’t uninstall an app from this screen, though – for that, you need to go to the Google Play store.
Prune unused apps
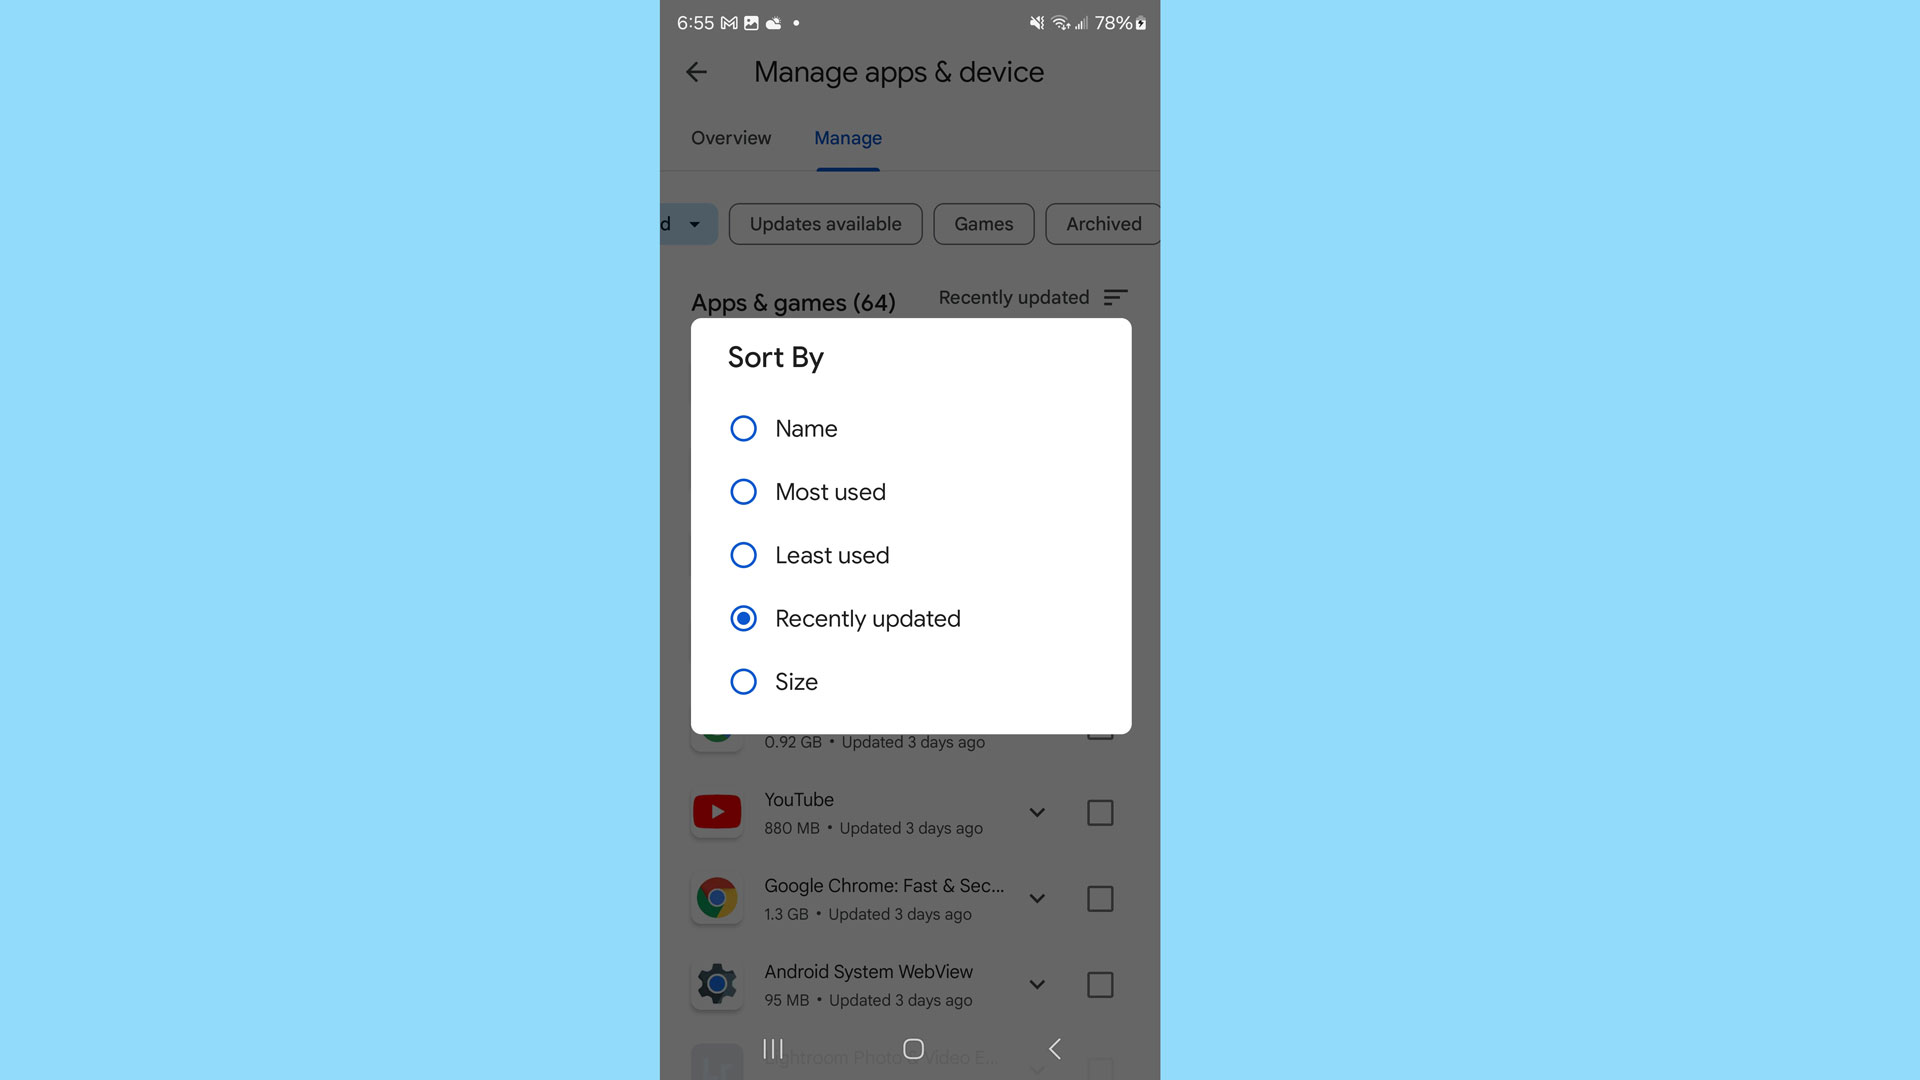
It happens to all of us. We download apps that seem interesting, then they fall into disuse. No point in leaving such apps to take up space on your phone if you’re not using them anymore. Go to the Google Play store, tap your account icon in the upper right corner, choose the first option to “Manage apps & devices,” and then click the “Manage” tab. Not only can you uninstall unwanted apps, but you can also sort apps by least used so you can see candidates for purging. Keeping apps you don’t need or use on your phone could become a security risk. Purging those apps both eliminates that risk and lets you regain precious space.
Lock down security
To maximize your phone’s security, hop into the “Security and privacy section” of the Android settings to confirm several settings.
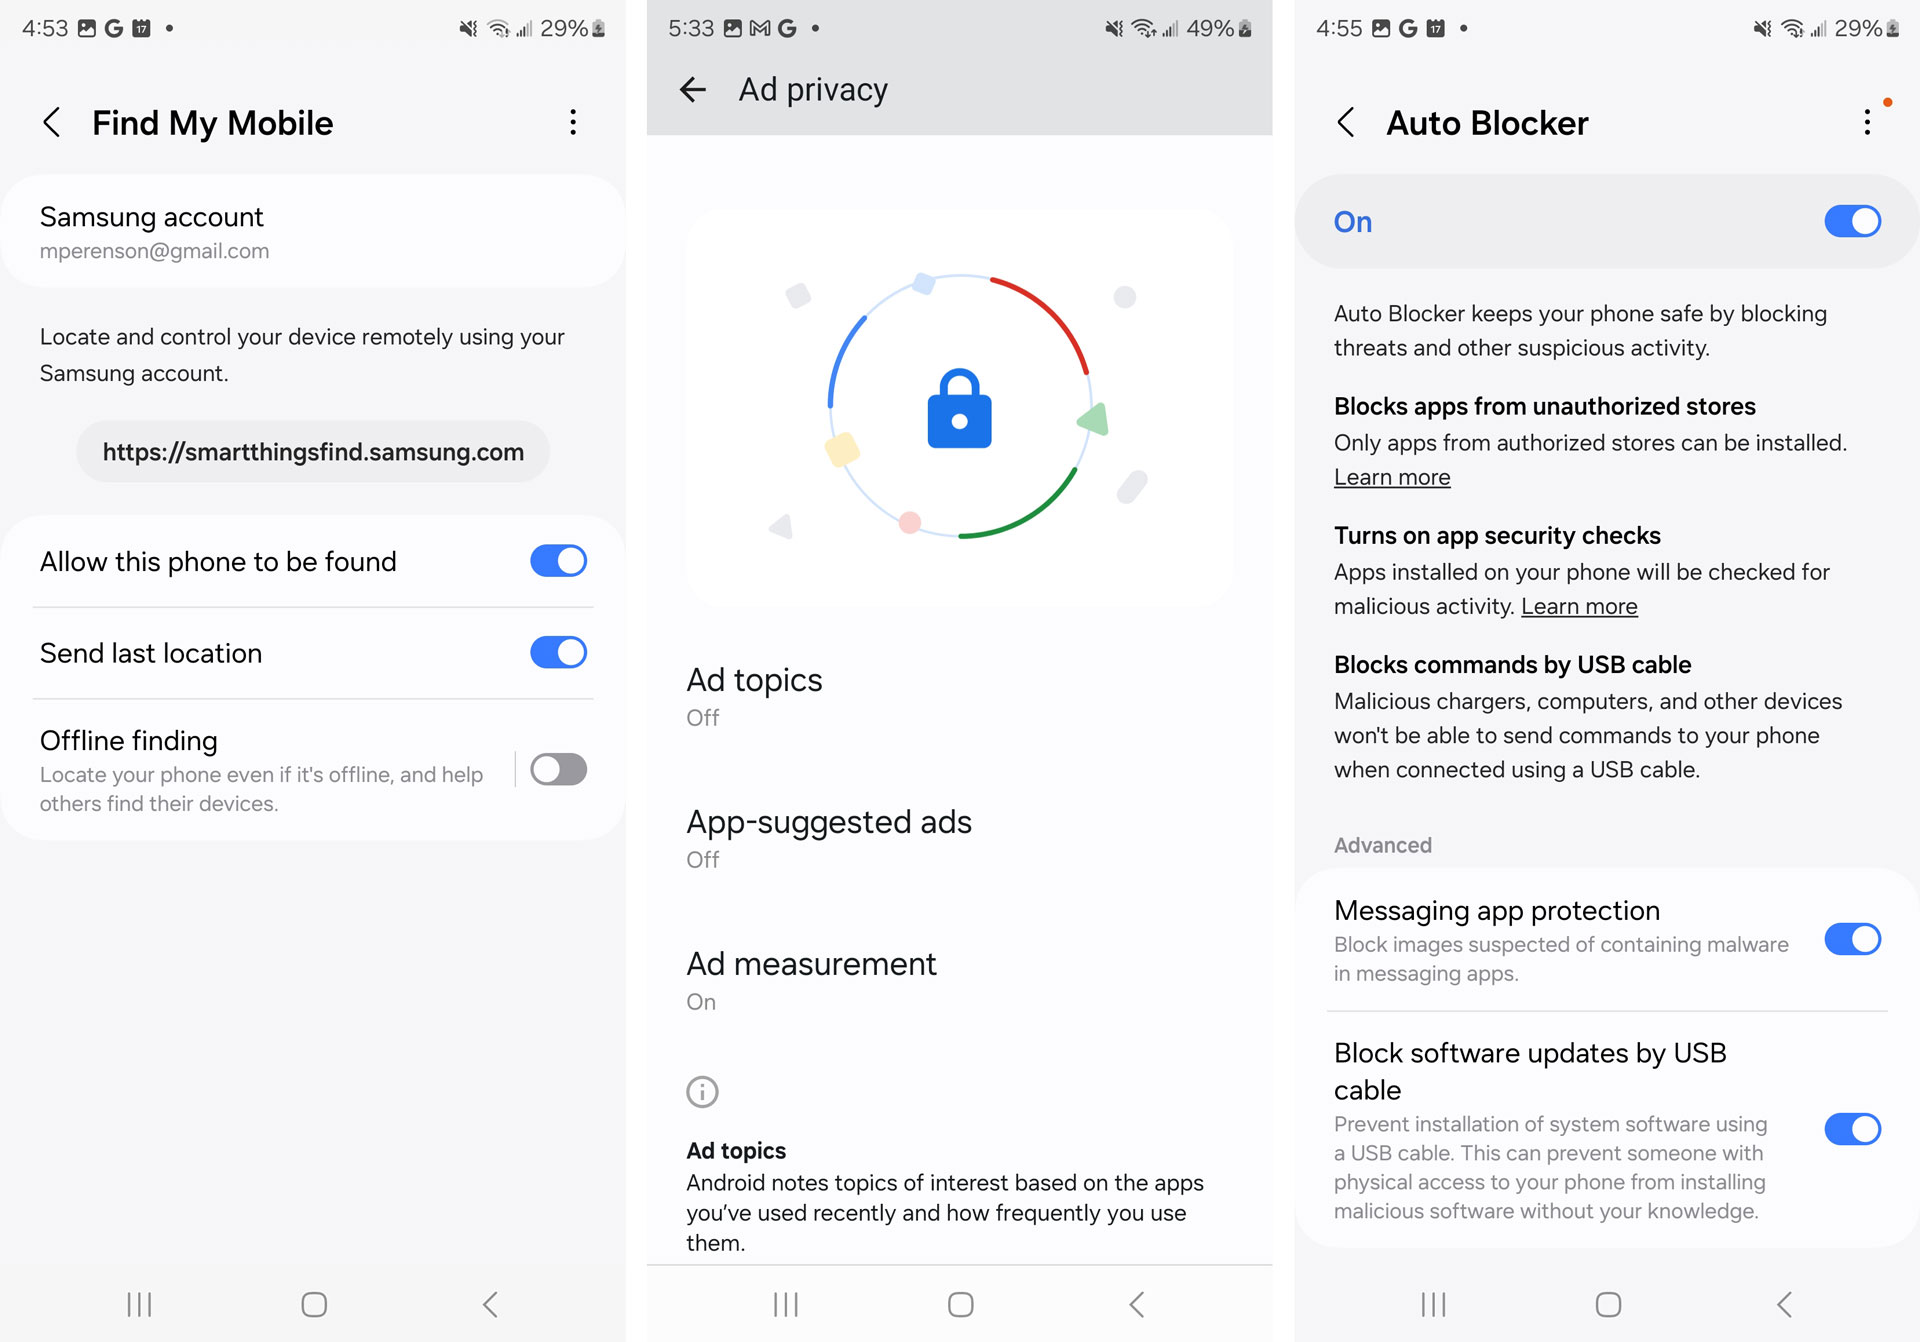
Let’s start with making sure you can find your phone if it gets lost. Go to “Find My Mobile” or “Lost device protection” and turn on the slider to allow the phone to be found, and for the phone to send its last location.
Sign up for breaking news, reviews, opinion, top tech deals, and more.
Go to “App security” and enable Google Play Protect if it’s not already selected. This setting regularly scans your apps and device for security risks.
While in Android 14’s security menu, enable Auto Blocker to keep malware from finding its way onto your phone. This feature blocks unauthorized app installation, messages with malware-infested images, and malicious commands sent over a USB cable.
Another, easier way to confirm app permissions is by using the Permission manager. This bird's-eye view starts with the permission requested (i.e. body sensors, calendar, camera, call logs, location, microphone, etc.), then shows you which apps can access that info and under what circumstances – and which apps don’t have access. This is a handy way of spot-checking app access and making sure apps have the access you intended. Another privacy view lets you see which permissions apps accessed in the last 24 hours or the last 7 days.
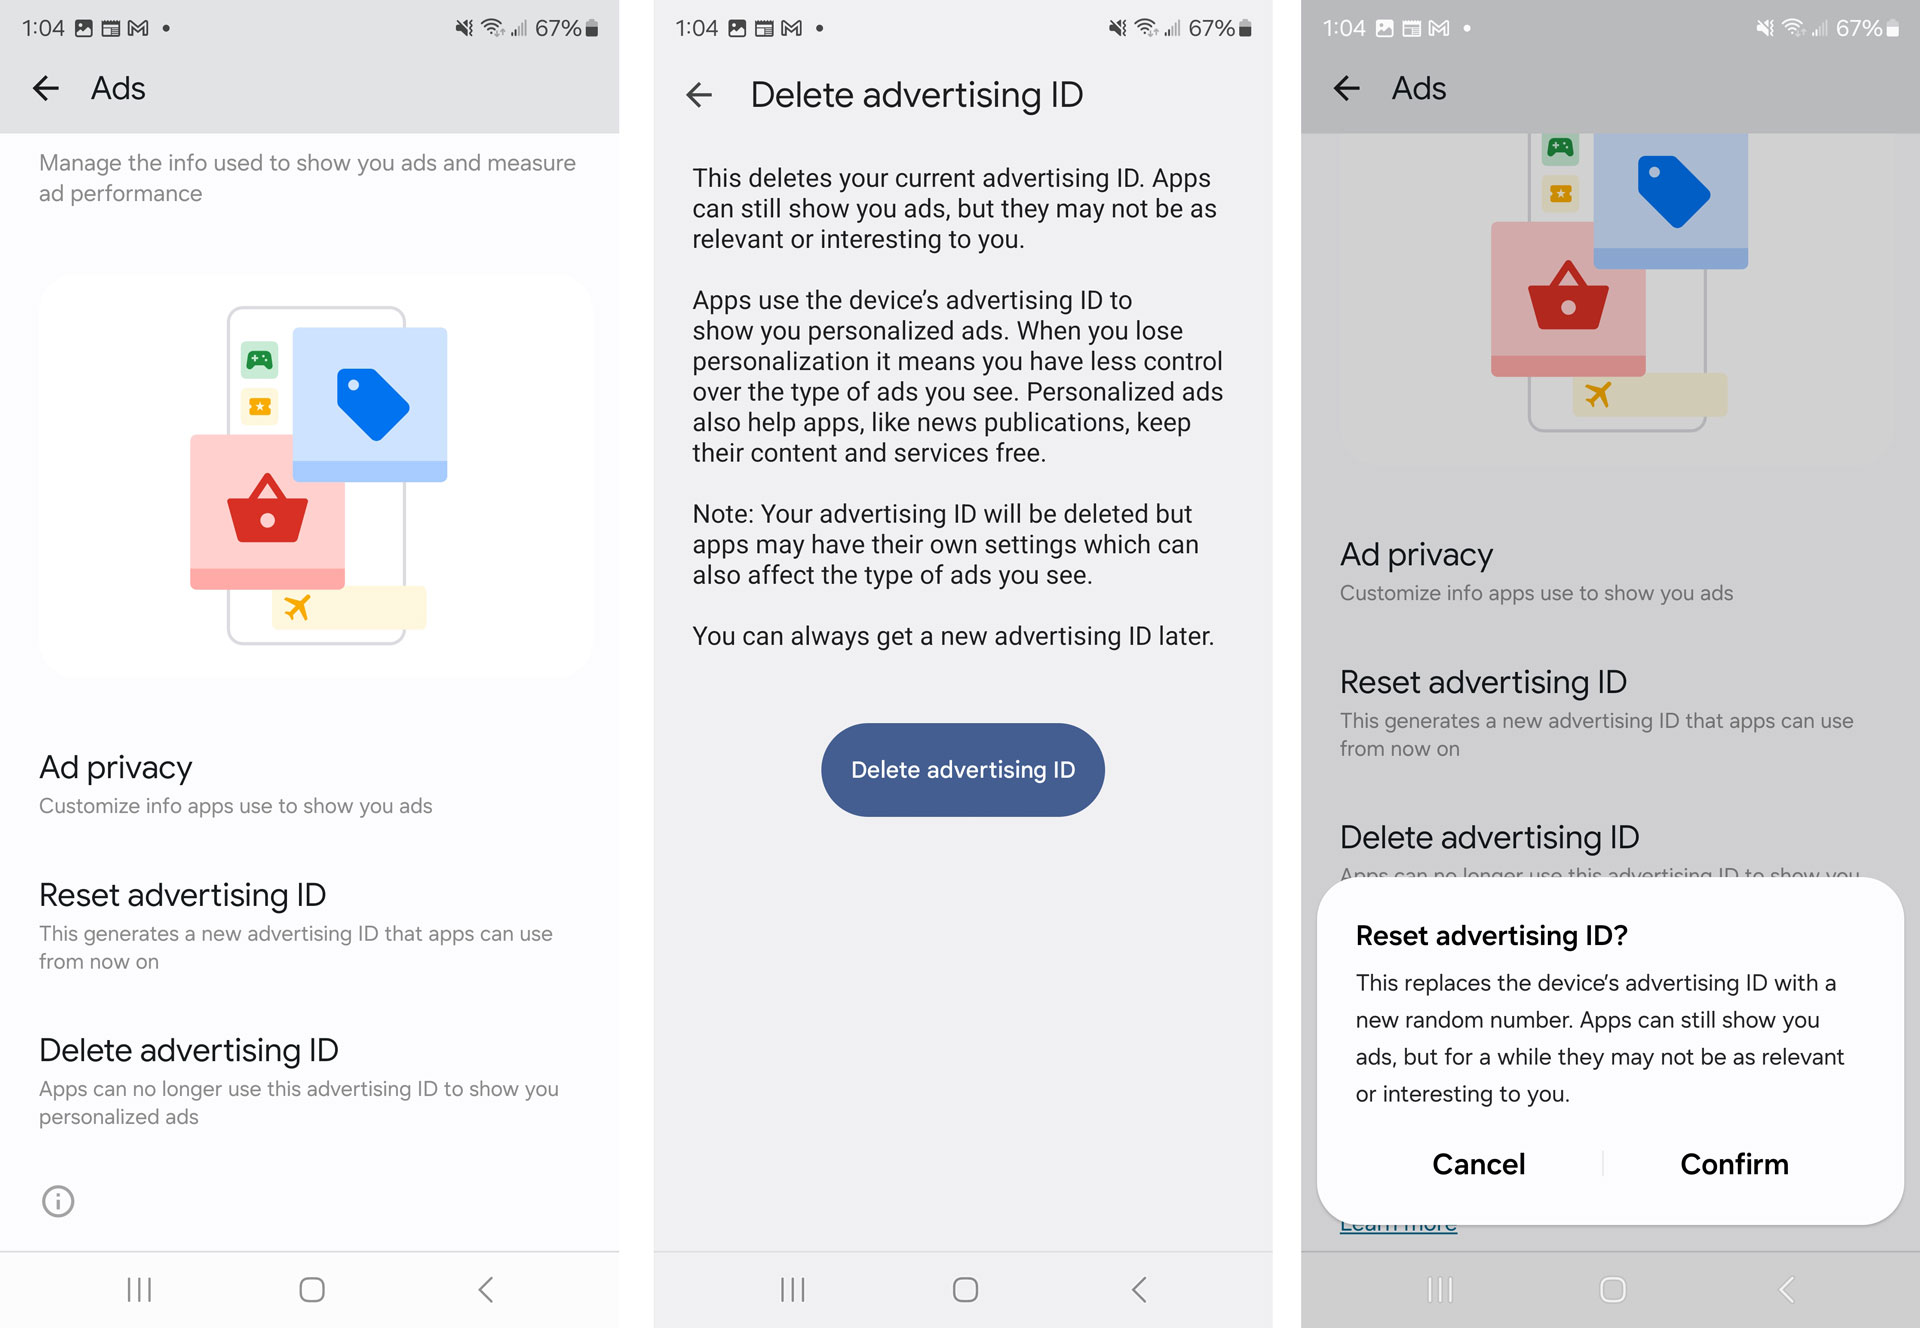
Finally, dig into “More privacy settings” to access Google privacy settings. If you have more than one Google account on your phone, this is where you can adjust the source for Google’s autofill (under “Autofill with Google”). Opt out of ads and control what’s served to you by scrolling down to “Ads” and selecting “Ad privacy” to adjust options like what info apps can use to show you ads, and whether apps can suggest ads. You can further protect your privacy by changing the settings for your device’s advertising ID, either by choosing “Reset advertising ID” or “Delete advertising ID.” Either choice disrupts Google’s ability to deliver personalized ads. This is how you can stop Google from serving up ads about air fryers after you searched for air fryers, for example.
Add Emergency contacts to the lock screen
You can add an emergency contact or medical to your lock screen under the “Safety and emergency” settings. This is also where you can silence notifications while driving.
Enable fast charging
Go to the “Battery” menu and check the “Charging settings” to make sure you have both “fast charging” and “fast wireless charging” selected. This way, you can charge your device speedily while on the go. Go to the “Background usage limits” menu to make sure the phone puts apps you’re not using to sleep. Doing so minimizes battery drain.
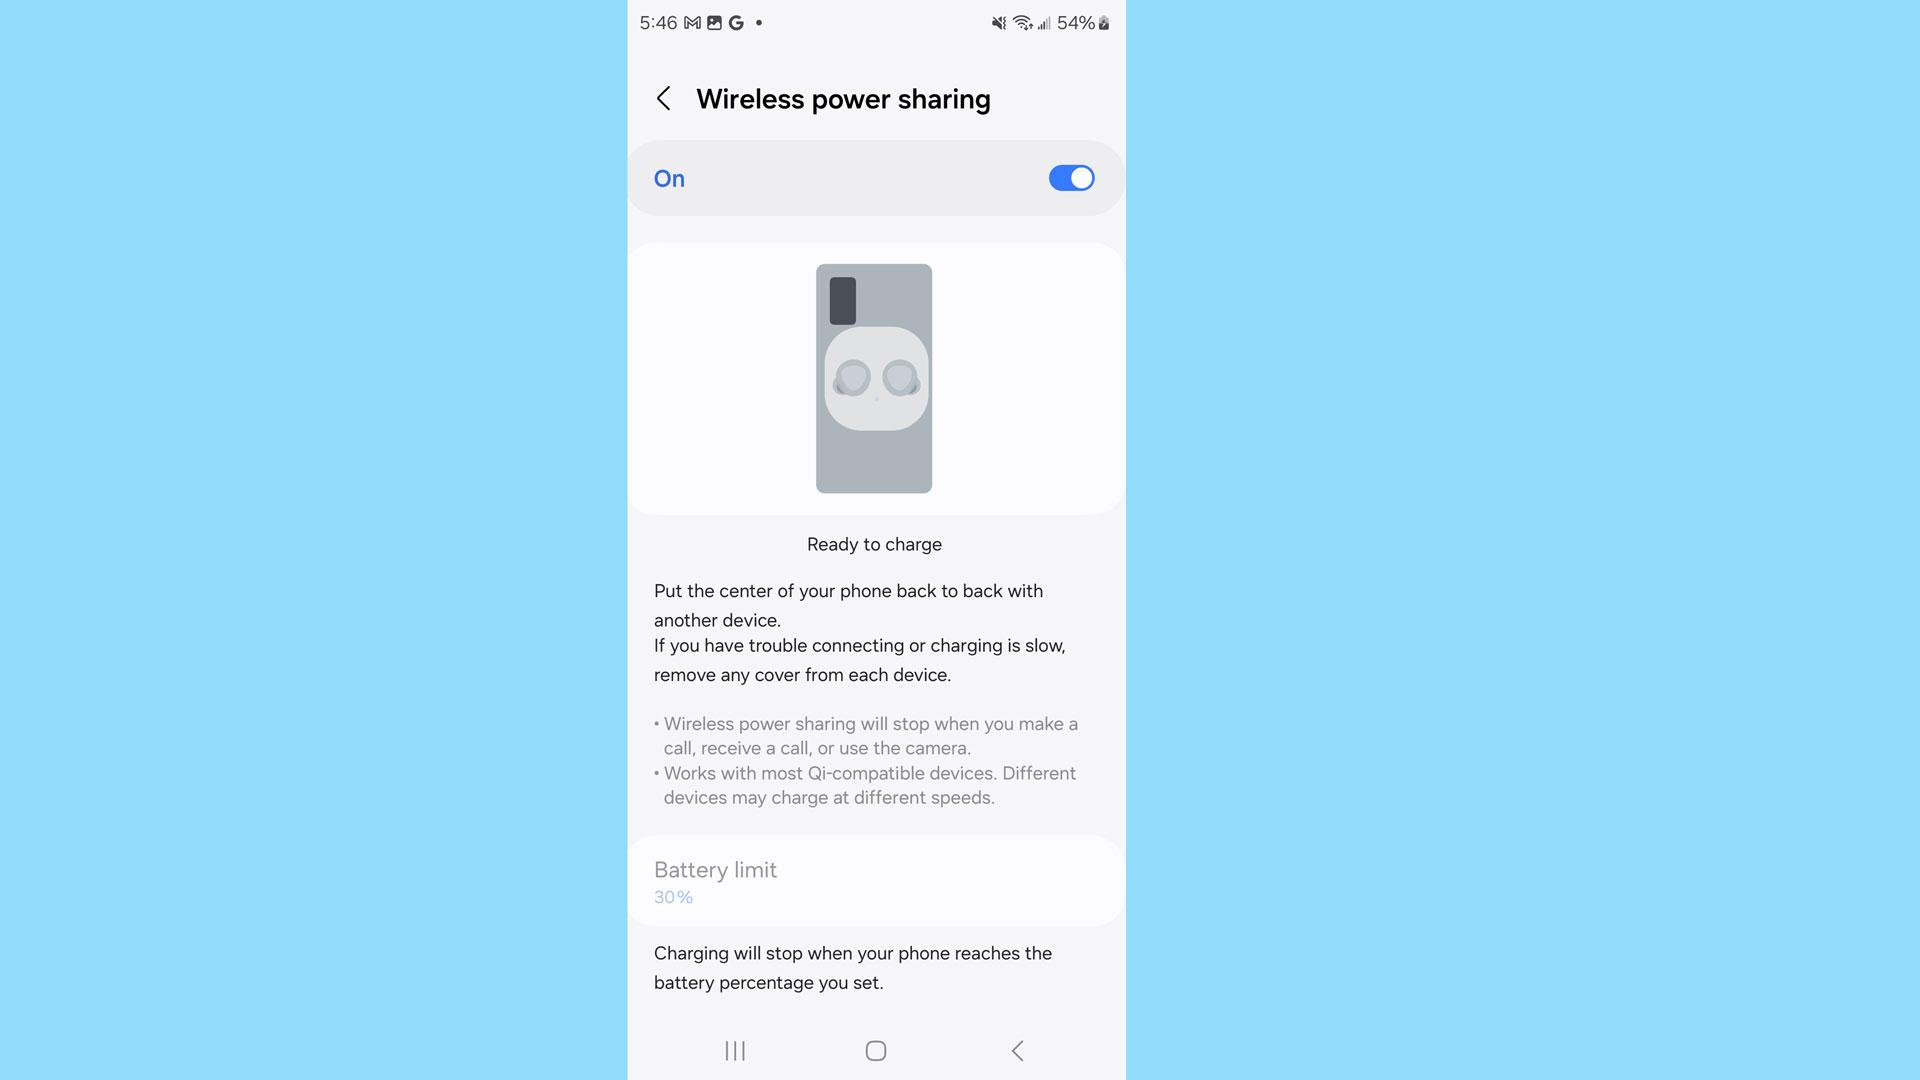
While in the Battery menu, note the “Wireless power sharing” option. Many newer phones with Qi wireless charging support sharing the phone’s power with other Qi-compatible devices like a watch, earbuds, or another phone. When you want to share your power, come back here to enable this feature. If you turn it on and don’t use it, the phone will stop sharing power.
Optimize display settings
Under the “Display” menu, first choose between light or dark mode. “Dark mode” can be easier on the eyes, and it can help save battery, too. Disable “Adaptive brightness” for better battery performance, since this mode will otherwise boost the brightness in some circumstances and drain the battery faster.
Check the “Screen timeout” settings and opt for a comfortably minimal number like 15 seconds or 30 seconds to protect your phone from other parties. Longer screen timeouts drain the battery faster and make your phone vulnerable to accidental exposure if you put it down and someone else snags it.
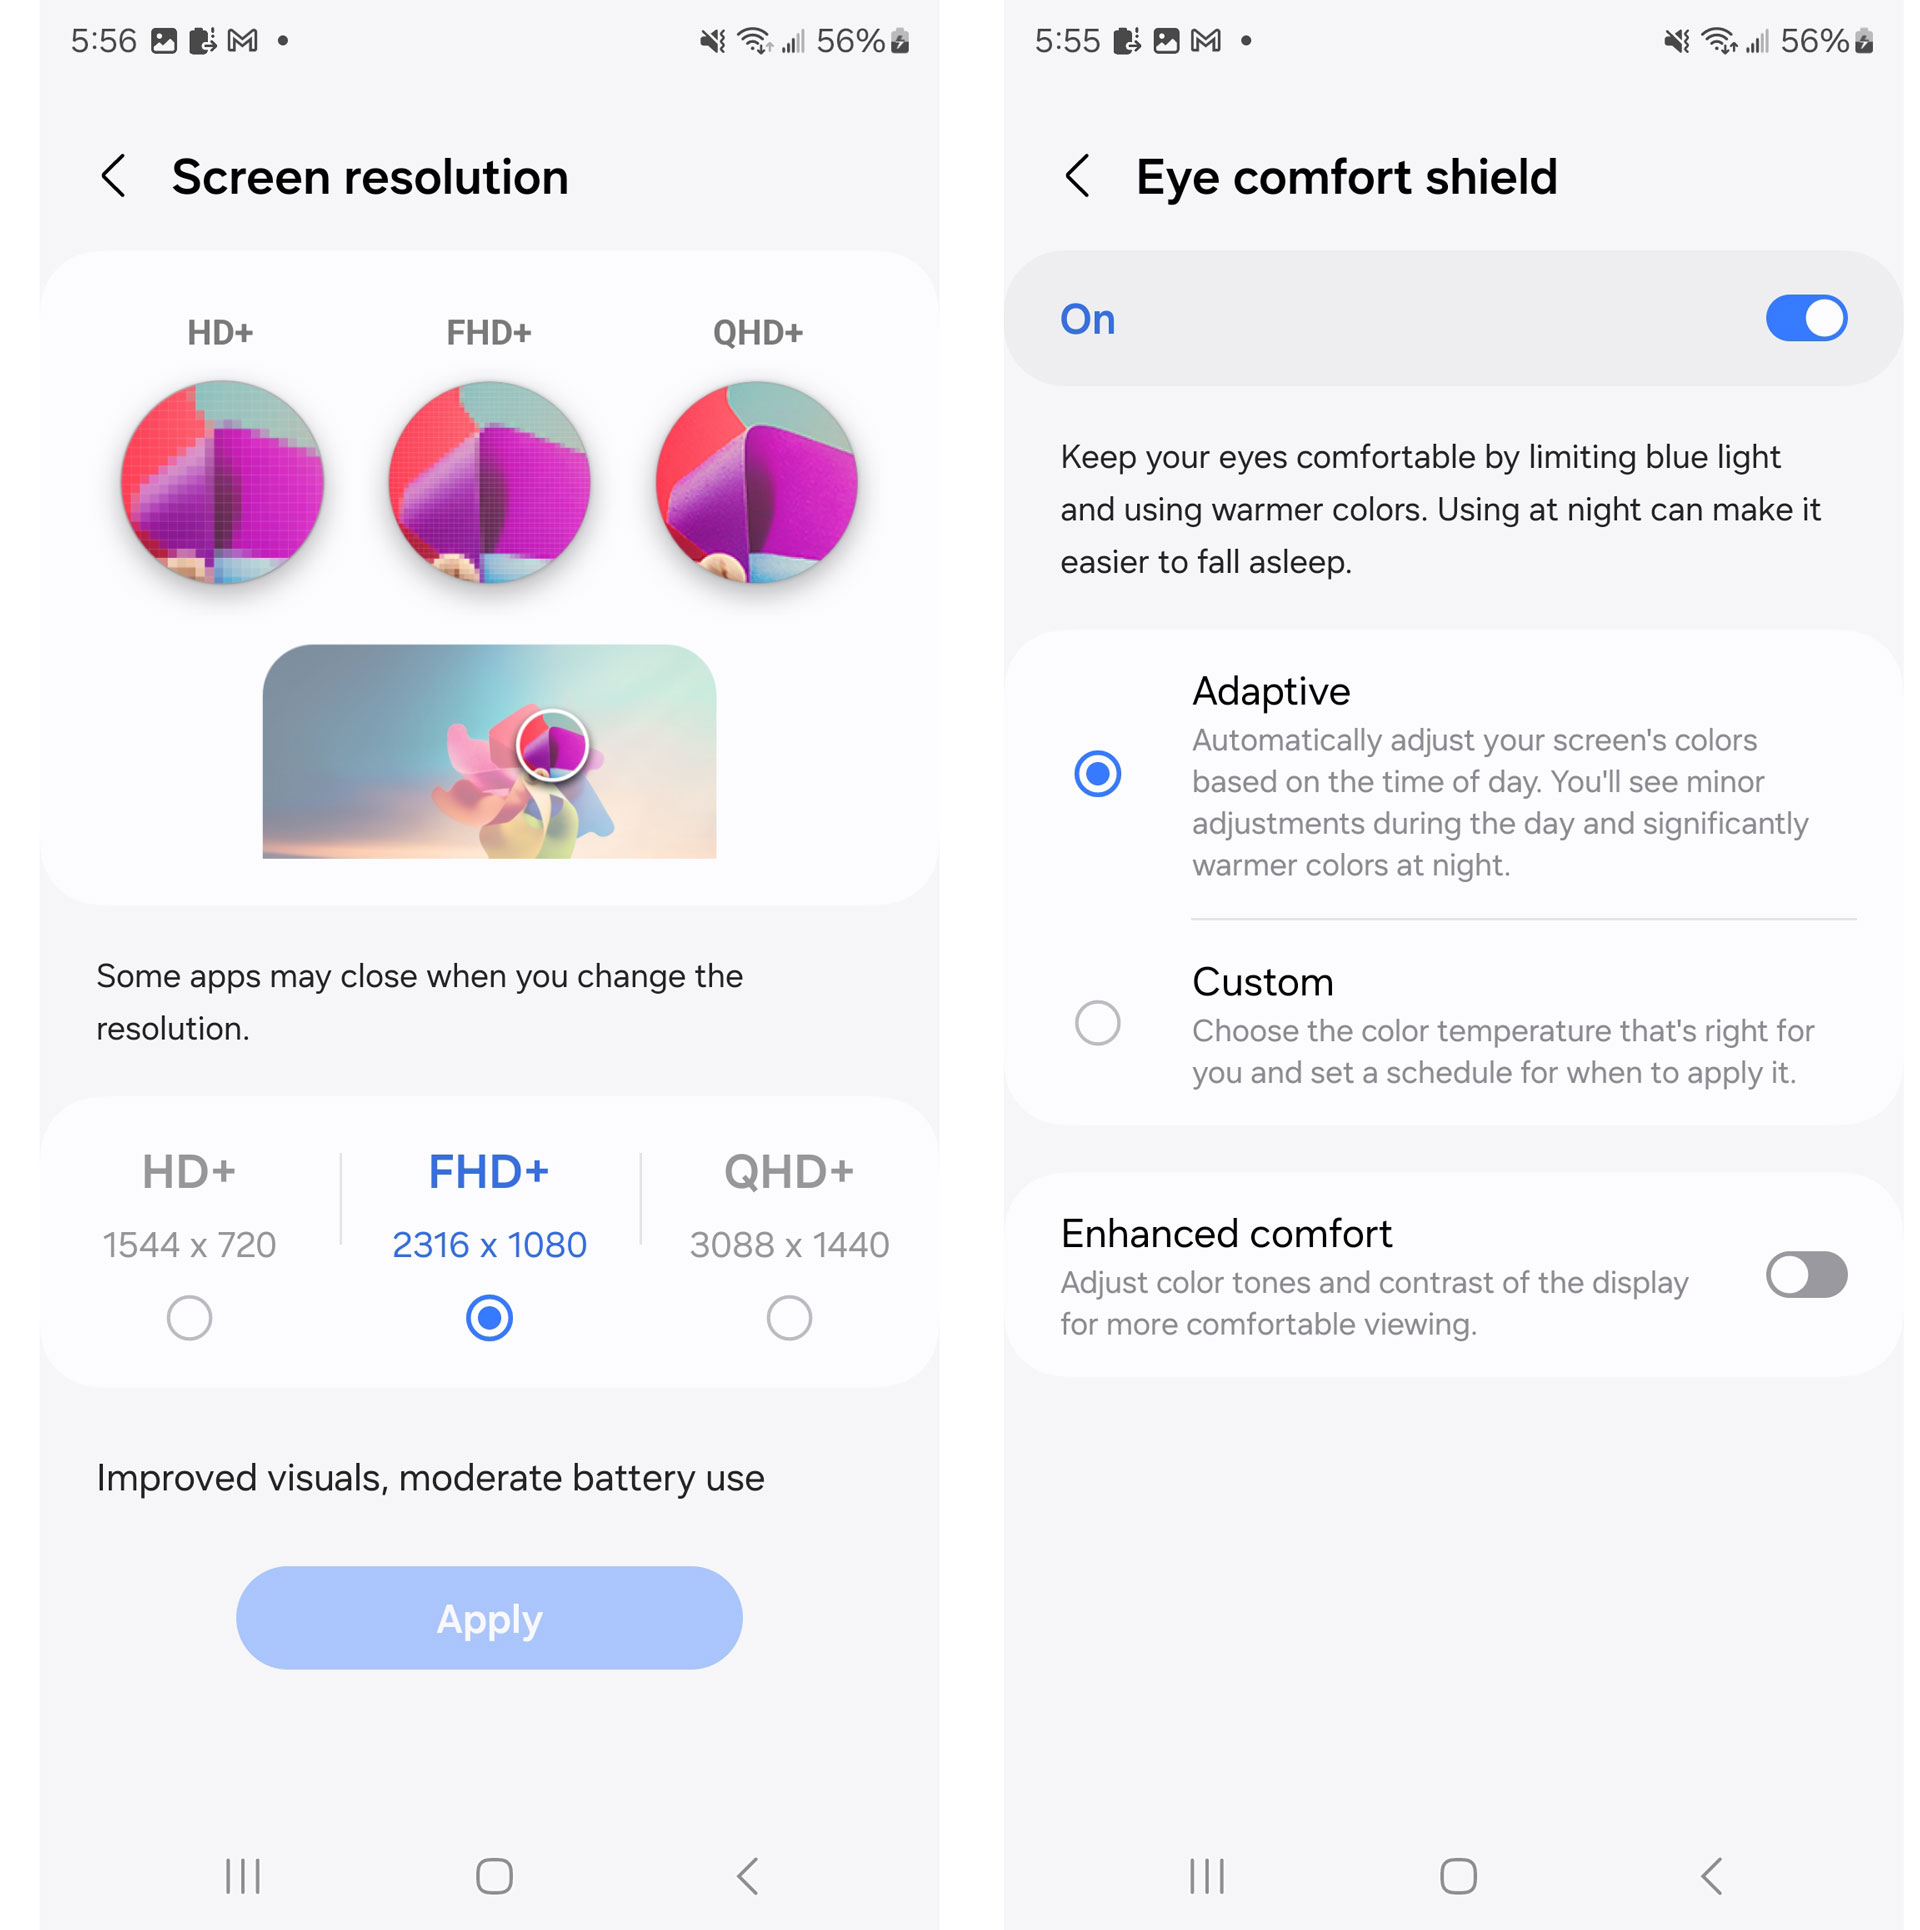
Minimize your blue light exposure by enabling “Eye comfort shield” and customize the settings for the color temperature of this mode. Just beware of using this mode during hours you might use your camera – the screen’s warmer cast can throw off your perception of image exposure and color when snapping pictures.
Finally, check the “Screen resolution” and find the option that works best for you. For example, the S23 Ultra has a display capable of QHD+ (3,088 x 1,440 pixels) resolution, but the phone defaults to FHD+ (2,316 x 1,080 pixels) screen resolution since it balances visual clarity and battery consumption. Play with these settings to see which you like best, and whether the sharper screen is worth the trade-off in battery life.
Customize notifications
Once upon a time, customizing notifications was simply about which apps you allowed to send you notifications, how those notifications would sound, and how they might appear. With Android 14, you can now set what notifications appear on the lock screen, and you can interact with those notifications. Go to “Notifications“ and take the time to review your general notifications settings as well as your “Lock screen notifications” permissions to avoid potentially awkward situations and keep prying eyes away from your private notifications. Or, choose to disable lock screen notifications to eliminate the chance of someone seeing something they shouldn’t entirely.
Choose modes and create routines
Some of us have predictable schedules that dictate our lives. If that's you, navigate to “Modes and routines” to access pre-configured yet customizable modes that determine phone settings for different environments or circumstances (i.e. sleep, driving, exercise, work, etc.). You can also create your own custom mode, or create a routine to match your locations and behaviors.
Confirm backup settings
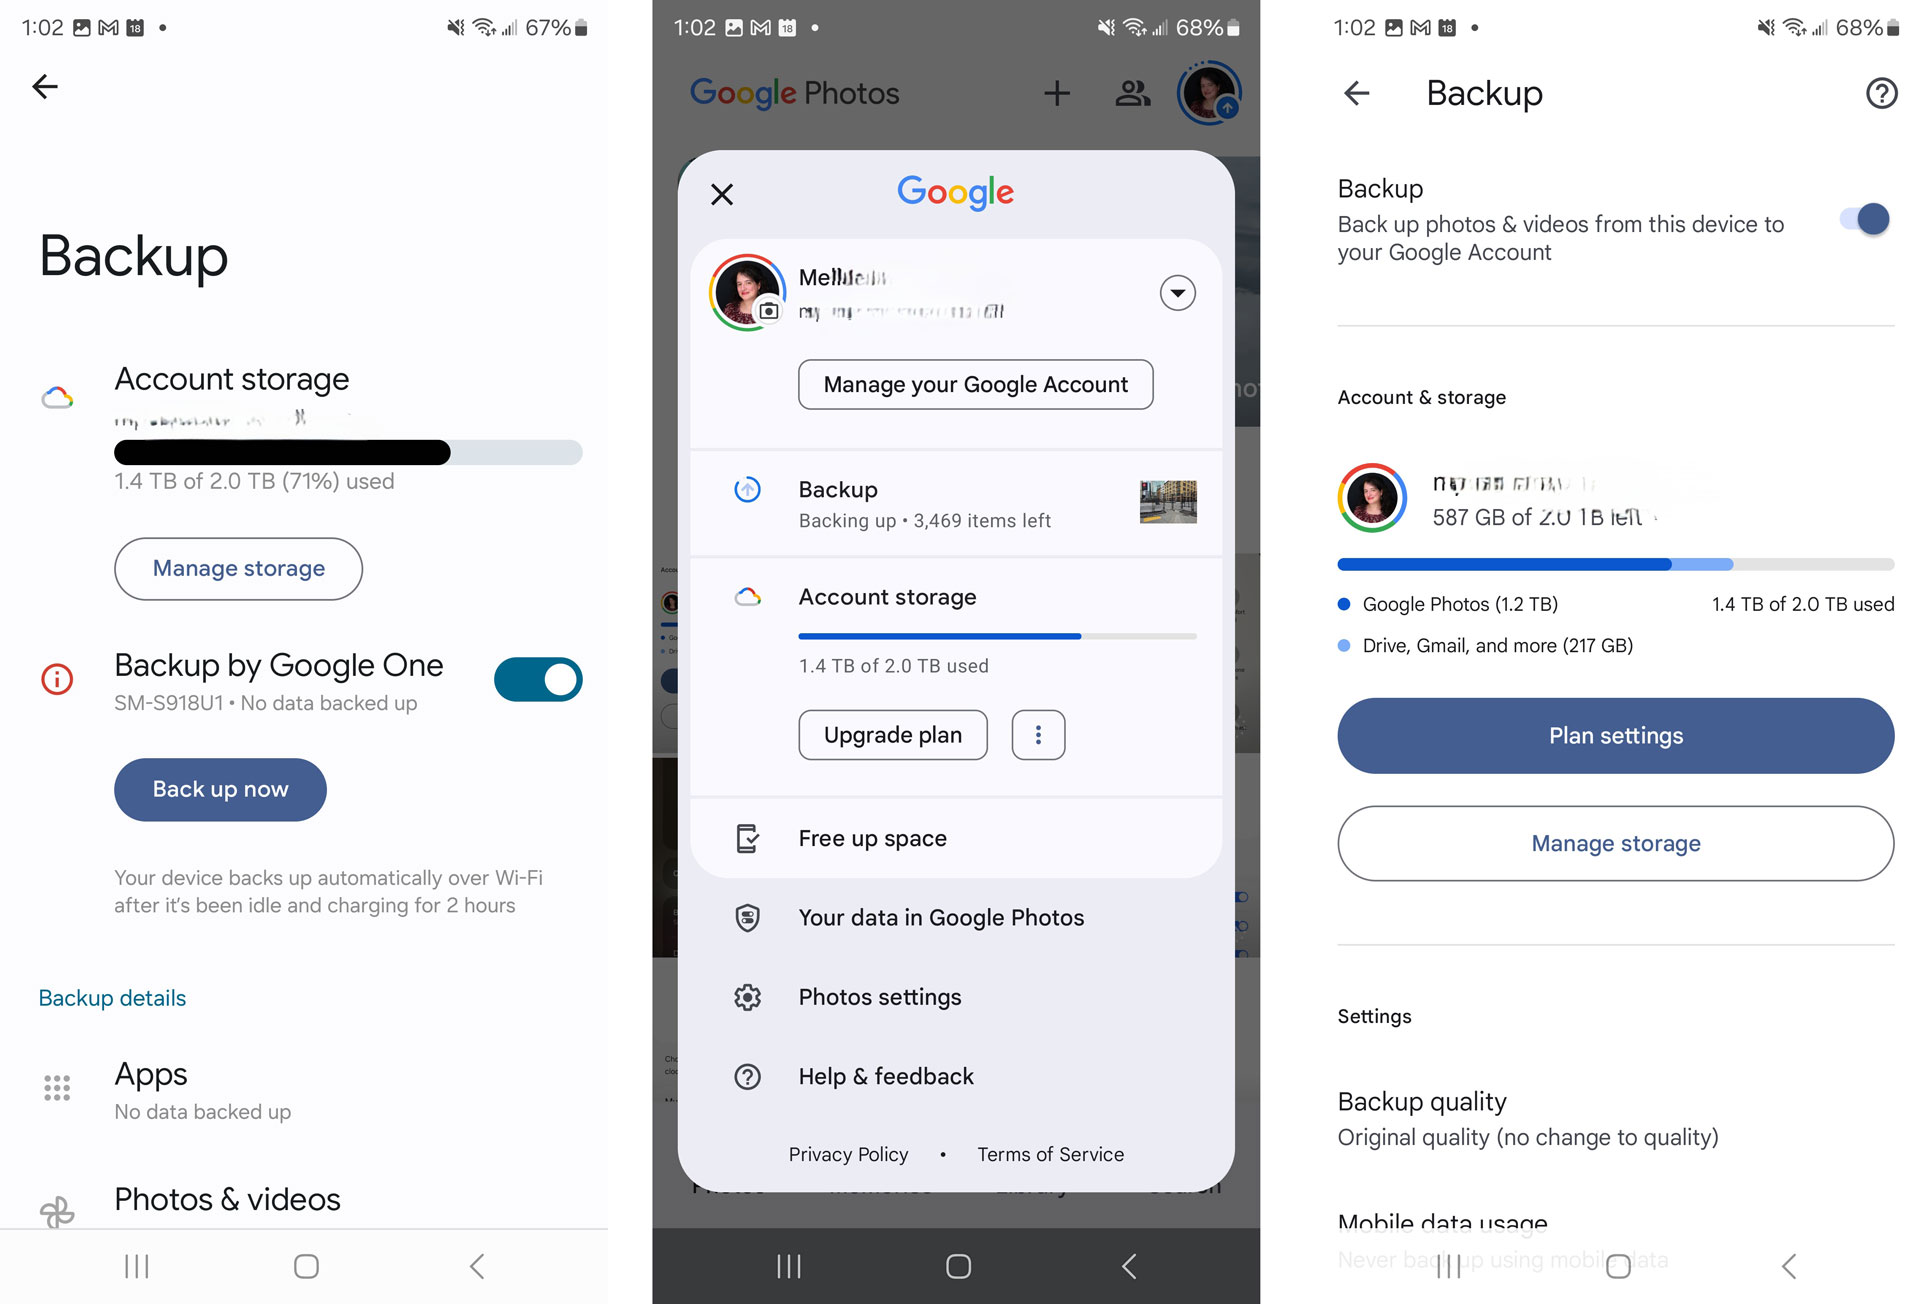
It’s critical to get your data back ups set up properly in the event your phone gets stolen or damaged. And it's even more important to double-check the back up settings before you have a loss. Head to “Accounts and backup” and go to the Google Drive “Back up data” settings.
Android can back up app data, SMS and MMS messages, call history, device settings, and Google account data like contacts and calendars. You can back up photos and videos, too, via Google Photos—just make sure your phone stays on and the Photos app remains open to get your images packed up.
Edit the quick-access settings menu
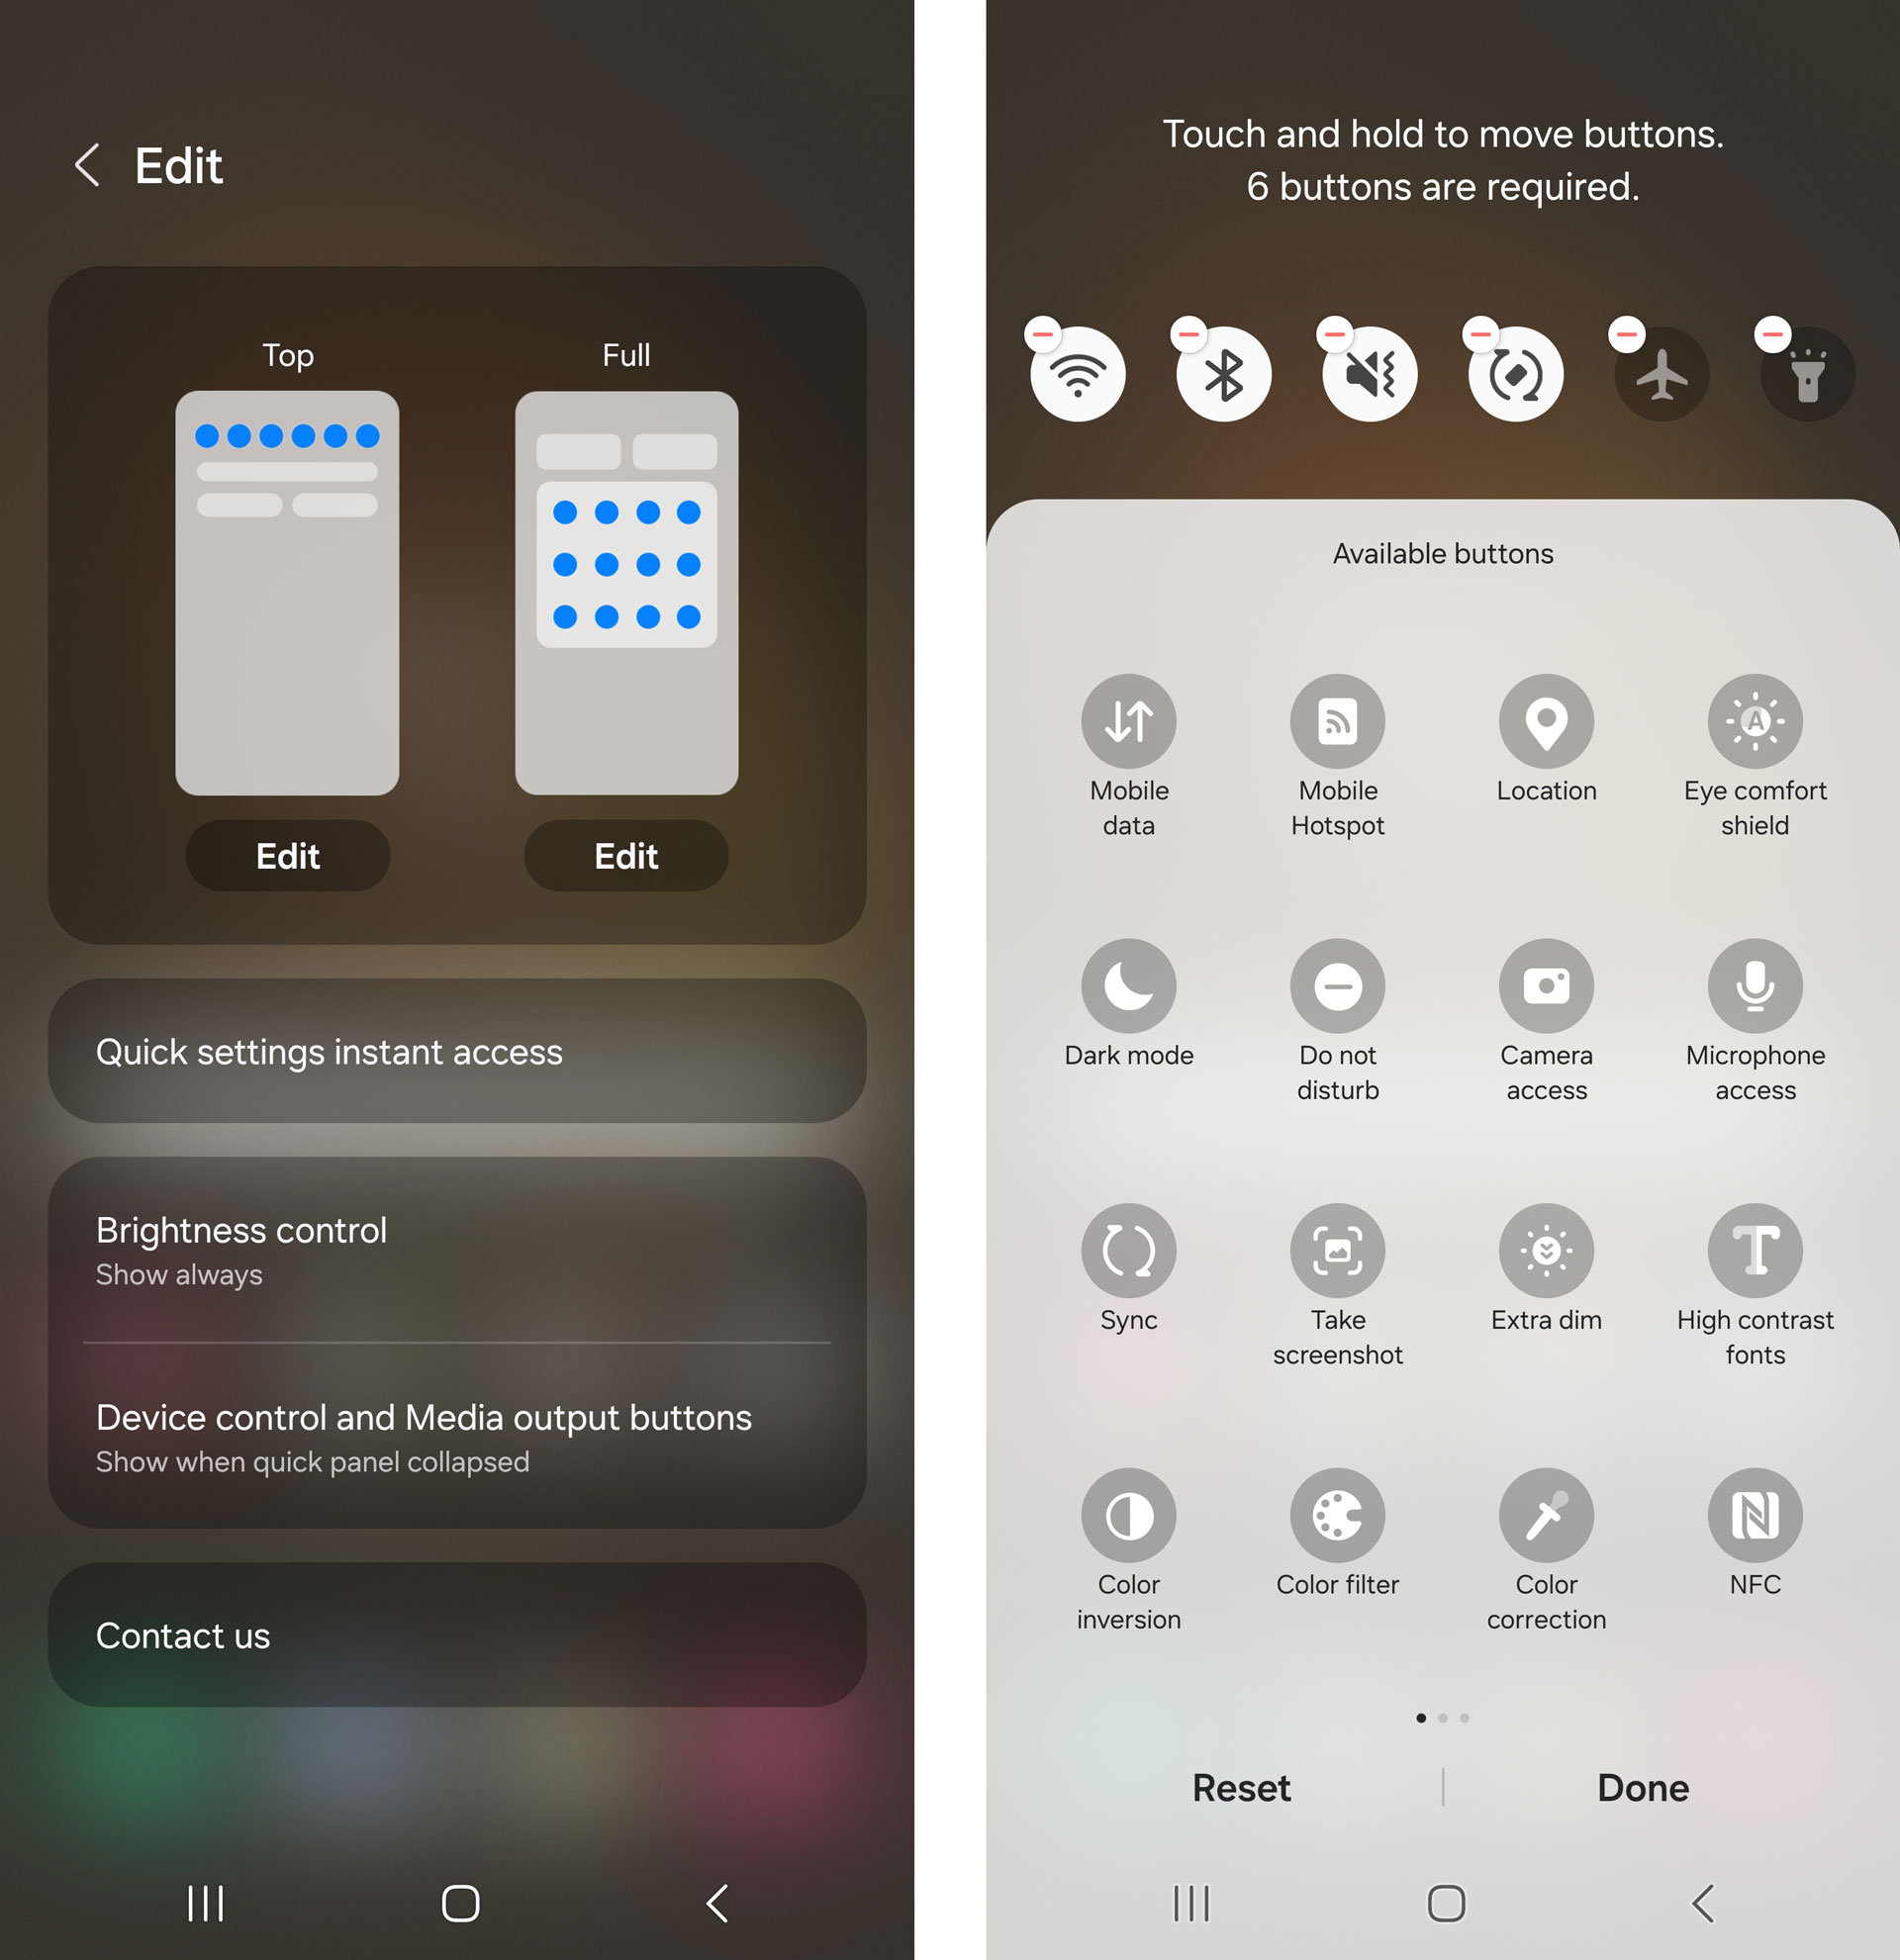
Only so many icons can fit on the pull-down quick-access menu screen. Tap the pen icon at the top right to edit the short-cut icons' appearance (along the top of the screen, or in a block) and prioritize actions.
