Moving all your important files and folders between Windows and OS X is a whole lot easier than you'd think.
Once you've moved files over to your Mac, you'll then need to make sure you've equivalent programs installed.
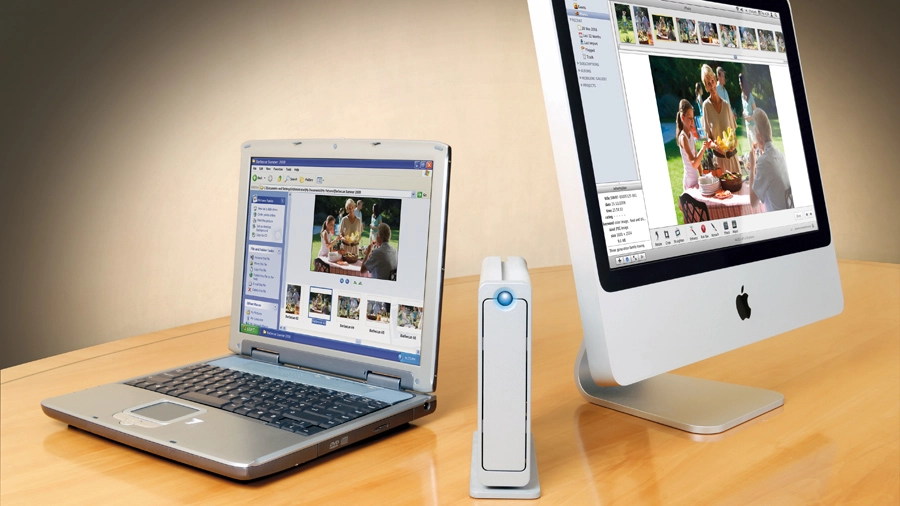
Article continues belowMigrate any file

First, you need to source a suitable free application for your Mac - sites such as applemacfreeware.com can help here. Then, install the application you wish to use on your Mac.
Choose File > Open, or look for an Import option and explore the choices to see what file types the program can import - if your file type is covered here, you can simply transfer the file across and open it directly to verify it works correctly.
If your file type isn't covered, don't panic. Instead, make a note of what file types are supported by the program. Now switch back to the program you usually use on your PC to edit that file, choose File > Save as or File > Export, and see what file types are supported.
If one matches the options in your Mac program, then export the file in that format, copy it across to your Mac and attempt to open it in the new application. Hopefully the file will be transferred and most - if not all - of its original features will be preserved. If this fails, try another file format if a match exists.
Conversion services

If no match is found, don't admit defeat yet. You might have to jump through a few extra hoops, such as exporting the file into a format that can be opened in another program, which in turn can save the file in a format you can subsequently use on your Mac.
For example, there's no way to directly import an Access database into the Mac version of OpenOffice, but you can import it into the PC version instead. Once done, save the file in OpenOffice ODF format, which can then be opened on your Mac.
Another solution is to try an online conversion service such as Zamzar or PDF Online - PDFs are a good option if you don't need to edit the files, just view or print them.
You can create PDFs in many applications, or use the free Nitro PDF Reader - it's packed full of features for creating PDFs, but in many cases you can simply drag your file onto the desktop Nitro icon to get things started.
Do it in Windows

If, after everything else, you still can't open or edit certain files on your Mac, all may not be lost. If you have a spare, unused copy of Windows lying around, you can create a virtual computer on your Mac using free software called VirtualBox.
This creates a virtual PC on your Mac, inside which you can install Windows and your old software programs, enabling you to edit and access those files you're unable to open on your new Mac.
A problem you're much more likely to run into, however, is that while the Mac will happily read the files themselves, it may not be able to read 'catalogue' files that organise these files into photo albums, say, or playlists. If you use Google's Picasa to organise your photos on your Windows PC, for example, you'll be able to move the JPEGs themselves across to be managed in iPhoto without any problems, but the organisation that you've done in Picasa, and some special tags, unfortunately won't translate across.
One workaround for this problem is to ensure that the tags you wish to transfer are embedded in the files themselves, rather than held within the program. Tags added to JPEG images in Picasa are allocated to the file, for example, but you can also employ the help of third-party software to both verify and insert tags.

When it comes to your music collection, install MP3Tag. Not only will this enable you to check that tags created in other programs have been embedded in the file itself, it simplifies the task of creating your own metadata such as artist and album name.
The equivalent tool for JPEG and TIFF images is MetaEditor, which you can download from freewarezoom.com/archives/metaeditor.
So how do you physically move your files over to your new Mac? Well, it's not greatly different from moving your files from one PC to another. You can do it by copying them onto an external storage device connected to your PC, then eject it, connect it to your Mac and copy the files off it. Or you can do it over the network.
External device

Let's start with the easy old method of copying to an external storage device. If your PC has a CD/DVD burner, you could, of course, transfer your PC files via a series of blank CDs or DVDs. This is a slightly inelegant system, though, as your files are unlikely to fit on a single optical disc.
Instead, you'd do well to buy an external hard disk that can connect to both your old PC and your new Mac and transfer your files this way. Besides, external hard disks are useful for other tasks, such as backing up with Apple's Time Machine.
Plug your disk into your PC, drag your files across to it, then eject it and move it across to your Mac before dragging all the files from it to your Mac's internal hard disk. Each stage could take a while depending on how much data you have to copy. If you have the option of using a connection interface that's faster than USB, take it - but this is a one-time transfer, so don't get too antsy if it's taking a few hours.
It's important to take into account that the standard format for disks used with Windows PCs is NTFS. Macs use a different format by default, called HFS+. This shouldn't affect you if you're moving data from a PC to a Mac, because Macs can read disks that are formatted as NTFS. However, they can't write to them without resort to third-party software, so this isn't a long-term solution.
Firewire Target Disk Mode
There's one other clever trick you could use to transfer files directly from your PC to your Mac, but while it's by far the most direct and least prone to problems, it's likely to be appropriate for only a few.
Macs have the ability to boot into what's called FireWire Target Disk Mode. When you do this, your entire Mac transforms into little more than a very bulky and expensive hard drive that can be mounted on the desktop of another Mac as a dumb hard disk, simply by connecting them together using FireWire; you can then simply drag and drop files between them.
It's not as elegant when you introduce a PC into the mix. Not only are PCs far less likely to have any FireWire (sometimes called i.LINK or IEEE 1394) ports, but Windows can't even read - never mind write to - disks formatted with the default HFS+ format that Macs use.
If your PC does have FireWire ports, however, you could buy a $50 piece of software called MacDrive that will enable it to read from and write to HFS-formatted disks. Once that's installed, boot your new Mac with T held down and connect the two over FireWire.
If you choose to transfer your files over a network, however, you can avoid all these format-related issues. True, you might get a whole set of new problems… but luckily we can help you out with those too.
Although you can connect your old PC and new Mac together directly, most likely you'll have a small home network setup that you can use. It doesn't matter whether the two computers are connected to the network with cables – plugged into the back of a network router using Ethernet - or wirelessly over one of the various Wi-Fi flavours.
However, unless your network only has pure 802.11n network devices, transferring gigabytes of data wirelessly can take a long time, so we'd suggest connecting over Ethernet if it's practical. This will prove to be a much faster transfer method, particularly if your computers and router support gigabit Ethernet.
Networking niggles

You'll see our guide to networking your old PC and new Mac at the top of the opposite page. We've used Windows XP, but the steps are similar should you have Vista or Windows 7.
While we've opted for sharing the PC's files and accessing them from the Mac, you can choose to make the Mac shareable and drop files onto it from the PC - but our method is more secure in the long run and less liable to problems.
Moving your email can prove trickier. The most reliable method, if you're using IMAP mail, is to enter your log-in details into Mail on the Mac. Depending on how you've set up your IMAP mail and folders, all your messages should then be pulled down.
If you're using POP, this isn't an option. If possible, contact your ISP or mail provider and ask them for help converting your POP access to IMAP and moving your existing archive onto the IMAP folders. Apple offers help for this here.
Transfer email to your Mac

If you don't have access to IMAP email or you're not using a webmail account such as Google Mail or Windows Live Hotmail, then the most effective way to transfer email from your PC to your Mac is to use the free Thunderbird email tool, which works on both computers.
If you're already using Thunderbird you can jump straight to the step-by-step guide on transferring your Thunderbird profile folder to your Mac, but in most cases you'll need to import your email from another program first.
If you're currently running Microsoft Outlook, Outlook Express or Eudora, then Thunderbird is fully equipped to import all your settings and messages - if you're not prompted to do so during the setup process, open the Tools menu and select Import. Leave Import Everything selected, click Next, then select your existing email program, click Next and follow the wizard through to its end.
Once you've verified all your settings and mail have been transferred into Thunderbird you're ready to transfer it all across to your new Mac.
Windows Mail
If you're using Vista and running Windows Mail you must perform additional steps to transfer settings and messages across to Thunderbird: you'll have to manually set up your email accounts in Thunderbird (choose File > New > Mail Account to do so), but you can transfer your Windows Contacts across.
To do this, open Windows Mail and choose Tools > Export > Windows Contacts… Select CSV (Comma Separated Values) and click Next to open a new window. Click Browse to choose a suitable location and filename for your exported file, then click Save followed by Next. Check which fields are being exported - in most cases they'll be fine, so click Finish to save the file.
The final step you need to perform in Windows Mail is to move the folder containing your messages to an accessible location: choose Tools > Options > Advanced tab, and click the Maintenance button followed by Store Folder. Click the Change button and browse to C:\ - click Make New Folder, call this 'Mail folders' and click OK twice, then Close and OK. Close Windows Mail to move the messages to their new home.
Windows Live Mail

If you're running Windows Live Mail, you can at least easily import your account settings: in Thunderbird, select Tools > Import, select Settings and click Next, select Windows Live Mail and click Next > Finish.
When it comes to transferring your contacts, open Windows Live Mail and switch to Contacts view. Either click the Export button if it's visible or click the menu button to reveal a drop-down menu and select Export - from here, click Comma Separated Values (.CSV). Follow the wizard - which is identical to Windows Mail's - to export your contacts.
You also need to move your message folders: click the menu button and either choose Options or select Options followed by Mail. Then follow the same procedure as outlined in the Windows Mail section above.
Transfer to Thunderbird
Importing messages into Thunderbird needs a plug-in: go to to the ImportExportTools website and save the ImportExportTools-2.3.5.xpi file to your hard drive. Open Thunderbird and choose Tools > Add-Ons. Click Install, select the downloaded xpi file and click Open > Install Now. Click Restart Thunderbird when prompted.
Now, right-click Local Folders in the left-hand menu and choose New Folder. Name it 'Imported' and click Create Folder. Select Imported and choose Tools > ImportExportTools > Import all eml files from a directory > Also from its sub-directories. Browse to C:\, select Mail Folders and click OK - after a short pause all your messages should be imported.
All that's left to do now is import your contacts: choose Tools > Import, select Address Book > Next, choose Text file… >. Next, select Comma Separated and import the file you exported. Once done, click the Address Book button to verify the addresses you need have come across.
With all of your contacts, account settings and messages in place, you're now ready to transfer your Thunderbird profile to the Mac - see the step-by-step guide for details on doing so.
Transfer your browser settings

The last thing you want is to lose all your bookmarks and other browser settings when you switch to the Mac. Your options depend very much on what browser you're using, but if you're using Google Chrome you get a head start here: not only can you continue using Chrome on the Mac, you can quickly and easy transfer all your current settings - including bookmarks, themes and even plug-ins - to it with no fuss.
Click the spanner icon and then choose Options > Personal Stuff to access the Sync function, which uses your Google account. Then switch over to your Mac and set it up again - all of your settings will be transferred automatically.
In Firefox 5 or above you can use the built-in Firefox Sync add-in to get the same kind of options. If you're running Internet Explorer, or wish to switch to an alternative browser on your new Mac (such as Safari), then you can install the free Xmarks tool on both your old and new browsers: this can sync both your passwords and your bookmarks across multiple browsers and computers, wherever they are located.
Belkin bundle
Traditionally, we'd recommend both Move2Mac (a USB cable-based system) and Outlook2Mac as an easy way to copy your files across from an old PC to your Mac, but now you have other options.
Not only can you 'gulp' in your entire PC using one of the virtualisation apps mentioned above, but you could buy Belkin's Switch to Mac solution, a cable-and-software bundle which works with Windows Vista and Windows 7. It's not a perfect solution, but it does lessen the pain of transferring your emails, photos and other files manually from a PC.
Finally, remember that if you buy your Mac from Apple, its staff are usually able to do a simple file transfer for you if you can manage to take your PC to one of its stores. Other Mac resellers may offer a similar - or even richer - service, however, so shop around to get the best deal on this paid-for migration services.
So that's it. Copying your files onto your new Mac and organising them as you prefer can take a while, but it's a one-off job and worth doing properly. Once you've finally finished and everything's up and running to your satisfaction, you'll be glad you did it - you're a Mac user now!