How to master black and white photography
Learn how to shoot stunning mono photographs
Sign up for breaking news, reviews, opinion, top tech deals, and more.
You are now subscribed
Your newsletter sign-up was successful
Light and shade
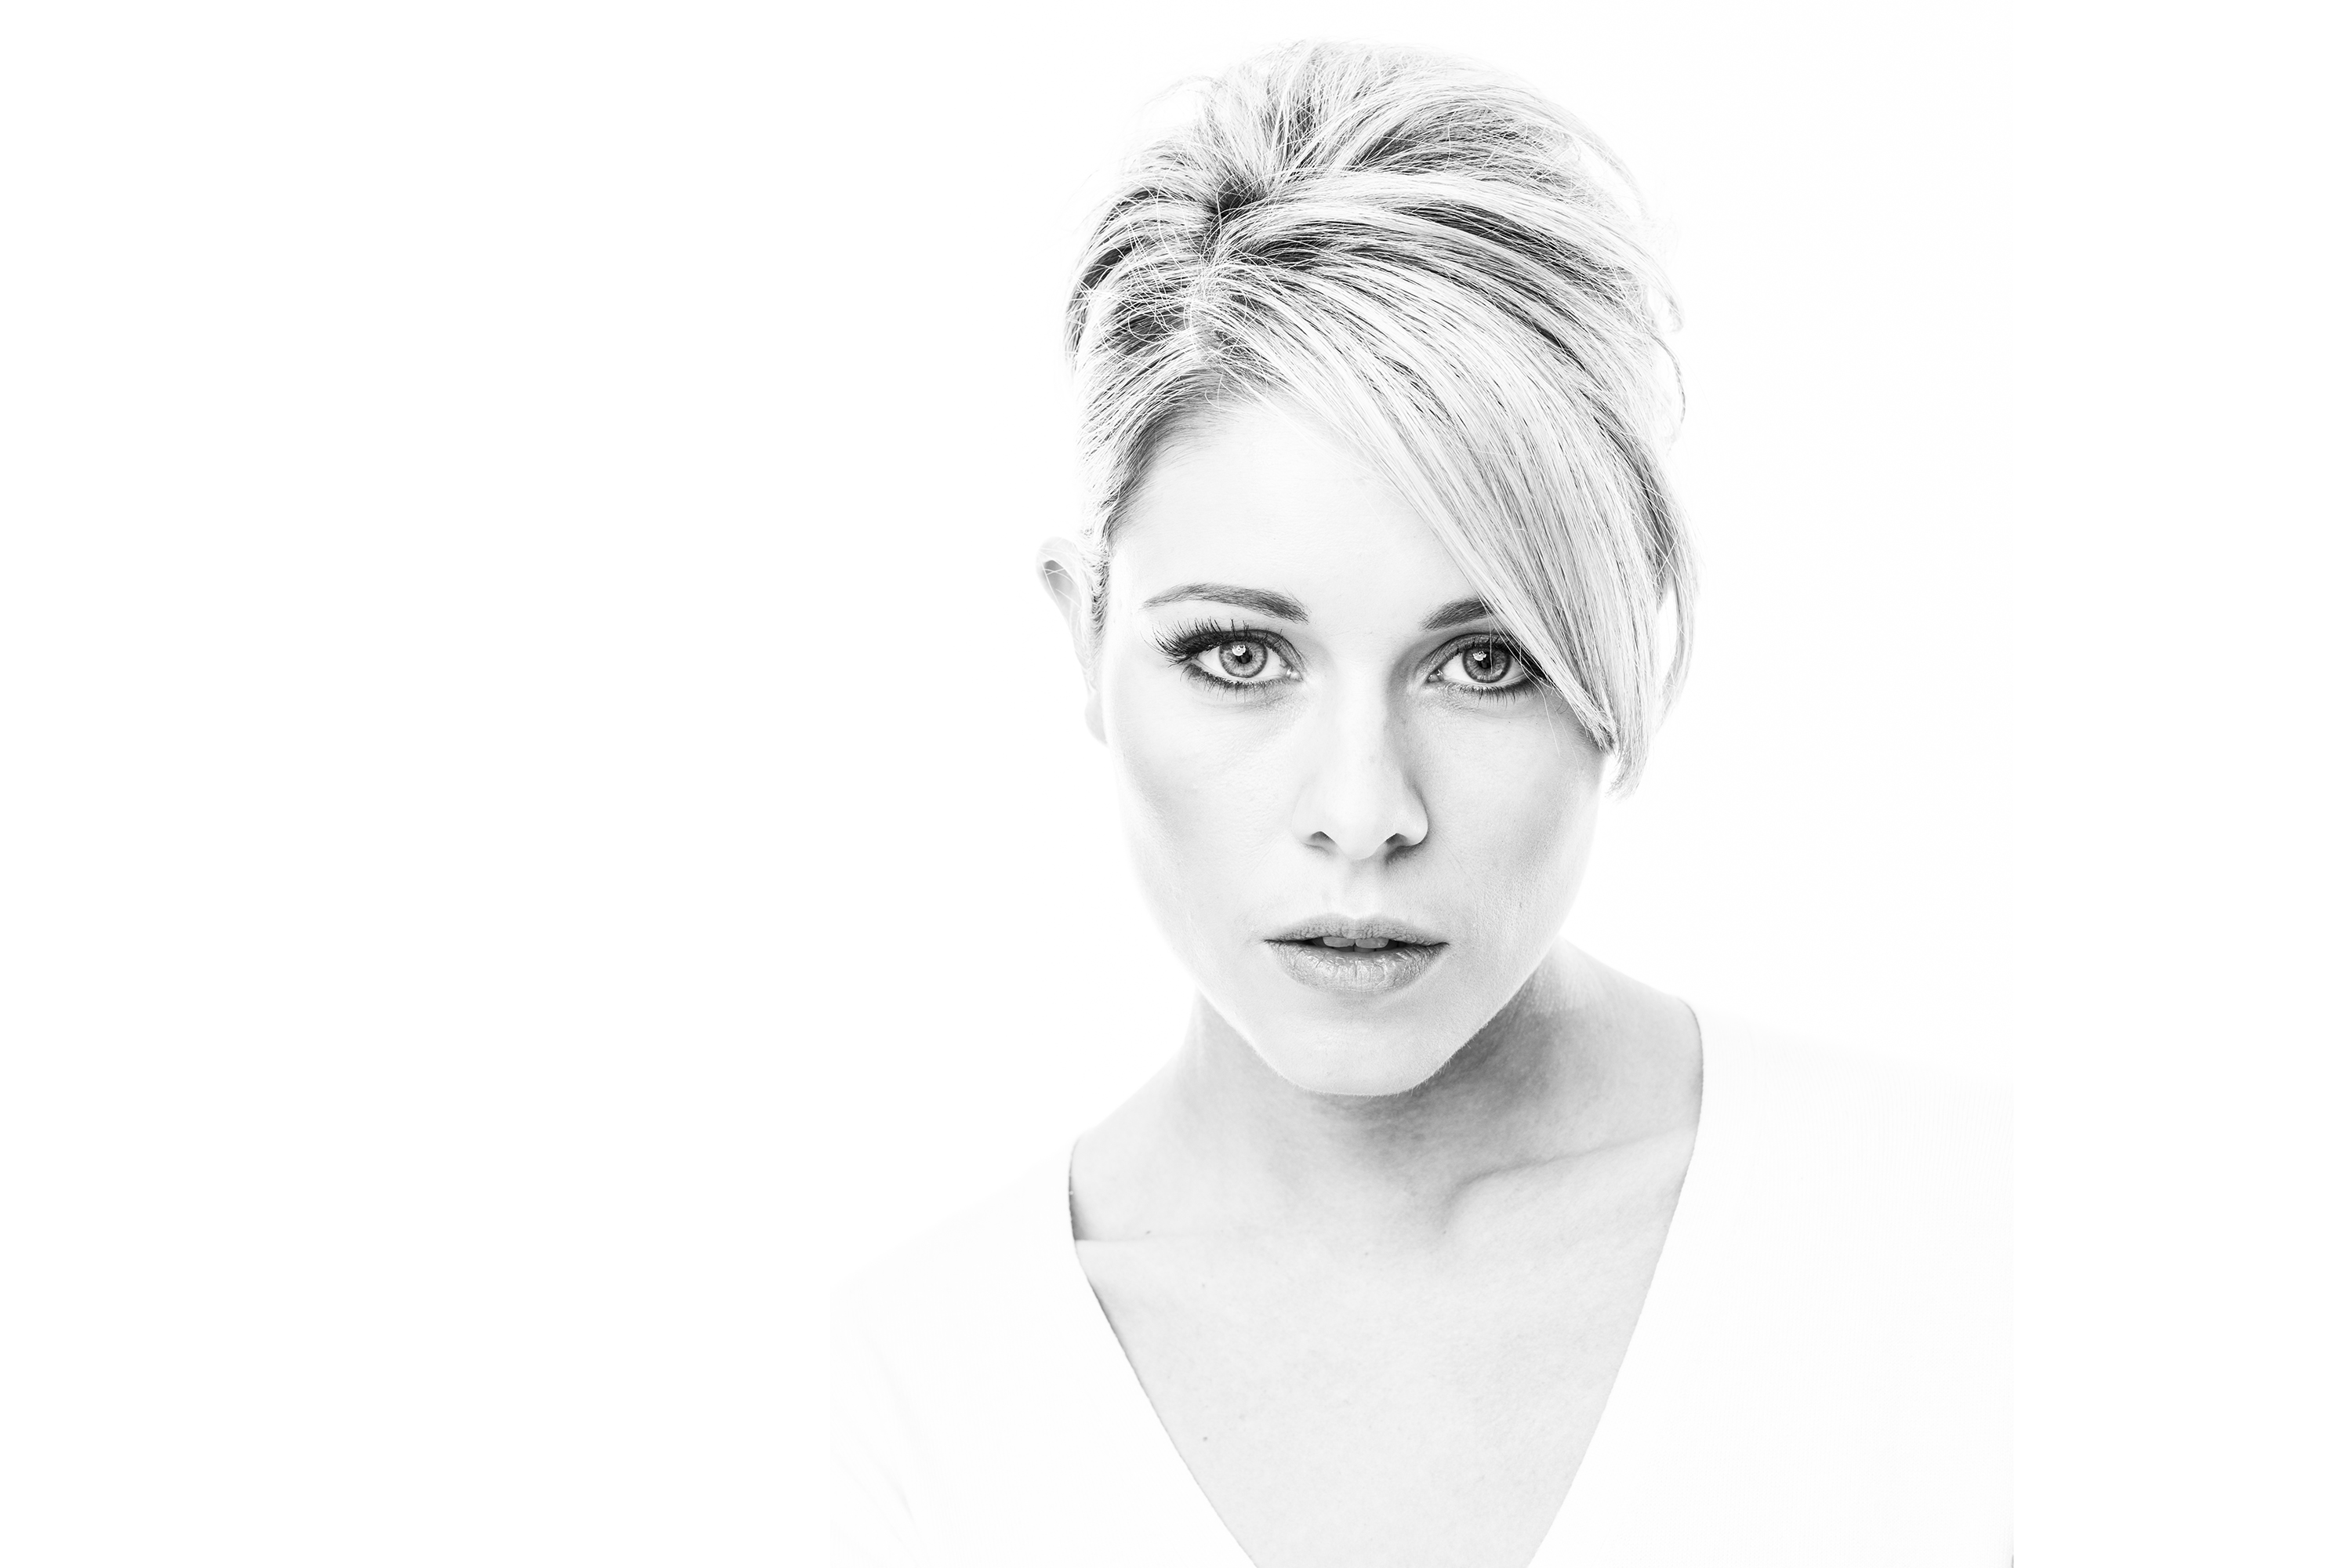
Successful black and white images don’t always have to contain an even mix of light and dark tones. Look for subjects that have mainly light tones to produce clean-looking ‘high-key’ images.
These images work best when you have a light-colored background to work with, and also soft, diffused lighting to prevent too many dark shadows spoiling the high-key effect. Close-ups, still lifes and portraits – where you often have control over the lighting and background – make good subjects for the high-key treatment, but don’t discount the possibility of shooting high-key landscapes when there’s snow or mist, as these conditions are naturally dominated by lighter tones.
Successful black-and-white images don’t always have to contain an even mix of tone
Alternatively, try shooting scenes made up of mainly shadows and midtones. The dark tones give a sense of mystery, making it an effective technique for intense portraits.
For successful ‘low-key’ images you need to make sure that little or no light falls onto your background, so only the main subject is lit. This is usually achieved by controlling the lighting using flash or continuous lighting, such as a reading lamp, but you can achieve low-key results using daylight alone; you just need to search out areas of shadows to use.
Conversion tips
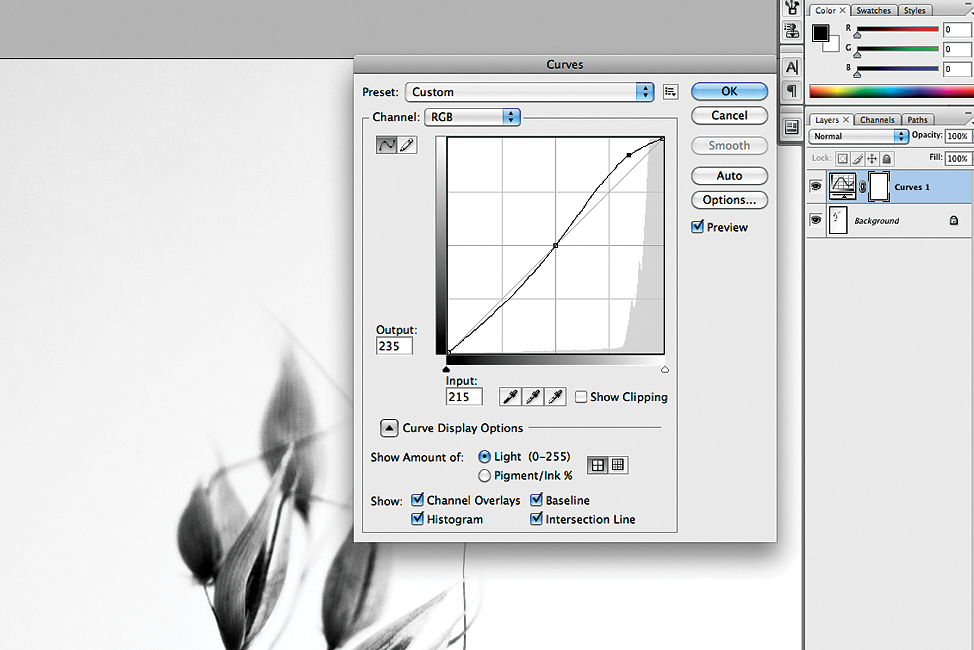
Lighten the background
Even if your background is illuminated, you may still need to use a Curves adjustment layer in Photoshop to make it lighter. Do this by dragging the right-hand end of the curve upwards.
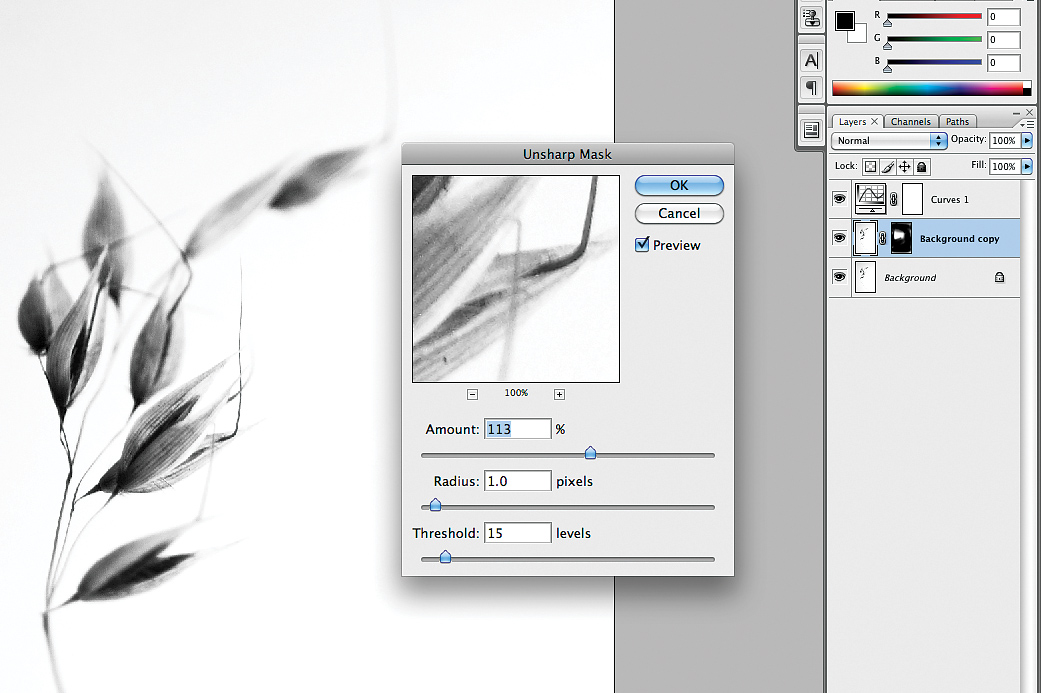
Sharpen the detail
To really draw attention to the sharpest areas of the subject, add a little extra sharpening using Photoshop’s Unsharp Mask filter. The lack of shadows makes noise much less noticeable.
Low-key

For successful 'low-key' images you need to make sure that little or no light falls onto your background, so only the main subject is lit. This is usually achieved by controlling the lighting using flash or continuous lighting, such as a reading lamp, but you can achieve low-key results using daylight alone; you just need to search out areas of shadows to use.
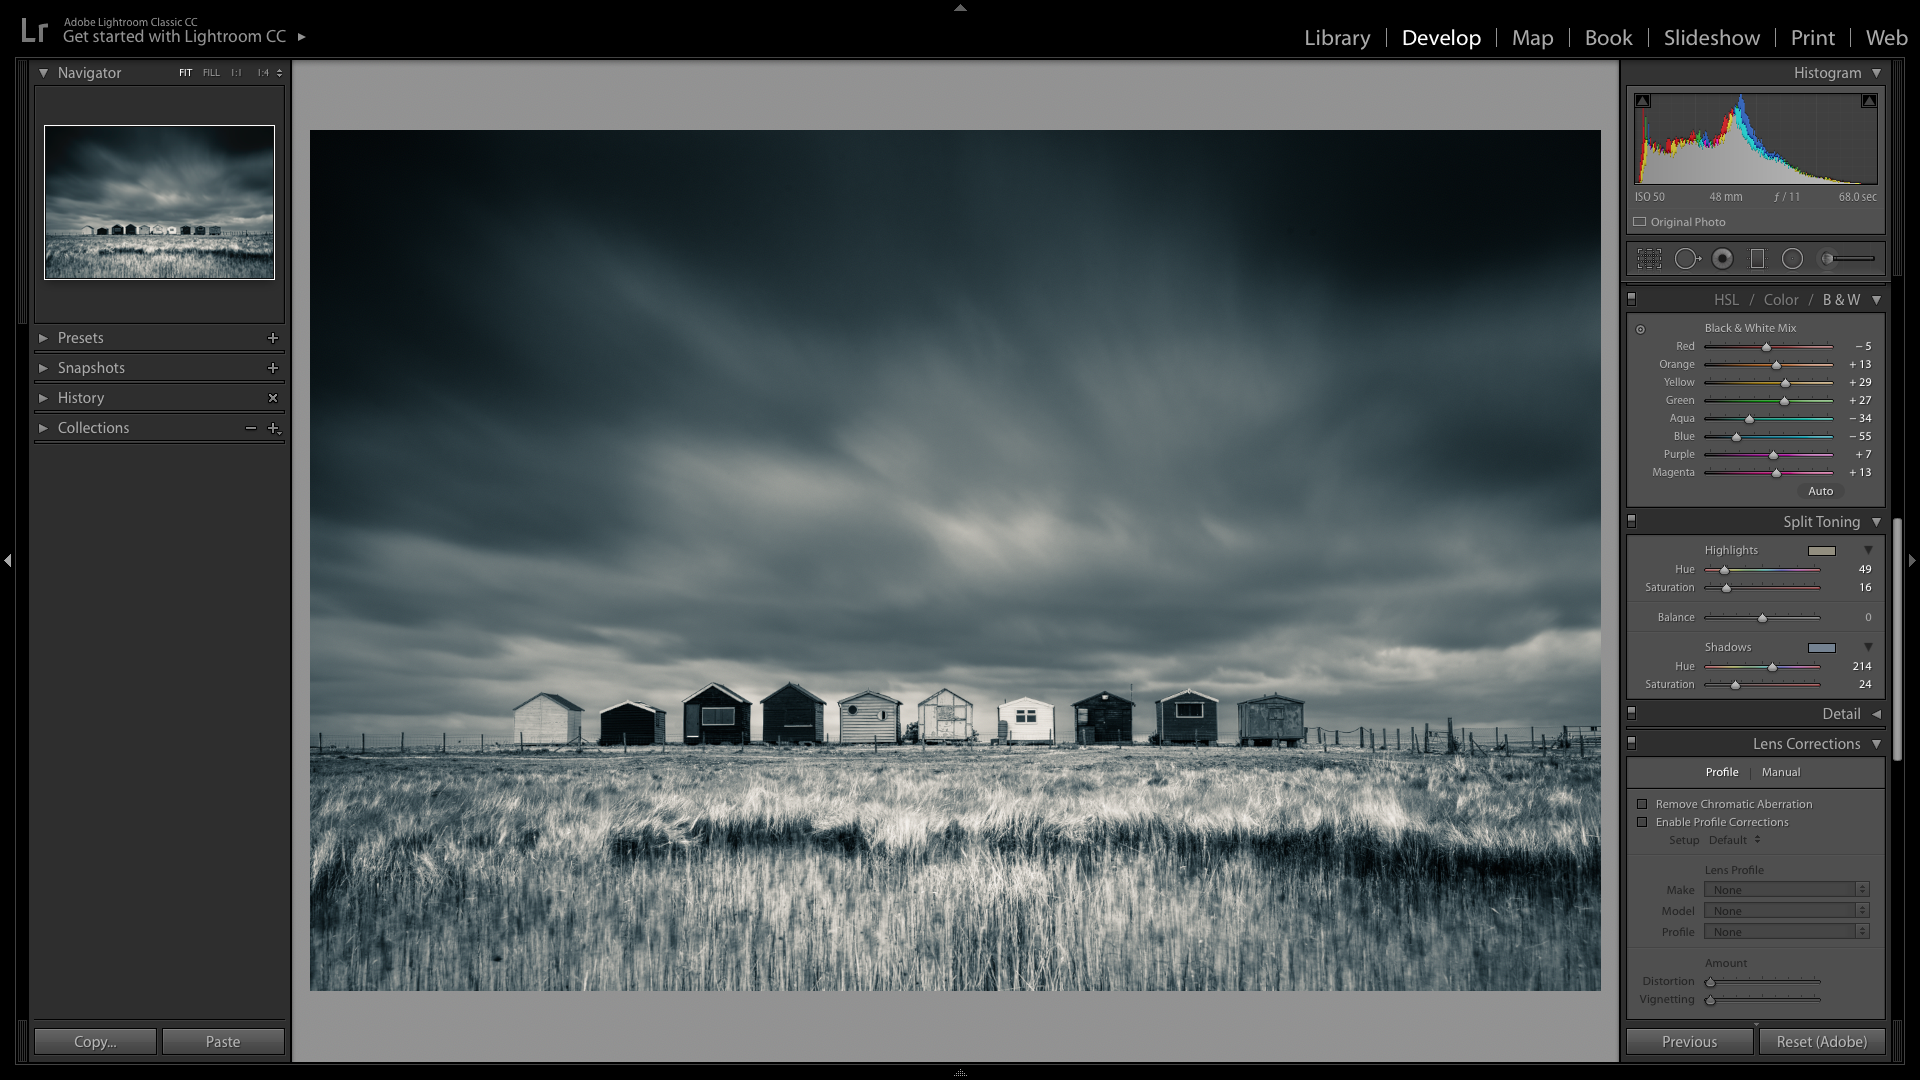
Try this...split-tone mono
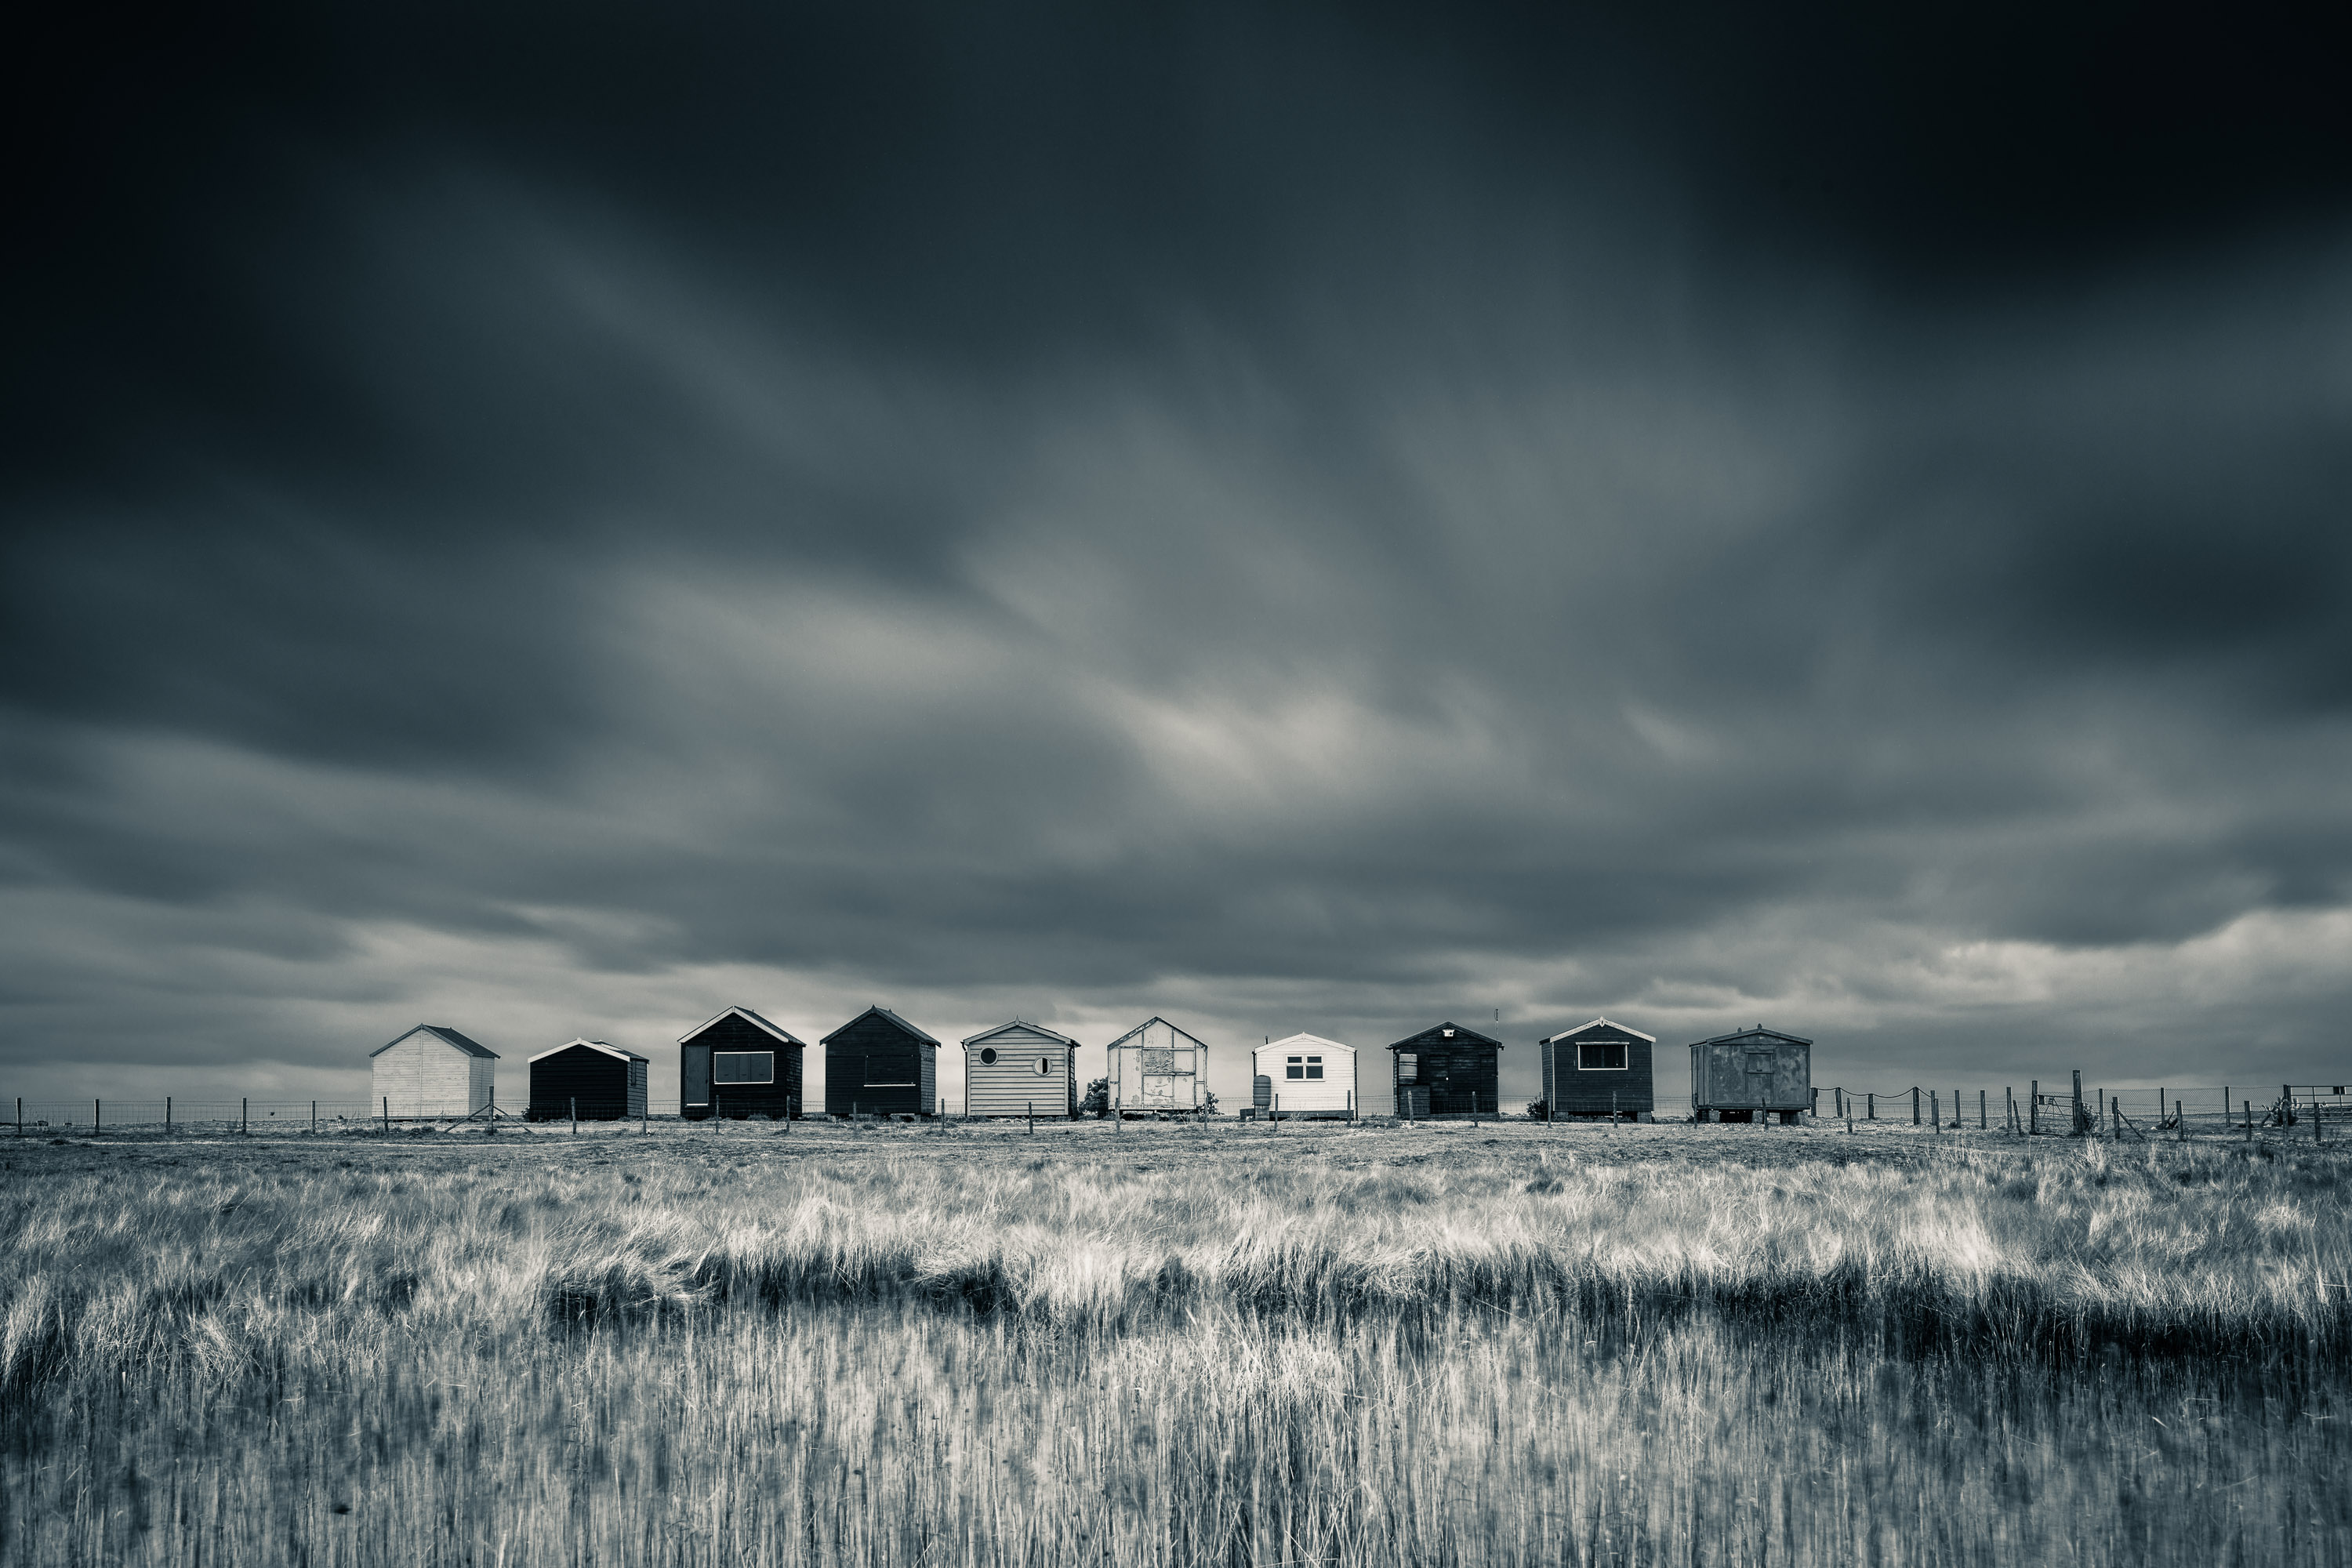
This technique involves using Lightroom or Photoshop to add one color to a shot’s highlights and another to the shadows, replicating traditional chemical toning from the days of film.
When processing your raw file in Lightroom (or Photoshop's Camera Raw interface), there's a dedicated panel for dialling in your split-tone mix.
Sign up for breaking news, reviews, opinion, top tech deals, and more.
While you can split-tone any black and white image, the effect is perfectly suited to minimalist high-key and low-key shots.

Phil Hall is an experienced writer and editor having worked on some of the largest photography magazines in the UK, and now edit the photography channel of TechRadar, the UK's biggest tech website and one of the largest in the world. He has also worked on numerous commercial projects, including working with manufacturers like Nikon and Fujifilm on bespoke printed and online camera guides, as well as writing technique blogs and copy for the John Lewis Technology guide.