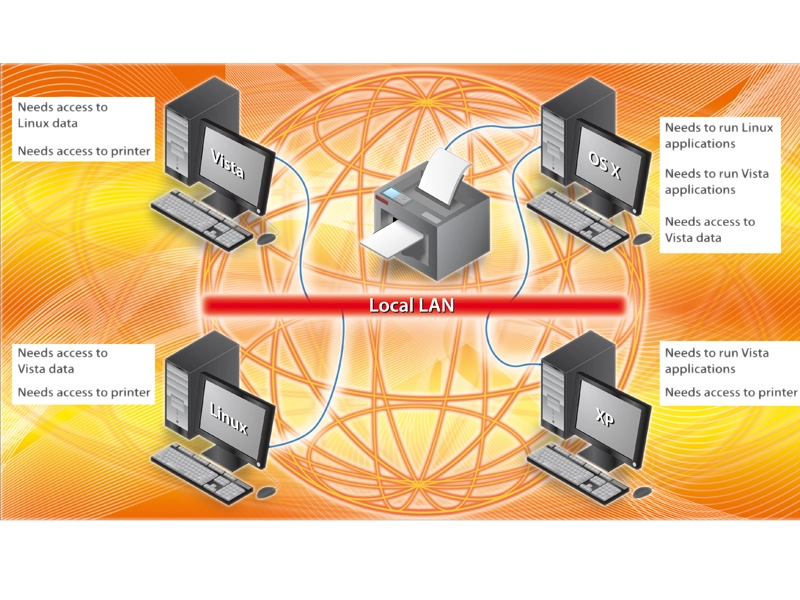
Windows is far from being the only game in town.The Apple Mac's secure and stable OS X operating system has a fiercely loyal band of devotees, and the user-friendliness of Linux distros has persuaded many people to take advantage of a seemingly endless supply of free software.

Until now, the problem has been sharing resources between the operating systems, and both Linux and OS X are traditionally seen as isolated from Windows for this reason. However, this is no longer the case. Read on to find out how to configure Linux, OS X and Windows to freely share each other's resources, and in some cases, even log into each other.

Sharing OS X folders with Windows

OS X uses the same open-source Samba software as Linux to share data with Windows machines, and setting it up is quite simple. First, in OS X, we need to create an account for users to log into.

From the Apple menu, choose System Preferences. In the View menu on the resultant window, choose Accounts. Click the '+' button to add a new user and enter a full descriptive name and a short name. The short name is the username you'll enter when logging into the Mac. Enter a password to complete the task.

Next, we need to turn on file sharing. In System Preferences, click 'Sharing'. This brings up a list of all the resources that OS X can share. Highlight 'File Sharing' and ensure that it's ticked, then press 'Options'. Make sure that 'Share files and folders using SMB' is ticked and select the user name you want Windows users to log in as to access the files you decide to share. Then click 'Done'.

You can now add folders in the 'Shared Folders' list by clicking the corresponding '+' button. You can also add users to the 'Users' list and use the up and down arrows to define the access they will have to the folder.

To mount the shared folder in Vista, click on Start and then on the 'Network' option. Your Mac should appear. Double-click on it, enter the user name and password for the account you set up in OS X to access it, and you should see the contents of the shared folder. In XP, click on Start and then 'My Network Places'. In the Network Tasks bar, select 'Add a Network place' to invoke the wizard. Click 'Next' and browse the network to find the shared OS X folder.

Get the latest news and reviews with the free TechRadar Windows Vista Sidebar gadget

Sharing Windows folders with OS X

Accessing data from a Windows share in OS X is also easy. First, click the Finder icon in OS X. Now click the disclosure triangle located next to 'Shared' in the Finder window sidebar to display all of the computers connected to your network.

If you can't see the Windows computer for some reason, you may still be able to connect to its shares directly. In Finder, click on 'Go' and then on 'Connect to Server'. In the address field of the 'Connect to Server' window, enter the URL for the share using the syntax smb://<server>/<share>/.

For example, if you have a Vista machine called 'VSERVER' and it's sharing a folder called 'common_docs', you'd enter the following: smb://VSERVER/ common_docs/. Now click 'Connect'. OS X will prompt you to enter the workgroup, user name and password of the share you want to connect to.

It's worth noting here that you can use this technique to connect to another Mac with file sharing enabled or a Linux machine that is sharing out files using its own Samba software. This way, you can swap files directly between the two operating systems.

Most consumer Linux distros should have Samba installed by default, making interoperability with Windows quick and simple to use. You can mount Windows shares in Linux and also share out your Linux folders securely to Windows machines, all with a few mouse clicks. If you can see shares on your real Windows computers from your Mac, you should also be able to see folders shared from Linux, and vice versa.

Sharing a Windows printer with OS X

It's possible to share your Windows printer with machines running OS X. In XP, share the printer by selecting 'Printers and Faxes' from the Start menu, right-clicking on the icon of the printer you wish to share and selecting 'Sharing' from the pop-up menu.

Select 'Share this printer' and enter a name for it in the Share name field. This name will appear as the printer's name on your Mac. You can only use the following characters in the name: A-Z, a-z, 0-9, !, $, *, (, ),_, +, -, ', and a period (full stop). Finally, click the 'Apply' button to share the printer.

On the Mac, choose 'Print' from the File menu and then choose 'Add Printer' from the resulting Printer pop-up menu. Click 'Windows' in the toolbar of the dialog that now appears and browse to the shared printer. If prompted, enter your Windows user name and password to connect to the printer.

Select an appropriate make and model printer from the 'Print Using' pop-up menu, and finally, click 'Choose'. If you can see the Windows printer on the Mac but you can't print to it, Apple says that this is likely to be because its name is more than 15 characters long. Simply shorten the name and try to connect again.

Sharing an OS X printer with Windows

The easiest way to share your Mac's printer with XP and Vista is by downloading a piece of software called the Bonjour printer wizard – see the 'Resources' box over the page for details. Bonjour requires Java and the Windows driver for the printer to be installed before you run it. You can get the driver free from the printer manufacturer's website. A good rule of thumb is that if the printer has an OS X driver, it will have a Windows driver too.

After downloading and installing Bonjour, run it and click 'Next'. You'll see a list of OS X printers that are being shared. Select the one that you want and press 'Next' again. Select the make and model of driver to use from the subsequent list and press 'Finish'. That should be all there is to it!

Logging into Vista from OS X

You can graphically log into an installation of Vista Ultimate, Enterprise or Business from a machine running XP or any version of Vista using a facility called Remote Desktop Connection (RDC).

What's less well known is that you can also do it from OS X. This is because Microsoft has released an RDC client for the Mac in the form of a universal binary that runs on both Intel and Power-PC Macs. You can download it free from Microsoft. See the resources box on the right for more details.

To enable RDC on the Vista server, open the Control Panel, select 'System and Maintenance', then 'System' and finally the 'Remote Settings' entry on the left-hand pane. There are three options here. The option to deny access is the default. The other two let you allow connections running any version of the RDC client software or only those running a version that supports Network Level Authentication (NLA).

NLA is a new security layer designed to enable remote users to log into Vista machines securely. It creates a secure link before the log-on screen appears. Release 2 of the Mac version of the RDC client uses NLA, so you can select the third option.

In the Control Panel, select the 'Add or remove user accounts' icon and on the subsequent screen press 'Create a new account'. Call it 'remote' and make it a normal user. Select it in the list of accounts, click 'Create a password' and enter one.

Vista administrator accounts are automatically granted remote access rights provided that they have a password on the account. To grant remote access rights to a normal account, go to the Control Panel and select the 'System and Maintenance' icon, then the 'System' option and finally the 'Remote Settings' entry. Press the 'Add Users' button. Press the 'Add' button on the on the pop-up window that appears.

The next pop-up window has a text entry box labelled 'Enter the object names to select'. Type the word 'remote' and press 'Check Names'. The name that you entered now changes to include your machine name at the start, followed by a backslash. Press 'OK' and the list of users allowed to log in remotely will include the non-administrator account.

To test the connection, log out and launch RDC on the Mac. Enter the IP address of the Vista server and the username 'remote' and its password, and the Vista desktop should appear.

Access a Linux desktop from Windows

Linux allows you to log in remotely, run programs and have the GUI displayed on a remote machine. With the right software, that remote machine can be running Windows.

One such piece of software is open-source Xming. See the 'Resources' box for details on how and where to download it. You'll need to install Xming, Xming-fonts and the Xmingportable- Putty packages. You can simply accept the defaults for all three installations.

On your Linux computer (we're using Ubuntu, as ever), install the SSH package (to provide secure logins) and then go to the System pull-down menu, where you must select 'Administration' and finally 'Login Window'. On the Remote tab, change the login style to being the 'same as local'. Finally, bring up a command line and enter 'ipconfig' to obtain the machine's IP address.

Back in Windows, run Putty from the Portable Putty program group. It may give a warning about certificates. Don't worry about this; simply press the 'Yes' button and continue to log in.

Next, we need to run the Xming Xlaunch program. Select 'Multiple Windows', press 'Next', select 'Start a program' and press 'Next' again. Select 'Using Putty' and enter the IP address of the Linux machine as well as your Linux username and associated password. Press 'Next' twice, and finally, press 'Finish'.

An X terminal should appear on your Windows desktop. The application is still running on Linux, however. To test if the connection is working, try typing the command 'xcalc' or 'xclock' to see if the output also comes back to Windows. To run Linux programs in the background, simply add a '&' after the command.

Originally published in PC Plus, Issue 274

Now discover how to catch and protect against attackers on your wireless network