
 Become a TechRadar Insider


Setting up and taking creative shots in the comfort of your own home is easy to do, and in this new DIY photography project we're going to show you how to make a lightbox using nothing more than a window and some greaseproof paper.
We'll be using the technique to photograph flowers, but it can be applied to all kinds of items found around the home - try photographing slices of fruit, such as oranges and kiwi fruit, or clear sweets. The possibilities are endless!

1. Set up the light box
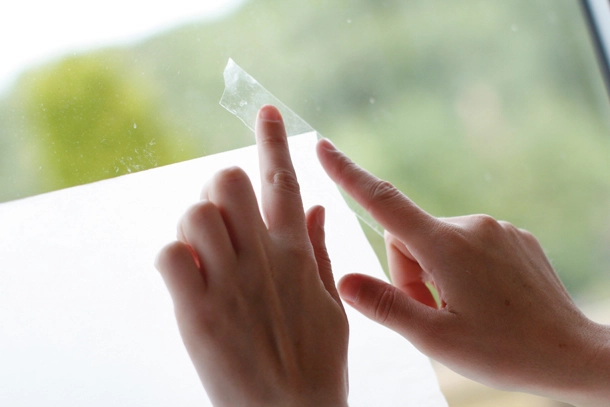
Tape a sheet of greaseproof paper to a window. You can either shoot the flowers on their stems, or cut them off as we have and tape them to the paper.

If you do this make sure you use clear tape, and spread the petals over the paper so you can see through them.

2. Switch to Av mode
Set your camera to Aperture Priority mode so you can control the aperture. Set the aperture to f/8 to keep your images sharp from front to back, and set the ISO to 100 for detailed, noise-free shots.

3. Brighten the exposure
Your camera will underexpose shots in an attempt to render bright backlight as a midtone, so go to the Exposure Compensation setting and dial in +1 stop of exposure compensation. Check your shots, and increase this as high as +2, if necessary.

4. Set the focus
Set the focus to the centre AF point, and make sure the centre of the flower is precisely in focus. If you're photographing two or more flowers, set the focal point for the largest flower in the shot.

5. Use a tripod
To ensure that your images are perfectly sharp, mount your camera on a tripod. Even pressing the button can cause slight camera shake, so for the best results use the self-timer or a remote release. You should start by composing your shot from a low angle, pointing upwards.

6. Start shooting
Now you can get shooting. Experiment by taking photos of one flower by itself or a bunch together. You can overlay different flowers on top of each other or just stick to one type as we have. It's entirely up to you which composition you prefer!