How to build a monster PC that will play any game
Sign up for breaking news, reviews, opinion, top tech deals, and more.
You are now subscribed
Your newsletter sign-up was successful
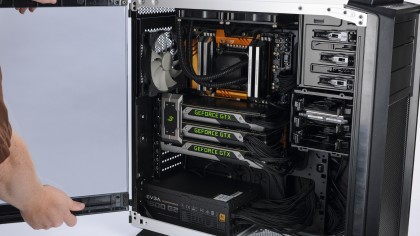
This next shot demonstrates a couple of interesting properties. The main one is the 760T's side panel. It's actually a swing-out door with a levered handle, like on the Thermaltake Level 10 GT. When it's rotated this far out, you can lift it off its hinge and set it aside. No screws to deal with.
We've also removed one 3.5-inch drive cage and mounted the other one right below the 5.25 drive bay. We did that mostly just to see what it looks like, but also to help visualise the placement of custom water cooling gear like reservoirs and pumps. Our SSD is secretly mounted behind the drive cage, on the same plane as the motherboard.
Down under
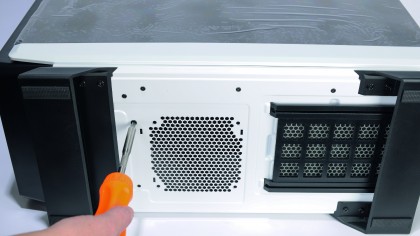
Looking at the underside of the case, we have a set of six screws holding down the two drive cages. Two screws hold down the cage that's closest to the front of the case. It feels secure despite being half as many as we'd like, and you don't need to remove the case's front foot to access the screws holding down the cage. Removing the four-screw cage reveals a 120mm fan mount.
This is ideal for intake, but you'll have to keep an eye on dust or add your own filter. To the right of that is the intake for the power supply, which comes with a slide-out filter.
Building bridges
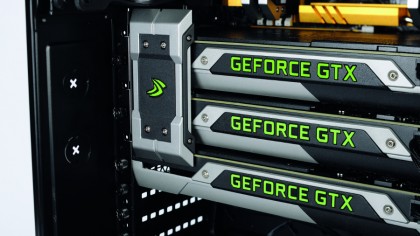
One of the fun things about building with Nvidia cards is their SLI bridges. This fancy job comes courtesy of EVGA, and its design matches that of our cards, which use the "reference" design of the base model. At 18 quid, the bridge is not cheap.
But when this machine is powered on, the logo lights up green to match the lighting of the letters on the cards. The top section of the bridge is just barely short enough to wedge in underneath the case's pre-installed 140mm exhaust fan.
It's one of the tightest clearances we've dealt with. You can flip it around and get a lot more space, but then the Nvidia logo is upside-down, which irks us. To get the GTX 980s installed this close together, by the way, you need to unscrew a raised plate near the cable connectors on the other end.
Sign up for breaking news, reviews, opinion, top tech deals, and more.
Getting in my grill
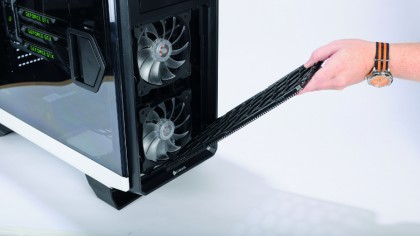
The front of the case has two 140mm fans pre-installed. The blades are made of clear plastic, presumably to let custom lighting shine through better. The case comes with a two- speed fan controller pre-installed, but we chose to skip it when wiring things up, in favour of testing the fan headers on the motherboard.
We'd recommend a fan cable extension or two, because the cables on the front fans are not especially long. In contrast to the 750D, the fan grill on the 760T can be removed completely, making for easier access. In both cases, the grill snaps in and out easily. No screws or yanking required.
If you remove the other 3.5 drive cage (or mount it over the 120mm fan on the bottom of the case) you could squeeze in a 240mm radiator, if you wanted. The 780T has even more room up front, enough to comfortably accommodate a 280mm radiator.
Tangles and dangles
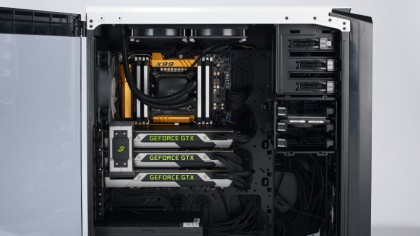
With three graphics cards, five fans and two storage devices, there's a lot of cabling. We switched to the kit of individually sleeved cables to lend some flexibility, but we'd have liked to have made more adjustments, if we'd had time.
The case comes with four 2.5-inch trays, but we removed all but one to make room. Since we didn't wire up the fan controller, we fed its cables back, tucking them into the empty 5.25-inch drive bay. The eight-pin PCI Express cables have two of their six pins on a separate cable, so we snaked the spares up with the fan controller cables. (The reference GTX 980 needs only six-pin cables.) The cable connecting the front USB 2.0 ports to the mobo was just long enough to reach. You can buy extension cables online.
The three musketeers
One of the advantages of working with an X99 system is it supports more than 16 PCIe lanes. The i7-5960X can wrangle a whopping 40 lanes, in fact. For a pair of high-end graphics cards, 16 lanes is enough, but just. With the rise of 4K, extra lanes are welcome. Even the best GPUs need to whip out the buddy system to handle a resolution that high.
With the GeForce GTX 980s, our gaming performance was significantly better than pretty much any machine we've built before. This month's system averaged 110fps in Tomb Raider, at 4K, with everything but anti-aliasing enabled. Not bad, not bad at all. Hitman: Absolution also recognised all three cards, so we averaged about 100fps there.
The case's dimensions came in handy when wrangling this much hardware. Despite these cards being over 10-inches long, we didn't need to remove any drive cages to fit them in. And despite all that cabling, there's plenty of space behind the motherboard. Sometimes, after you're done hooking up, you need to basically squish the side panel down until you can secure it. Here, we needed only the gentlest of pushes to close it.
The i7-5960X has a base clock of 3GHz, so it isn't easy to hit 5GHz, but because of Haswell- E's higher performance, plus the extra cores, multi-threaded performance is pretty incredible. We got this rig up to 4GHz, which is pretty respectable for a 240mm closed-loop liquid cooler juggling up to 16 CPU threads.
When those are all fully engaged, this chip will trounce 12-thread CPUs that reach 5GHz. For pure gaming, an i7-5960X isn't perfect, but highly threaded tasks like video encoding feast on power like this. Ultimately, we'd recommend a custom cooling loop to get the most out of eight cores. You'd probably want a roomier SSD, too. We used the 850 EVO because it's new and interesting.