


The beauty of Apple Pay is that it is classically 'Apple.' Simple and elegant, it combines the tech you've already got (an iPhone or iPad with Face ID or Touch ID, or an Apple Watch) with a one-step payment process that, like a contactless credit card, is faster and safer than a PIN.
All you need to do is double-tap the power button on your iPhone and authenticate your identity with either Face ID or your passcode – or rest your finger on your phone's Touch ID sensor on older phones. Then place the top of your iPhone screen near any NFC card terminal with the Apple Pay logo, and you're all set.
But first, you need to set up Apple Pay, which is a fairly simple process. Here, we'll run you through the steps you need to follow to enable this easy payment method. Then, we'll discuss other tricks for getting the most out of Apple's system.
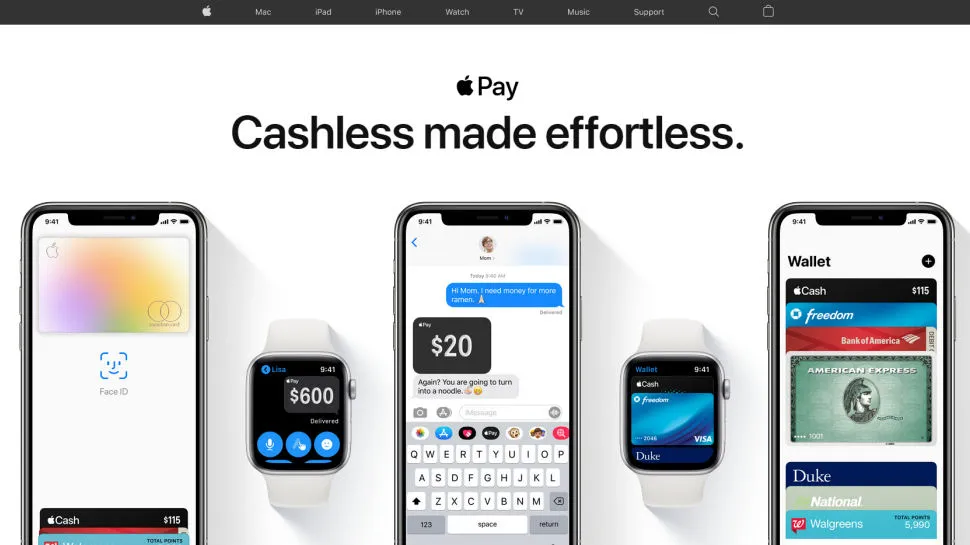
How to set up Apple Pay in your Wallet
To begin using Apple Pay, open Wallet (formerly Passbook) on your iPhone and tap the '+' button in the top right. You'll have the option to add a Credit Card, Debit Card, Apple Card, or transit card in certain cities.
Use your phone camera and position your card in the frame. Your phone will automatically import the details – though you can also add them manually. Hit 'Next,' then verify the information and add your Security Code. Hit 'Next' again, and Apple will contact your bank before prompting you to sign the Terms and Conditions.
Depending on your bank account settings, you may be prompted to confirm your identity via 2FA. Do so, and you now have a card ready to use for Apple Pay! You can then set it as your default card if you wish.
After that, you can select 'Done' to return to the main Wallet menu and add new cards, or tap the top-right ellipsis to open the card's individual settings. There, you can add a billing address, change card notifications, or delete the card entirely.
How to use Apple Pay
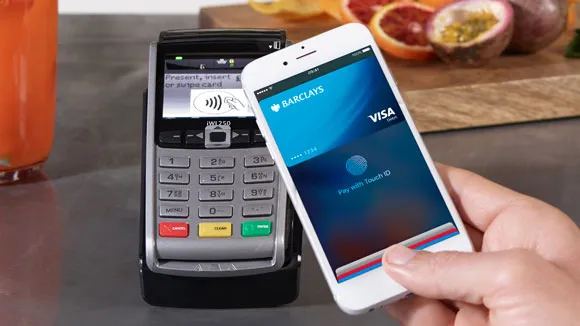
As we explained above, using Apple Pay is easy once you've added a card. You can prime your Apple Pay card by double-tapping the power button and verifying your identity with Face ID or a passcode. Or, on older phones, you rest your finger against the Home button without pressing down to validate your identity.
Either way, the phrase "Hold near reader" will appear, allowing you to tap your phone against a compatible NFC card reader. If you see the logo below attached to the reader, you should be good to go.

That method uses your default Apple Pay card. If you want to use another card, pull up Apple Pay, then tap the primary card when it appears. That will pull up all of your other available cards and passports. Tap the card you really want to use, and it will revalidate your identity before allowing you to use it.
How to add rewards cards to Apple Pay
Apple Pay isn't just for credit cards. Dozens of stores have Wallet apps that you can program to pop up on your lock screen anytime you physically enter that store, so you can get rewards points before you pay for your cart.
In the Wallet app, scroll to the bottom and tap 'Edit Passes.' Scroll down again and select 'Find Apps for Wallet.' This will pull up every compatible app that works with Wallet, including Target, Walgreens, and Starbucks.
Each app handles the next part differently. Once you log into the app with your rewards account, you'll find an option to add it to Wallet as a card. In Wallet, tap the rewards card followed by the ellipsis, and you can turn on the Automatic Selection function. Unless you've turned your Location Services off, the card will appear anytime you step into the store.
Once you're ready to pay for your cart, Apple Pay will pull up the store rewards card instead of your default card. Then, once you tap the rewards card and receive your points, Apple Pay will switch to your credit card so you can pay.
How to use Apple Pay on your Apple Watch
Apple Pay also works brilliantly with Apple Watch. Once you pair your Watch, you'll have access to the same cards as on your iPhone – after following a few simple steps.
Open the Apple Watch app and find Wallet & Apple Pay. You'll see the cards you already registered; tap 'Add' next to any card you want on your Apple Watch, then reenter the CVV to confirm. If you want to add a new card, hit Add Card, and your phone will walk you through the steps.
Using Apple Pay on Apple Watch is much easier than on an iPhone. Double-click the side button, and your default card will appear without any authentication. Hold your Watch's face to the card reader until you hear a tone and feel a slight pulse, which confirms the transaction was completed.
For a more in-depth look, check out our guide on how to set up Apple Pay on the Apple Watch.
How to use Apple Pay with Express Transit
This section specifically applies to people living in certain metropolitan areas: London, NYC, DC, LA, Chicago, Portland, Hong Kong, Beijing, Shanghai, Hong Kong, or anywhere in Japan.
Apple Pay has an Express Transit mode that lets you tap your phone to activate a transit card or debit/credit card without the Face ID requirement. That way you won't hold up the line or miss your train trying to authenticate. Tap your phone or watch; you'll feel a vibration, and the payment will go through.
If you want to use Express Transit for a credit card, open Wallet and tap the card you want to use. Hit the ellipsis to open settings and tap 'Express Transit Settings.' Choose any of the available cards to make it the default.
As of early 2021, only two cities let you add actual metro passes to your Apple Wallet: Washington DC and Los Angeles. If you have a SmarTrip card, you can add it to Wallet by tapping '+' and then 'Transfer Existing Card.' TAP users will need to add funds from Apple Cash or a debit card to the pass on their phones.
Use Apple Pay for in-app and online purchases
Certain apps or websites have a 'Buy with Apple Pay' button that makes the checkout process a walk in the park.
Tap that button, and any billing/ shipping address and contact information associated with your default card will auto-populate the fields. If your Apple Pay card doesn't have that information yet, fill it in, and Apple will save that information in Apple Pay for next time.
You may not want to use your default card for this transaction. If so, tap the blue '>' icon next to your Apple Pay card, and you'll be taken to your list of options.
Once you've reviewed the info, double-tap the power button or place your finger on the Touch ID button to finish the transaction.
How to set up Apple Pay on macOS
Adding Apple Pay to your iPhone doesn't add it to your Macbook Pro even if they're using the same iCloud account or Apple ID. You'll need to add it separately.
Make sure you're logged into your iCloud account. Open System Preferences and the Wallet & Apple Pay menu. When you click 'Add Card,' you'll see any associated cards you've used for iTunes or App Store purchases. You can choose any of them, or 'Add a different credit or debit card' to insert a new one.
You'll now have the option to use Apple Pay for purchases on your laptop or desktop so long as you never log out of iCloud. If you do log out, you'll need to go through this process again.
Select the Apple Pay button when checking out from an online retailer. You'll have the choice of either using the Touch ID button to authenticate with your fingerprint, double-tap the Touch ID to prompt a password check, or tap 'Pay' in the Touch Bar to enter your password.

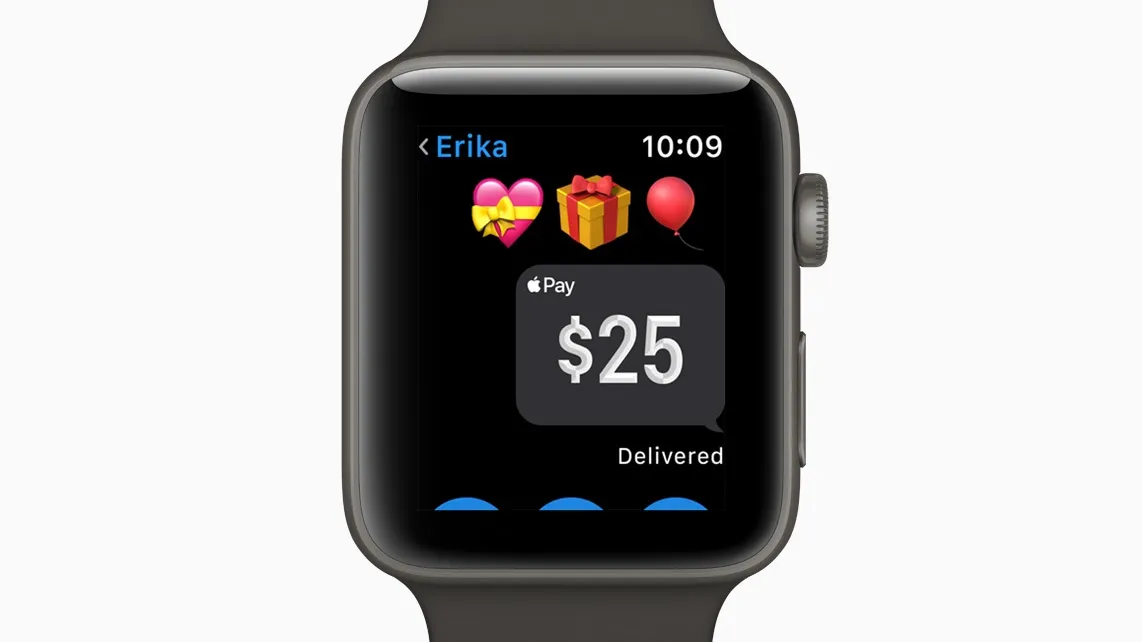
How to use Apple Pay via iMessage
With modern iPhones, you can also send or receive payments directly through iMessage. First, however, you must go to your Wallet app, tap the Apple Cash Card icon, and choose to Set Up Apple Cash.
Agree to the terms and conditions, and you'll have the option to receive money from iMessage into your Apple Cash account. To pay others or deposit money, though, you'll need to add a debit card. Like Venmo, sending and receiving money is free, but you'll need to pay a small fee to transfer cash immediately from Apple to your bank.
With your account set up, using Apple Pay in iMessage is easy. In iOS 14, you can see the Apple Pay icon directly underneath the text box. Tap this to pull up the Pay interface, where you can select any amount and either Request it from or Pay it to that person.
Choose the amount, hit the appropriate button, then authenticate the transaction with Face ID, Touch ID, or your passcode.
- How to use Google Pay instead
