


So, you’ve just gotten your Oculus Rift and are dying to get it set up and ready to play the incredible VR experiences available to you.

We’ll help guide you through the process so you’ve got everything installed, plugged in, set in position and ready to go.
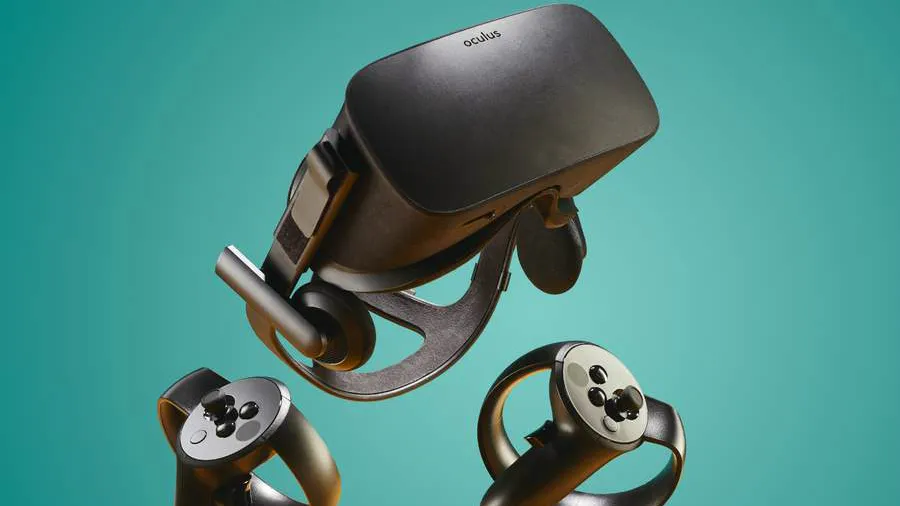
(Note: We’ll be focusing on the currently sold Oculus Rift with Touch Controllers bundle. If you have the older bundle with one sensor and an Xbox One controller, the setup will still be fairly similar.)
Get the software
To get started, even before you unbox your Rift headset, you should begin to download and install the Oculus Rift Software. You can find that software here.
There’s no sense in unboxing and plugging everything in just to wait for the download and installation. So, it’s best to just begin the process, let it download and install in the background, while you work on the next steps.
You’ll have your choice of where to install the software, though we’ll recommend an SSD since long loading times in VR are an exceptional drag. You can also begin downloading and installing games in the software before setting up the hardware, but the free games that come with your headset bundle may not show up as free until your hardware is connected.
When you’re downloading the software, it’s also a good time to update your graphics card drivers.
Set up an account
The Oculus Rift Software will guide you through setting up or signing into an account.
You have the option to create an account or simply use your Facebook account.

The unboxing
Get all of the Oculus Rift components out of the box. You’ll want make sure you remove all of the plastic coverings that you find. You’ll especially want to make sure you get the plastic covers off of the sensors and the headset lenses.
The plastic on the sensors could interfere with tracking, and the plastic on the headset lenses won’t do any favors for your visual experience.
Unpack the batteries as well. You’ll find magnetic side covers on each controller. Pop those off and load a battery into each controller.
Connect everything
When you’re ready to start connecting everything, run the Oculus Rift Software. This will lead you through all the connections, and ensure that each device has connected properly.
The Rift headset will need to connect to the HDMI port on your graphics card (not your motherboard). The cable also has a USB connection that needs to plug into a USB 3.0 port.
Your two sensors also need to connect to USB ports. Plug each in, and make sure that at least one is plugged into a USB 3.0 port. If there’s an issue with any of the USB connections, try switching them around.
USB ports near one another can sometimes share a hub and run into bandwidth issues. This is something we’ve actually experienced.
Check the Oculus Rift Software and make sure that all of the connections are recognized. You should see a green “OK” in the software.
(Note: Oculus recommends no more than two sensors connect via USB 3.0 ports. If you have three sensors, connect the third to a USB 2.0 port. You can learn more about why that’s the case here.)
Pair your controllers following the on-screen instructions. The software will show you which buttons you need to press to activate pairing.

Set up the space and get calibrated
Before you ever put the headset on, make sure you’ve got a space cleared to play in. Even if you’re planning to play seated, clear out the area around your seat so you won’t accidentally knock anything over even if you’re leaning in your chair.
The Oculus Rift Software will ask for your height, and then guide you through positioning your sensors. The typical setup is to have them on each edge of a desk, with both angled slightly inward toward your place space and ideally 3 feet to 6.5 feet in front of your play area. Make sure nothing will obstruct their view of the headset and controllers.
Once the sensors are in place, follow the on-screen instructions, moving to your play area and squeezing the controller trigger. If any sensor adjustments are needed, the software will instruct you on what to alter. You may also use the Guardian System to establish a virtual boundary around your play area, with the Oculus Rift Software instructing you to trace your play area using one of the Touch controllers.
(Note: You can also try Oculus’s experimental 360-degree tracking with two sensors using the instructions here, or set up a third sensor positioned behind your play area directly opposite one of the front sensors.
From here, you’ll be ready to step into your play area, slide on the headset and adjust the straps to fit. For the rest of the setup, you’ll receive guidance on the Rift headset screen.
Supported content on TechRadar means the article has been created in partnership with a developer, publisher, manufacturer or other relevant party. When you see this disclosure note in an article, it means that the article idea has been approved by another company – a developer, hardware maker, or publisher – but that otherwise the content is planned, written, and published by TechRadar without any further approval. This is distinct from sponsored content on TechRadar, which is created entirely by a third party, and not the TechRadar editorial team.
