How to migrate from an old Mac using Migration Assistant
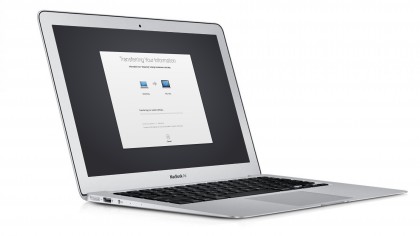
Migrating to OS X El Capitan
You can upgrade to OS X El Capitan on Macs from as far back as 2007. In terms of software, you'll need to be running at least OS X 10.6 Snow Leopard – if you're still running OS X 10.5 Leopard, then you'll first have to buy an upgrade to 10.6 and install it before you can move to El Capitan (which itself is free).
You'll also need an Apple ID to download the upgrade from the Mac App Store. In theory, all your settings and data will be preserved when you migrate. However, because theory and practice sometimes differ, it's a good idea to ensure that you have an up-to-date Time Machine backup on an external drive or removable disk before you start. Check out our tutorial on how to set up and configure a Time Machine backup for more information.
If your Mac is set up to make regular backups, then all you need to do is check when the last successful one ran. Click the Time Machine status icon in the menu bar and choose Open Time Machine Preferences.
If the latest backup is older than today, run a new one; if your settings get wiped when upgrading, you'll then be able to restore them from this backup.
Get the updates
You'll also need to ensure that the most recent OS X updates are installed so that you can access the App Store, because this is the only way to get an El Capitan upgrade. Note that the update process will be different depending on whether you're updating from 10.9, 10.8, 10.7 or 10.6.
In 10.6 Snow Leopard, go to the Apple menu, select Software Update and wait while it checks for new software. Once updates have been identified, choose Show Details to see which ones are available.
To save some time, you can opt to install only the Mac OS X Update Combined. Once all applicable updates have been downloaded and installed, you may need to restart your Mac.
Then, once you've made sure there's a recent backup in place, go to the Apple menu, then open the App Store to get and install El Capitan. In OS X 10.9, 10.8 and 10.7, Click on the Featured tab and look for 'OS X El Capitan' a little way down under Quick Links on the right.
In this guide we'll show you how to migrate data from another Mac, by connecting the two via a network cable. This might not be useful to you now, if you've got just the one Mac, but in the future when you upgrade to a new machine, you can use this method to transfer your data and ensure that nothing vital is overlooked.
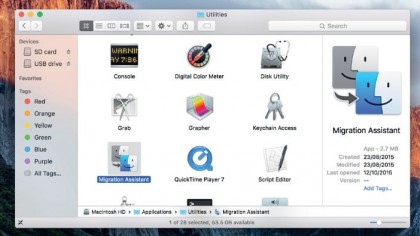
1. Open Utilities
To migrate data you need either a Time Machine backup on a removable disk or an older Mac connected to your new one with El Capitan already on it.
Once you have your backup connected, open Applications and scroll through to the Utilities folder.
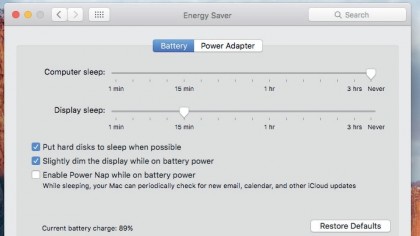
2. Migration Assistant
Within Utilities, find and launch Migration Assistant. You'll need to prevent the computer from going to sleep during a potentially lengthy migration: from the Apple menu, choose System Preferences > Energy Saver and slide the Computer sleep fader to the Never position.
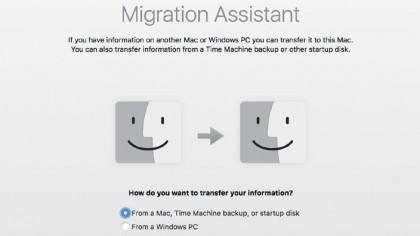
3. Migration type
The simplest migration works using a Time Machine backup on a connected external disk. On the destination Mac, choose 'From another Mac, PC, Time Machine Backup or other disk' and click Continue.
Select the disk that the backup is on and click Continue again.
4. Migration method
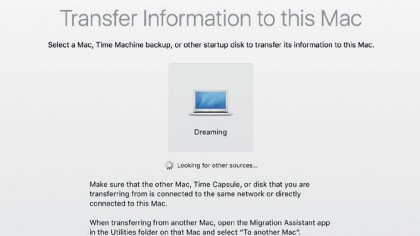
If you're migrating from a networked Mac, choose 'From another Mac or PC'. While Migration Assistant displays 'Looking for other PCs', run the Assistant on the source Mac, choose 'To another Mac' and click Continue.
Check the passcode on both Macs is the same.
5. Items to migrate
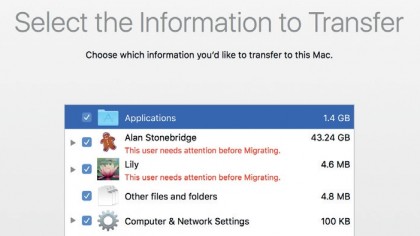
Whichever way you migrate, you need to quit other apps and programs on any machine running the Migration Assistant. Click Continue again. On the target Mac, the Assistant displays a list of items that can be migrated – user settings, applications, files and folders.
6. Perform the migration
In the list, select the items that you want to migrate by ticking or unticking the boxes next to them. To view smaller items within a group, click the arrow next to the group.
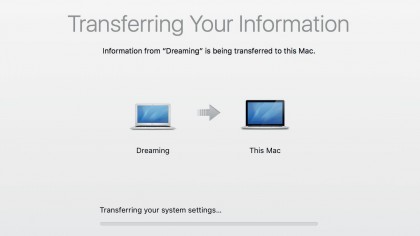
Click Continue to begin the process of migrating the data. How long this takes will depend on the amount of data selected and the connection method you're using. Obviously, using a physically-connected disk will be the fastest method; if you're connecting over a wireless network, the transfer will be a lot slower than over a Thunderbolt or FireWire cable.
Once the transfer has completed, migrated users will have their own Home folders on the target Mac. To check that settings and documents for a particular user have migrated successfully, log out and log back in as that user.
- Enjoyed this article? Get more tutorials, guides, and tips on how to get the most from your Apple devices inside MacFormat. Take advantage of an exclusive offer in our sampler today.
Sign up for breaking news, reviews, opinion, top tech deals, and more.
You are now subscribed
Your newsletter sign-up was successful