
 Become a TechRadar Insider


Did you know it's possible to run Windows on your Mac? That's right, if you're feeling a little homesick or you can't install a favourite application (or find a Mac equivalent), you can create a "virtual" PC into which you install Windows and use it just as you used to.
A program called Parallels Desktop 7 (£65) makes it possible to seamlessly integrate your old applications into your new Mac environment.
You can run Windows in its own window, complete with the familiar desktop environment you've come to know and love, or you can attempt to merge it seamlessly into your Mac desktop. The advantage of this latter approach is that it's less intrusive, and you can run your Windows applications alongside Mac ones.
There are a few things worth considering before you begin. First, using Parallels isn't suitable for playing the latest Windows games on your Mac; instead you'll have to investigate a technique called BootCamp, which allows you to install Windows side-by-side with your Mac. See www.apple.com/support/bootcamp/ for details.
Second, you'll be sharing system resources between your Mac and Windows. Parallels will automatically configure Windows with the minimum amount of memory needed to run, but if you have 4GB or more installed on your Mac, consider doubling the amount allocated to it. Also make sure you have at least 50GB hard drive space spare.
The final consideration is that you'll need a spare, licensed copy of Windows to install: if you've sold your old PC on, or your PC came pre-installed with Windows, you won't be able to use the copy of Windows you had before, and will have to purchase a new copy specially for use in Parallels.
Parallels features a Convenience Store button on its main page - clicking this and switching to the Operating Systems tab allows you to quickly and easily purchase and install Windows 7. However, the prices are rather steep, so you may wish to shop around for a boxed copy of Windows 7 instead. It's cheaper, and if your Mac comes with a DVD drive it's just as simple to install.
Once you have your copy of Windows to hand, you're ready to begin the installation. Read on to discover how to merge Windows seamlessly into your Mac, then make the most of your new set-up.
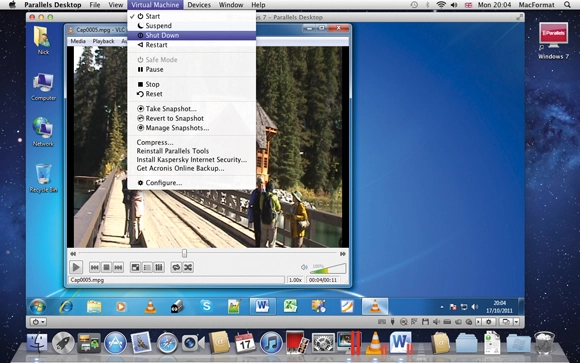
How to set up Windows in Parallels Desktop 7
1. Wot, no disc drive?

If your Mac doesn't come with a disc drive, and you have another PC or Mac on your network with a drive, follow the instructions to set up Remote Disc before popping in your Windows disc in. Once connected, Parallels will install Windows from that drive.
2. Install Parallels Desktop

Browse to www.parallels.com/uk/download/desktop/ and click Download Trial. You'll need to enter your email address - your trial activation key will be sent to this address. Download the DMG file to your Downloads folder, then open it and double-click Install, then follow the setup instructions.
3. Choose install file or disc

Launch Parallels and click Activate Trial, entering the key you received via email. Leave "Install Windows from DVD or image file" selected and click Continue. Select your DVD drive or a downloaded image file using the "Install from" menu. In most cases you'll want to pop your Windows disc in the drive.
4. Setup options

You'll be prompted to enter your product key - do so and click Continue. When prompted how you want your Windows programs to work, choose "Like a PC" for now and click Continue again (you can change this setting letter). Tick "Customize settings before installation" and click Continue once again.
5. Tweak virtual PC settings

By default Parallels allocates 1GB of RAM to your virtual PC. If you have more than 4GB of RAM installed in your Mac, up this figure to 2GB (2048MB) to give your virtual PC a speed boost. The other settings can be ignored, so click Continue and Parallels will attempt to automatically install Windows.
6. Sit back and wait

If all goes well, Windows will install and you'll have to do nothing until the process finishes. If your product key is rejected, try restarting, but untick the box to enter a product key when prompted. You'll need to enter it after you've installed Windows, but the setup should now complete successfully.
7. Configure network access

Once installation is complete, you'll be prompted to configure your network. First, select "Home network" to enable your virtual copy of Windows to access your Mac's folders, but click Cancel at the second screen when prompted to set up a Homegroup, which isn't required by your virtual copy of Windows 7.
8. Access Mac folders

You'll notice a shortcut on the desktop entitled Parallels Shared Folders. Clicking this reveals a folder called Home, giving you access to personal folders, including Documents and Music. Add other folders by clicking the Handshake icon at the bottom of the screen and choosing Add from the menu.
9. Start using Windows

Once setup and transfer - if required - is complete, you can use your new virtual copy of Windows in exactly the same way you used your PC. Install programs, tweak settings and make sure you activate Windows. Also, consider installing security software to protect it from malware and other threats.
Get more from Parallels
You've sorted the basics, now fine-tune your new Windows installation
You've installed and activated Windows, and reinstalled those apps you need. You might be forgiven for thinking that's the limit of Parallel's capabilities, but dig a little deeper and you'll be pleasantly surprised by what else you can do.
Sharing folders and files between Mac and Windows can be done a number of ways. There's a Magic Briefcase folder with desktop shortcuts on both Windows and Mac for easy access to a shared folder, while Parallels will automatically share your Mac's Home folders via a desktop icon in Windows too.
Another advanced tweak is that you can configure the hardware settings of your new "computer" should you wish to experiment in order to boost its performance. Note that doing so will take more resources away from your Mac, but if you've just doubled the memory in your Mac for example, it's a good excuse to allocate a bit more to your PC to give it a performance boost.
If you're lucky enough to own a Mac with a quad-core processor, you can allocate two of those cores to your PC and watch it fly. All of these settings are accessible from Parallels' Virtual Desktop menu - select Configure to tweak them.
Note that making too many changes to your virtual hardware may result in Windows demanding you reactivate it.
While you're here, work your way through the Options tab too - you can fine-tune exactly how integrated Parallels is with your Mac (disable access to Windows applications from the Dock via the Applications section, for example), plus tweak various settings such as whether or not Time Machine includes your virtual machine in its backups.
Also consider disabling SmartMouse if your mouse seems to perform erratically - but before that, try uninstalling Parallel Tools from the Control Panel in Windows, before reinstalling it from the Parallels Virtual Machine menu.
How to switch modes in Parallels Window mode
1. Window mode

The default view for Parallels is "Windows mode" - this basically means that Windows runs inside its own dedicated window, just like any other application on your Mac. Just roll your mouse over the Parallels window and it magically transforms into your Windows cursor - the keyboard is also captured when the window is in focus, ready to use in your virtual copy of Windows.
2. Full screen mode

If you find yourself frequently using Windows exclusively, rather than OS X, open the View menu and select Enter Full Screen to view Windows as if you were sat at a PC. Full-screen mode is perfect for those occasions where you need to spend quality time in Windows. Switch back by rolling the mouse to the top of the screen where the Parallels menu will reappear.
3. Modality mode

Selecting this mode makes Windows shrink to a resizable thumbnail image that sits on top of all other windows in semitransparent form, allowing you to monitor it while working in your Mac. If it's too distracting - we think it's a little too opaque by default - make it more transparent from the Virtual Machine > Configure > Options > Modality menu.
4. Coherence mode

This is the option that is enabled if you pick "Work like a Mac" during the setup process. It basically "merges" Windows and your Windows applications so they work seamlessly inside your Mac, appearing in their windows alongside Mac programs. It's perfect if you're only using Windows for a couple of legacy applications - enable it via View > Enter Coherence.
5. Working with Coherence

Once enabled, applications open within their own window on your Mac desktop, just like native Mac applications. Their icon appears in the Dock, which can be placed permanently like any other shortcut. Also note the Parallels menu bar icon: clicking this allows you to access the Windows Start menu from your Mac as well as access other Parallels options.
6. Get a better look

One thing Coherence will highlight is the major stylistic difference between Windows and Mac, which may look jarring when you open Windows applications in Coherence mode. Open Parallel's View menu and select Use MacLook to download and install an app that gives your Windows applications a Mac-like feel to help them blend in better with their new home.