How to Delete Duplicate Photos on a Mac
Just how much of your hard-drive space is taken up by duplicated photos? Well, thanks to two free programs — Duplicate Photos Cleaner and Duplicate Cleaner for iPhoto — you can easily go through a selected drive, folder, or iPhoto library and weed out unnecessary copies, potentially freeing up gigabytes of drive space.
Just how much of your hard-drive space is taken up by duplicated photos? Well, thanks to two free programs — Duplicate Photos Cleaner and Duplicate Cleaner for iPhoto — you can easily go through a selected drive, folder, or iPhoto library and weed out unnecessary copies, potentially freeing up gigabytes of drive space.
Both apps are available through the App Store and work in a similar way. The only real difference is how you select what to scan; the step-by-step guide below outlines what to do with Duplicate Photos Cleaner, while Duplicate Cleaner for iPhoto will first ask you to launch iPhoto, then select your chosen iPhoto library before going through it looking for duplicates.
Note that Duplicate Photos Cleaner can’t compare the contents of multiple drives at once, so you won’t inadvertently delete photos backed up to a different drive than the one you’re scanning. Also beware that cleaning photos using either program means deleting them — they aren’t simply moved to the Trash. So proceed with caution, and back up first!
Quick look: Duplicate Cleaner
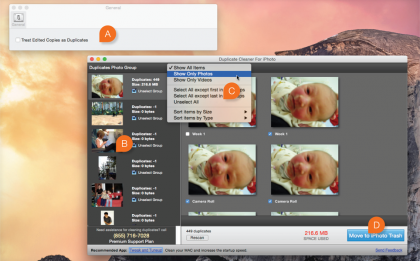
A. Match Edited Photos: By default, Duplicate Cleaner for iPhoto won’t match photos if one has been modified. To change this, select Duplicate Cleaner for iPhoto > Preferences and check this box.
B. How Photos Are Matched: Both apps match images via their file signatures, so identical photos that happen to have different names will show up too.
C. Filter Results: You can use the app to search only for duplicate photos or videos, or search for all media by clicking the menu button. Other options allow you to filter or sort results further.
D. Empty Trash: Duplicate Cleaner for iPhoto doesn’t delete files, but places them in the iPhoto Trash. In iPhoto choose Empty Trash to remove them for good.
Sign up for breaking news, reviews, opinion, top tech deals, and more.
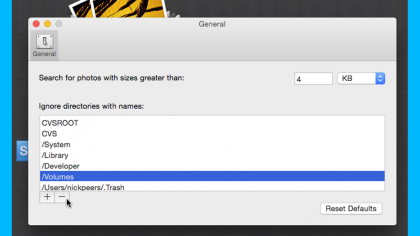
1. Remove Restrictions: By default only your main hard drive is searched — to allow searches of any drive, open the Photos Duplicate Cleaner menu and select Preferences. Select “/Volumes” in the “Ignore directories with names:” list and click the “-” button to remove it.
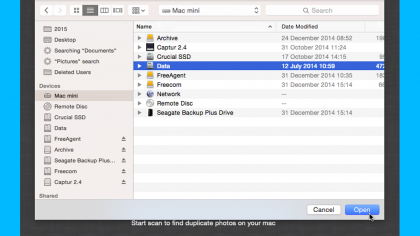
2. Select Folder or Drive: Click the “Select Folder and Scan Duplicates Now” button. Photos Duplicate Cleaner allows you to scan individual folders or drives only (you can’t select the whole computer). Select the folder or drive and click Open to start scanning.
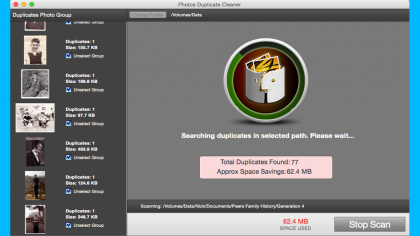
3. Wait for Scan: Your drive or folder will be scanned for duplicates. This can take time, depending on folder size. If any duplicates are found they’re displayed in the left-hand pane — a running total of duplicates and potential space savings is also displayed.
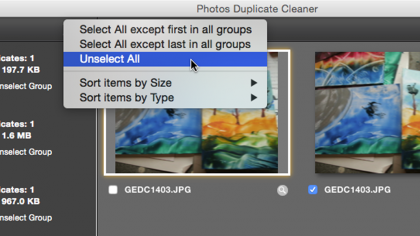
4. Play It Safe: A summary of duplicates found and potential savings appears — click OK. A large number of files could accidentally be deleted if you click Clean Duplicates. Instead, click the button to the left of Change Folder and choose Unselect All.
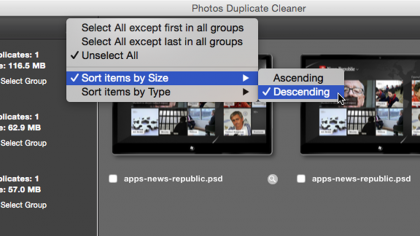
5. Sort Results: If you want to quickly reclaim some disk space, concentrate on the largest items first. To do this, click the menu button again, but this time choose Sort items by Size > Descending to display the biggest files at the top.
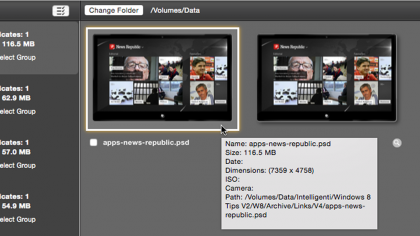
6. Compare Duplicates: The first entry in the Duplicates Photo Group list is displayed by default. Mouse over one of the duplicates displayed; after a pause a tooltip pops up with information about it, including its location, helping you identify which to keep.
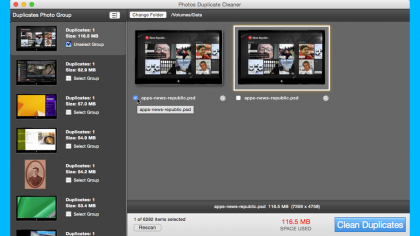
7. Select Files to Remove: If this doesn’t give you enough info, click the magnifying glass button beneath a duplicate to open its folder in Finder, to help you determine which version, or versions, you’d like to keep. Then check the box next to the name of the file(s) you wish to delete.
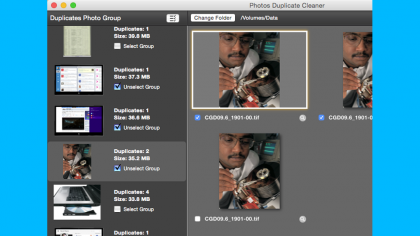
8. Clean and Clean Again: Move on to the next item in the list — if in doubt, leave items unchecked to remove later. To clean selected items as you go, click Clean Duplicates followed by “Yes,” at any time, to permanently delete the files you’ve checked — then continue reviewing.
- Protect your Mac with one of the best Mac VPN options