How to run Linux in a virtual machine
Virtualisation doesn't have to be scary. It isn't the sole domain of the enterprise, or cloud computing, or server farms. It's just as useful, and just as manageable, as the average desktop, and there now seem to be almost as many ways to virtualise Linux as their are distributions themselves.
You could pay money, for example, and buy a workstation product from either VMware or Parallels, both of which have excellent performance, support and some advanced features. Or you could try their open source equivalents, the wonderful VirtualBox and Qemu.
But there's another alternative, and it can offer the most transparent virtualisation integration into your current configuration, making it an ideal way to experiment with new distributions, and put them to the test.
This is KVM, the kernel-based virtual machine. These three letters might once have scared you off with stories of complexity and VNC sessions, but thanks to a wonderful Red Hat project called Virt-Manager, almost anyone with the right hardware can install KVM and get their own virtual machines running in no time at all.
And virtual machines really are the best way to experiment with the plethora of Linux distributions there are on offer. They're non-destructive, easy to set up, and almost as fast as the real thing to use. They're the best way to get a feel for a distribution without committing real hardware to the installation process, and virtualisation enables you to race through as many installations as your broadband connection allows.
And like all great journeys, it starts with the first step…
Step 1: Check your hardware compatibility
Sign up for breaking news, reviews, opinion, top tech deals, and more.
Before we go any further, you need to make sure that your system is up to the task of running other operating systems within a virtual machine. As a general rule, any machine from the last three years should work, but there are some system specifics you should look for.
Most importantly, your CPU should offer what's known as a processor extension for virtualisation. All the modern virtualisation solutions use this to dramatically enhance the performance of the virtualised machine, although older applications such as VMware Player will still work if you don't happen to have a CPU with the correct extension.
Which extension you should look for depends on which brand of processor you're using. Intel users should look for VT-x, while AMD users should look for AMD-V, for example.
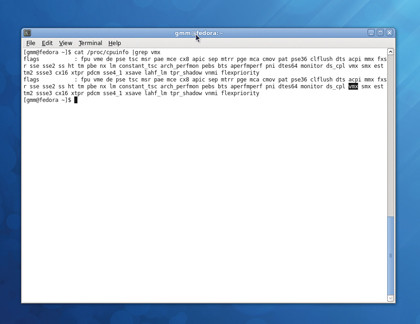
You can check your CPU for compatibility by opening a terminal and typing cat/proc/cpuinfo. This will list everything, and if you've got more than one core, more than one processor, or hyperthreading enabled, you see the list repeated for every instance.
Just make sure there's either a vmx or an svm entry in the flags section for any of these cores. The former is Intel's name for the virtualisation extension, while the latter is AMD's equivalent.
Fiddle with the BIOS
If neither appears and you think your machine should be capable, then virtualisation may be turned off in your system BIOS. Getting into the BIOS involves restarting your screen and pressing a specific key as your system's post messages appear, before the Grub menu. This key is usually Delete, F2 or, occasionally, F10.
The location of the setting is also dependent on your specific BIOS, but you should find the entry under either an Integrated Peripherals section, or within the Security menus.
Finally, you'll need to make sure you have enough storage space and memory. A virtual machine eats real resources, which means you'll need to allocate memory and storage space to each virtual instance while leaving enough over for your native operating system.
Linux distributions generally work well with between 512MB and 1GB of memory assigned to them, so you'll ideally need 1GB as a minimum, and ideally, 2GB or more.
It's the same with storage. A standard installation normally takes around 5GB as a minimum (depending on the distribution of course; if you're running a mini-distro such as Puppy Linux you'll need less than this), but if you're going to use a virtual machine for real work, you'll need to allocate more space.
Step 2: Use the right base distribution
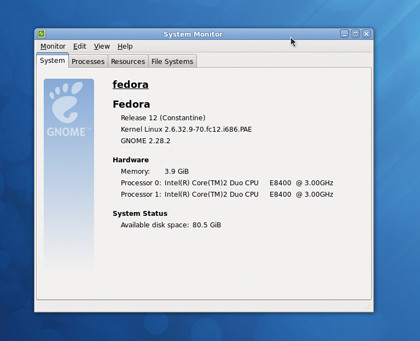
We've chosen Fedora 12 because it has the best implementation of Virt-Manager, and there's no reason to doubt that Fedora 13 will be equally as adept.
Fedora is easy to install and provides a top-class distribution. Virt-Manager is the application used to manage both Xen and KVM virtual machines on your system, and without it, these instructions would be a lot harder to follow.
This is because Virt-Manager turns what can be a very complicated setup procedure into a few simple clicks of the mouse. If you've ever created a virtual machine with the commercial VMware or Parallels Workstation, you'll find the job just as easy with Virt-Manager.
The discovery that Fedora is the best distribution to use if you want to play with Virt-Manager is no surprise considering it was developed by Red Hat, but what is surprising is that there aren't more distributions taking this open source project and making it an integral part of their virtualisation strategy, because recent versions of the application are so good.
Even Ubuntu, a distribution which has thrown its cards in with KVM as part of its campaign to push cloud computing with Eucalyptus, only manages to bundle an older version of Virt-Manager in its package repositories, and this older version is severely crippled in terms of features and usability.
Hopefully, the imminent 10.04 should address this problem, and Ubuntu users will soon be able to install a recent version of Virt-Manager without too much difficulty.
Step 3: Install the virtualisation software
The hardest step in the whole of this process is probably installing the specific packages required for virtualisation, simply because you get the best results from the commandline, which many people seem to be naturally allergic to.
But don't let that put you off if you've never used it before – we're only entering a line or two of text, and it shouldn't cause any problems. It's just the way Fedora works best.
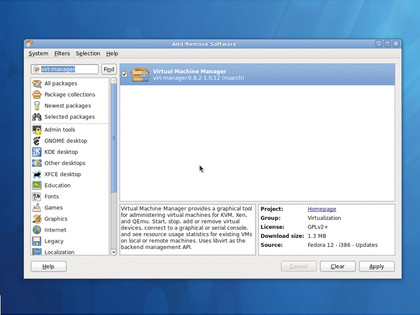
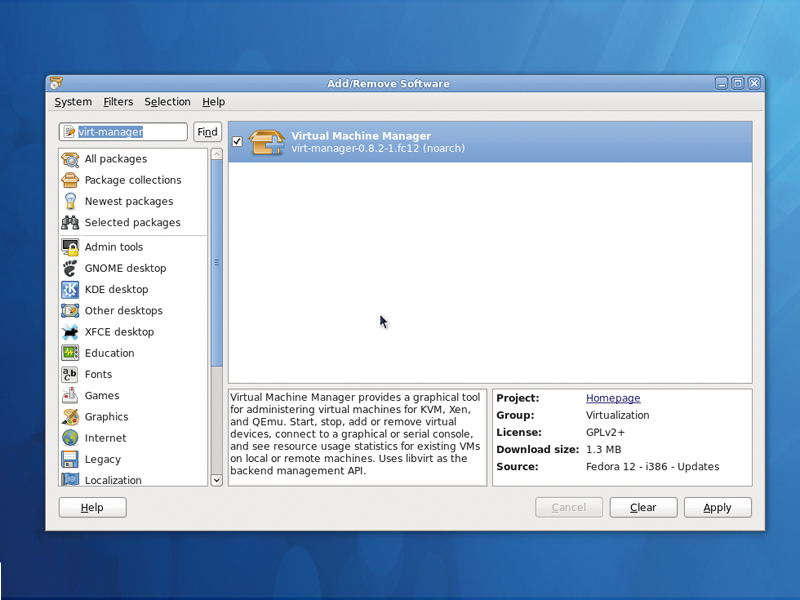
Quite a few packages are required to get virtualisation up and running with a default Fedora 12 installation. You could use the package manger, launched by clicking on Add/ Remove Software within the System > Administration menu, but we had trouble tracking down the KVM package, and had better luck using Yum on the command line.
From the command line, launched from the Applications > System Tools menu, type su followed by your user password. To install packages, type yum install followed by the packages you wish to install.
Here's the line we used: yum install kvm virt-manager libvirt
You should find that there are plenty of other packages that need to be installed as dependencies, and these will be grabbed automatically.
After installation, you can either restart your system or type /etc/init.d/libvirtd start (or use the service command) to start the virtualisation management process.
After that, you're ready to dive into the Virt-Manager application.
Step 4: Fire up Virt-Manager
Virt-Manager can be found by clicking on System Tools > Virtual Machine Manager. You'll need to enter your root password to be able to use the application, but there isn't much to see when it first runs. There should be just a single connection listed in the main window as 'localhost (Qemu)'.
In Virt-Manager terminology, a connection allows it to manage the virtualisation, and they can be on remote machines as well as local. Localhost is your current machine, and Qemu is the virtualisation technology that the connection is using.
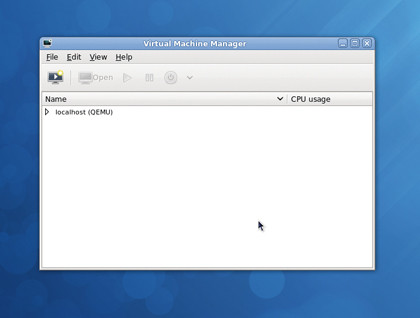
The reason why Qemu is listed instead of KVM is because KVM needs Qemu to provide access to the standard emulation elements required to run a virtual machine, such as the BIOS emulation. Qemu then uses KVM to access the virtualised parts.
If it doesn't appear on the list, or if you want to create a new connection, click on Add Connection from the File menu and choose Qemu/KVM from the drop-down Hypervisor list. You could also choose Xen if it's installed and you feel like experimenting with a different technology.
With older versions of Virt-Manager, you would now have to manually create a shared storage device by right-clicking on the connection and choosing the storage device. New versions handle this automatically from the instance-creation wizard, which is the next step.
Step 5: Create a new virtual machine
Click on the Play icon in the top-left, then give your creation a name. If you'll be running several different distributions, it's a good idea to name the virtual machine after the distribution you'll be running. Also, make sure you select Local Install Media, as this is how we're going to install the distribution.
On the following screen, select Use ISO Image and use the Browse button to navigate to the location of your ISO. You'll have to click on the Browse Local button to jump from the virtual storage to your home directory.
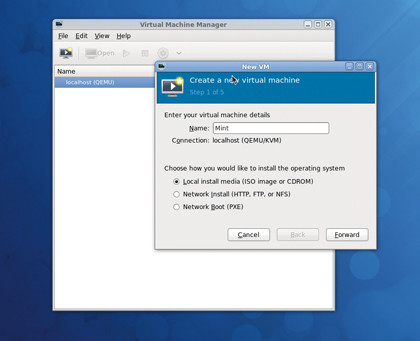
Virtual storage is the space that Virt-Manager uses to store its own virtual drives. Choose Linux as the OS Type in the drop-down menu below the ISO location. To ensure the best possible compatibility, try to choose a distribution with the closest match to the distro you want to try. For distributions like Mint or Crunchbang, for example, you could select Ubuntu 9.10.
On the next page, you need to select how much RAM you want to assign to the virtual machine. Minimal distributions like Dreamlinux could get away with 512MB or lower, but a modern Gnome or KDE-based distribution would ideally need 768MB and higher. The more memory your virtual machine has, the better it will perform.
Finally, on the next page, make sure to select Enable Storage, and click on Create A Disk Image. If you've got enough disk space, increase 8GB accordingly. Leave the final page at its default settings and click on Finish.
Step 6: Boot your new distribution
After clicking on Finish you'll find that Virt-Manager spontaneously launches into the boot process for your chosen distribution. A few moments after that, you will see exactly the same boot routine you'd expect if you were booting off a real drive with a physical disk. This all means that everything is working exactly as it should, and you've been able to successfully create and run your first virtual machine.
What happens next depends completely on the distribution you've chosen to run. Linux Mint, for example, will present a fully functional desktop, whereas other distributions may ask you to walk through the installation routine. Either way, you can get full control of the virtual machine by clicking within the window.
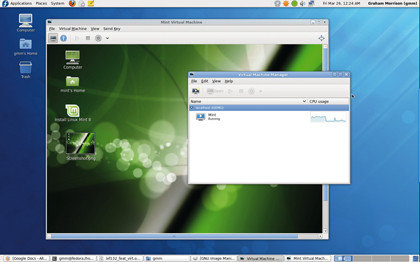
KVM will then take over your mouse and keyboard. You should see a small notification window telling you that the pointer has been grabbed and letting you know the key combination you need to use if you want to escape from your virtual machine back to the native environment.
This key combination is normally the left Ctrl and Alt keys, which has become something of a standard with virtualisation software. Pressing these together should give control back to your normal desktop.
If you ever need to send this specific key combination to the virtual machine you can use the Send Key menu, which lists all the various combinations you might want to use, such as Ctrl+Alt+F1 for the first virtual console view, or Ctrl+Alt+Backspace to restart the X server.
Current page: Try any distro: Step by step
Next Page Try any distro: Get more from Virt-Manager