Supercharge your Raspberry Pi
Get your soldering iron ready
Sign up for breaking news, reviews, opinion, top tech deals, and more.
You are now subscribed
Your newsletter sign-up was successful
We've shown you how to send output via the GPIO, but as the name suggests, they can also receive input. With this, it's even more important to ensure you don't send too much power into the pins.
To get input, just set the mode to input with gpio –g mode in then read the value withgpio –g read .
This hardware can display any eight bits of information, so you don't have to limit it to displaying just IP addresses. For example, you could make a modified version of the earlier camera controller script to use the LEDs to indicate its progress. You can find details on the full selection of GPIO pins here.
The pins we've used are the same in both revision 1 and 2 of the Raspberry Pi, but some have changed between the two versions. If you design your own circuits, or use ones from the web, make sure you use the right pins for your board.
You don't have to limit yourself to just switching pins on and off. The Pi supports a few methods of passing larger amounts of data through the GPIO. The two most common of these are Serial Peripheral Interface bus (SPI) and Inter-Integrated Circuit (I2C).
There are a number of devices available that use these, and plenty of information online to help get you started. So what's stopping you? Get out your soldering iron and build a robot army.
Gertboards and Arduinos
Connecting directly to your Pi's GPIO pins can provide you with basic input and output control, but there are limitations. There are two additional items that you can obtain to help you interact more precisely with the world around you.
Sign up for breaking news, reviews, opinion, top tech deals, and more.
The Gertboard is a fairly complete expansion pack for connecting between your Pi and the real world, including a micro controller, and a range of input and output options. It comes as an unassembled kit, so you will have to get your hands on a soldering iron to put it together.
Meanwhile, the Arduino is a micro controller that can connect to your Pi (or any other computer) via the USB port. Typically, it comes assembled, but kit forms are also available. In its raw form, it has fewer features than the Gertboard (which includes an Arduino microcontroller), but it can be expanded with a huge range of shields.

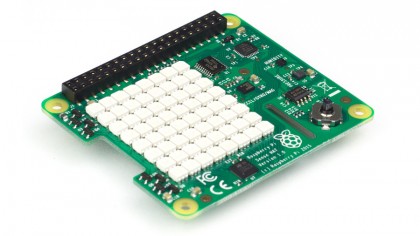
Also check out the official Sense HAT, a plug-in board that provides your Pi with sensors to monitor the outside world. It even comes with an LED matrix to allow you to display data without the need for a monitor.
Last, but not least, the RasWIK is a wireless kit specifically designed to teach you how to build wireless sensors and actuators – and many of its included projects don't even require any soldering.