This article is in association with Dabs.com
It's one of the geekier things we could say, but we love motherboards. They're the foundation of any system, the starting point from where the rest of the system is built up from.
Article continues below 
If you're doing a new build then you should already have an empty case. For upgrades you'll first have to remove all the old components, disconnect everything, undo the motherboard screws and remove it.
2. Add the backplate

Before we think about installing the motherboard you need to first push in the I/O backplate that will have come with the motherboard. This clips into place within the case and is going to be your main headache in a minute.
3. Check the mounting points

Double check the screw mounting points on the case match those of your motherboard. If you have a small microATX board you may need to add additional ones to provide support around the middle of the case.
4. Angle it in

It's easiest to angle the motherboard down towards the backplate. Make sure the I/O ports on the backplate, are lined up with the backplate's grounding catches. This can be a little tricky to line up correctly, so it's worth checking.
5. Screw into place

You will probably find the backplate pushes the motherboard away from the back of the case slightly. So you'll need to push it towards the backplate and then start to screw it into place. With a couple of screws done, the rest should be easy.
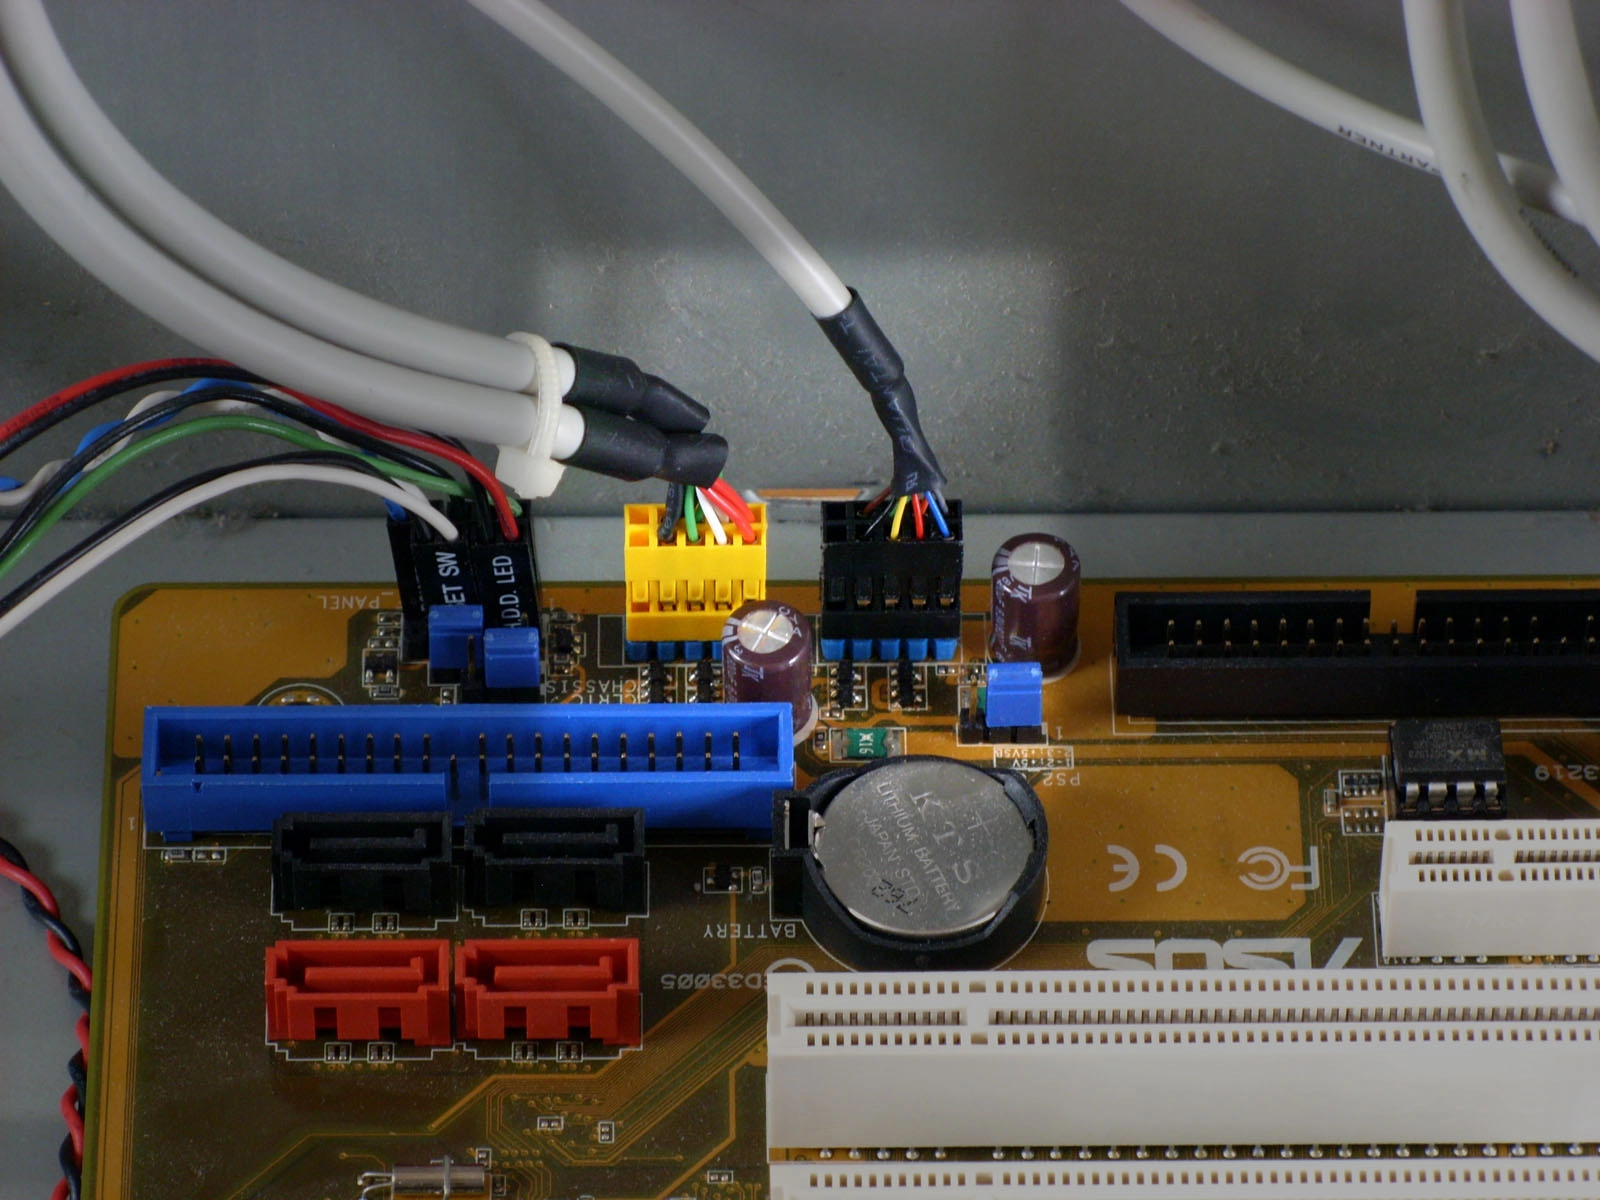
6. Front-panel connectors

The front panel on a PC's case provides the power and reset buttons, the hard drive and power LEDs and sometimes an internal speaker. You'll find these wires lose, coming from the front of the case and should be labelled: HDD LED, PWR SW, RST SW, PW LED, SPEAKER or something similar. Each will have a coloured wire and a black wire indicating the positive and negative terminals.
7. Front-panel risers

These connect to the front-panel's bank of risers on the motherboard. This may be labelled with corresponding names for each connector, it may not. Consult the motherboard manual to find where it is. The vital connector is the Power Switch with the Reset Switch a close second these can be connected any way around. For the LED connectors to work correctly the black wire needs to go to the negative terminal, otherwise it'll be off when it should be on.
8. Front panel audio and more

Many cases also provide front-panel audio and USB connections, for USB see below. The type can vary from moterhboard to moterhboard. Many use a standard 10-pin connector possibly marked yellow on the motherboard and labelled F_AUDIO. Ideally the case provides a keyed connector that simply plugs in to this. Otherwise consult the motherboard manual to match the case connectors to each pin.
9. Add Firewire and USB ports

Many motherboards come with additional screw-in backplate USB and Firewire ports. These connect to corresponding ports on the motherboard. These will be keyed and should be colour coordinated. Typically F_USB1, F_USB2 and for Firewire F1_1394 and F2_1394. It's just a case of matching one with the other.
10. Additional ports

The motherboard also provides interfaces for many other peripherals that you will need to install along the way. Importantly Serial ATA for your hard drives and new optical drives, possible a PATA interface for optical drives and old hard drives, we're showing an old floppy connector that's no uncommon. There's the large memory slots, the graphics PCI Express slots and older PCI slots. Not forgetting the CPU fan power, plus a number of other risers for less-common interfaces.
11. Plug in the power

Finally you will need to connect the ATX 24-pin main motherboard power and the 4-pin ATX12V processor power connector, which with Intel socket 1366 motherboards is an 8-pin EPS12V variant.
----------------------------------------------------------
Sponsored link: Get some cracking storage bargains with the Dabs.com Storage Spectacular
----------------------------------------------------------