How to use Xbox Game Bar in Windows 10
Get your game on
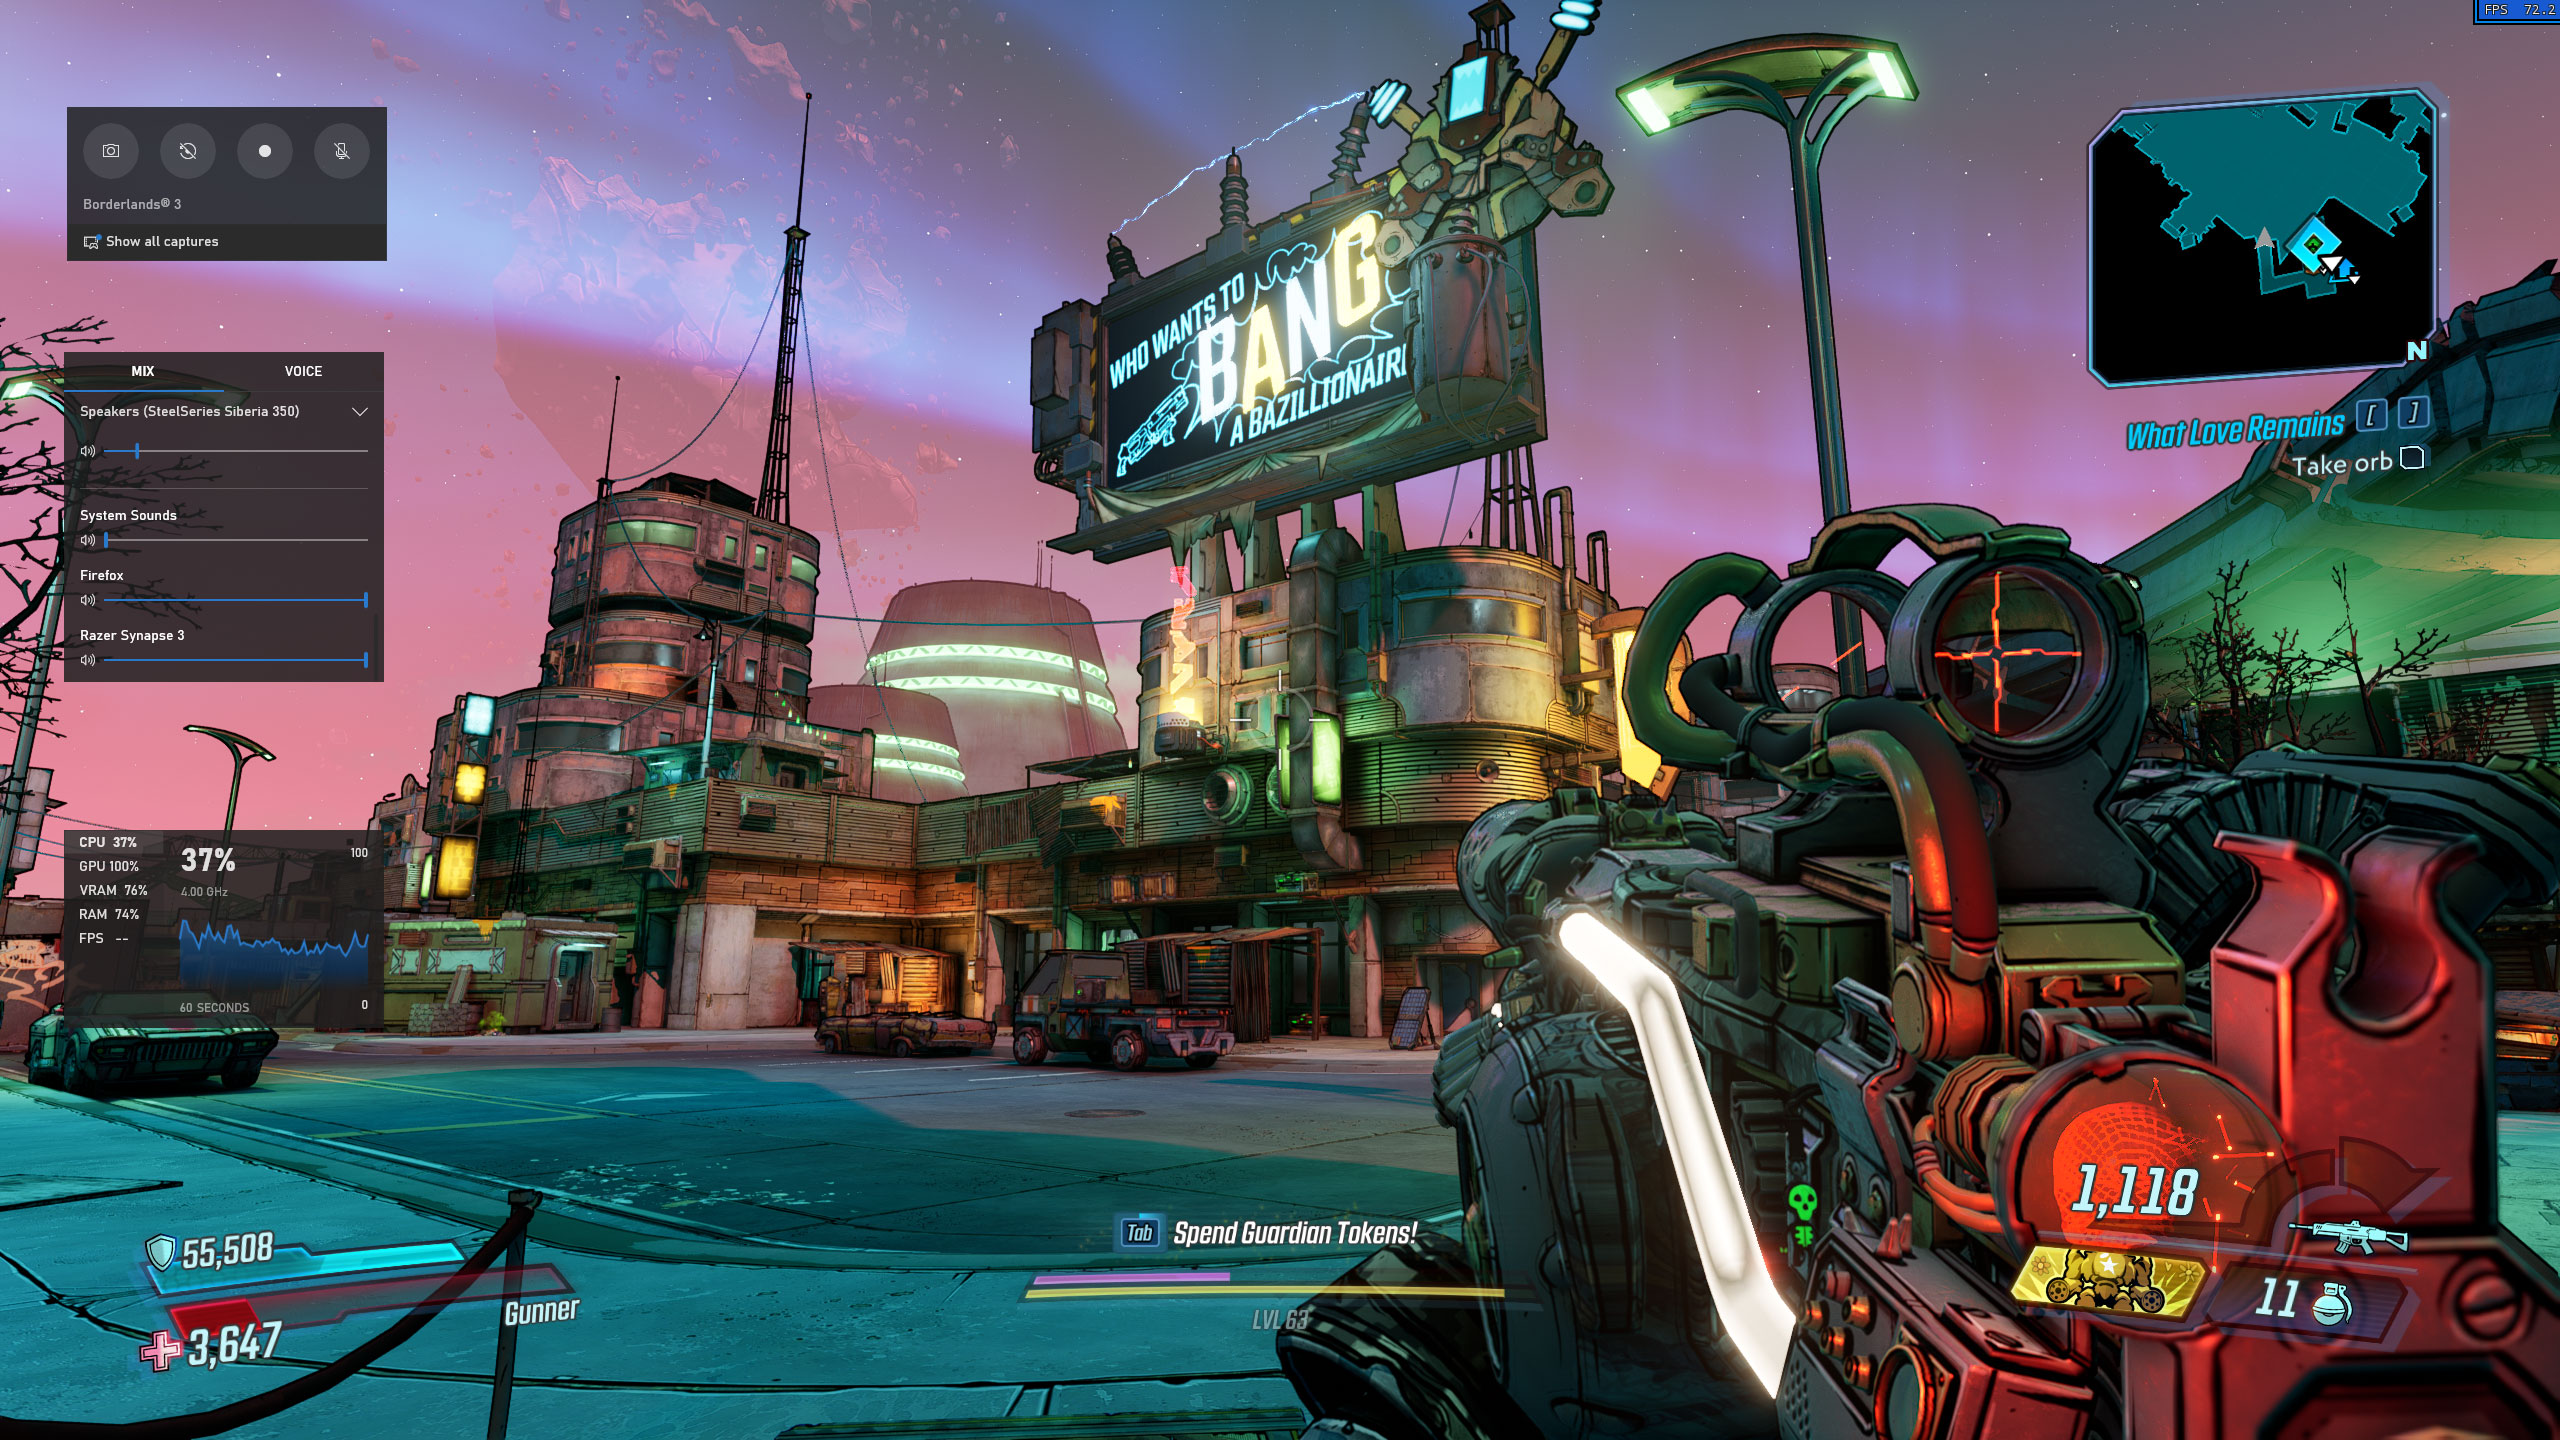
Whether it is a game-winning move or a side-splitting moment, PC games are full of great goings-on. To ensure you capture those moments for posterity, there is no need to get complex third-party software – Windows 10’s built-in Xbox Game Bar has everything you need ready to go.
The Xbox Game Bar in Windows 10 consists of an overlay with various widgets to aid in recording your gameplay. You can use these widgets to capture footage or screenshots, and they can be pinned in place or moved however you want. Master them all and you will have a great gameplay tool at your disposal.
- How to use the PS5 DualSense controller on a PC
- How to use your Xbox Series X controller on PC
- How Xbox Series X and Game Pass could brighten Microsoft's future
1. Basic controls
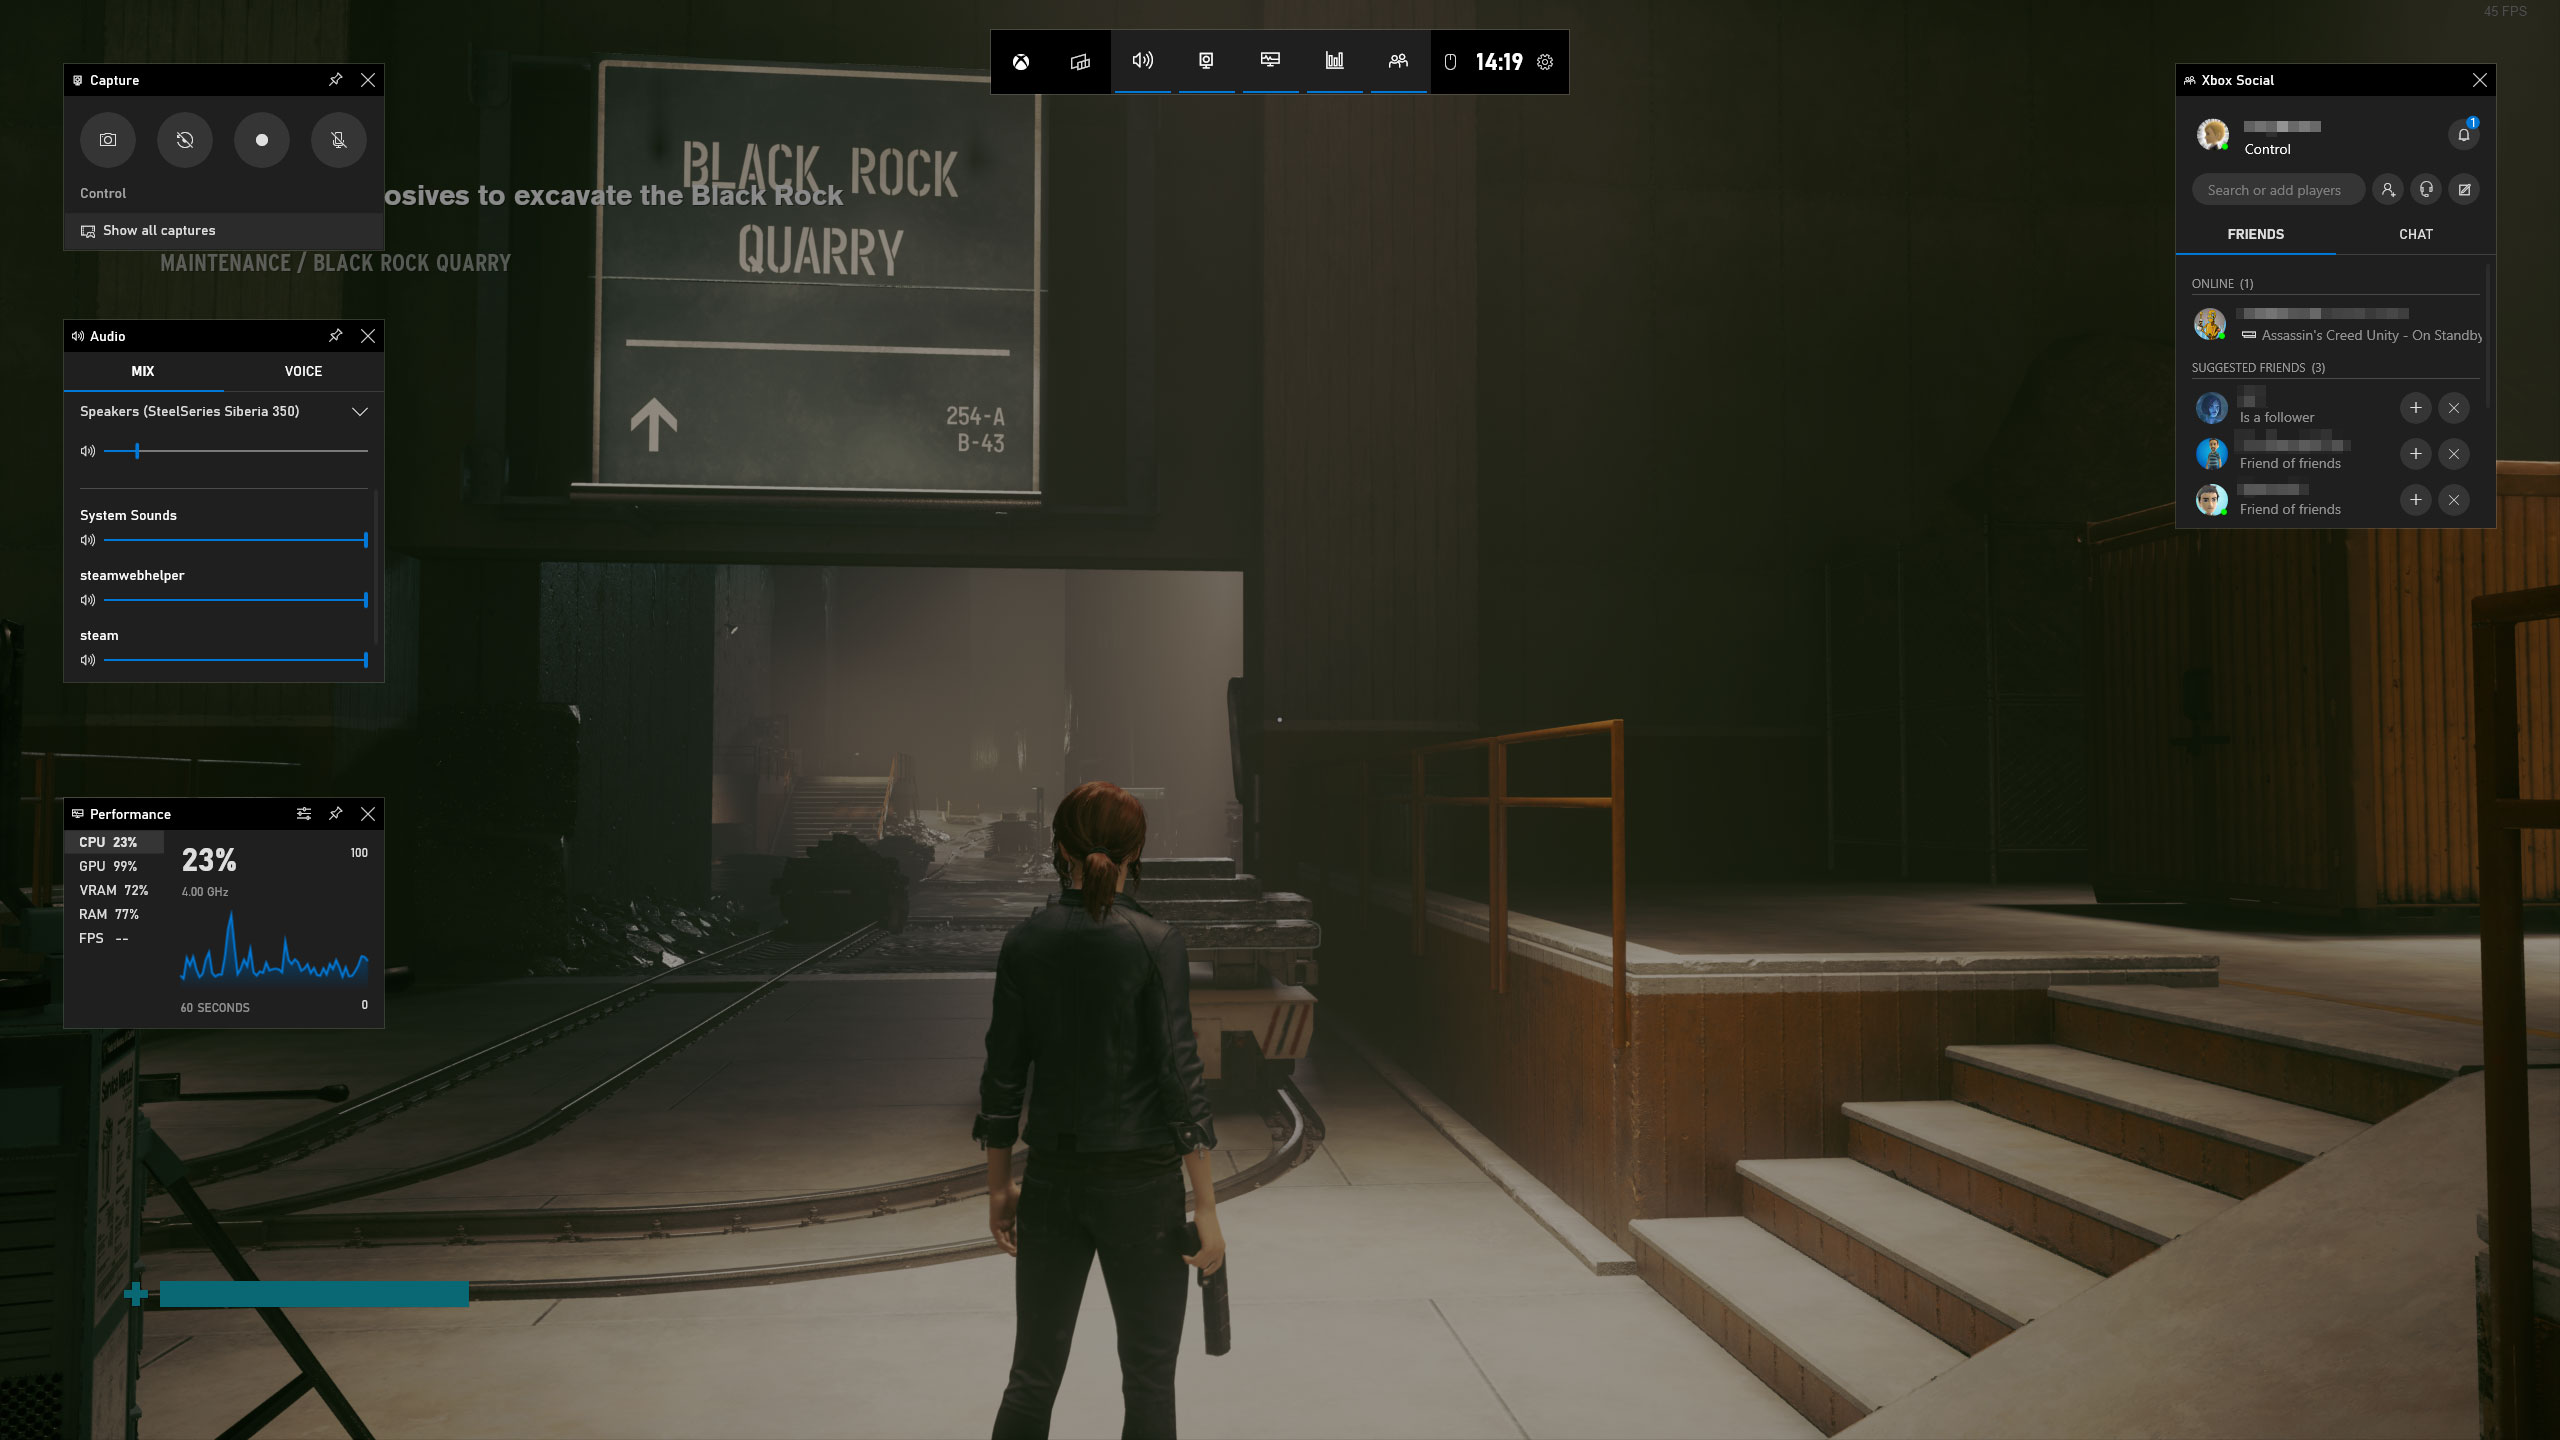
Although you can activate a lot of the Game Bar’s features from its various panels and widgets, the quickest way to get to work is through keyboard shortcuts. If you just want to get stuck in, there is a range of pre-determined shortcuts, but you can change them to your own preferences if you want (see step 7).
Some of the key shortcuts include Win+G to open the Game Bar overlay, Win+Alt+R to start or stop recording, Win+Alt+G to capture the last 30 seconds of gameplay, and Win+Alt+Print Screen to take a screenshot.
2. Main features
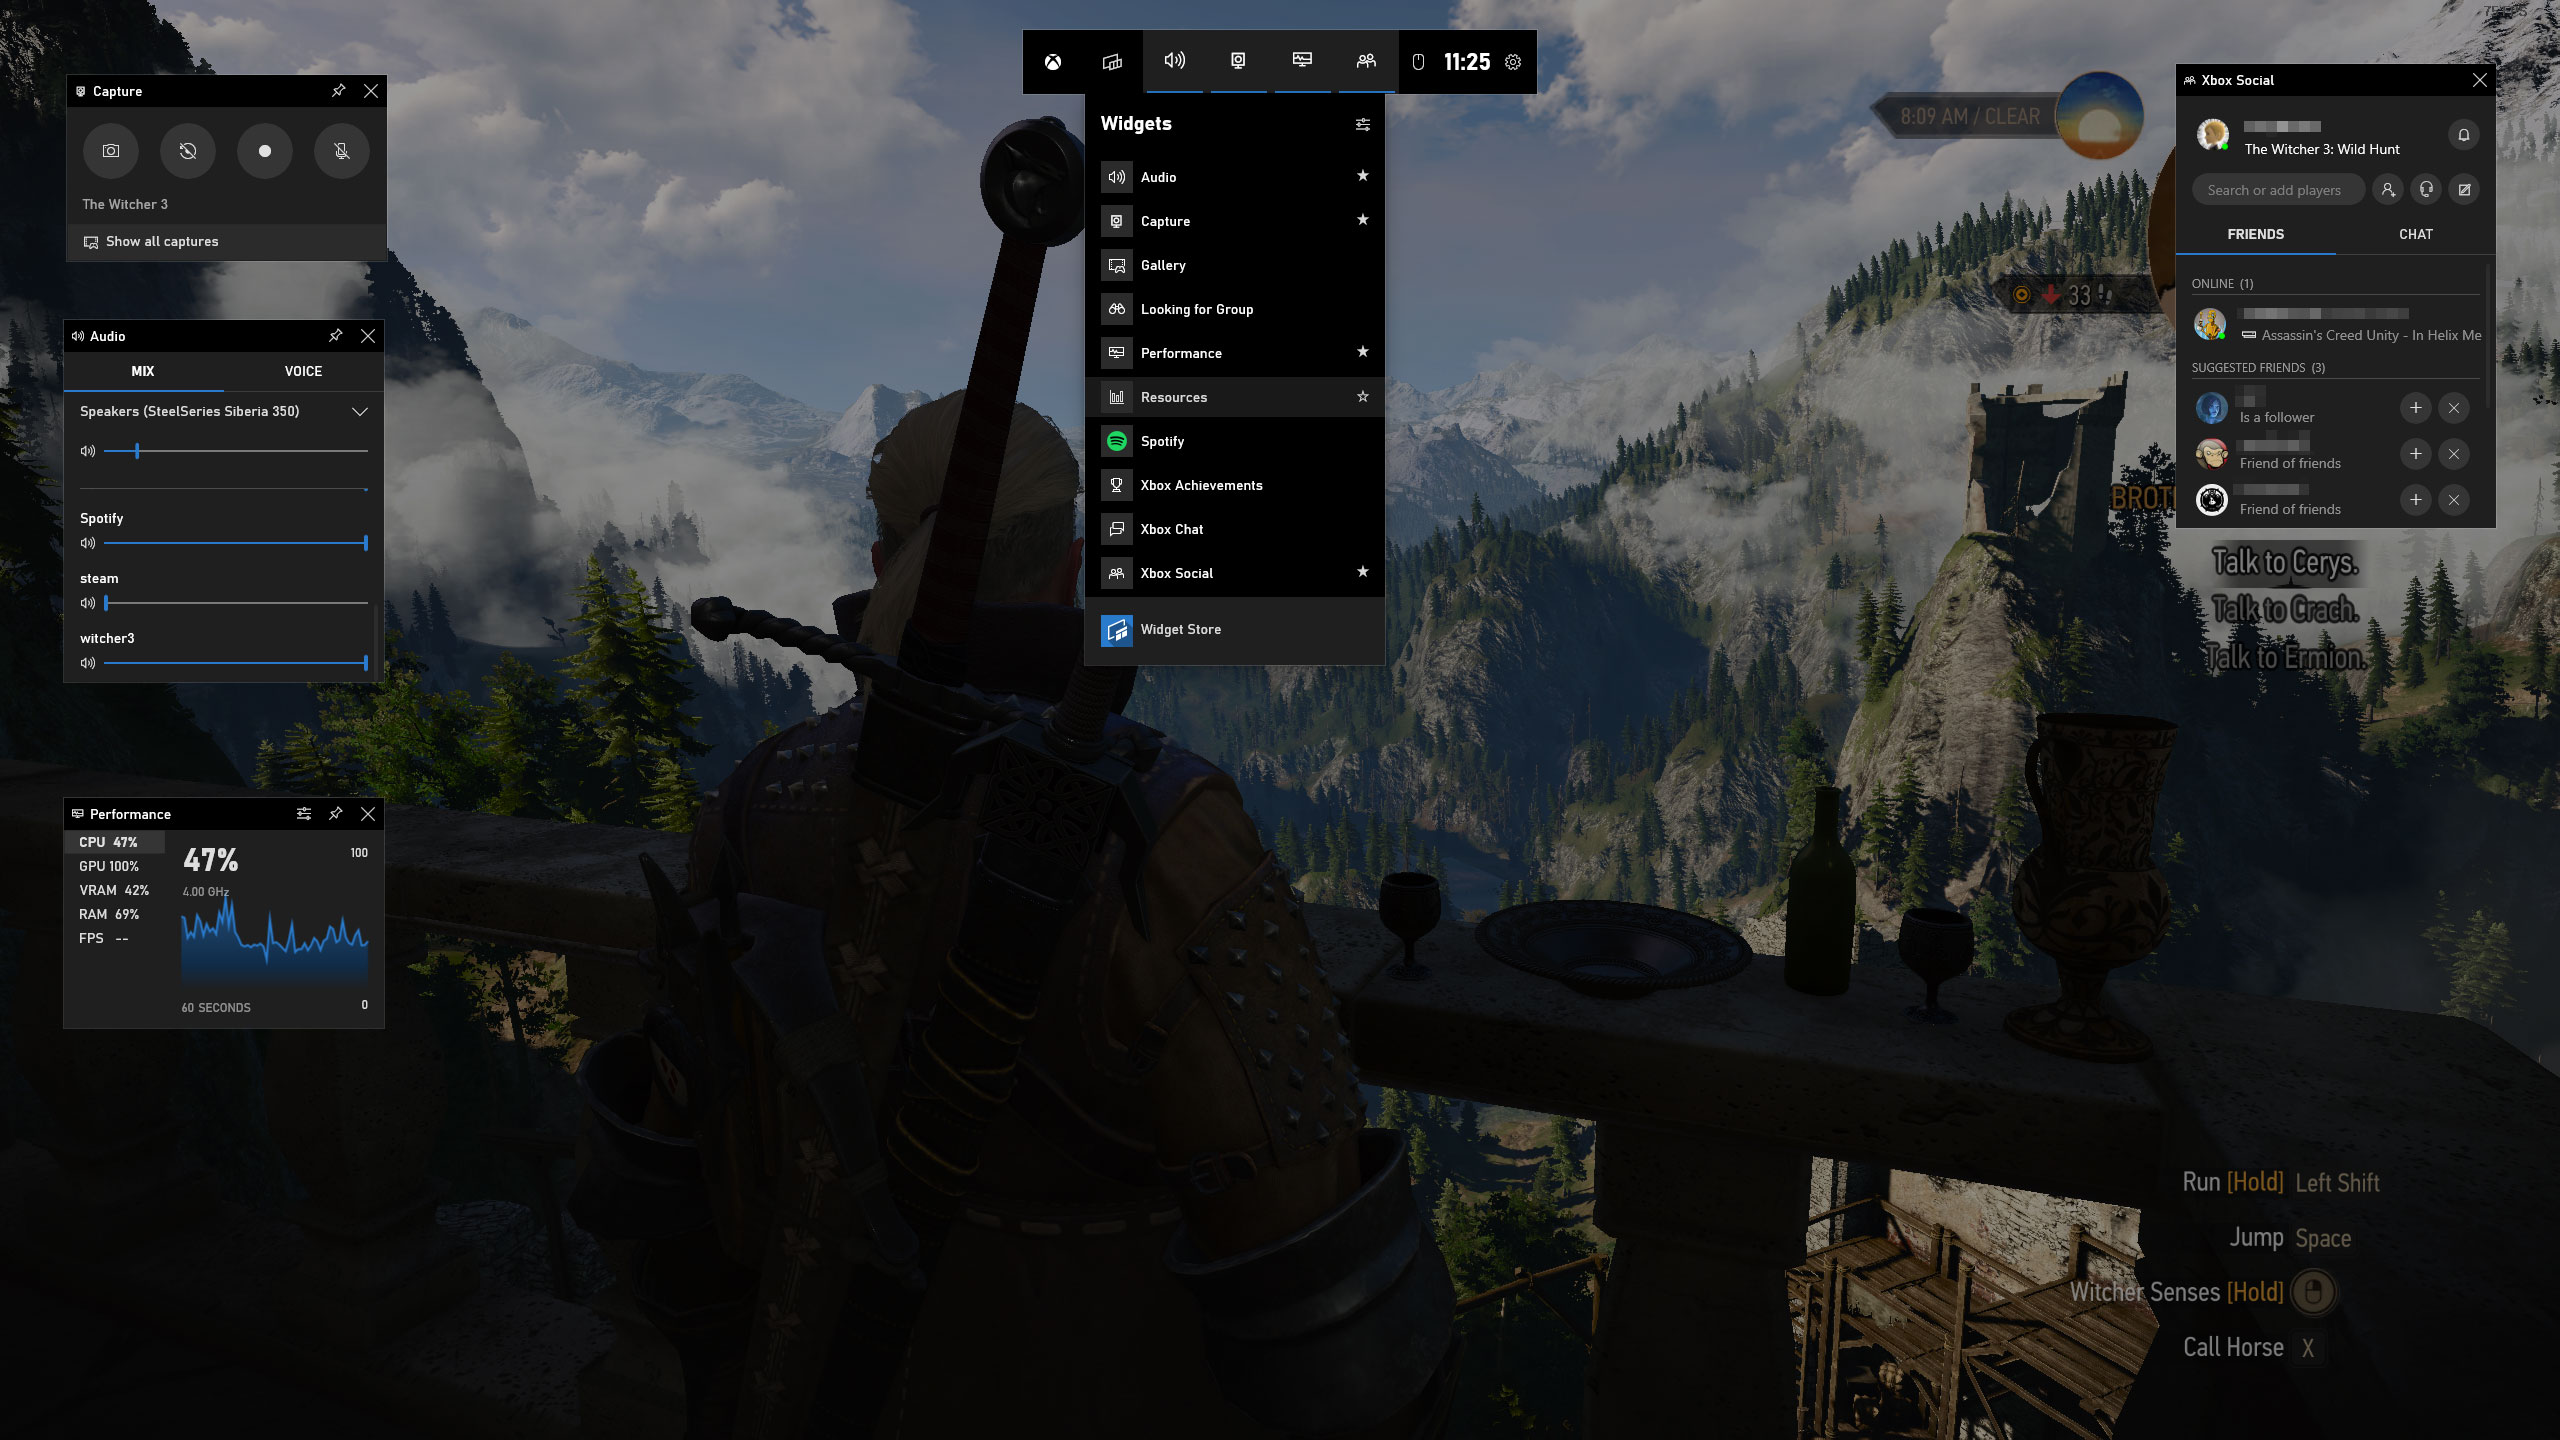
Press Win+G to open the Xbox Game Bar. At the top you will see a row of icons, with buttons for Widget Menu, Audio, Capture, Performance, Xbox Social, and Enable click-through. On the far-right is a button to open the settings menu.
Click a button to put the focus on its widget on-screen. Click it again to hide it, and once more to restore it to the overlay. The Widgets menu lets you show or hide widgets, add them to favourites (so they are always displayed), and find more to add to the overlay in the Widget Store.
3. Capture options
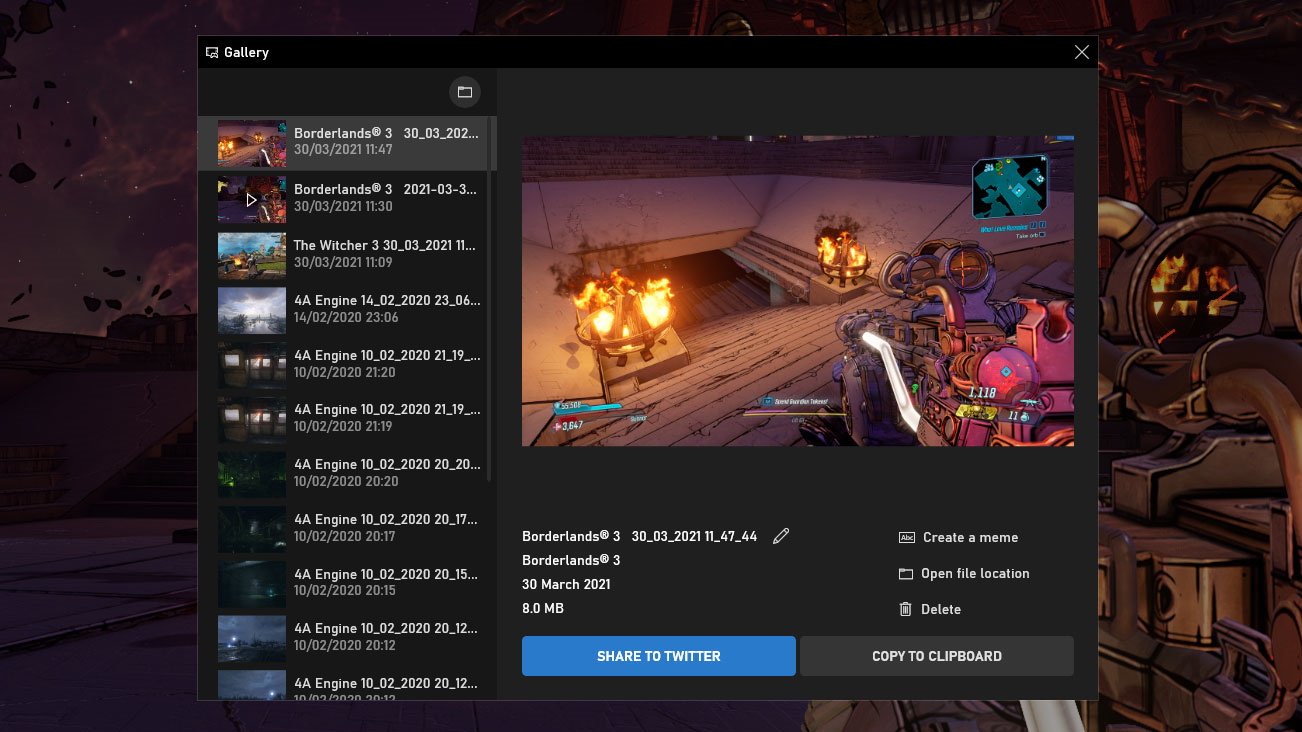
Click 'Show all captures' to see everything you have saved using the Game Bar. Select a file and you can share it to Twitter, copy it to the clipboard, rename it, delete it, or open its containing folder.
Sign up for breaking news, reviews, opinion, top tech deals, and more.
You can also “create a meme” by adding text to the top or bottom of a saved image, which can then be saved to your PC.
By default, in the top-left corner of the Game Bar overlay is the Capture widget. Here, you can manually take a screenshot, save the last 30 seconds of gameplay, begin recording game footage, and enable or disable the microphone while recording.
4. Audio settings
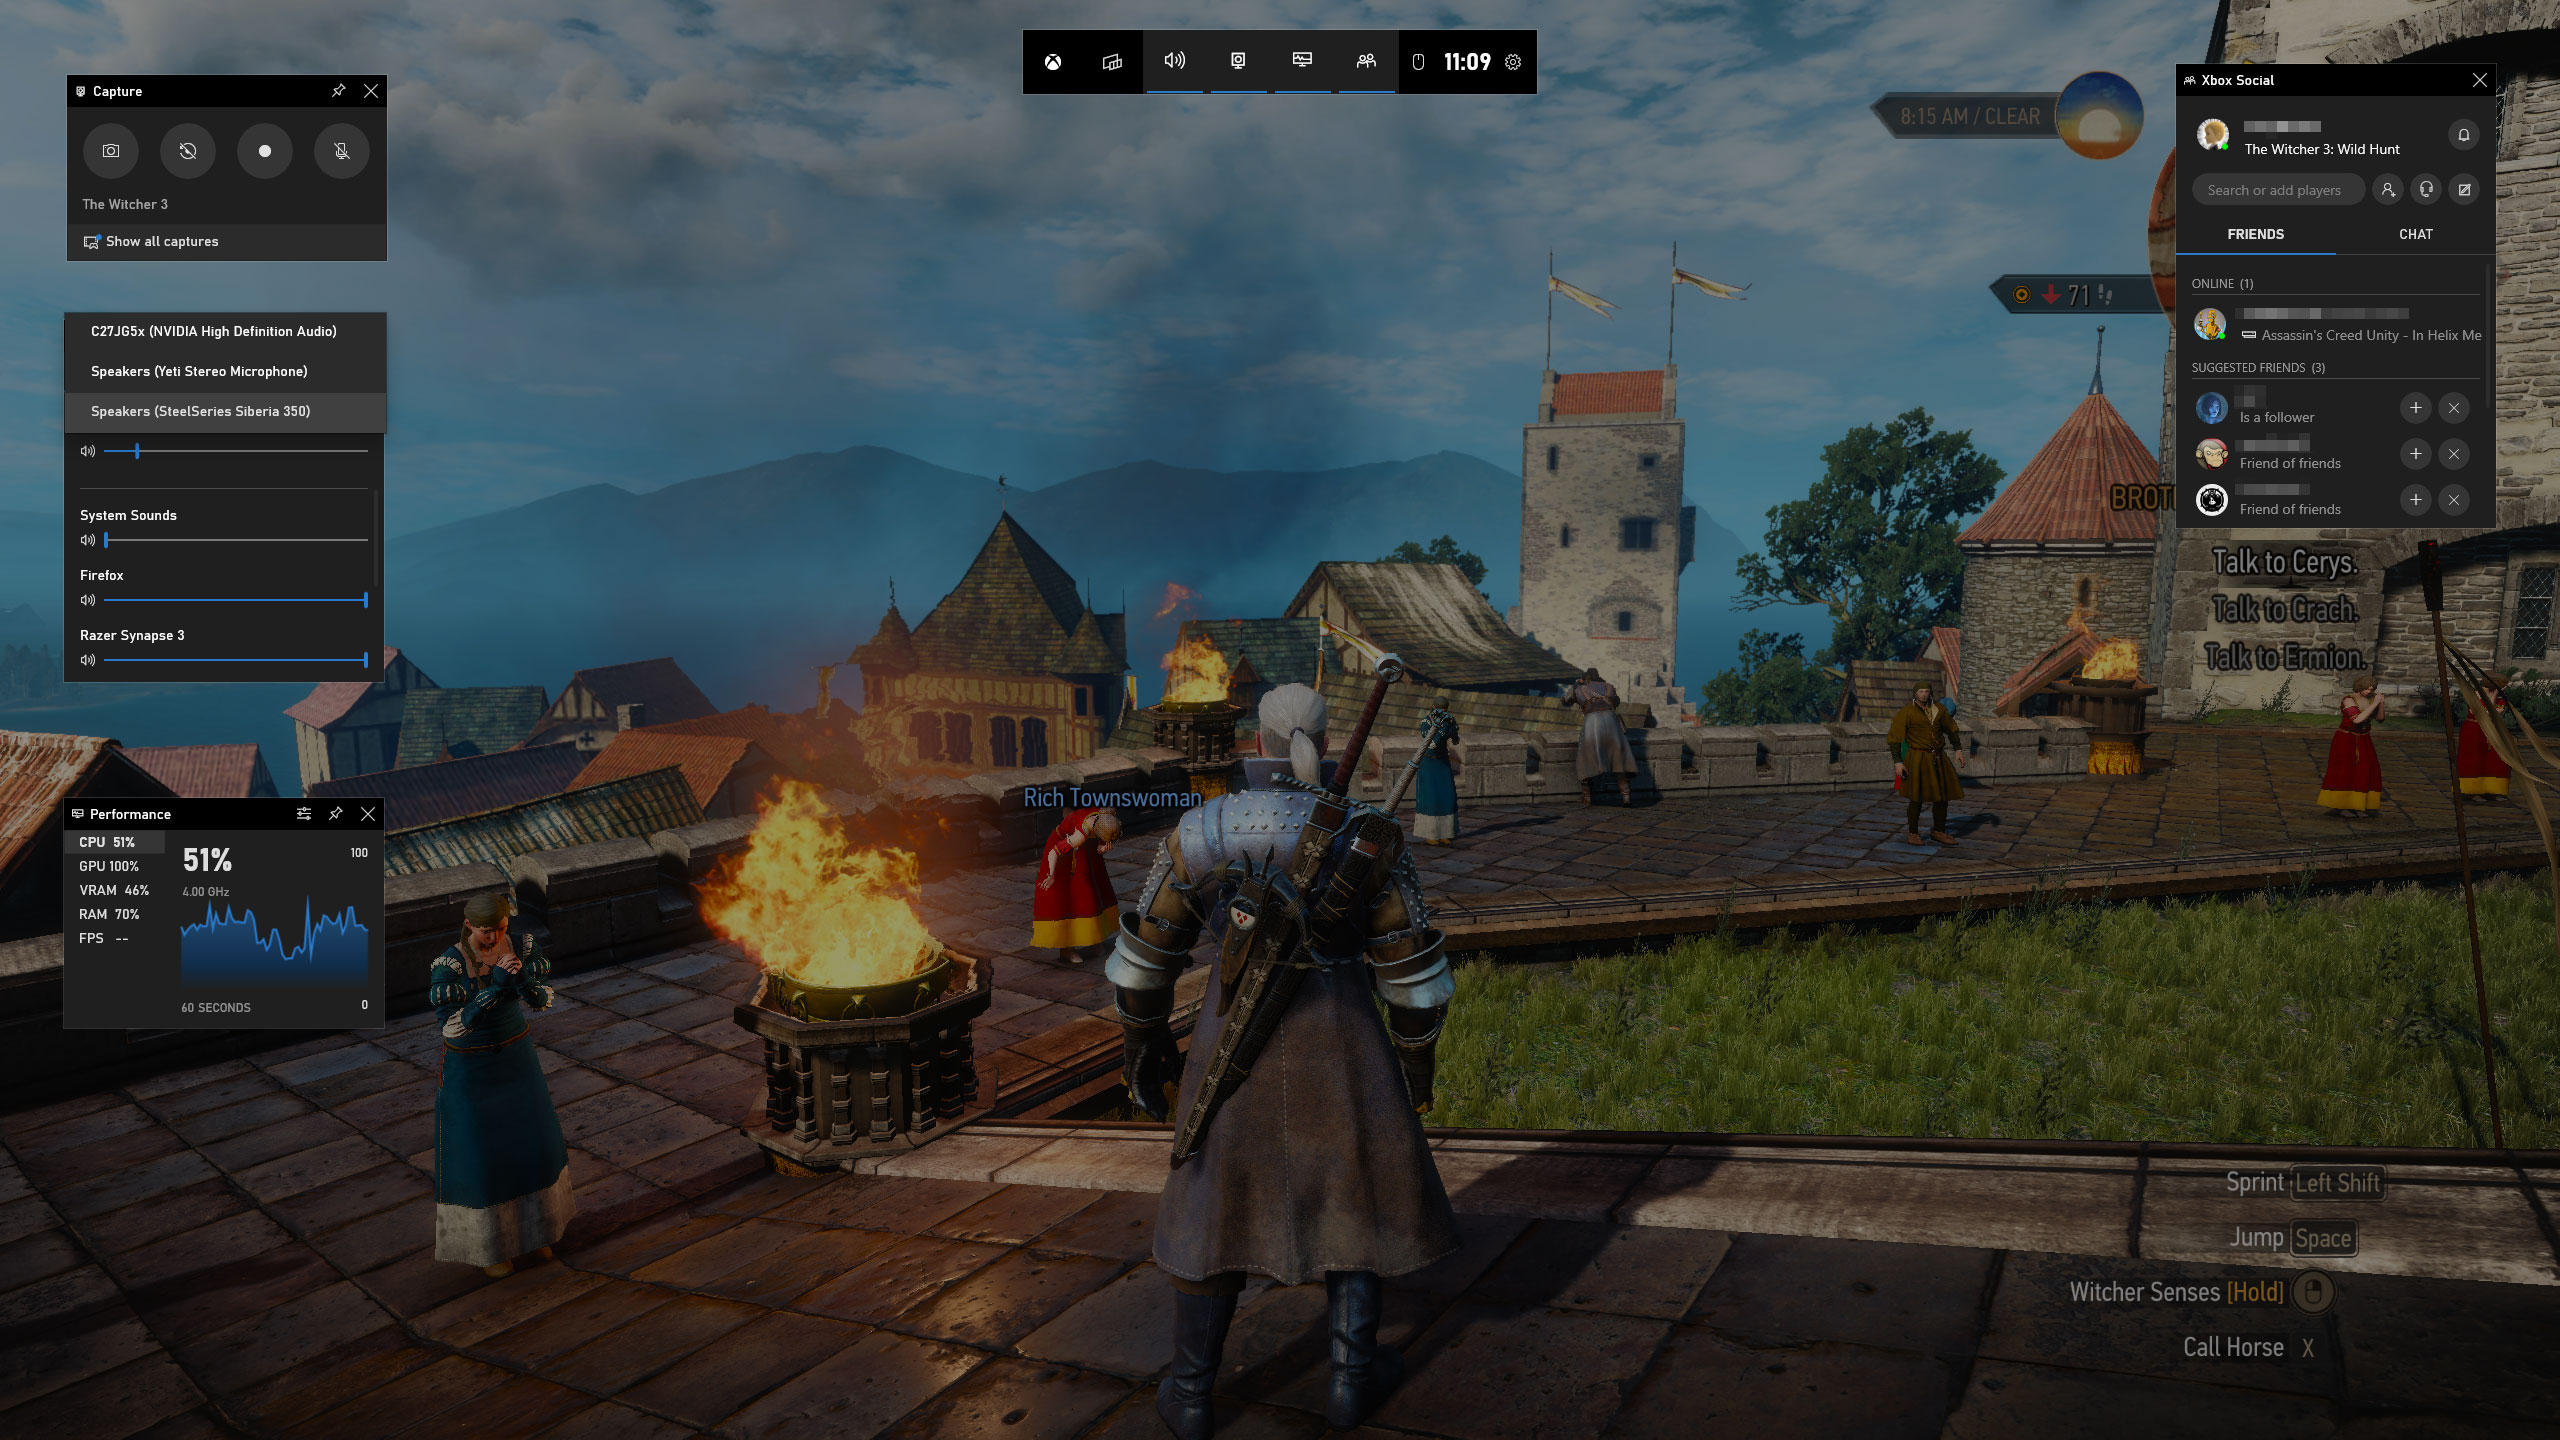
You can tweak these individually, helping you keep a good balance instead of simply turning the master volume up or down. You can mute channels individually, too. Change the output device by clicking its name on the Mix tab; you can do the same for input on the 'Voice' tab.
The Audio widget has some helpful controls to quickly adjust audio levels on the fly. Under the Mix tab, you will see volume levels for different apps you have open, including the main master volume and the game you are running.
5. Performance information
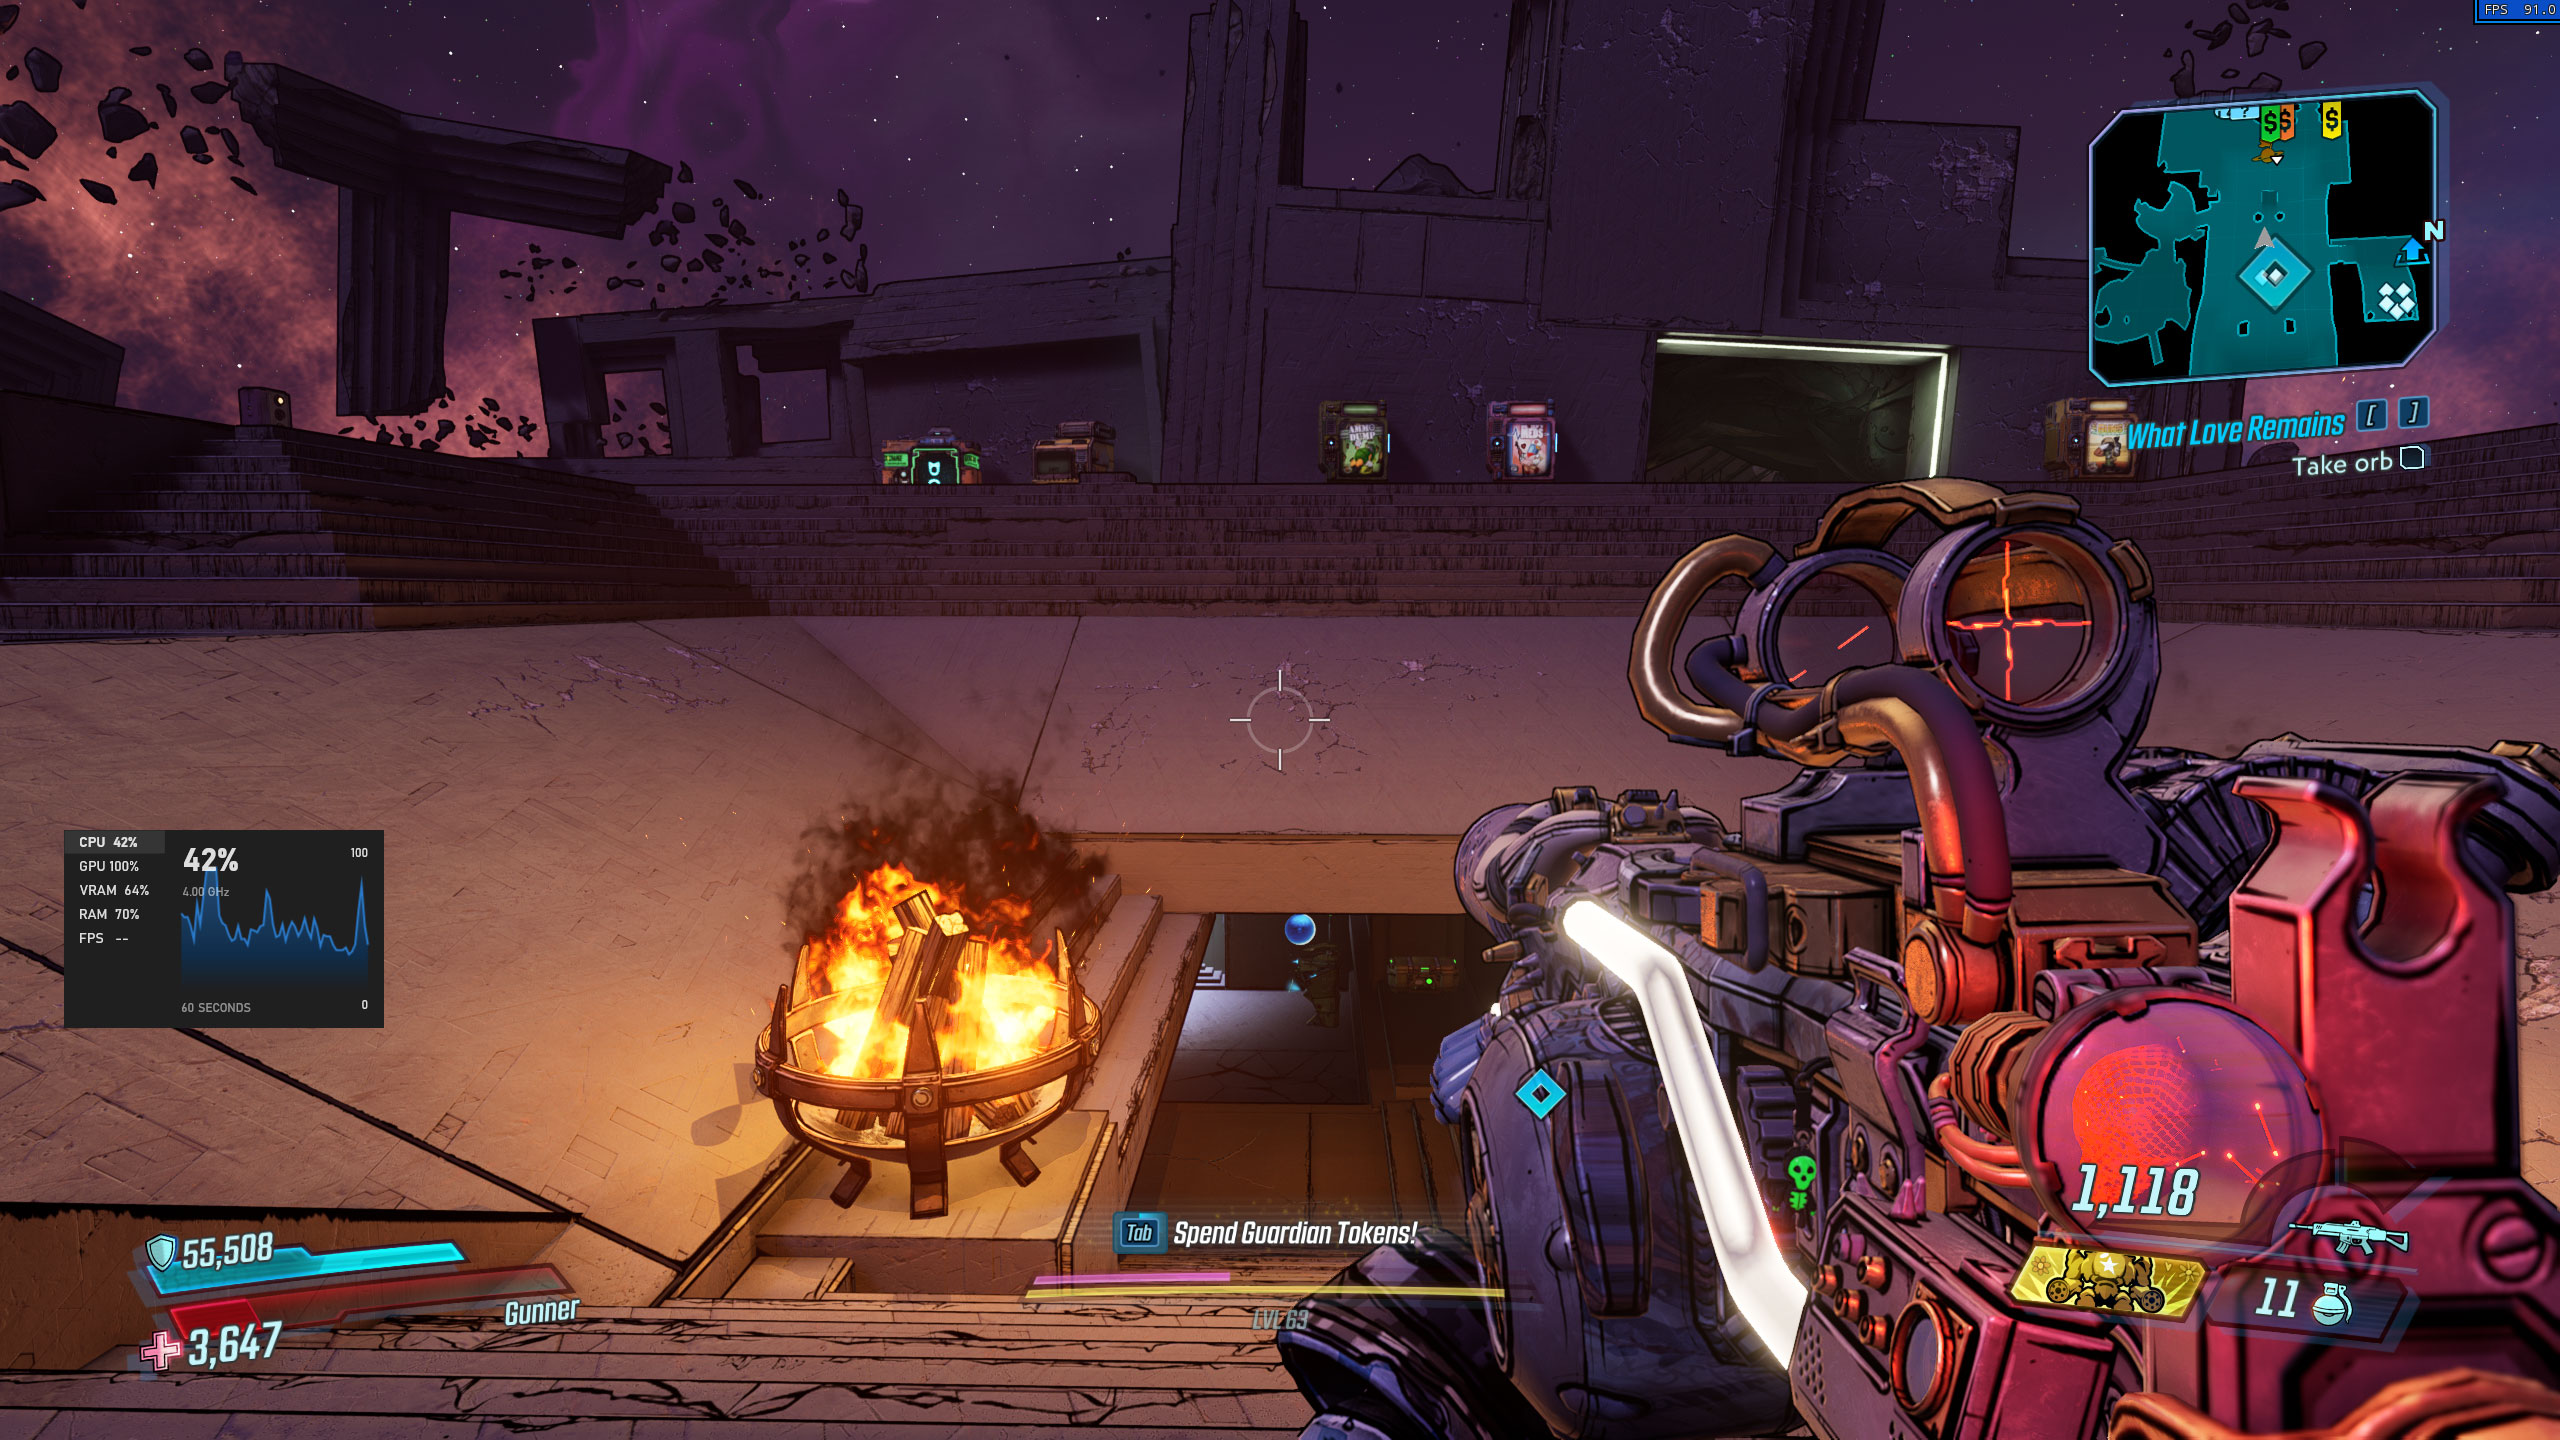
At the top of the widget is an options button. Click it to change what it shows and how it looks when it is pinned. Enable the “Override default transparency” checkbox and turn up the slider a little – this reduces the widget’s opacity so that it does not block out areas of your game.
Some games are true resource hogs, while at other times a background app can starve your game of what it needs to run well. In times like this, the Performance widget is a great tool. It shows readouts for CPU, GPU, VRAM, RAM, and FPS – click on one to see a graph of its performance.
6. Xbox Social
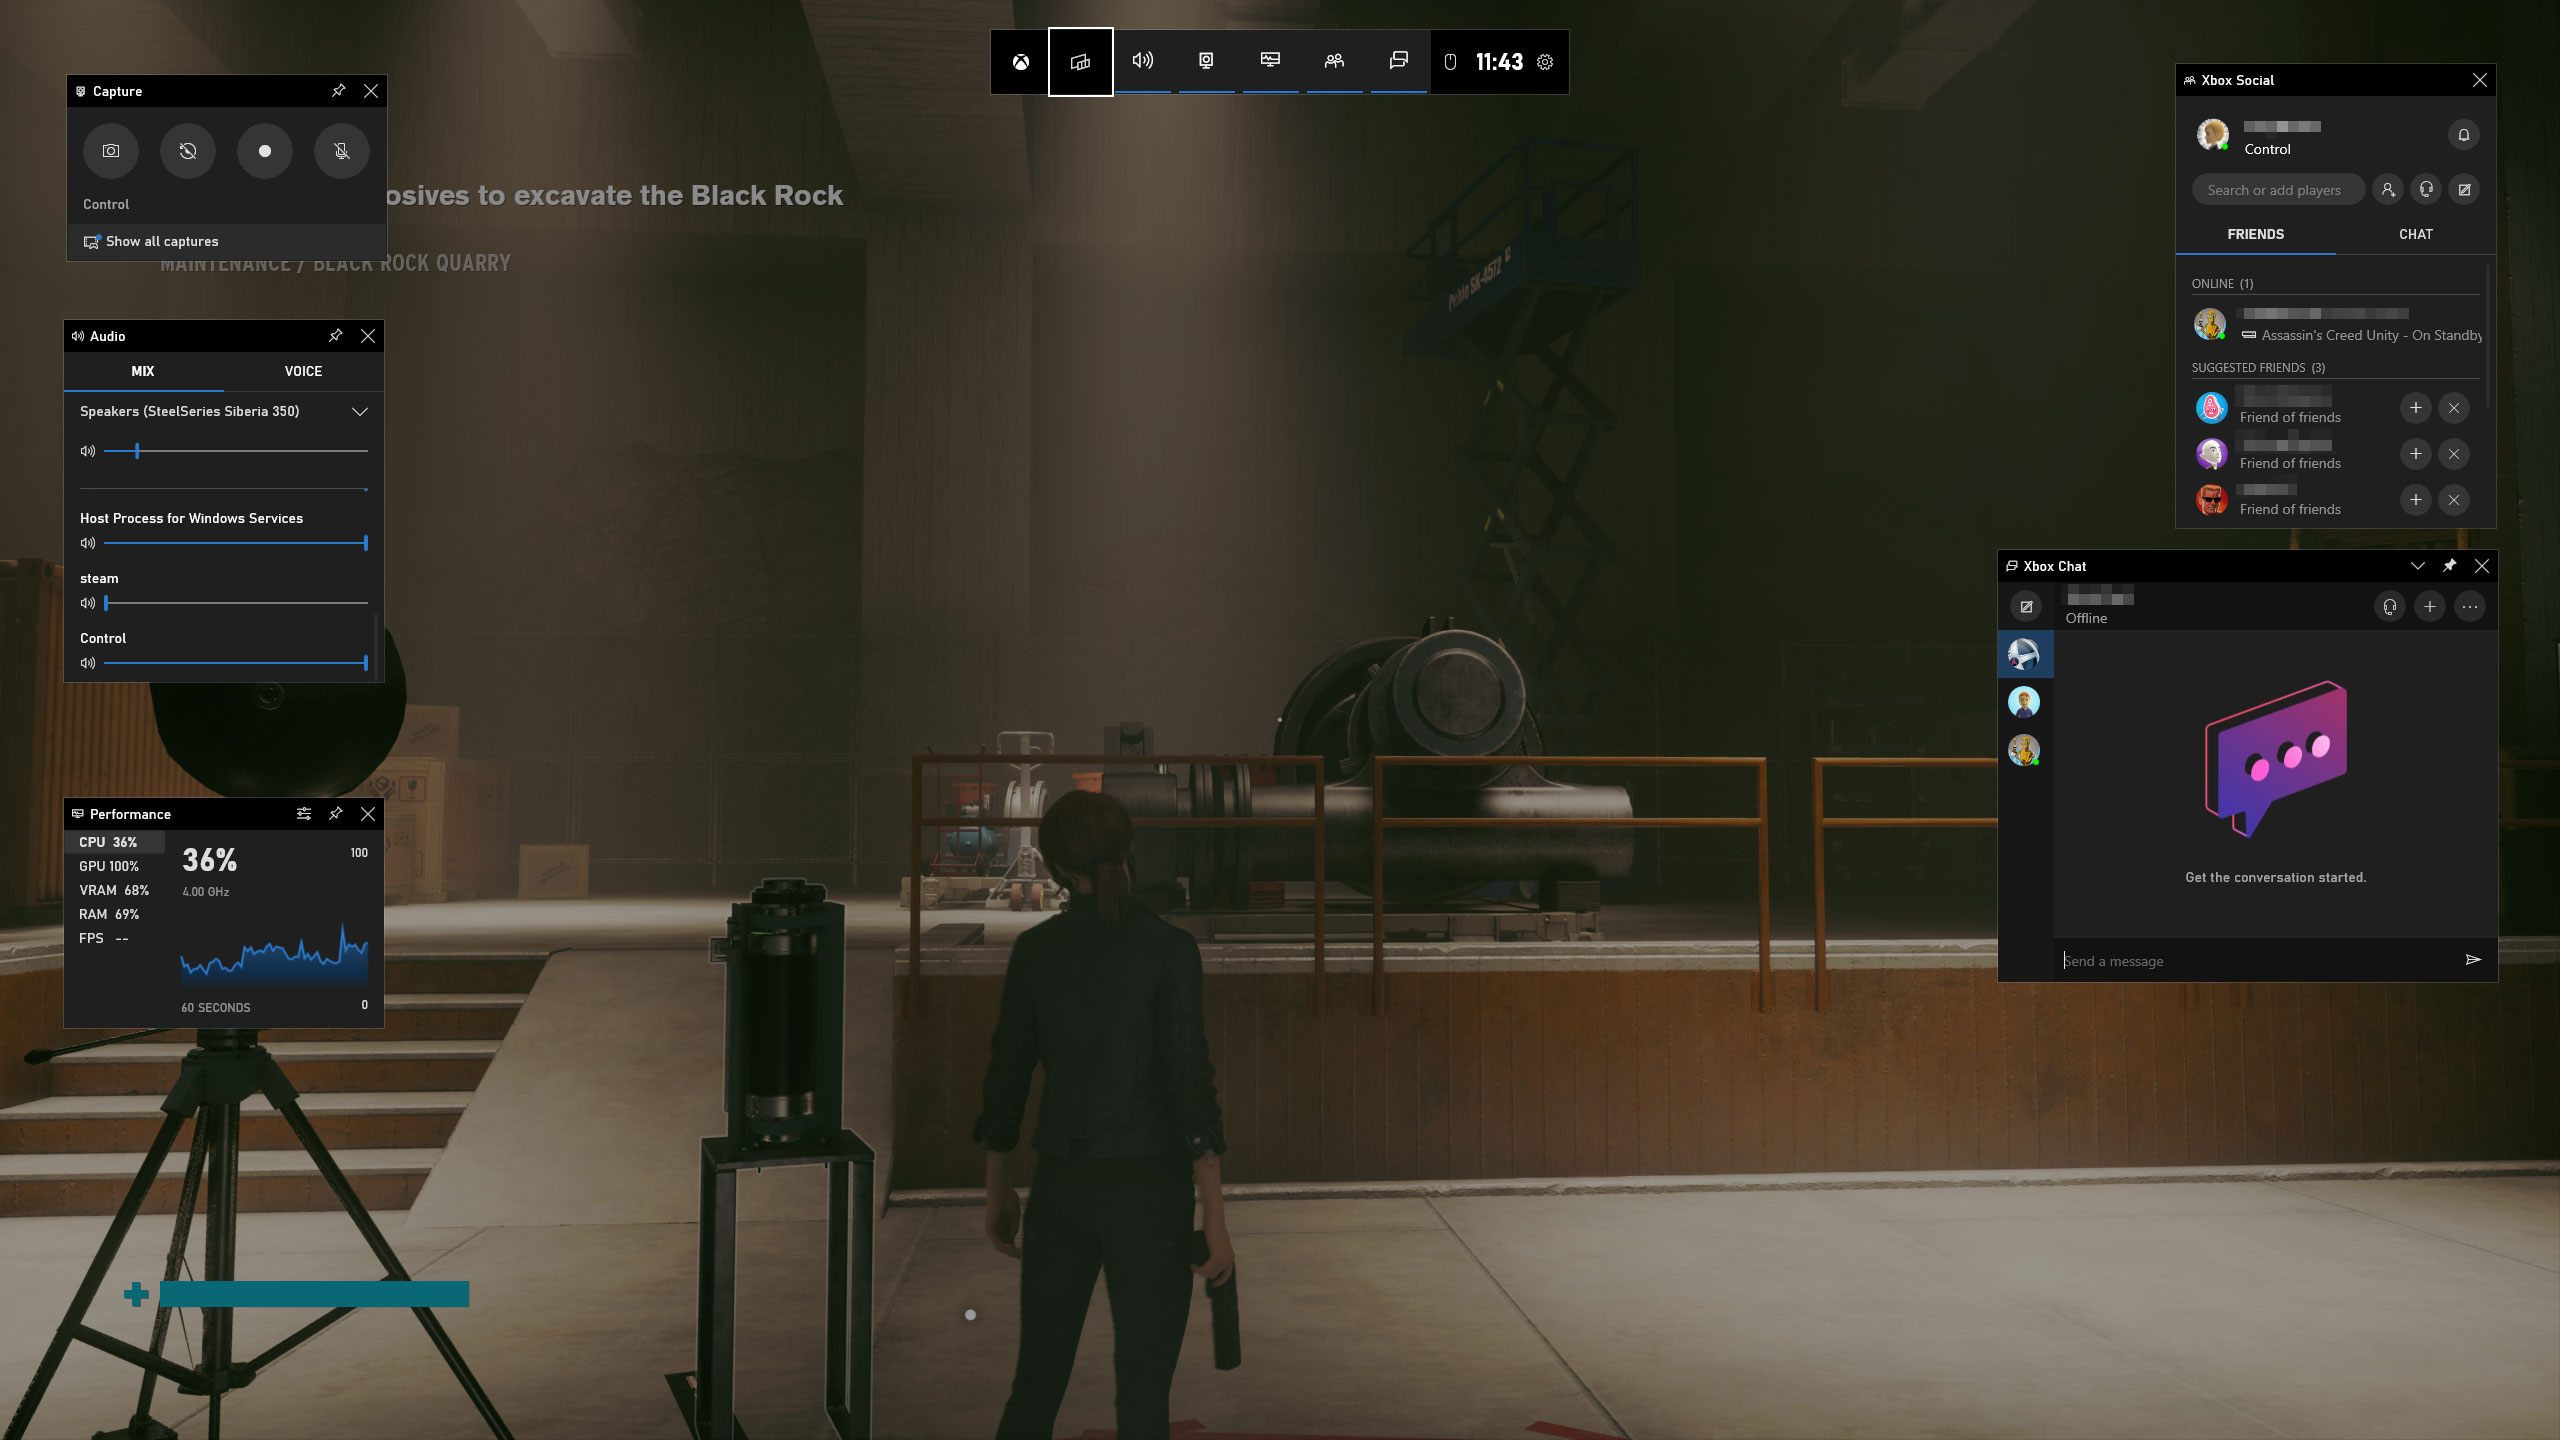
The Xbox Social widget also houses a list of suggested friends based on your current contacts, plus notifications and ongoing chat threads. Like the performance widget, this is a good one to pin while you are playing so you can keep the conversation going without having to constantly switch apps.
Got friends who game on Windows 10 or Xbox? They will show up in the Social widget. Double-click a friend’s name to open a chat window, where you can also invite them to voice chat, add people to the conversation, or pin the widget.
7. The Settings app
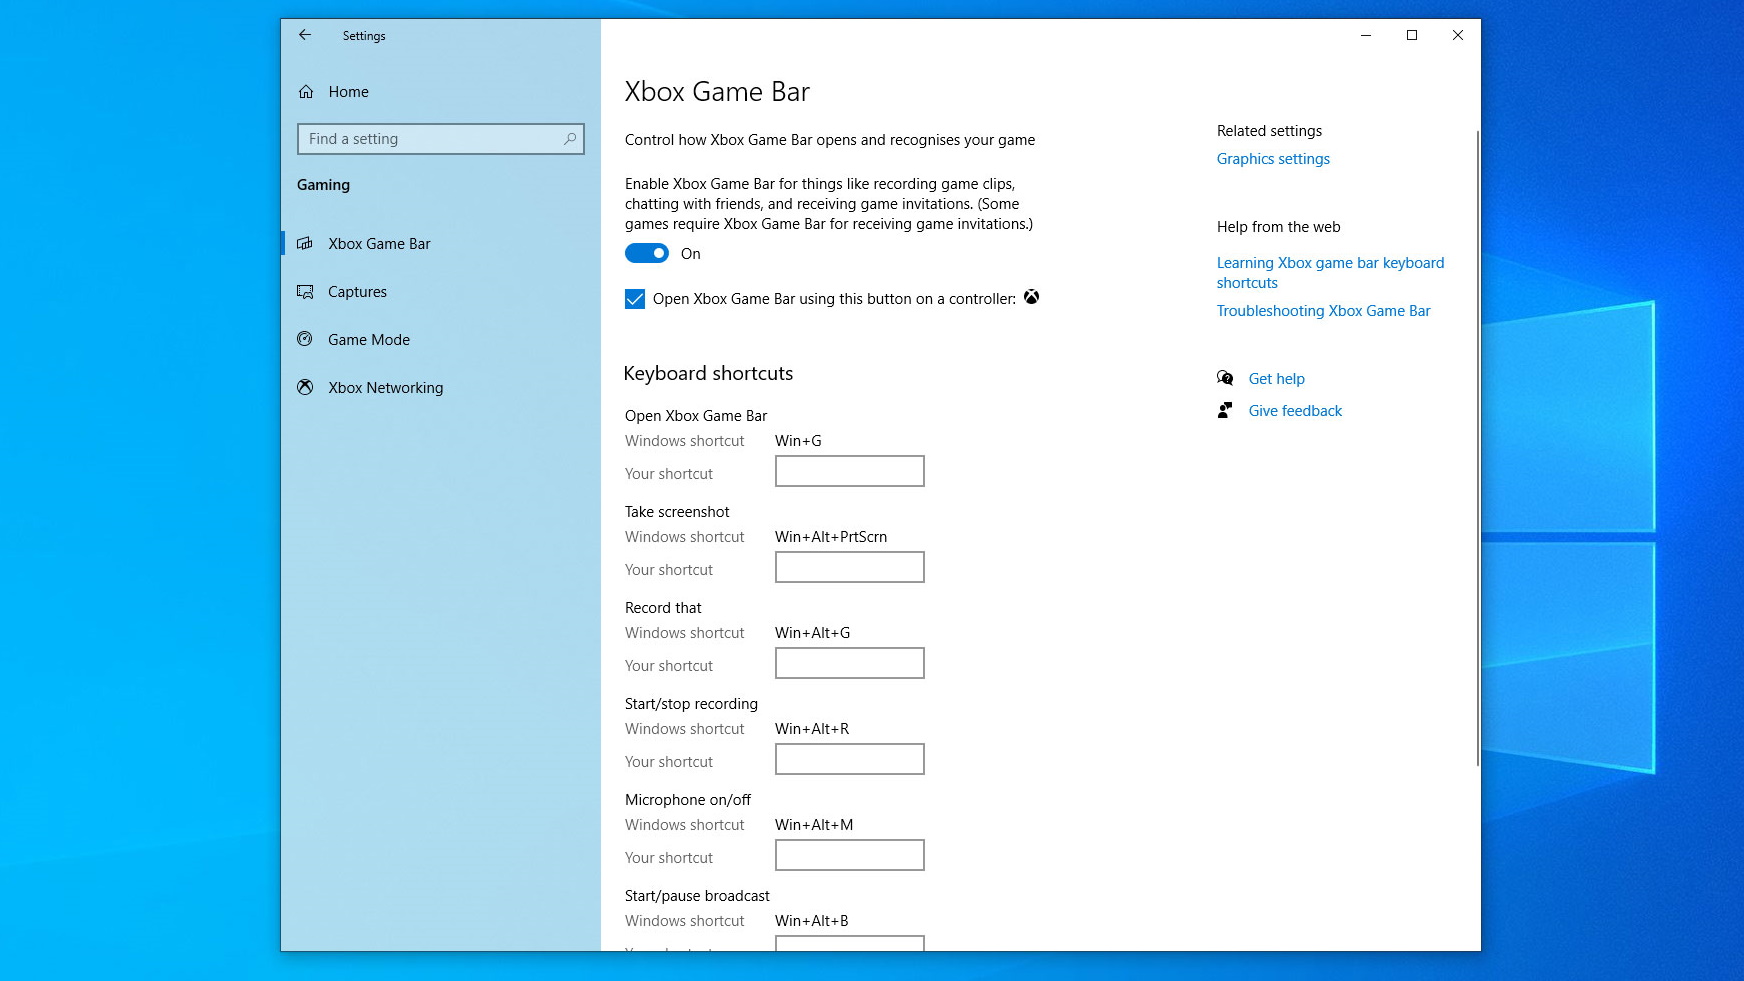
You can also tweak things in the Settings app rather than through the overlay. Open the Settings app from the Start menu, then click Gaming, then Xbox Game Bar in the left-hand sidebar. At the top is an option to enable or disable the Xbox Game Bar altogether. Below that, you can choose to open the Game Bar using the Xbox button on an Xbox controller.
Underneath is a list of keyboard shortcuts with default options selected. You can set your own shortcuts for various functions by clicking the box next to “Your shortcut” and entering a key combination.
8. Captures
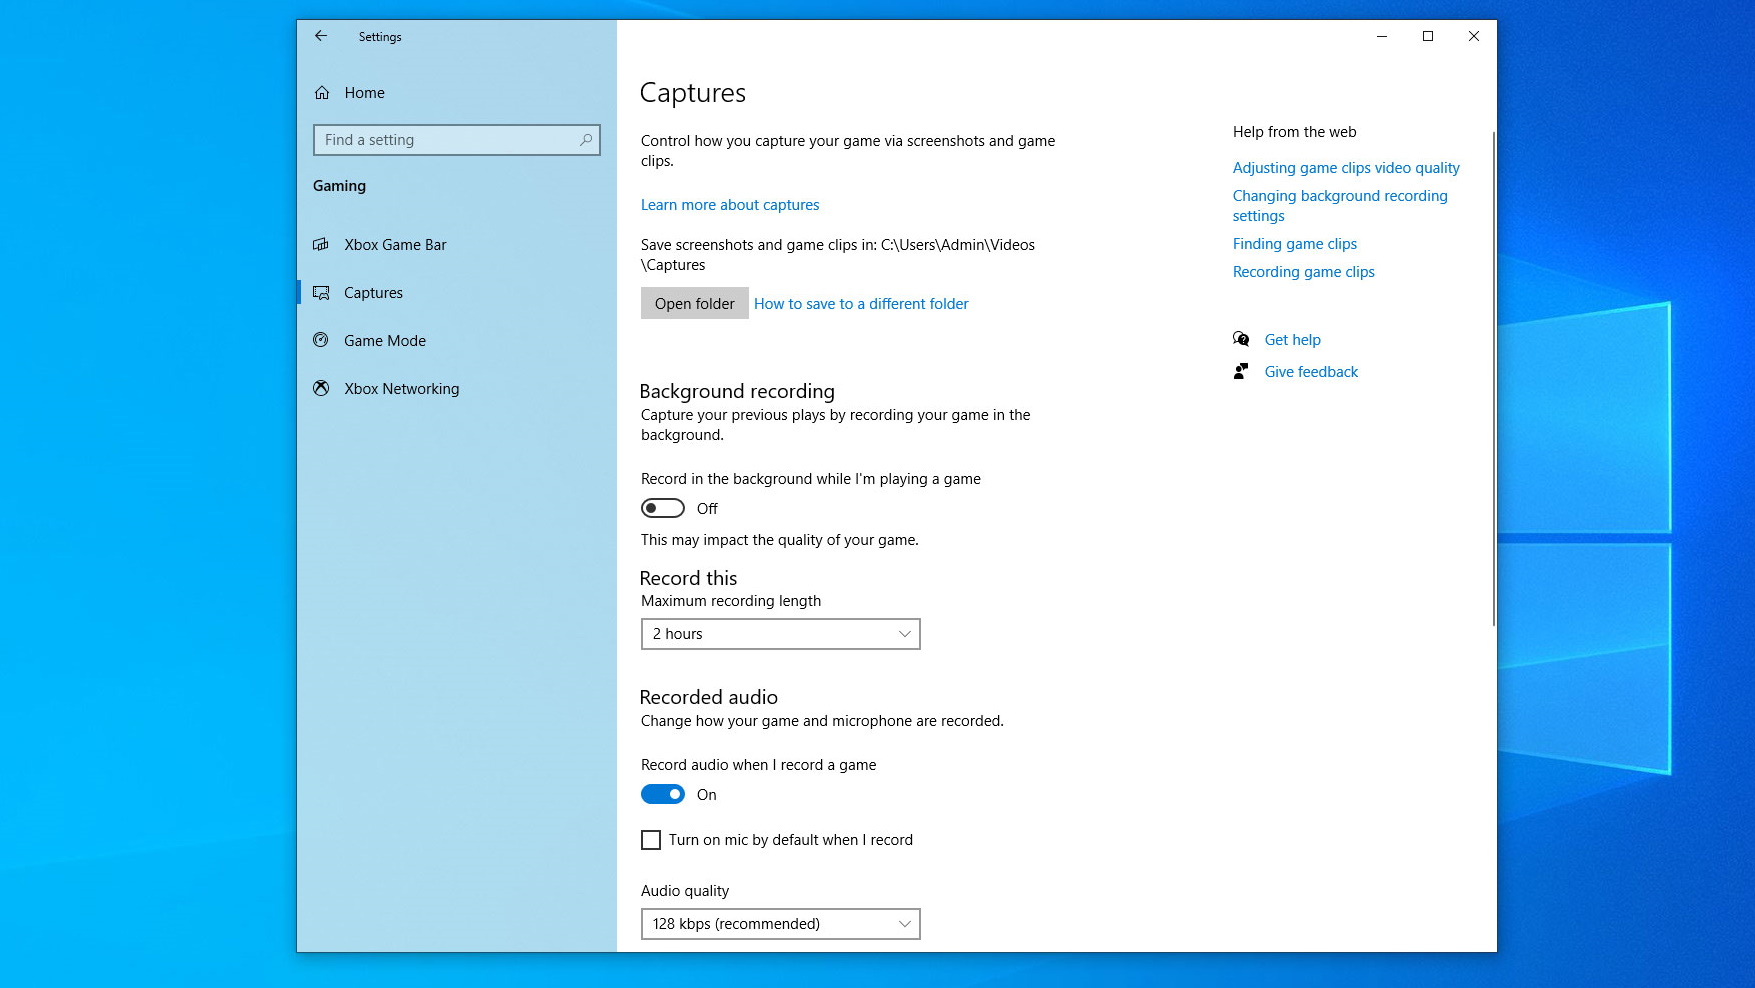
Scroll down to find settings for audio and video quality. There are some useful controls here, such as whether to record in 30fps or 60fps and whether your microphone is automatically turned on when you start recording.
In the left-hand sidebar, click 'Captures'. Here, you can change how and where your recorded images and videos are saved. Note that Windows will still find your Captures folder even if you move it elsewhere. Background recording, meanwhile, is useful if you do not want to lose a key moment of gameplay that you were not manually recording.
9. Game Mode
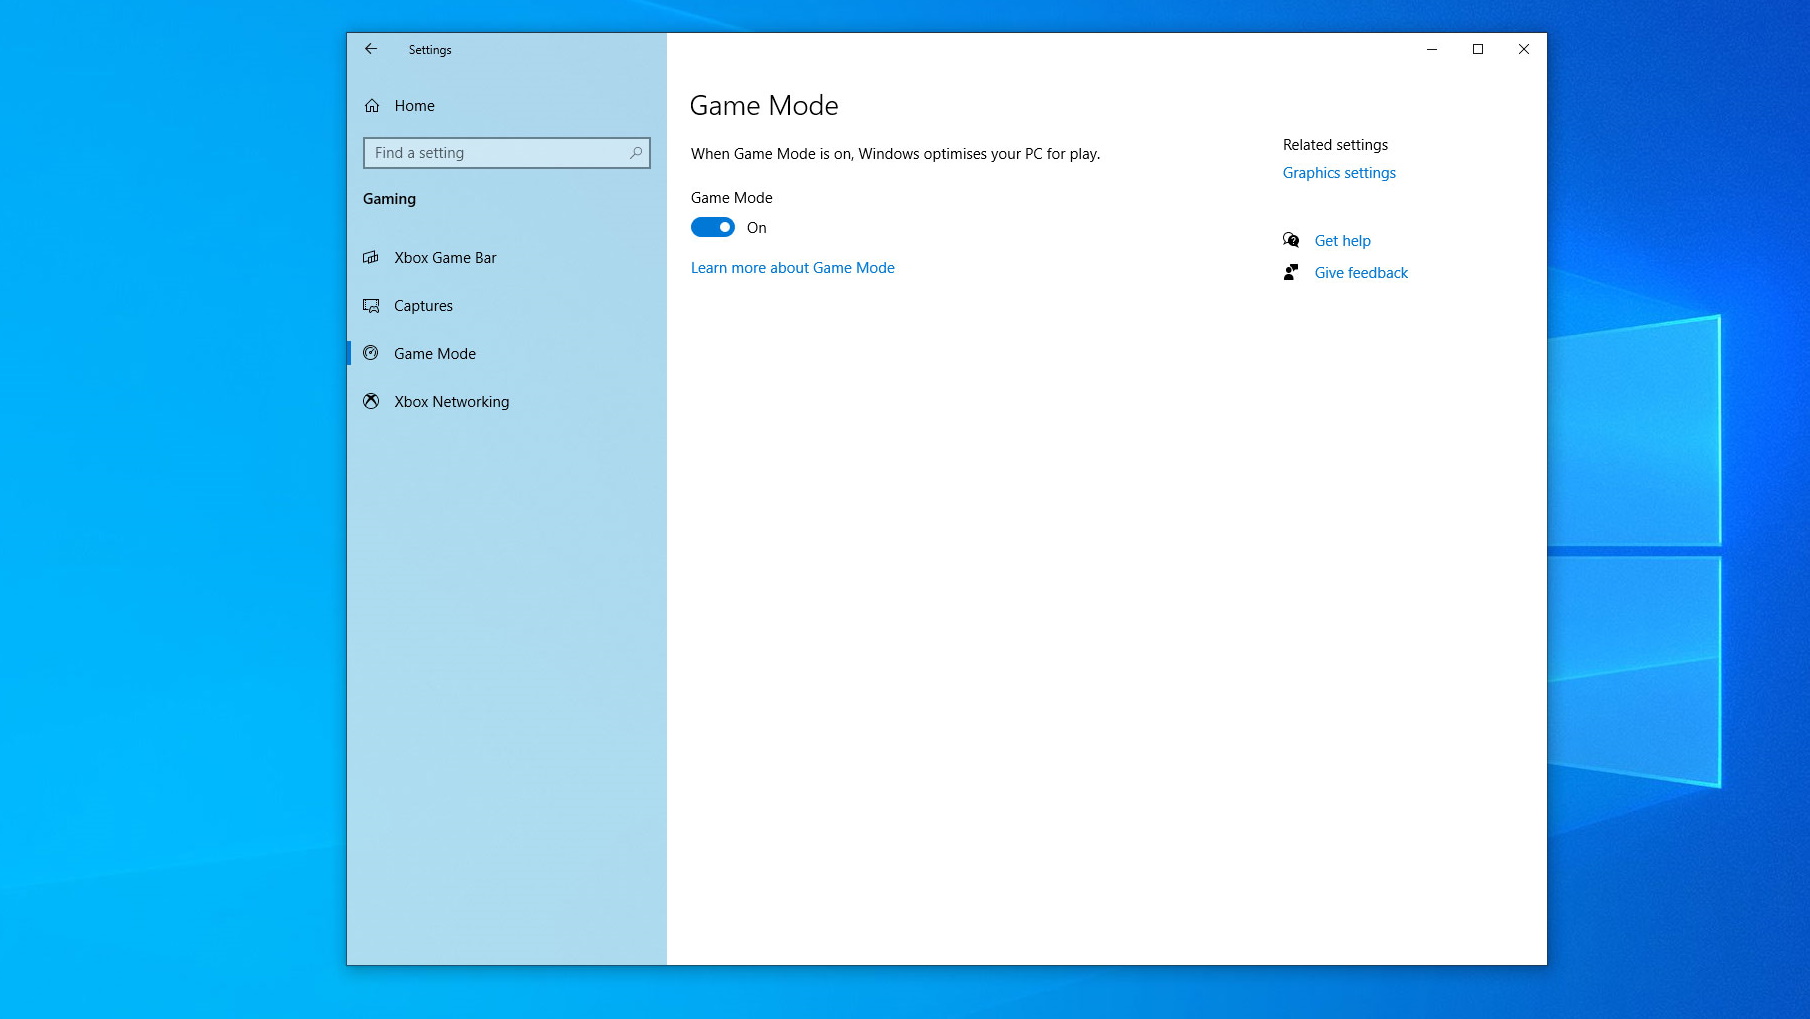
The third section in the sidebar is for Game Mode. The description says this “Helps achieve a more stable frame rate depending on the specific game and system,” although that is a little vague. In practice, this means your game gets more CPU and GPU resources compared to other apps.
This might help boost your game’s performance if it is competing for resources with other heavy-duty apps. However, it could also impact multitasking performance (like watching a video in the background), so try disabling it if you notice your game stutters or is otherwise negatively impacted with it turned on.
10. Xbox Networking
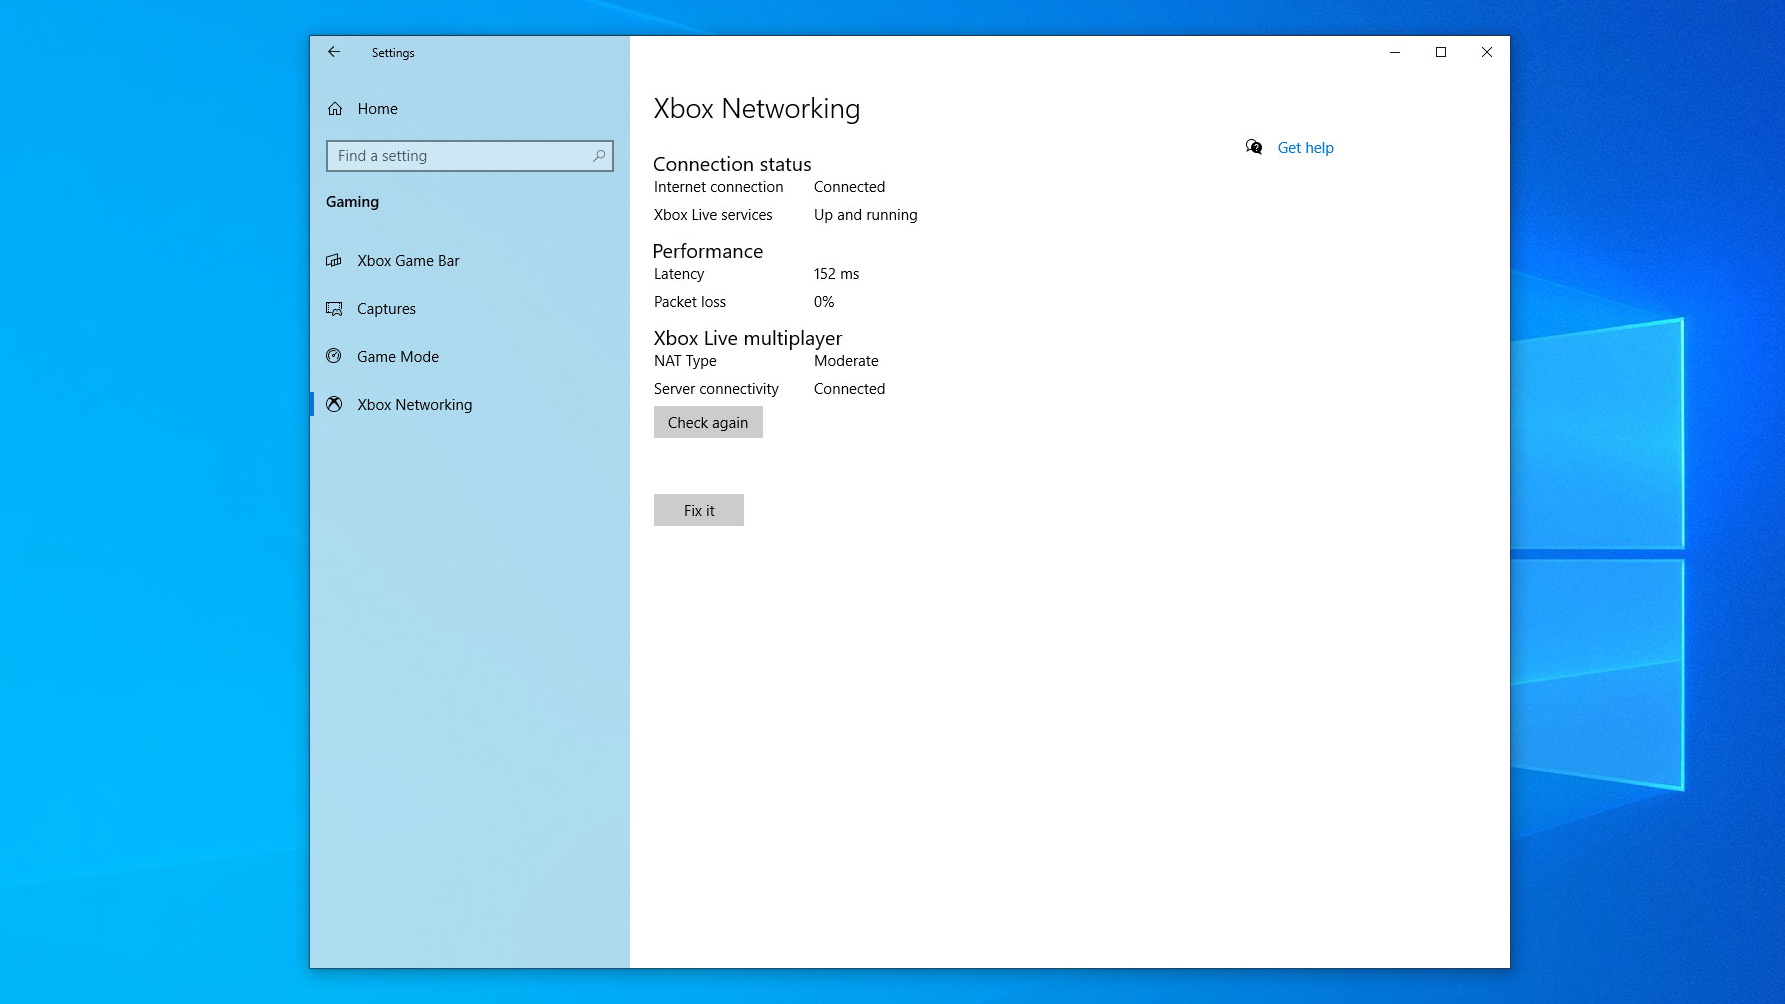
Finally, click 'Xbox Networking' in the sidebar. This section is useful for checking up on your connection. It displays the status of your internet connection and whether Xbox Live services are working. Below this, latency and packet loss are also shown, and you can see your NAT type and server connectivity under Xbox Live multiplayer.
After checking, you might see problems or errors here. If so, click Fix it and Windows will attempt to resolve the issue. If that does not work, try the steps at the Xbox support site.

Alex Blake has been fooling around with computers since the early 1990s, and since that time he's learned a thing or two about tech. No more than two things, though. That's all his brain can hold. As well as TechRadar, Alex writes for iMore, Digital Trends and Creative Bloq, among others. He was previously commissioning editor at MacFormat magazine. That means he mostly covers the world of Apple and its latest products, but also Windows, computer peripherals, mobile apps, and much more beyond. When not writing, you can find him hiking the English countryside and gaming on his PC.