How to use Photos in macOS Ventura - from moving videos from iOS, to editing
Get to grips with everything the built-in Photos app offers
Sign up for breaking news, reviews, opinion, top tech deals, and more.
You are now subscribed
Your newsletter sign-up was successful
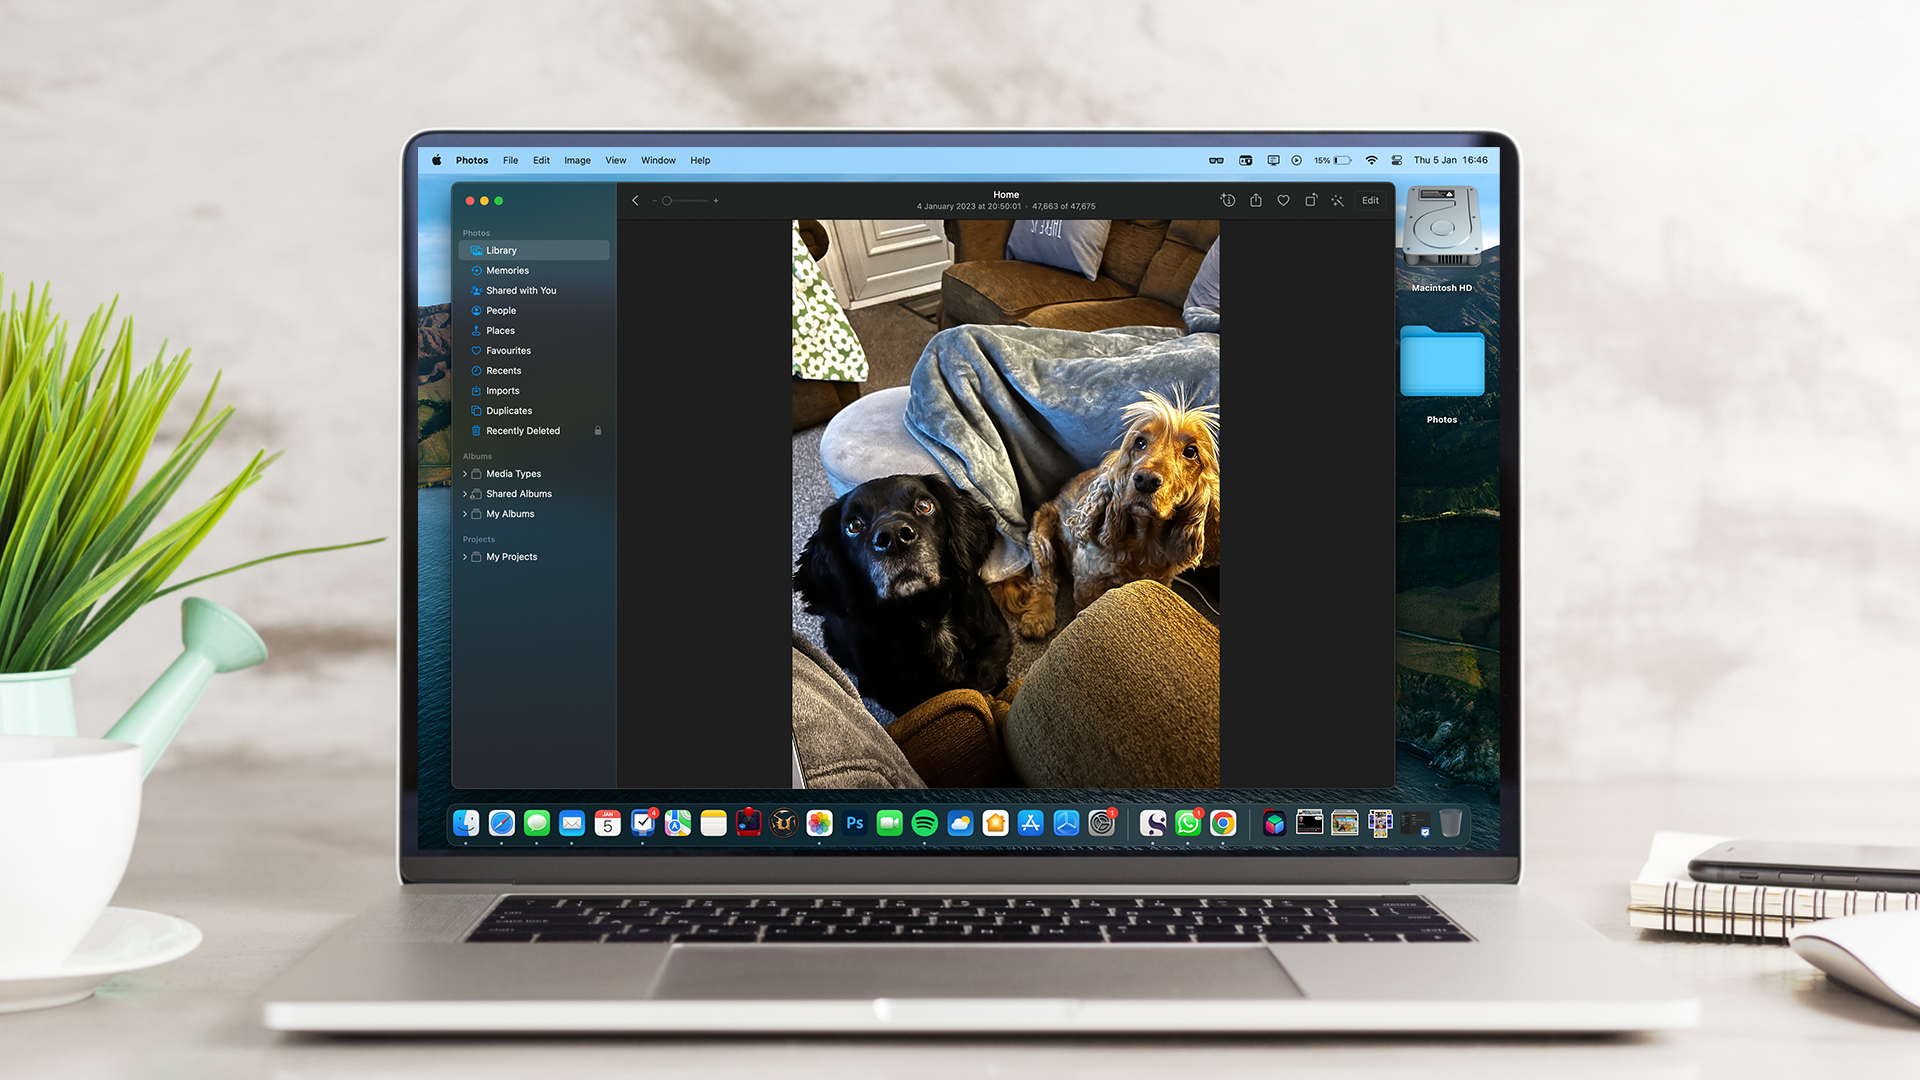
The Photos app has been a part of macOS for so long, it is almost possible to forget that it's there -- but it is fabulously useful. Much more than simply a tool for viewing your digital snaps and videos, in macOS Ventura, Photos has developed into a complete image management utility.
That's also thanks to iCloud, where you can take a photo on your iPhone and see it 'magically' appear on your Mac or iPad without doing any additional work to make that so.
However, as the years pass, some features could have gone under the radar for you, which is why we've created this guide to showcase some of the best features of Apple's Photos app in macOS.
Tools and Requirements
- macOS Ventura
- Photos app
Step by step guide
1. Importing media
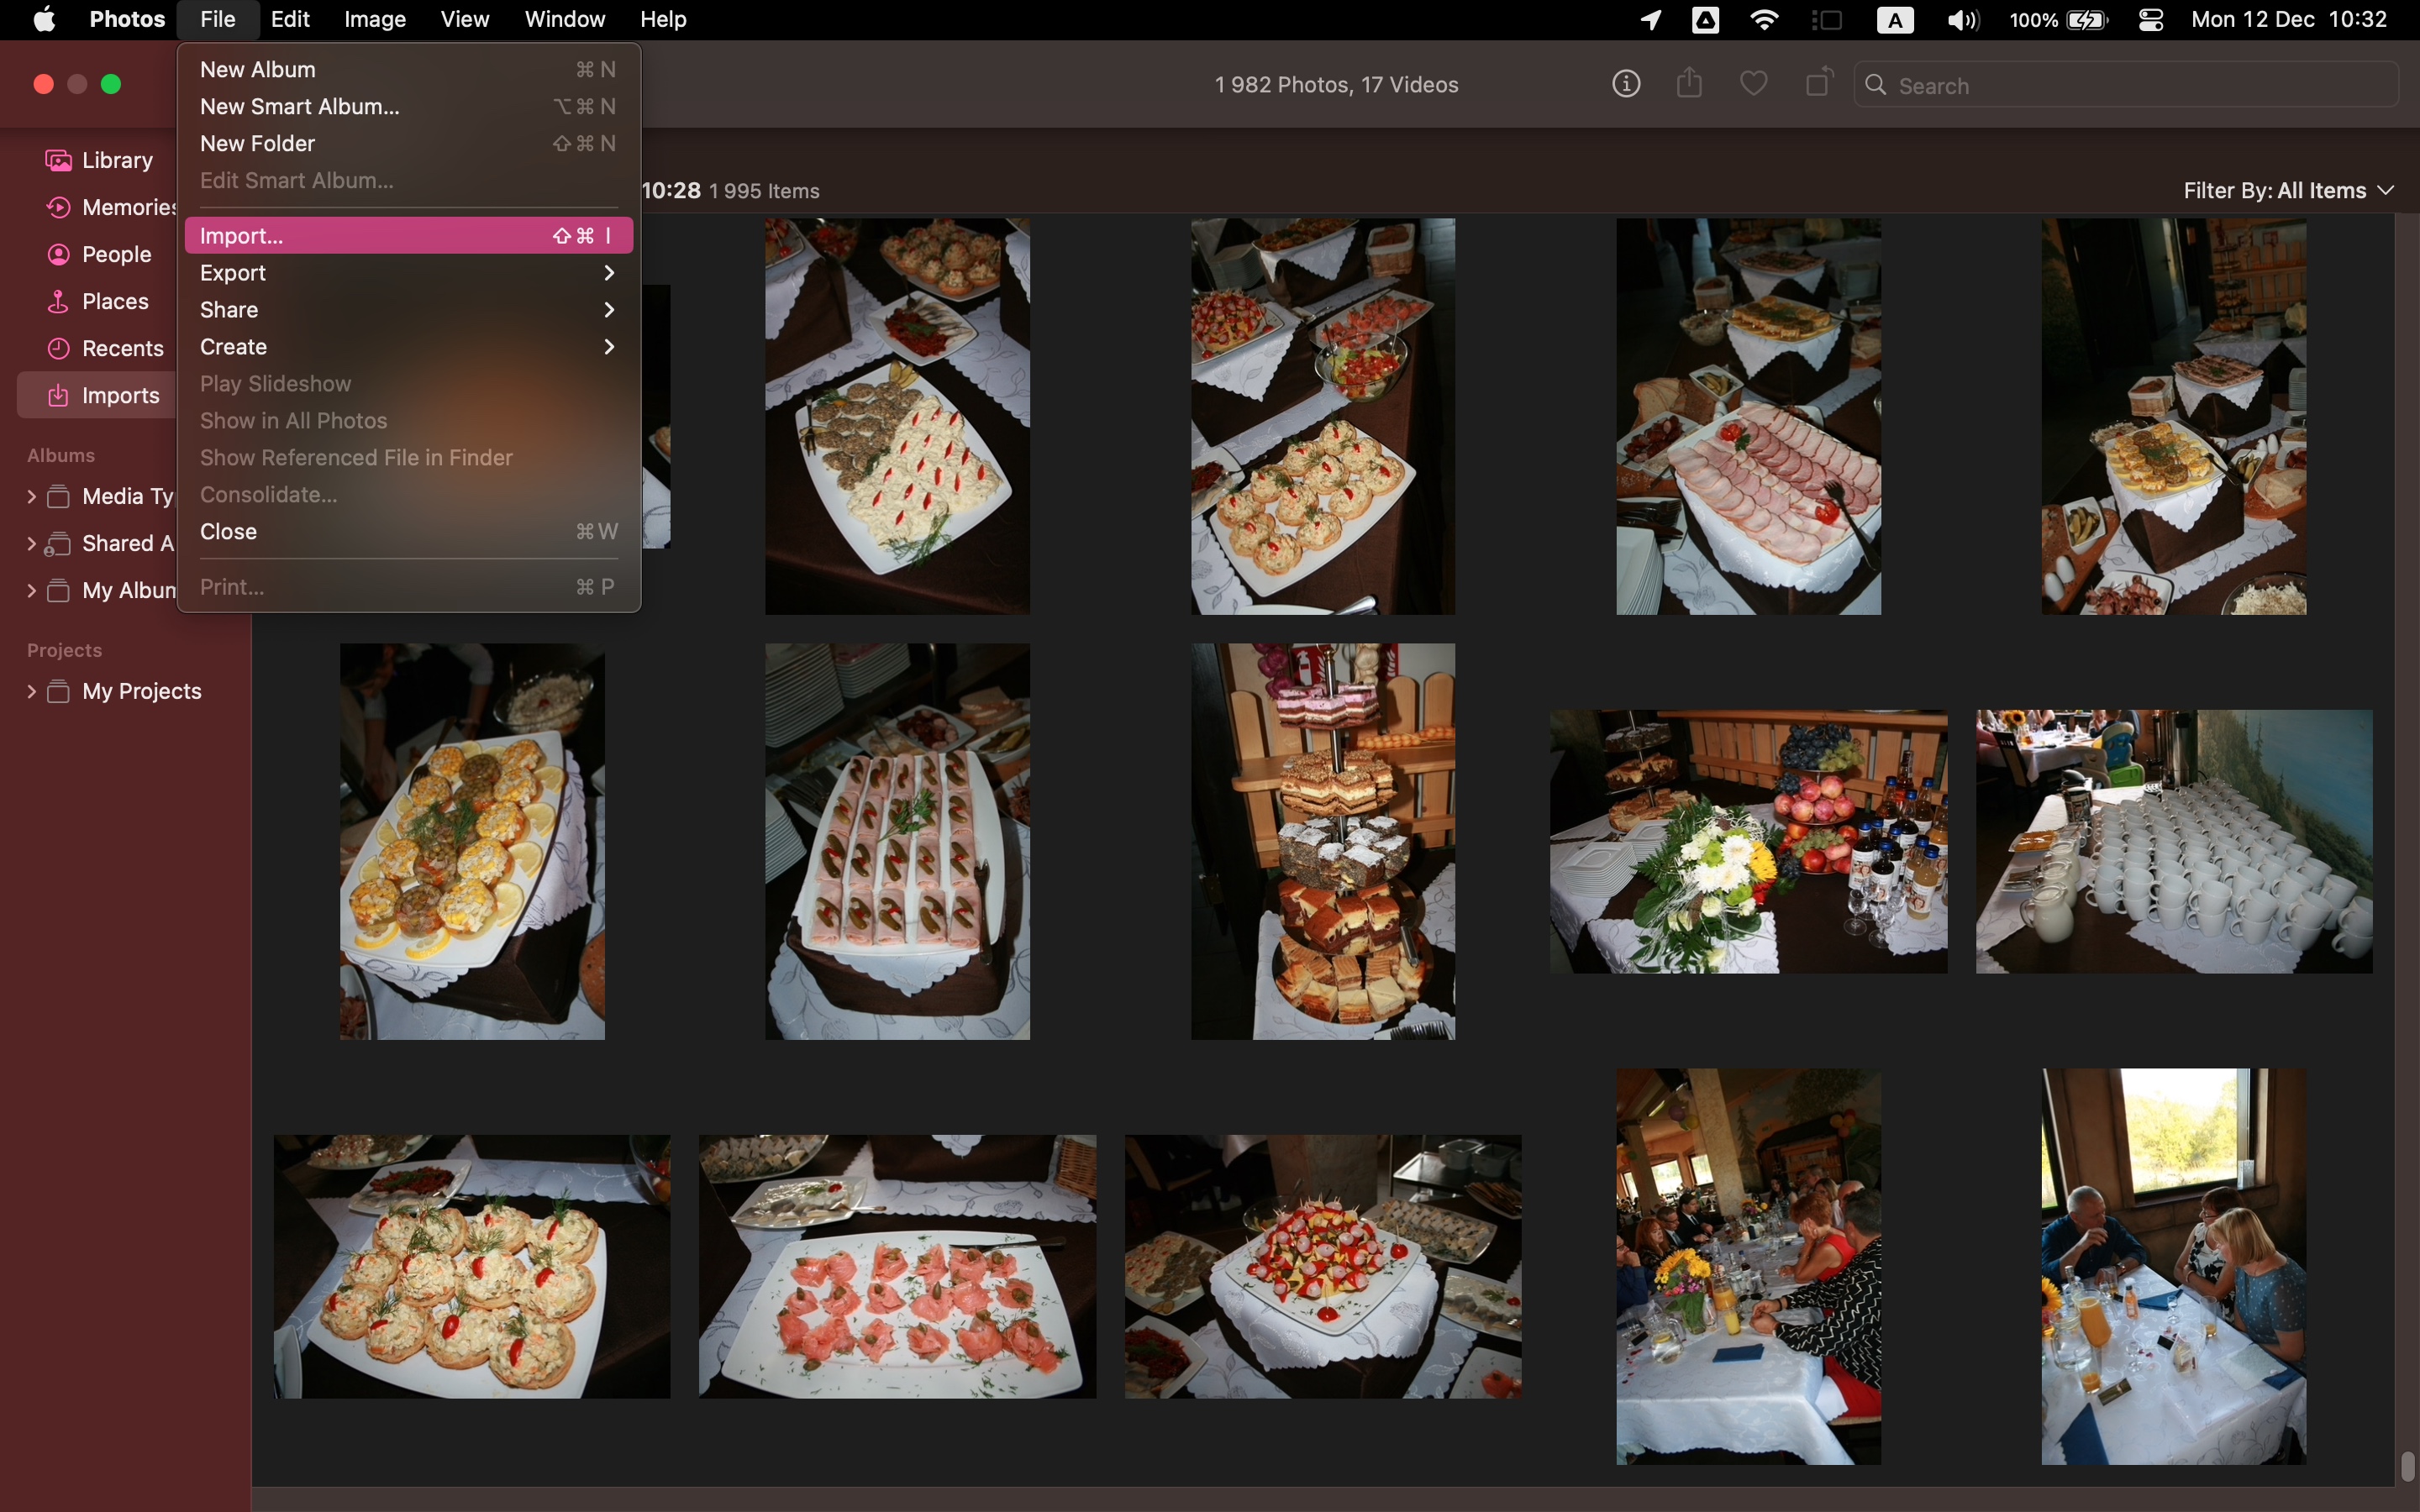
You can launch Photos from the Applications folder, and if you're going to be using it a lot, it is worth adding to the dock for easy access. Any photos you have stored in your Photos library will be displayed in the app, but there are many ways to bring in images and videos from other sources.
The simplest is to click File > Import (or press Shift + Command + I) before selecting a number of photos or a folder full of images to pull into the app and the library.
2. Viewing and organizing photos
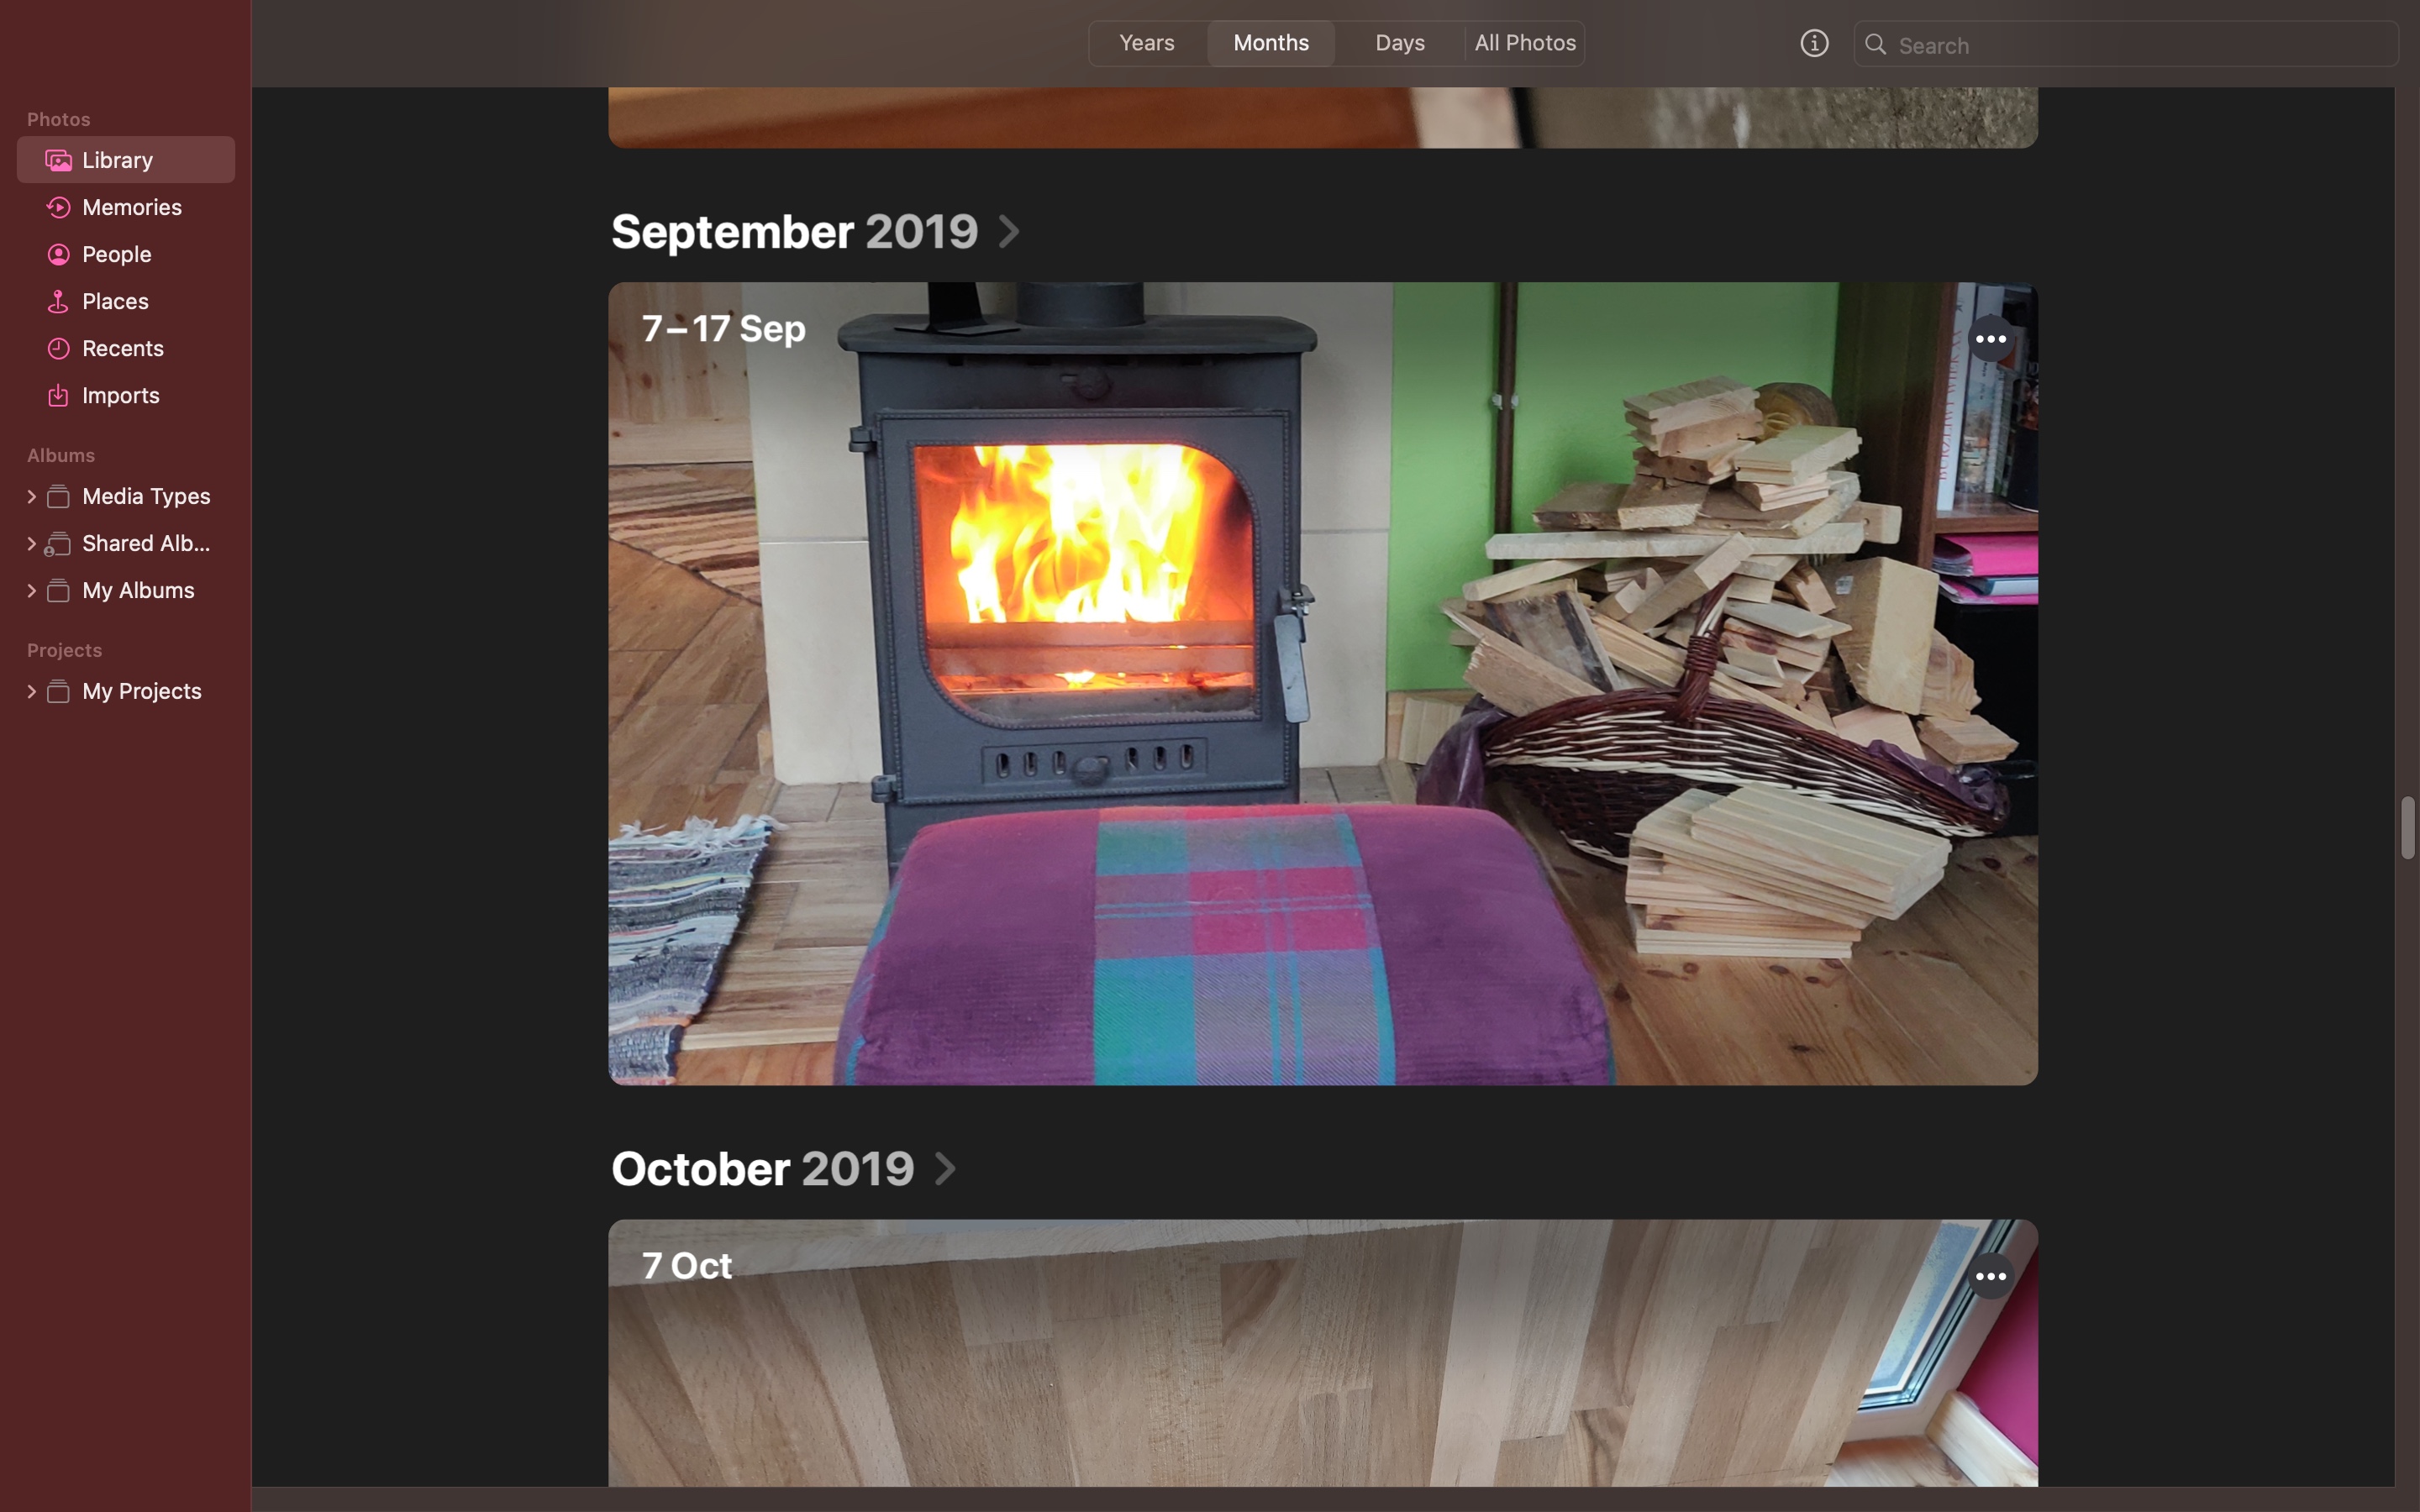
There are many ways to browse through your image collection in Photos, but the Library section is a good starting point. You can use the button at the top of the screen to organize images by year, month, or day of shooting, or decide to simply browse through everything.
You can also use the People section to view photos containing the same people, the Places section lets you browse a map populated with your images based on Exif data. There's also a handy Search box to the upper right to help you find specific images.
3. Editing images
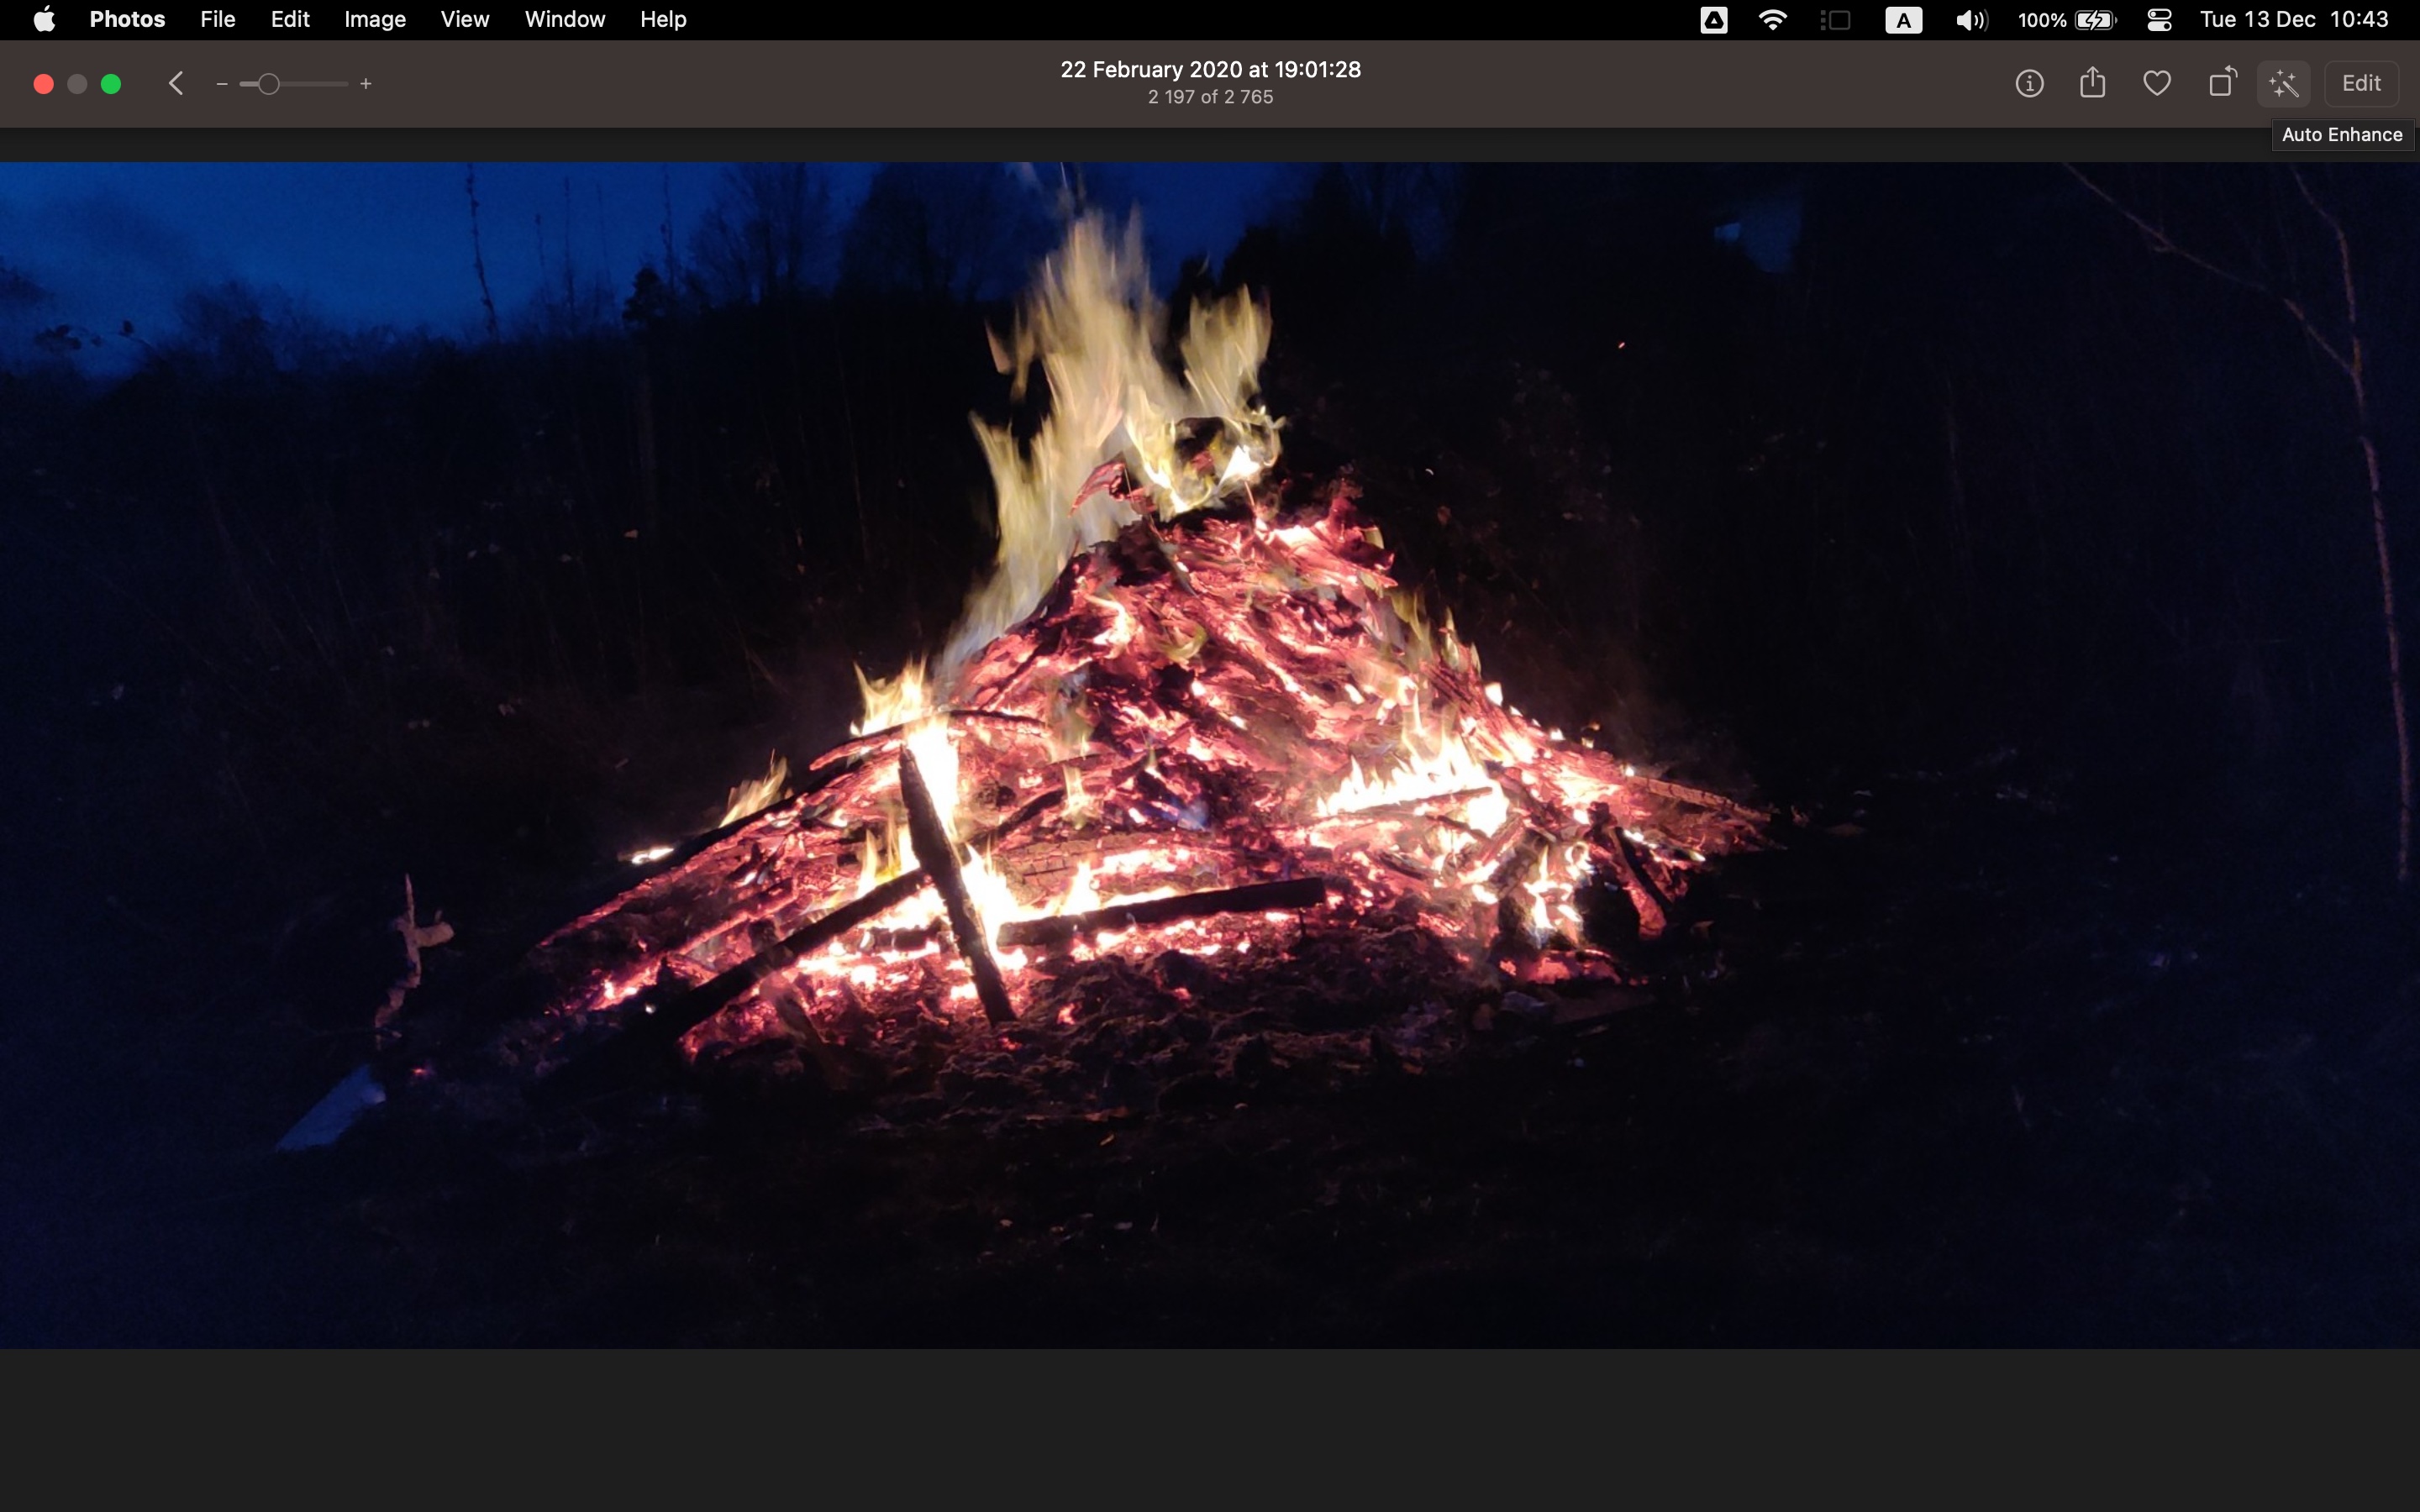
The Photos app can be used to make tweaks and changes to images. Double-click a photo to open it and then look to the upper right where you'll find various editing-related buttons.
The button featuring a square and an arrow lets you rotate an image, while next to this you will find Auto Enhance. This is a quick-fix option that applies various enhancement -- click it once to apply the ready-made tweaks to see if you like the results, and click again to undo the changes if you're unimpressed.
4. More advanced editing
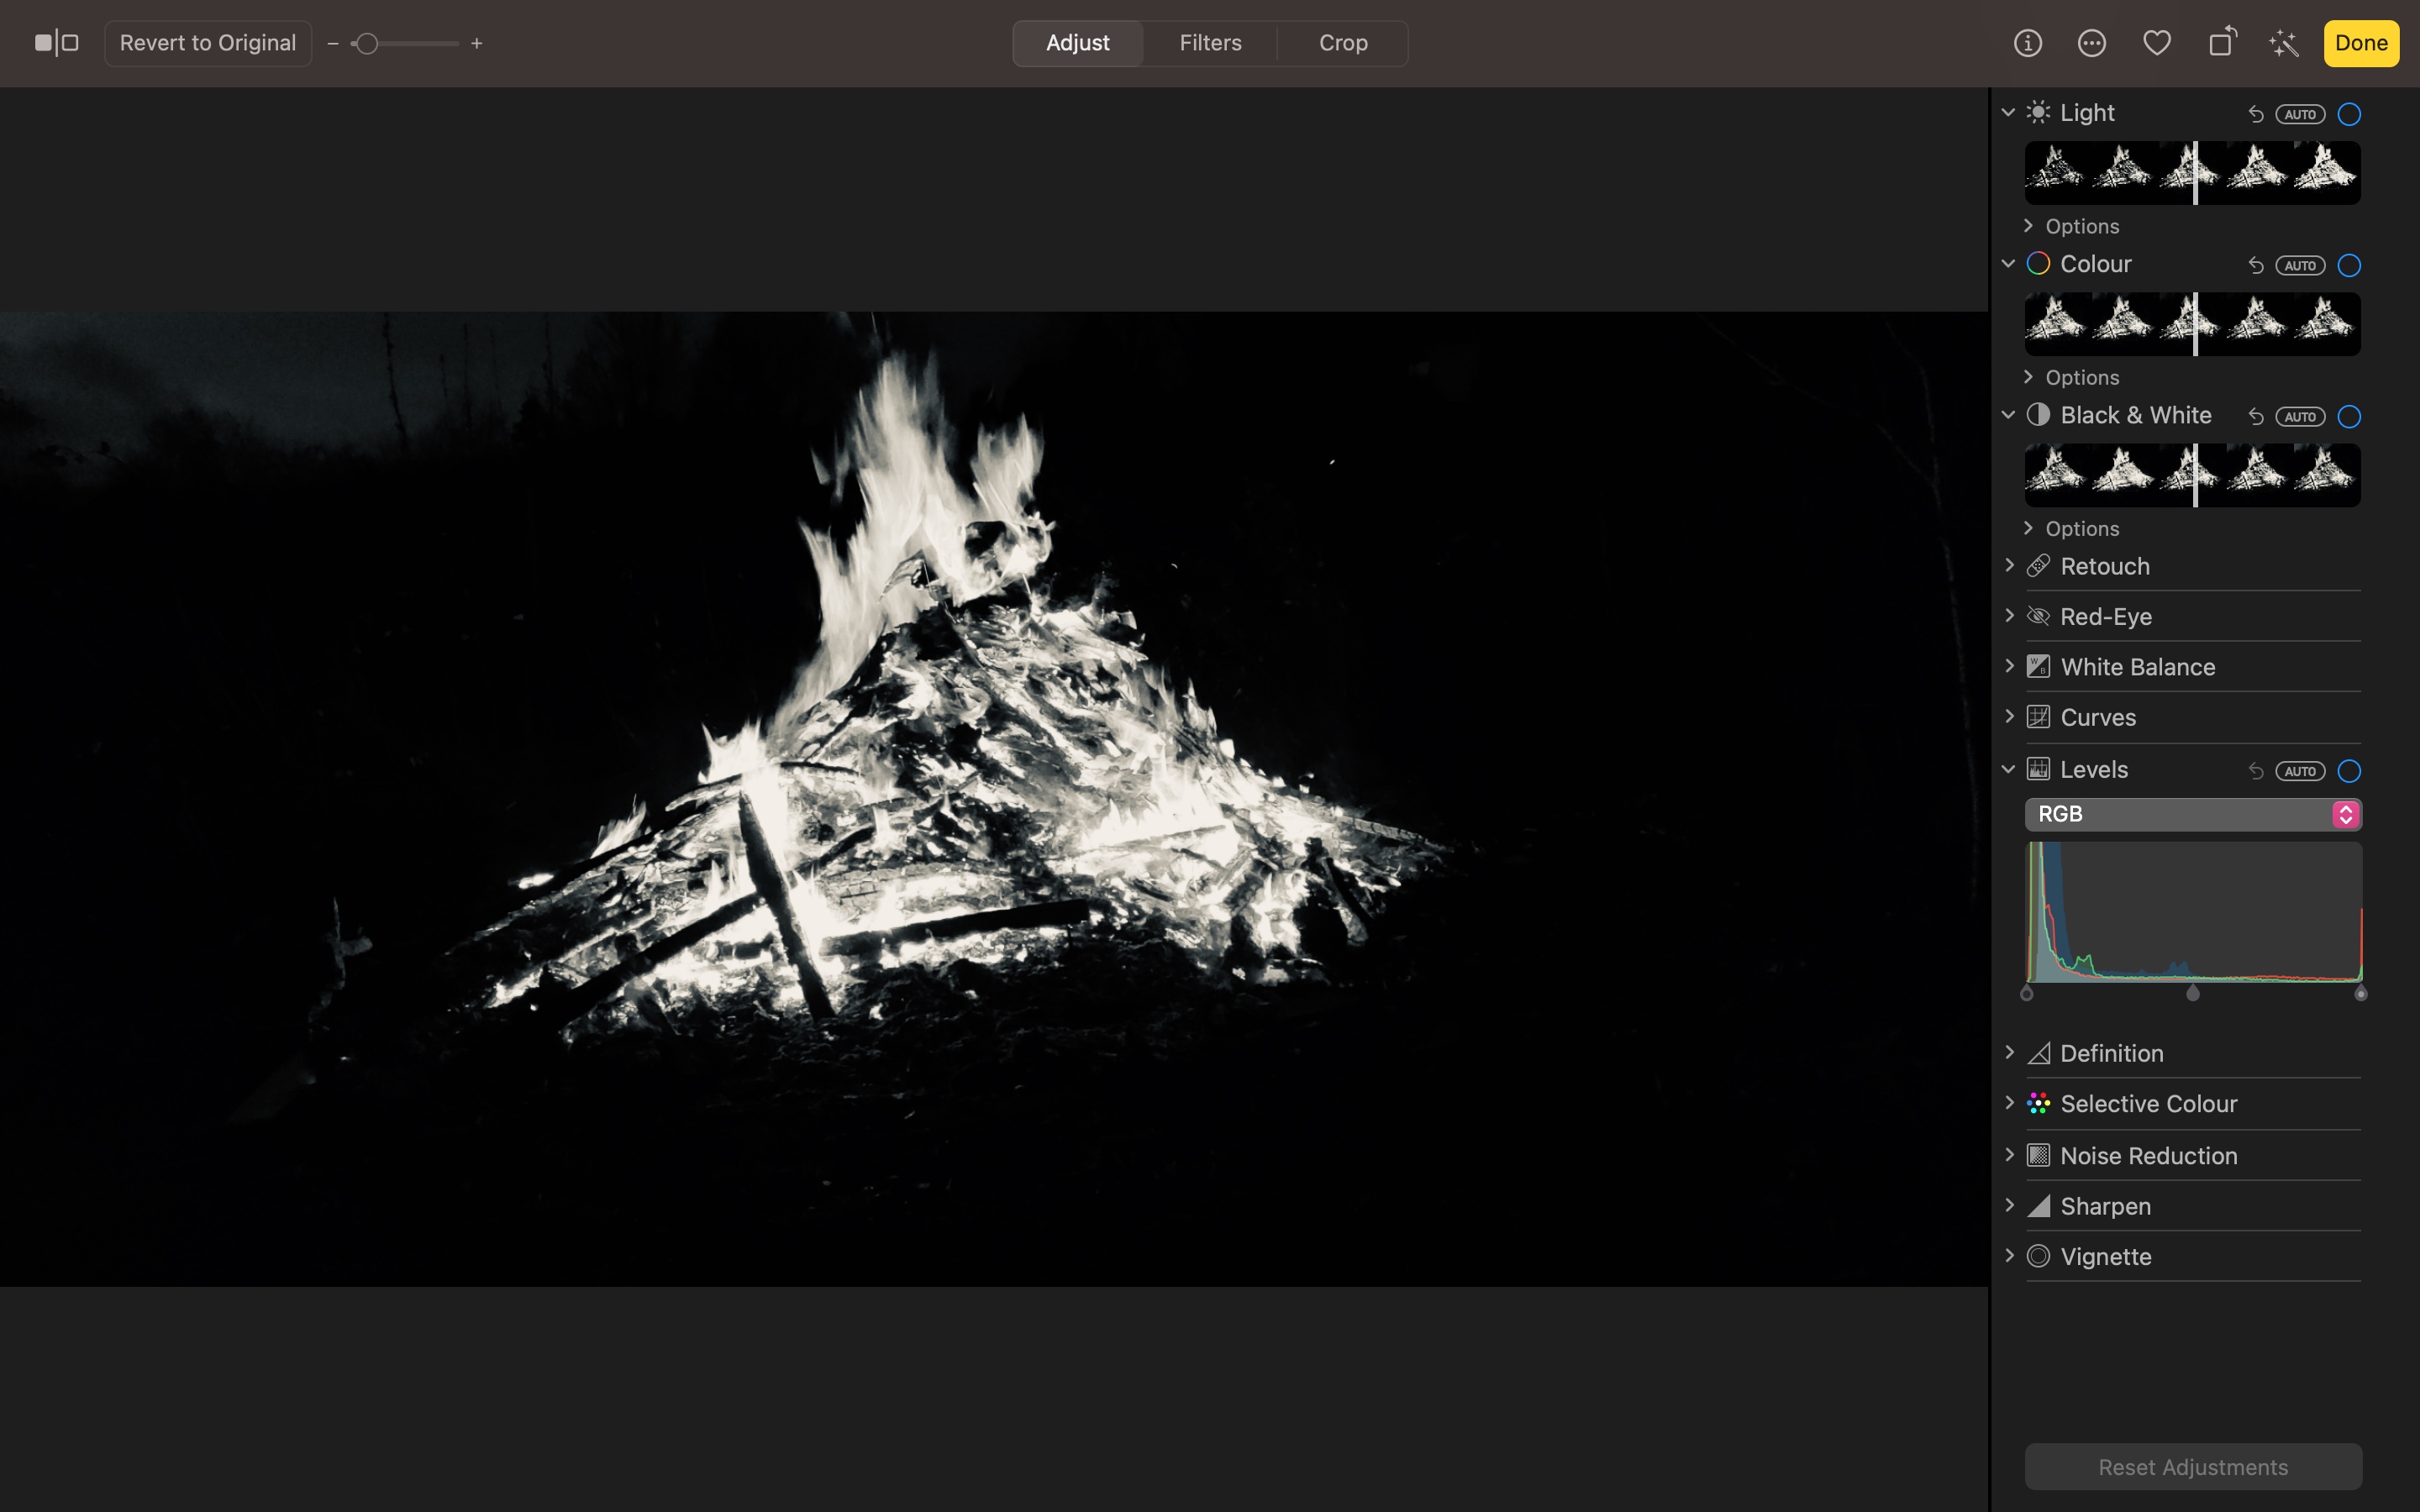
There are many more editing options available if you click the Edit button. On the Adjust tab, it's possible to use a range of tools such as Noise Reduction, Red-Eye Reduction, level and color adjustment, and much more.
All of the available tools can be used individually, or you can use a combination simultaneously if you want. Should you make changes you are unhappy with, just click Reset Adjustments to the lower right; conversely, to save changes, click Done to the upper right.
5. Further editing options

Moving to the Filters tab, you have access to a number of pre-defined effects to give your image a particular look -- just click to apply. At this point, it is worth noting the button to the upper left-hand corner of the app, the one that depicts two squares.
Click this, and you can toggle between the original version of an image and the tweaked version. Moving to the Crop tab, you can adjust the aspect ratio of an image, straighten up one that is wonky, and more. Click Done to save the changes you've made.
6. Creating and sharing photo libraries
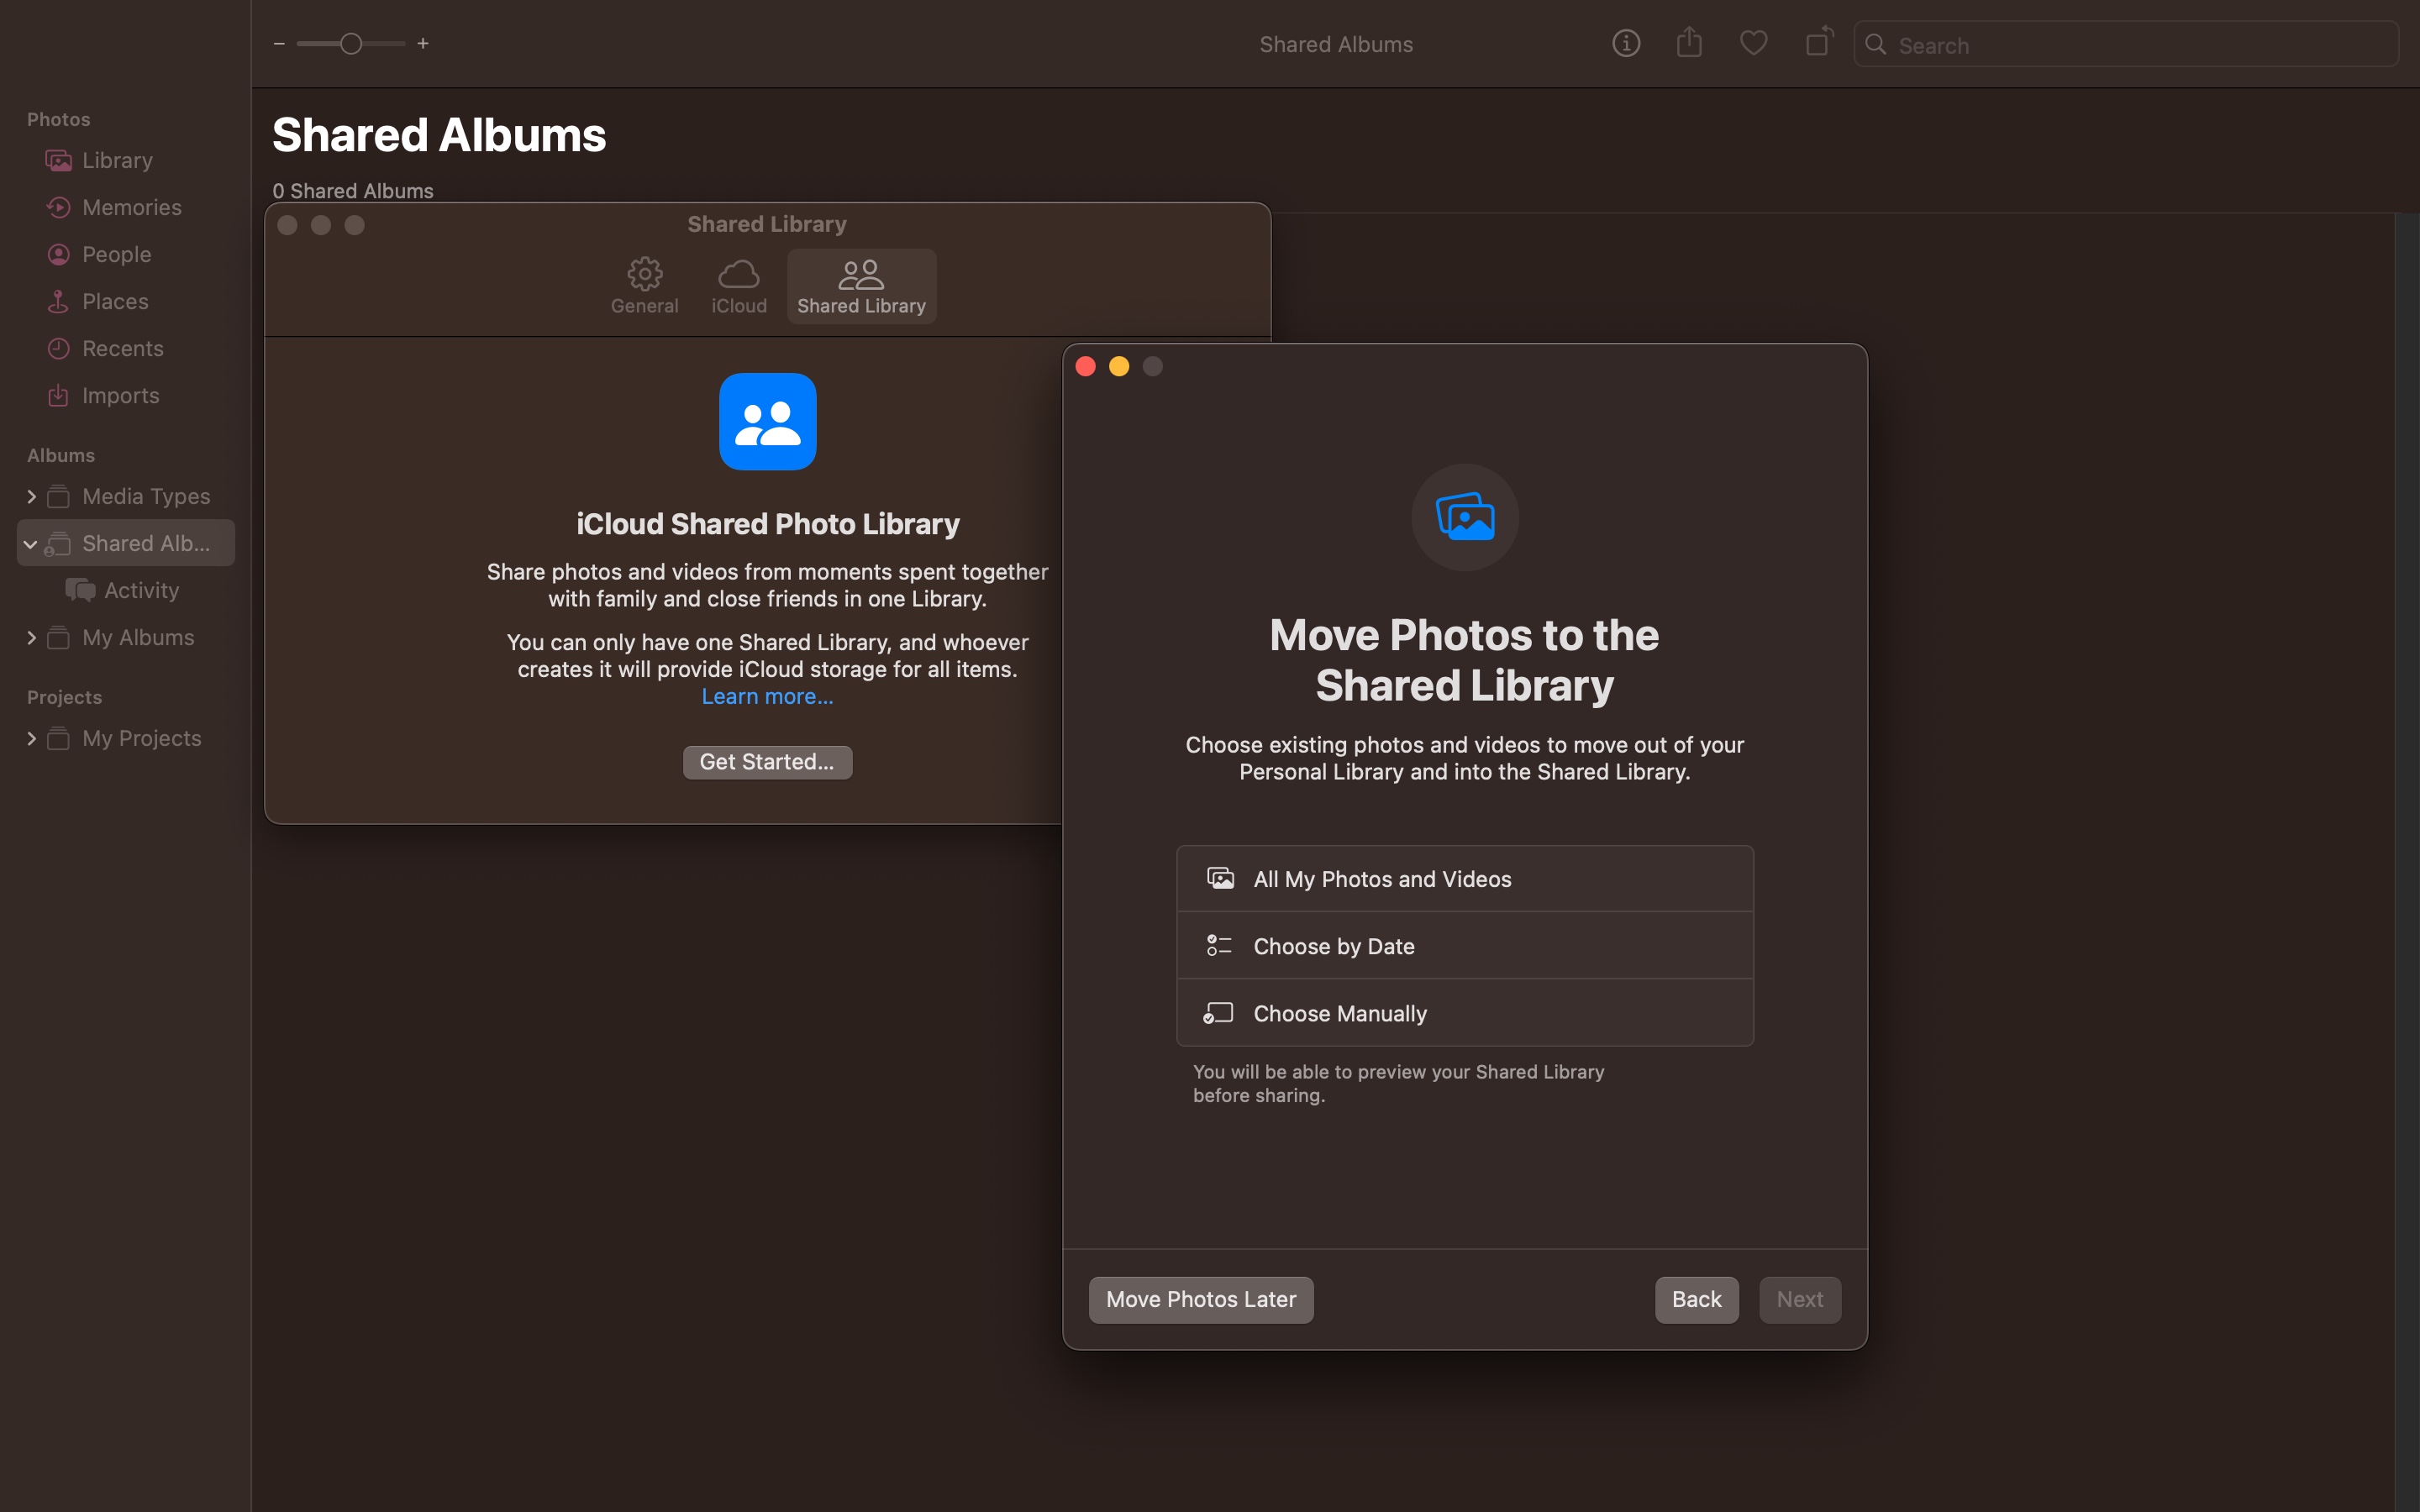
With Photos, you can create an iCloud Shared Photo Library that enables up to six people to collaborate on a photo collection. Click Photos > Settings and move to the Shared Library tab before clicking the Get Started button.
You can then add up to five people you would like to allow to contribute to the library. You can then opt to move your entire photo collection to the Shared Library or you can opt to select individual images manually.
7. Creating slideshows

It is great to simply browse through your Snaps in Photos, but slideshows are even better. To create an instant slideshow, move to your Library, click the Days tab, select a number of images and click Files > Play Slideshow.
You can then use the Themes and Music tab to customize the look and audio for your slideshow. For something more personal, you can select a number of photos from your library, and click File > Create > Slideshow > Photos before working through the process of ordering images, choosing a theme, and more.
8. Printing photos
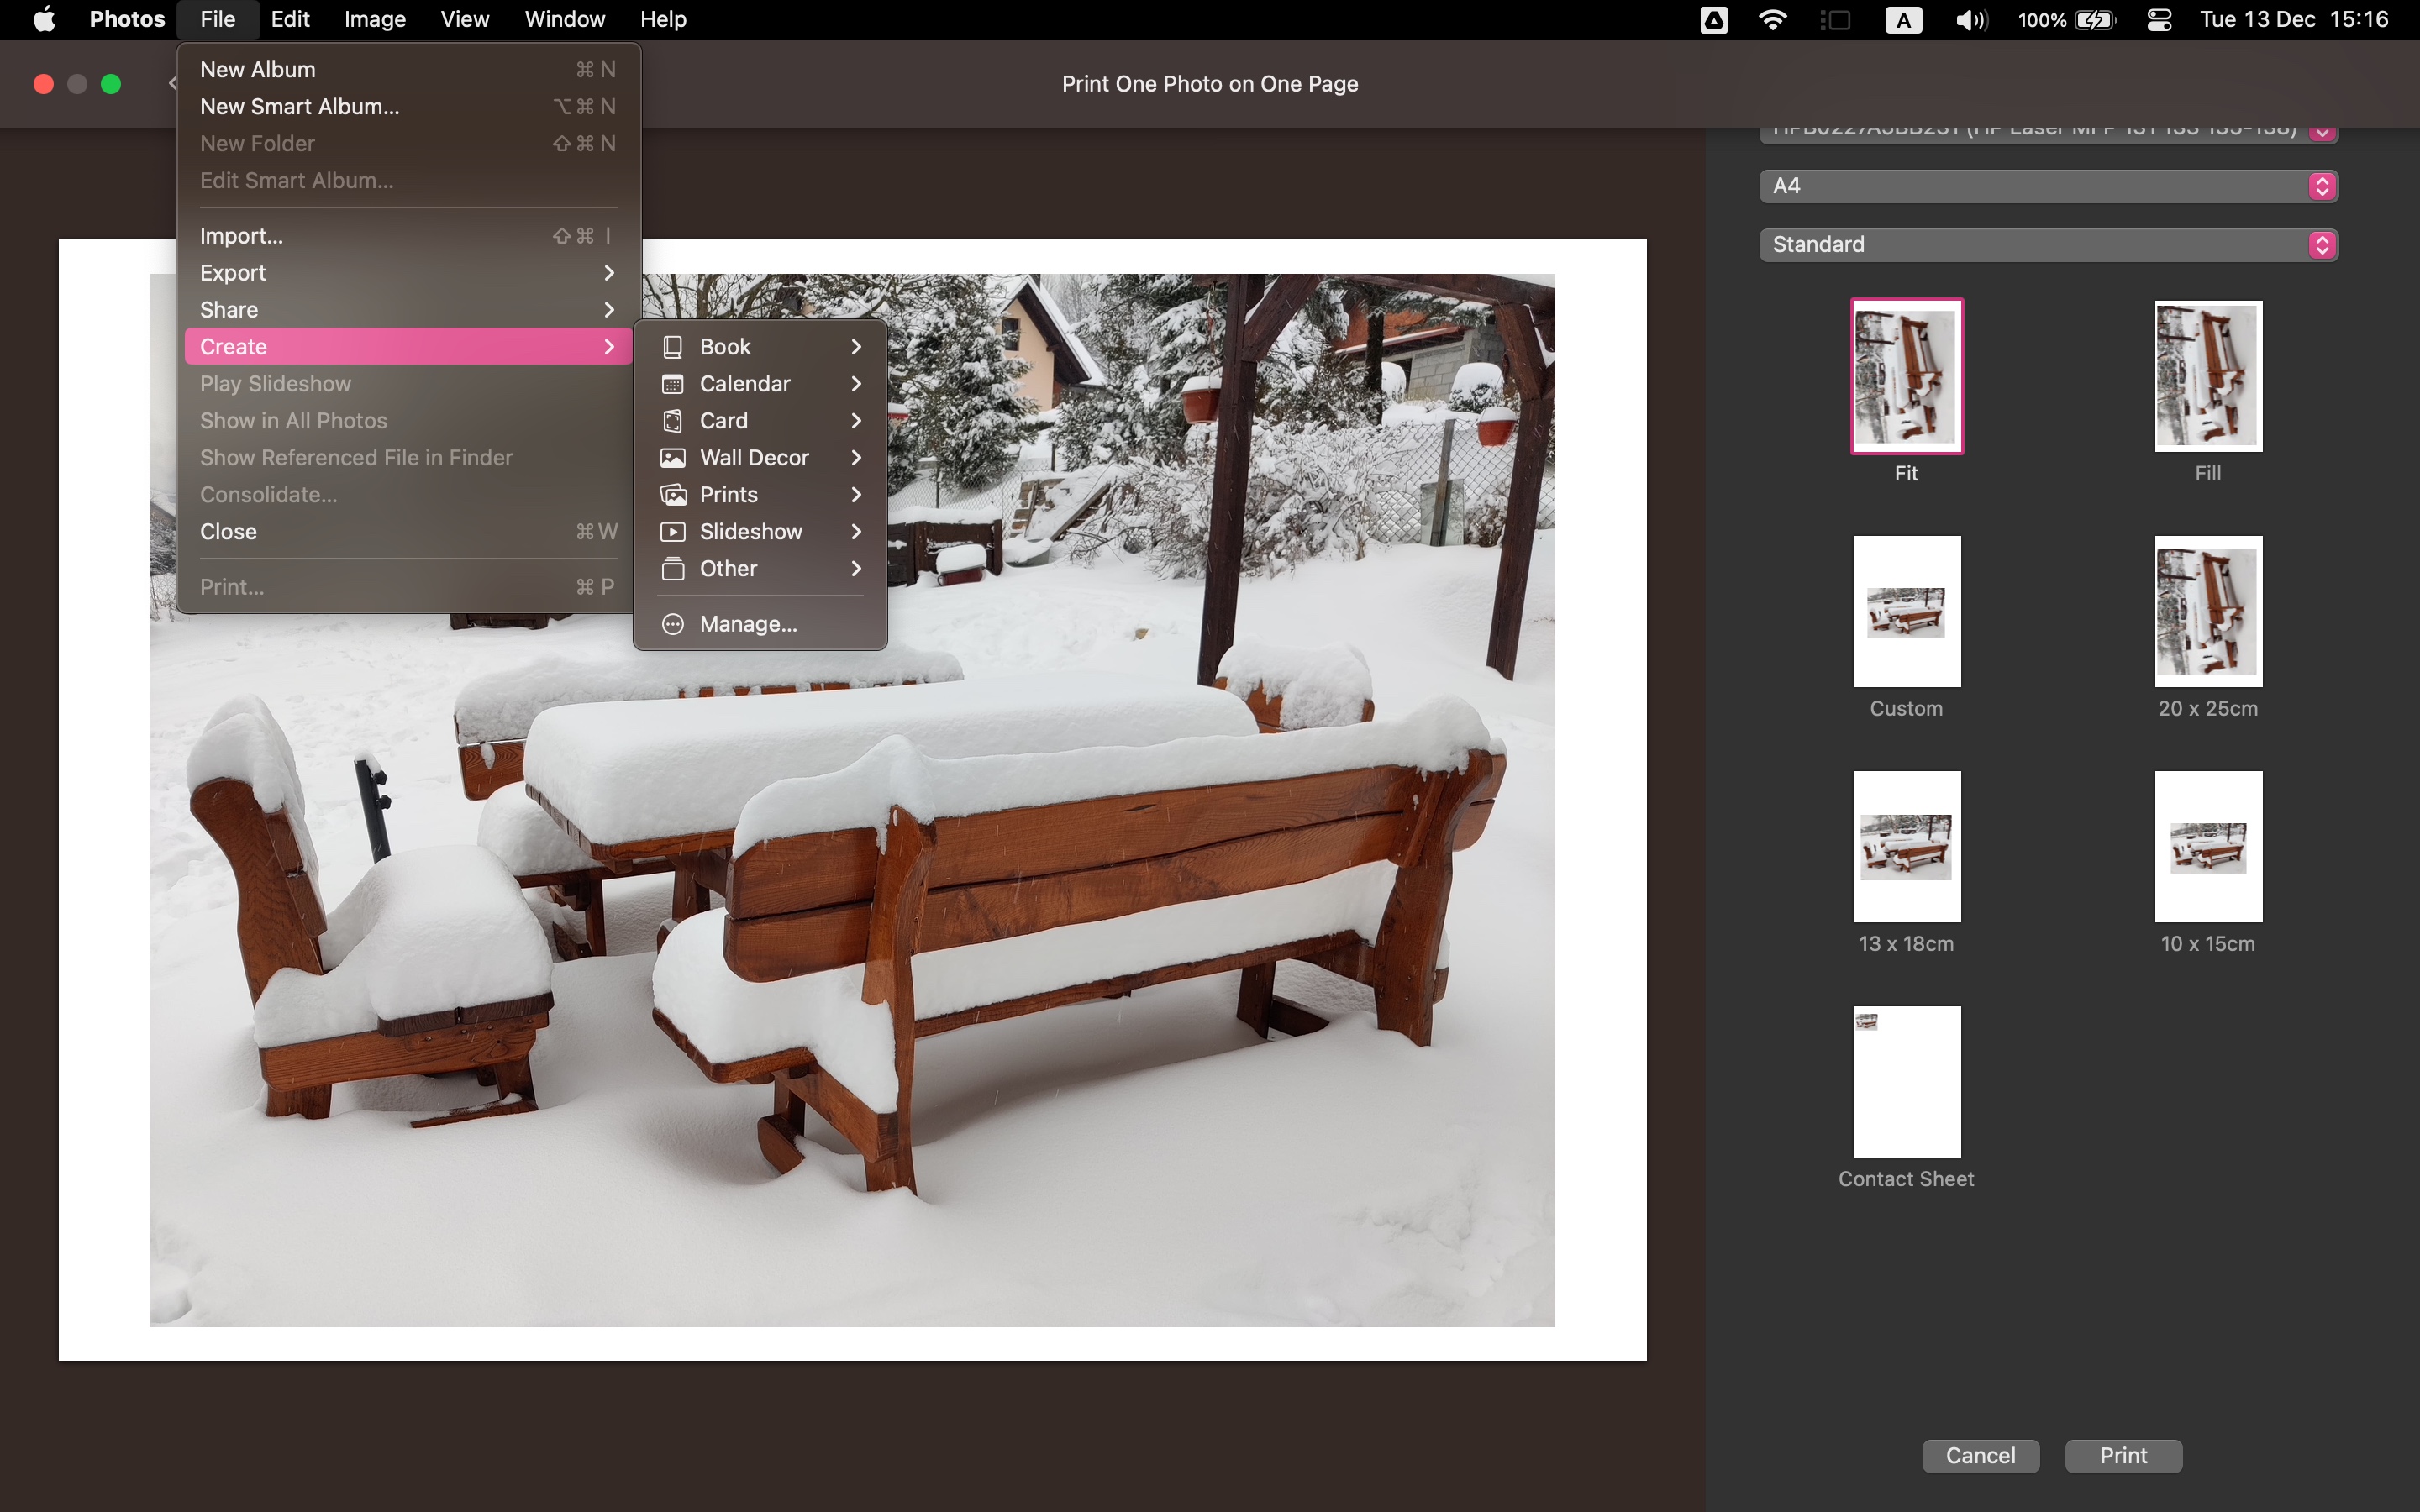
Looking at photos on your Mac is great, but you can also use the Photos app to print your favorites. This can mean just printing out photos on your own printer, but you can order professional prints for special occasions or gifts. Select one or more images and click File > Print and configure your preferences before hitting Print.
You can also use your images in creative projects using a third-party app. Click File > Create and use the submenus to choose from options such as a calendar, book, and more.
9. Recovering deleted photos

As you browse through your photo collection, you are likely to encounter images you are far from happy with. These photos can be easily deleted by selecting one or more images, pressing the Delete key on your keyboard and then clicking the Delete button.
You may find though, that you have deleted an image or two accidentally. Thankfully, there is a safeguard -- just move to the Recently Deleted album in the sidebar. You may find that you need to provide your password or use Touch IS, and then you will be able to recover deleted files.
10. Configure settings for Photos
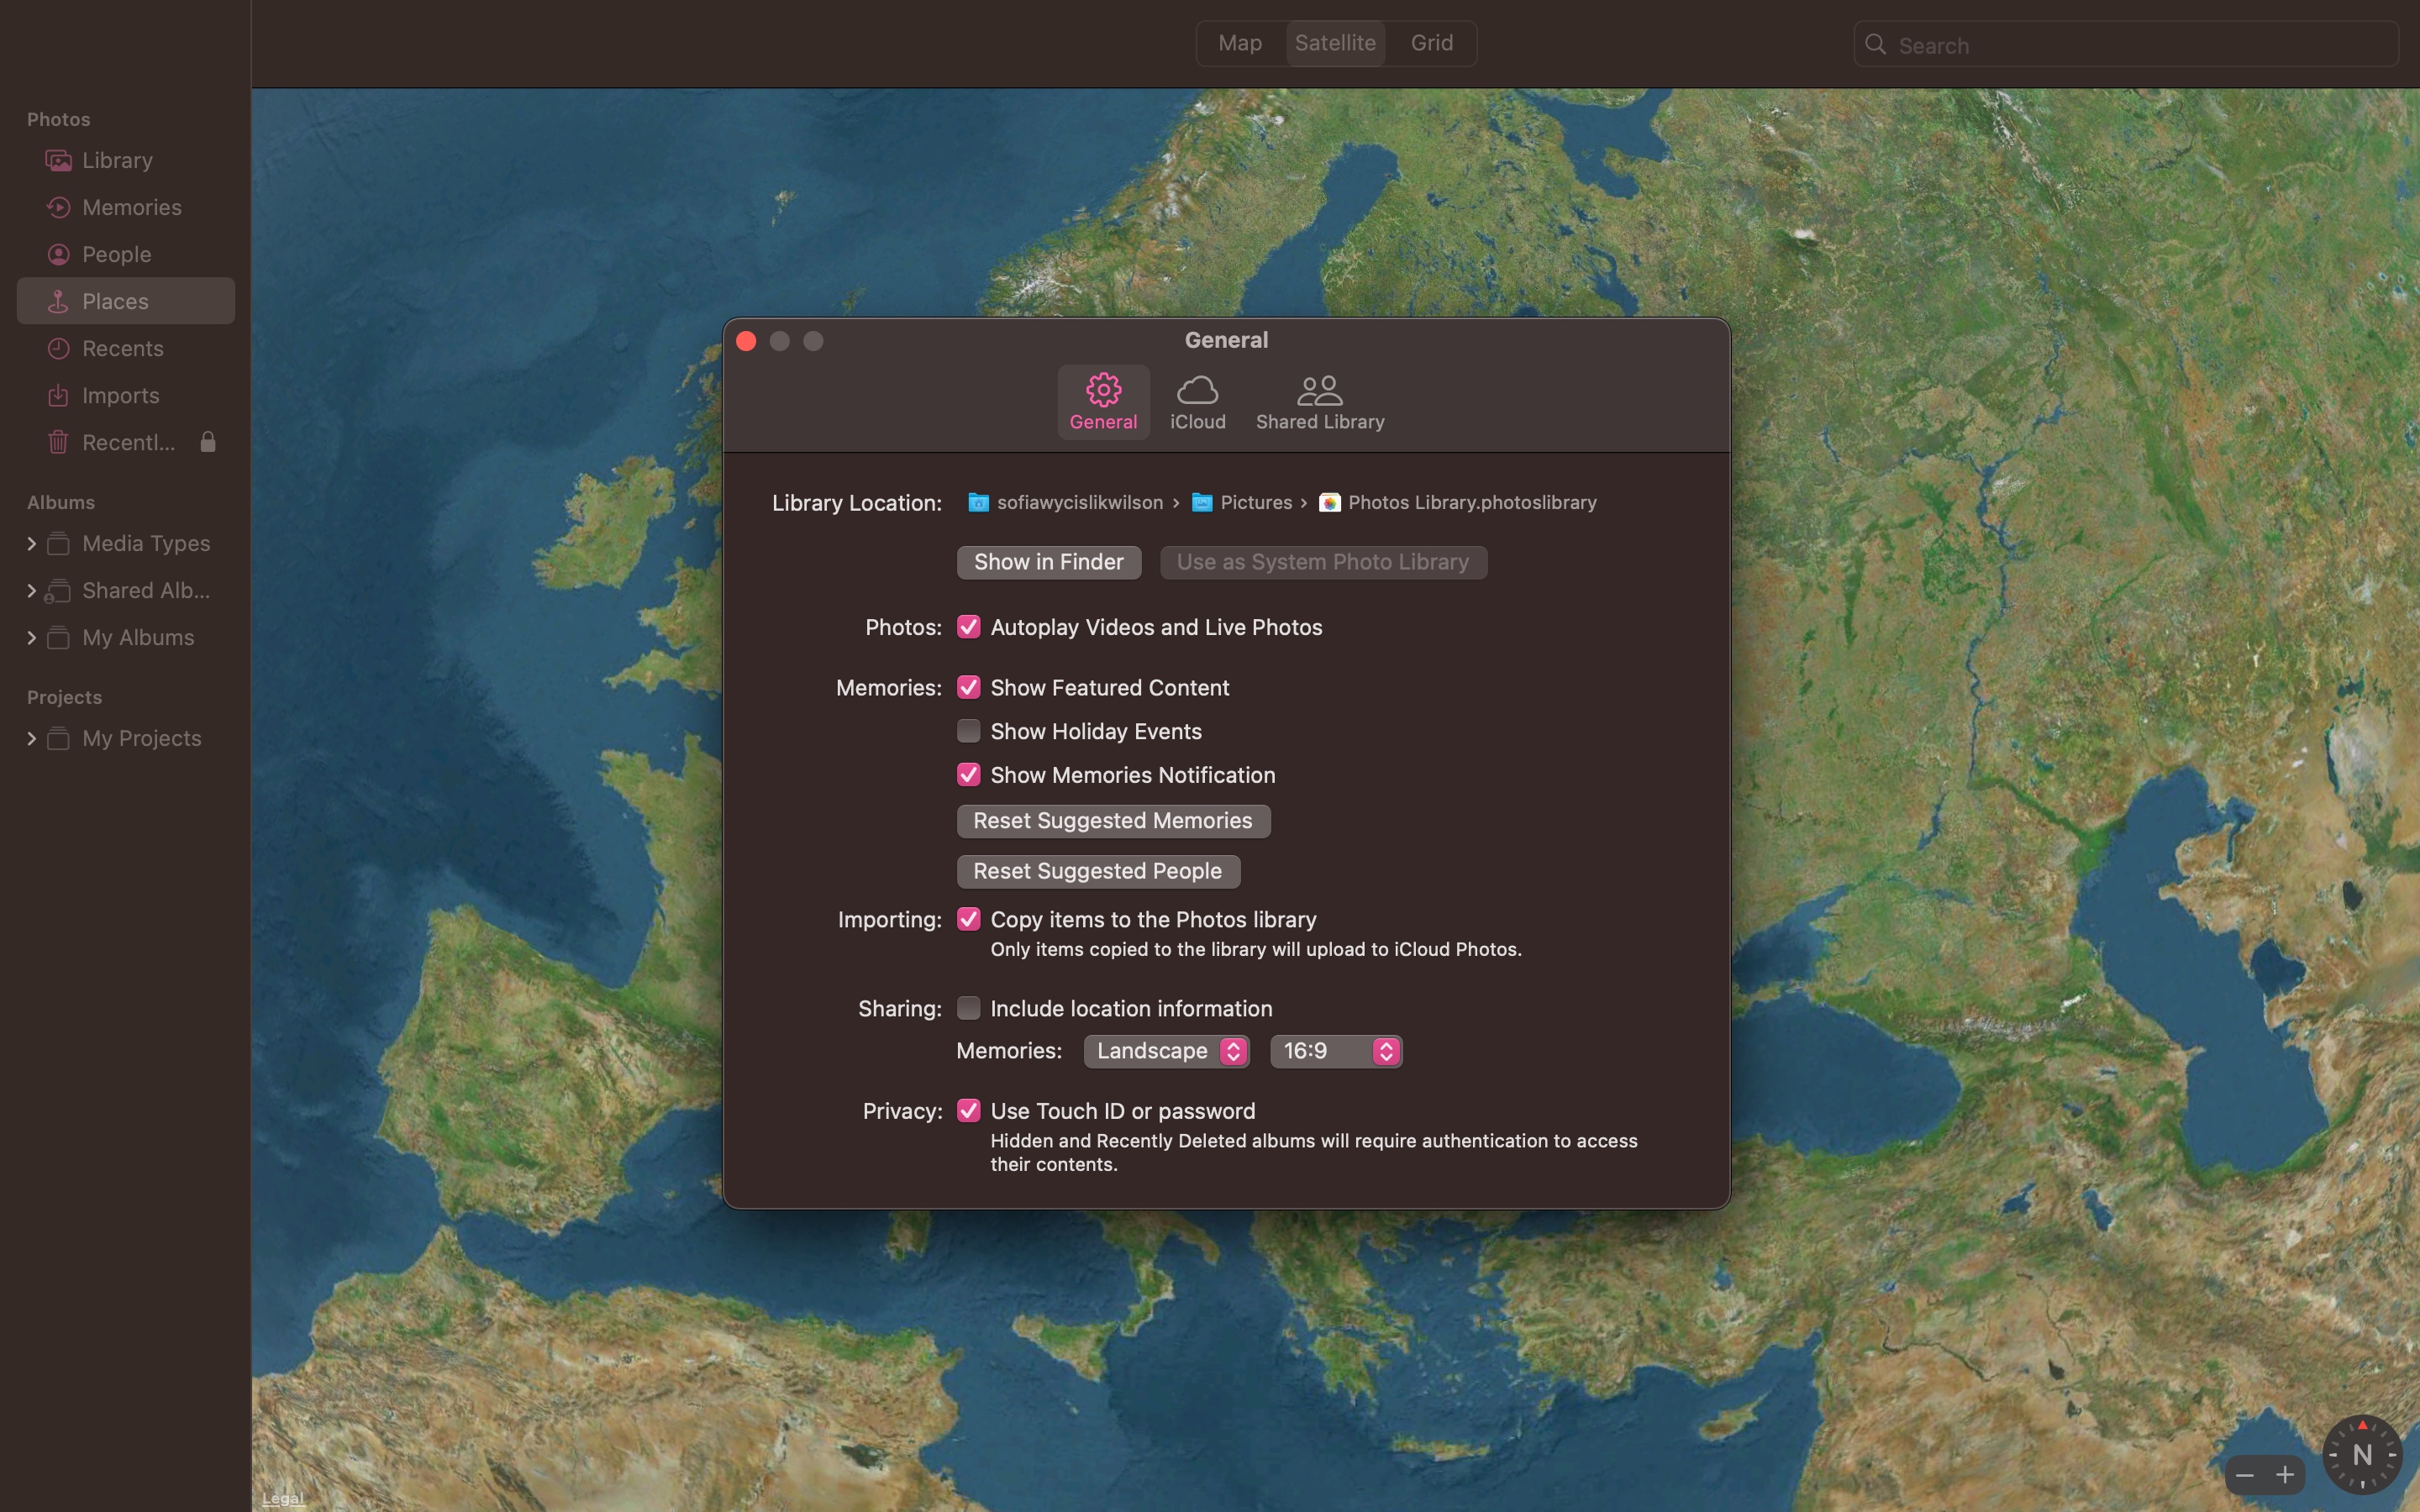
You may well find that Photos works for you without the need to change anything, but it's good to know that there is scope for changing things up a bit if you feel the need. Click Photos > Settings and use the General tab to choose where your Library should be stored, and to toggle a password or Touch ID for hidden and Recently deleted albums.
You can then use the iCloud tab to choose whether to download full-resolution versions of images stored online or to save space with smaller versions.
Final Thoughts
Photos is such an astonishingly powerful and useful app, it is almost hard to believe that Apple includes it as part of macOS for free. It is something of a jack-of-all-trades, and it is the sort of utility that you're likely to find useful on a just about daily basis. But being a jack-of-all-trades, there is some room for improvement, especially in certain scenarios.
It is hardly surprising that there are so many other tools you can use to keep on top of your photo collection. Should you find that Photos is not quite up to the task, there is plenty of choices out there, and the app you go for will depend on just how demanding you are.
If you're looking for something cross-platform and simple, Google Photos is worth a look. You could opt for the likes of Adobe Lightroom for serious management options, but XnView MP is also noteworthy.
Sign up for breaking news, reviews, opinion, top tech deals, and more.

Sofia is a tech journalist who's been writing about software, hardware and the web for nearly 25 years – but still looks as youthful as ever! After years writing for magazines, her life moved online and remains fueled by technology, music and nature.
Having written for websites and magazines since 2000, producing a wide range of reviews, guides, tutorials, brochures, newsletters and more, she continues to write for diverse audiences, from computing newbies to advanced users and business clients. Always willing to try something new, she loves sharing new discoveries with others.
Sofia lives and breathes Windows, Android, iOS, macOS and just about anything with a power button, but her particular areas of interest include security, tweaking and privacy. Her other loves include walking, music, her two Malamutes and, of course, her wife and daughter.
- Daryl BaxterContributor