How to speed up macOS 10.13
Boost your Mac
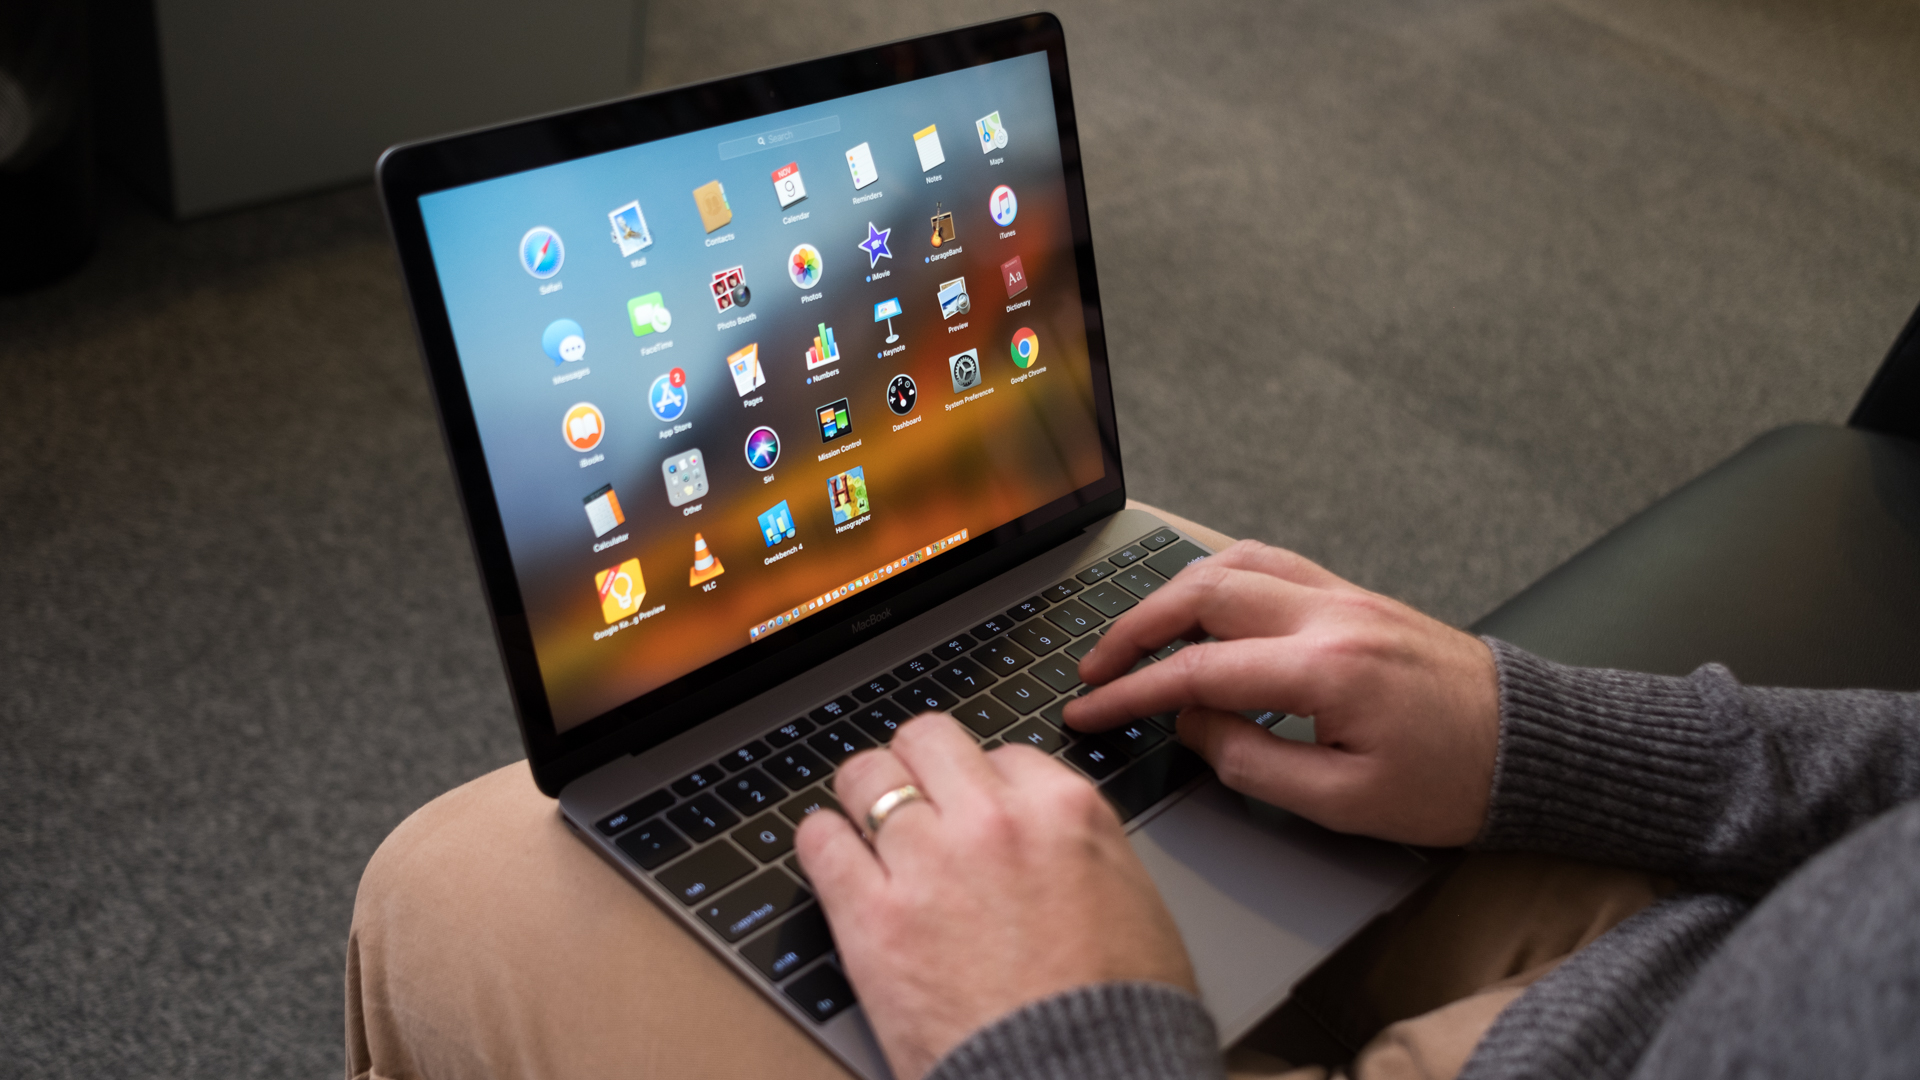
It is said that Steve Jobs once insisted that the CPU in an early Macintosh computer undergo a hefty redesign as it didn’t “look quite right”.
This obsessive attention to detail has continued, and the result has been a powerful series of machines. That said, Apple Macs do sometimes run slowly and may need a few tweaks to come up to full speed.
In this guide, you’ll discover our ten best tips for speeding up macOS 10.13 High Sierra, currently the most recent operating system that most Macs run on.
We've covered more radical steps such as installing new RAM chips and hard drives, as well as showing you how to use macOS’ built in tools to clear out clutter and repair hard drive errors.
1. Update, Update, Update!
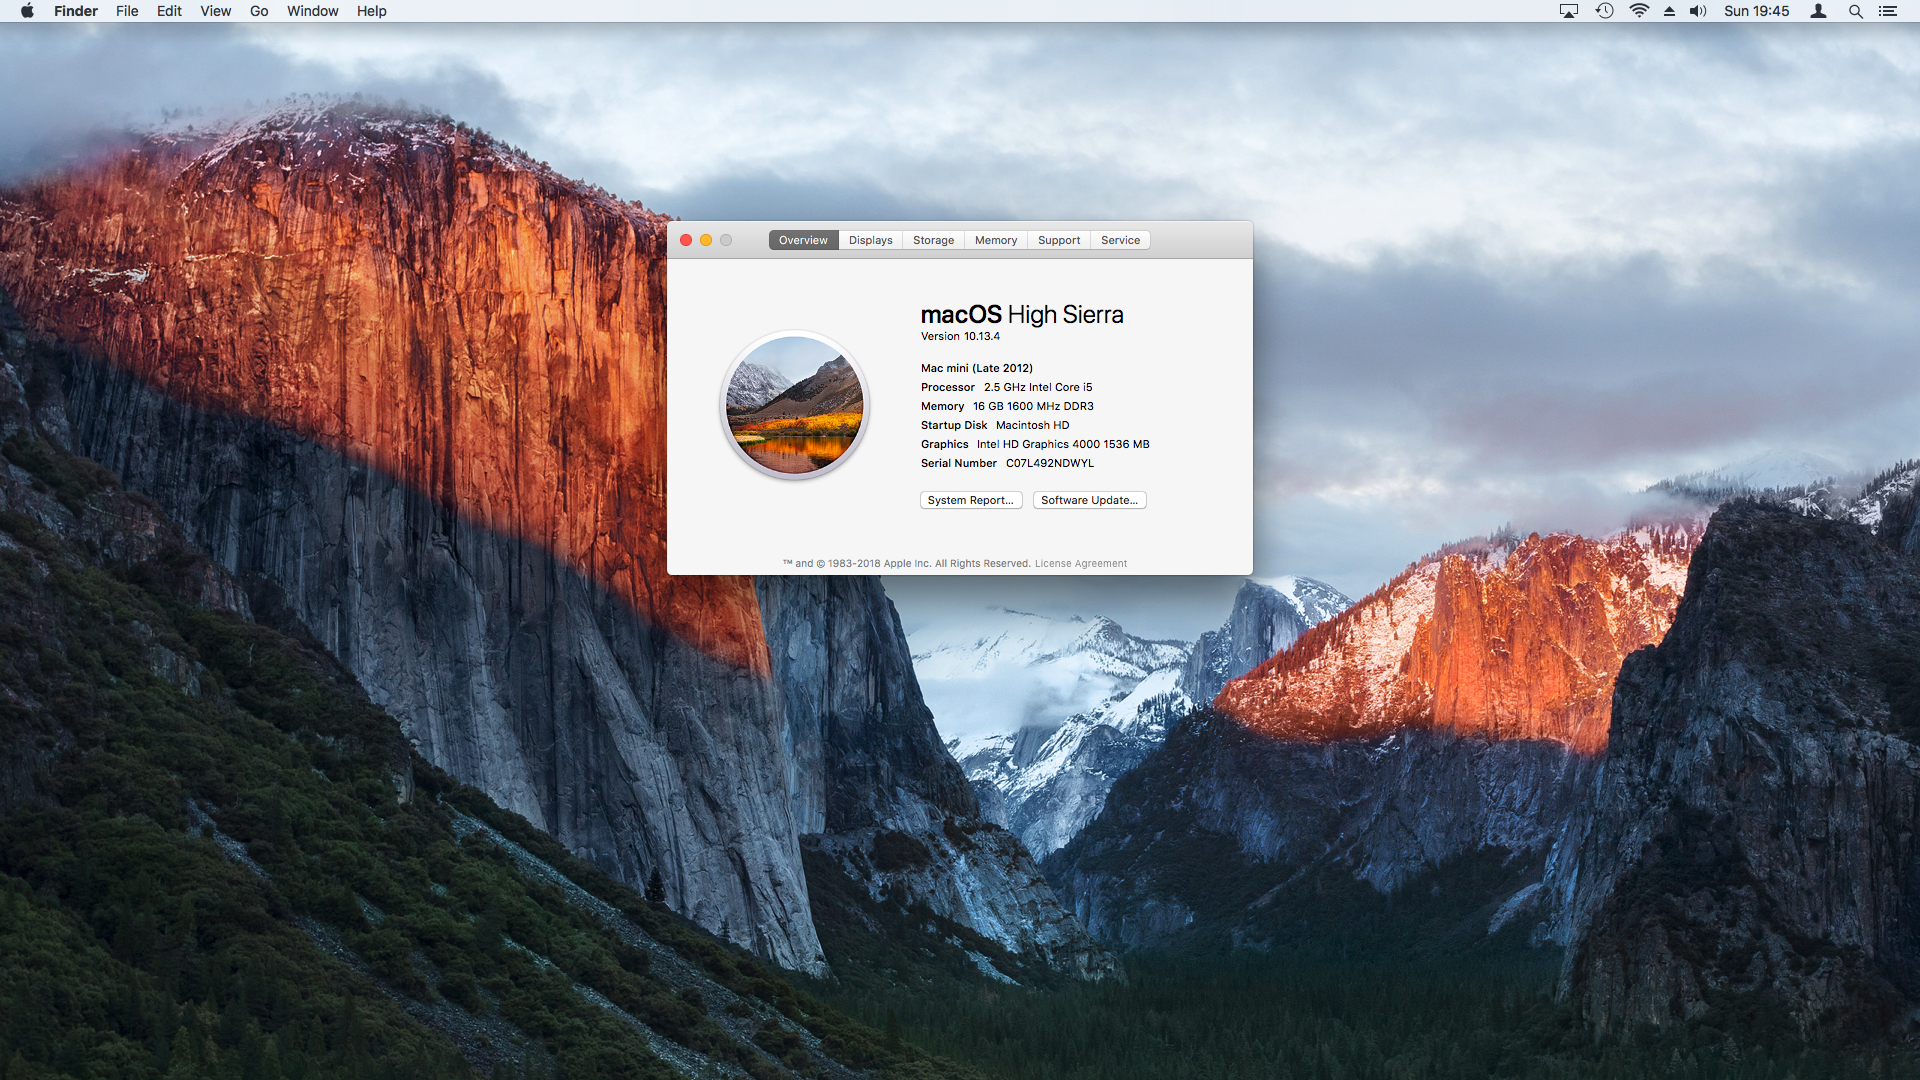
Apple continuously releases updates for macOS designed to maximize efficiency, fixing bugs which may interfere with the smooth running of your system. You can check if your Mac is up to date by clicking the Apple icon and selecting ‘About this Mac”. Click the ‘Software Update’ button to continue.
If a new version of macOS is available it will appear on the homepage of the App Store. Make sure to run a full Time Machine backup before proceeding. This is one of the easiest ways to speed up macOS 10.13.
2. Restart your Mac
While this may sound obvious, your Mac can easily become sluggish due to the sheer number of running processors, so restarting your Mac can help speed up macOS 10.13. Apple’s Energy Saver settings can also mean that while your display switches off, your machine is still running making it more likely an application will crash or consume too many resources.
Sign up for breaking news, reviews, opinion, top tech deals, and more.
Click the Apple icon, then ‘Shut Down’, in macOS 10.13 when you’ve finished using it. Your Mac may also need to restart in order to apply updates.
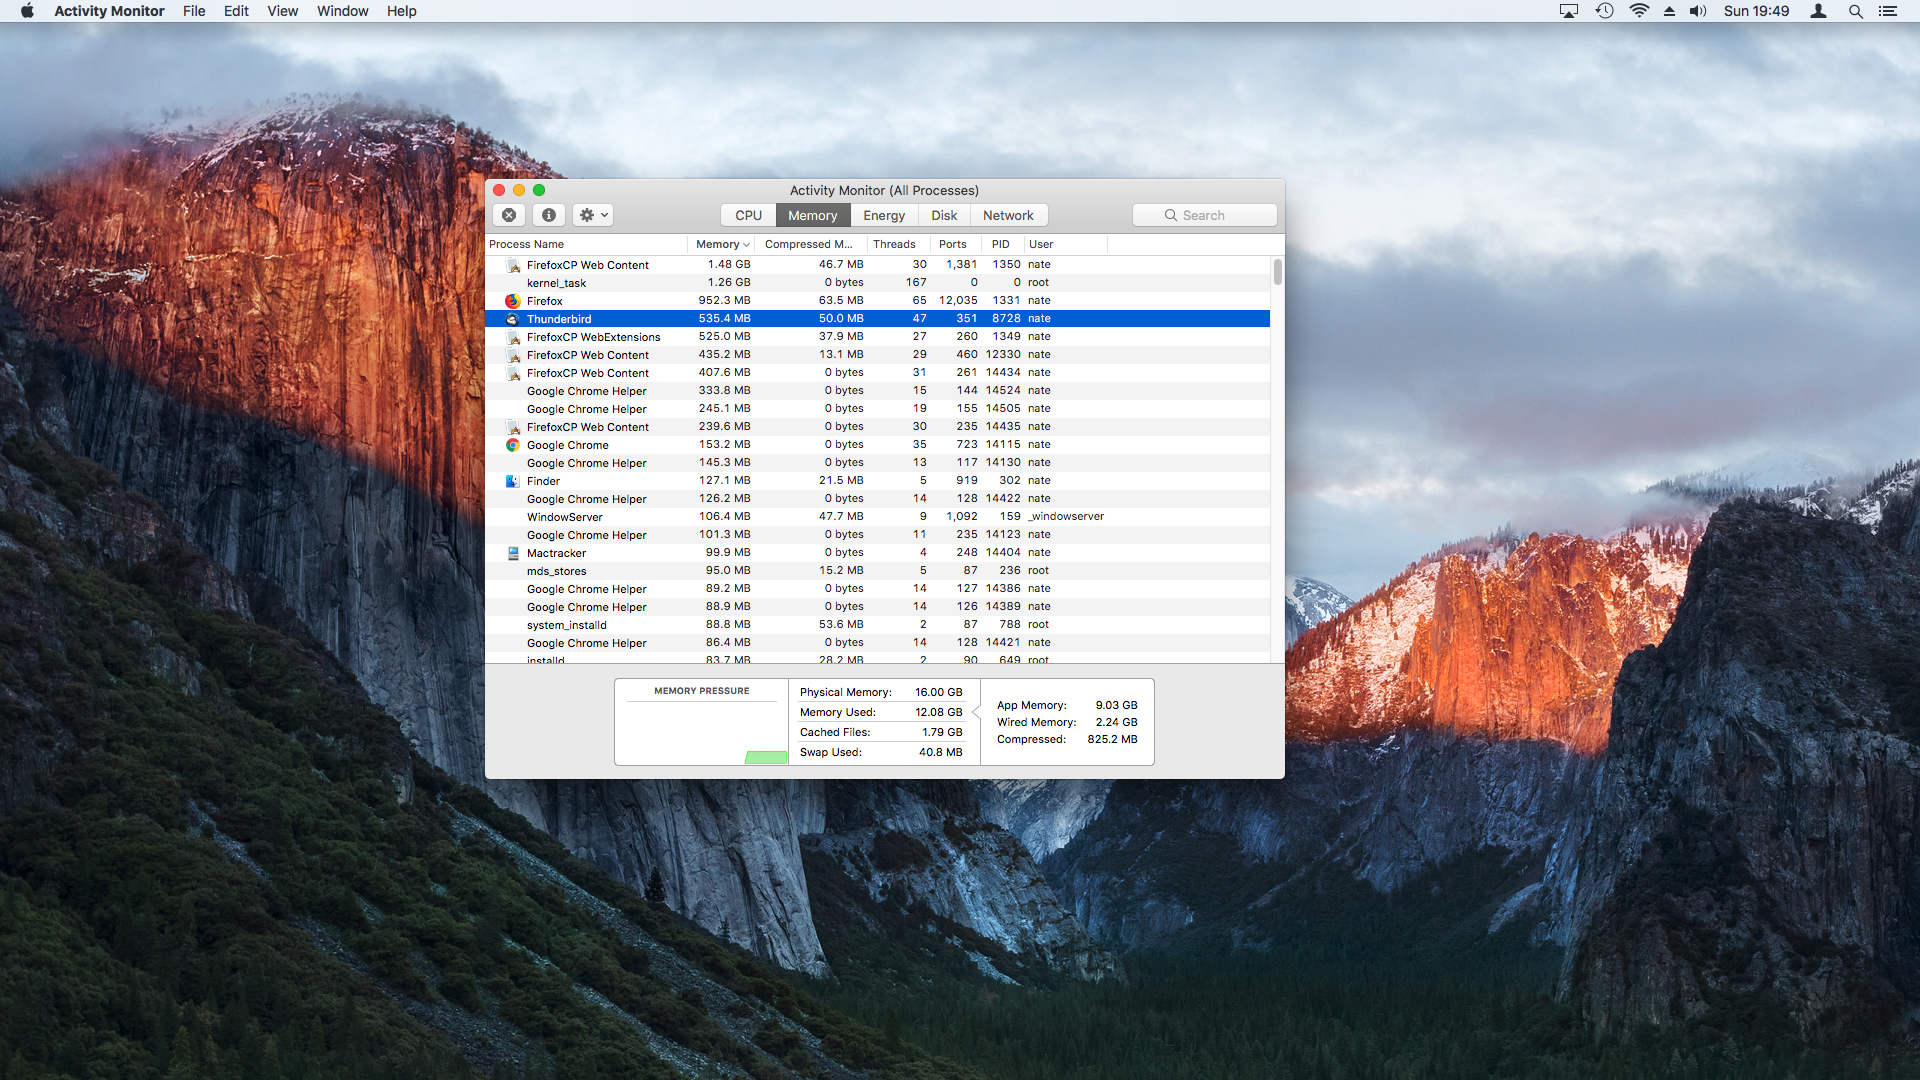
If your Mac is still running slowly, click the ‘Spotlight’ icon and launch ‘Activity Monitor’. Select the ‘Memory’ tab to see which programs use the most RAM.
3. Clear the caches
The macOS 10.13 operating system uses temporary ‘caches’ to store data required by running programs. If a program develops a fault these can be filled with junk data making it harder for other apps to access legitimate data quickly. Over time this can slow down your Mac dramatically.
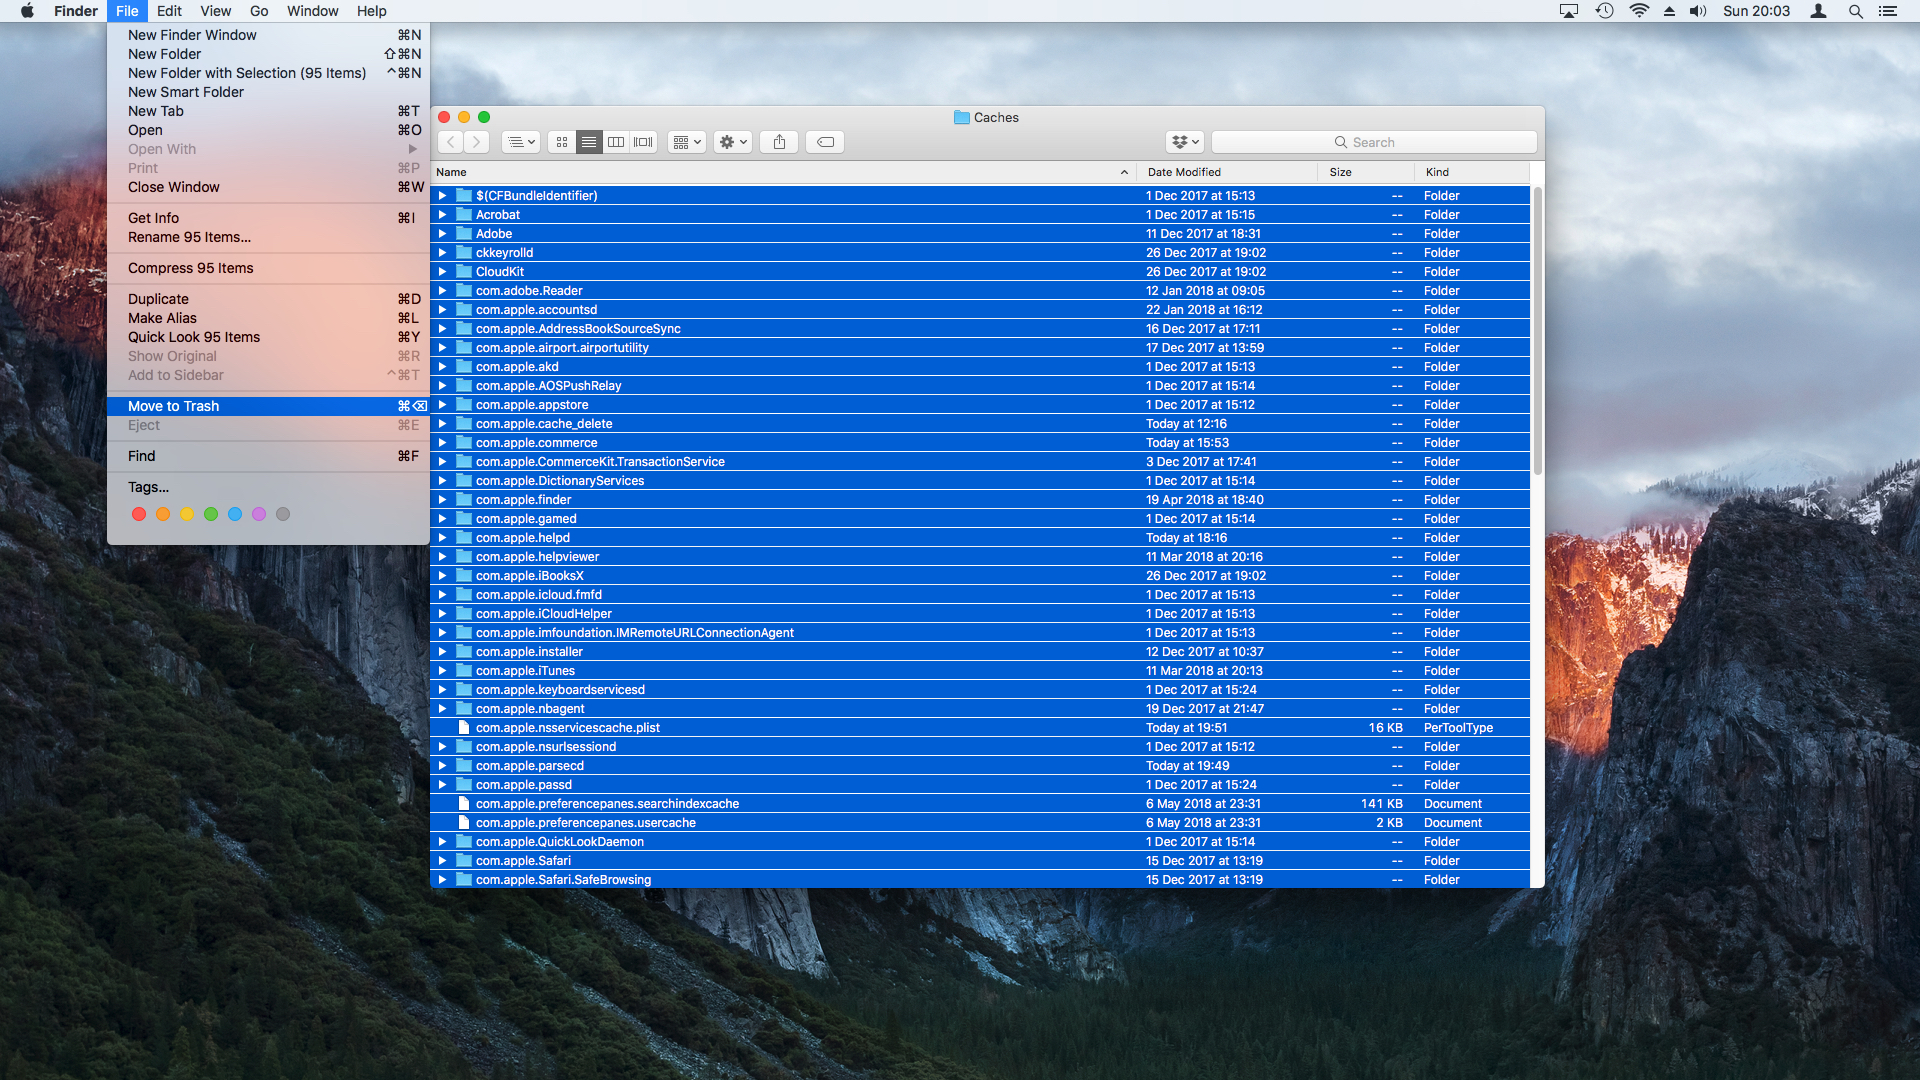
To start your spring clean and speed up macOS 10.13, first save and close any open files. Next open Finder and click the ‘Go’ menu option. Choose ‘Go to Folder’ then enter ‘~/library/caches/’. Press ‘Enter’ to be taken to the folder. Next, open the ‘Edit’ menu and select ‘Select All’. Choose file and ‘Move to Trash’.
Once these files have been sent to Trash, don’t try to empty it just yet. Instead, return to Finder and follow the same steps above to delete the files inside ‘/Library/Caches’. Restart your Mac, then empty the Recycle Bin.
4. Remove login items
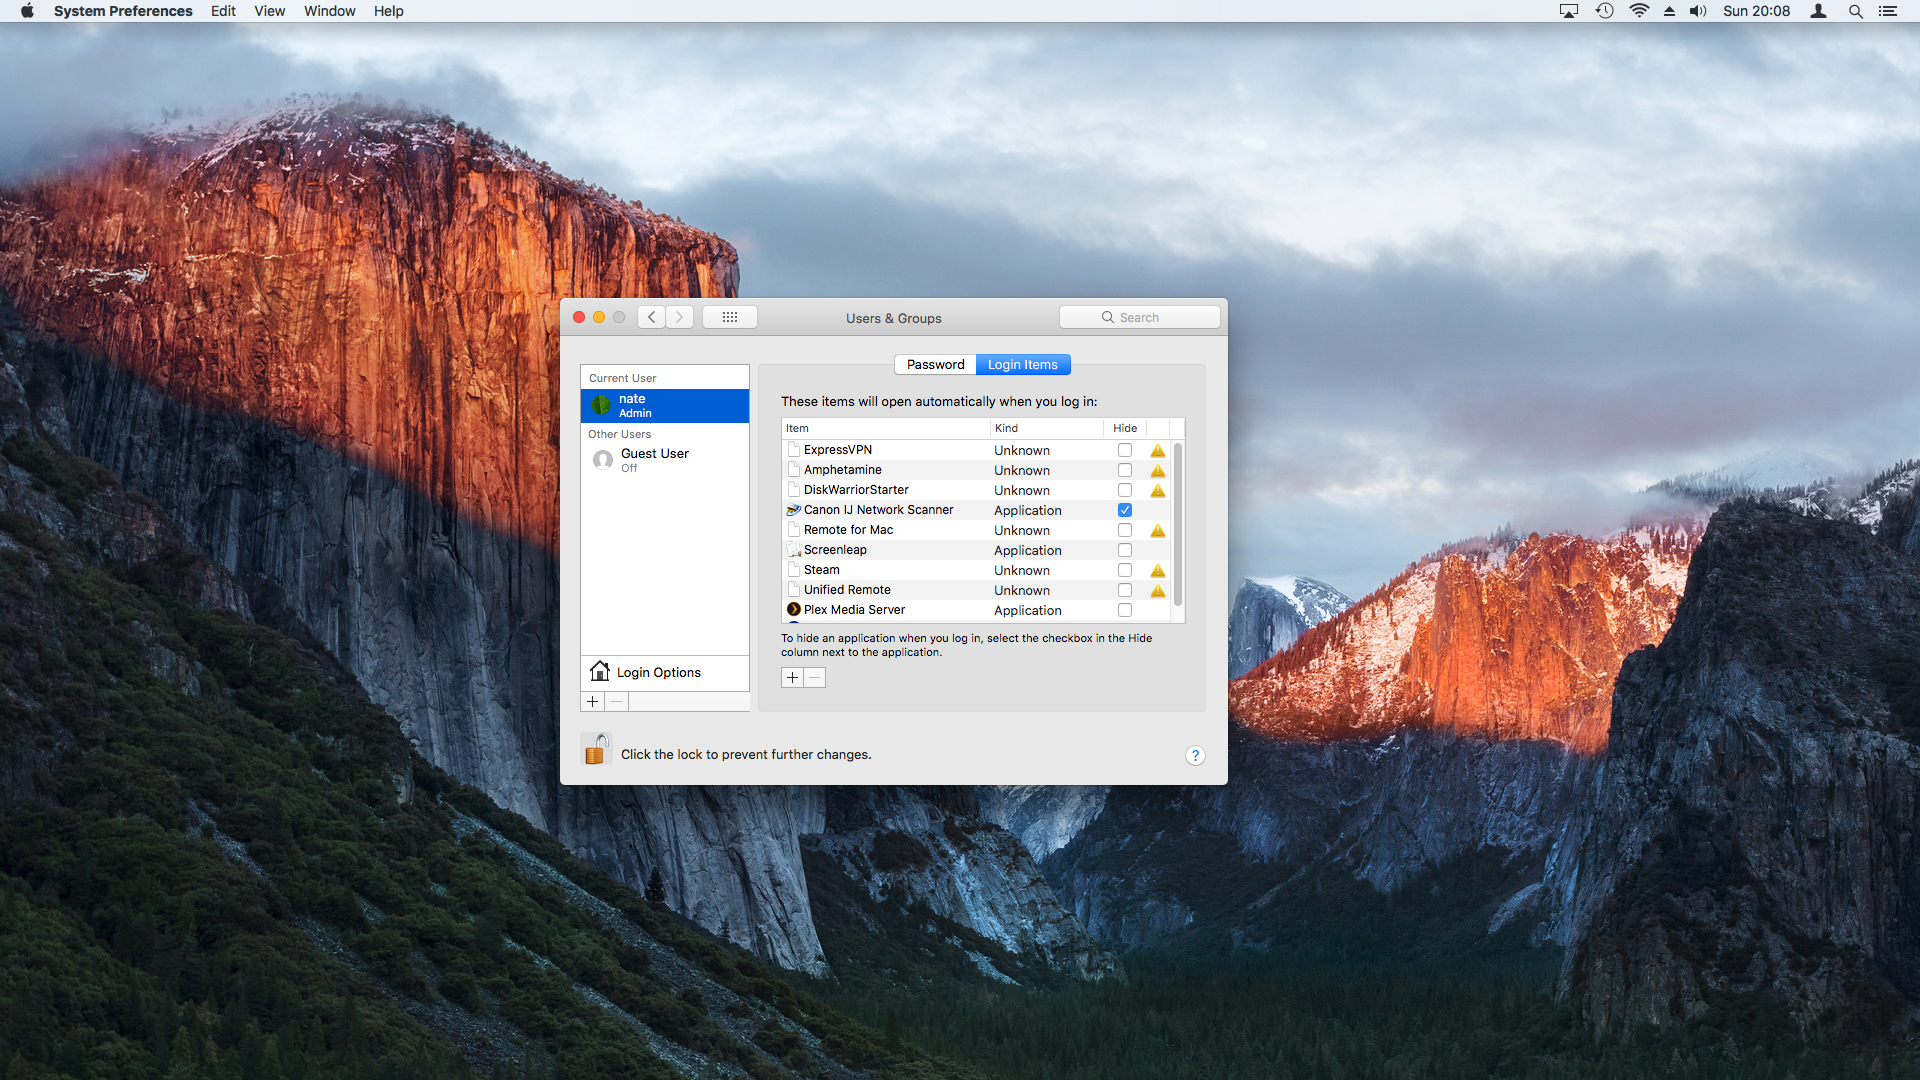
Certain programs that you install via the Mac App Store may be configured to launch automatically once your login. If you’ve had your Mac for a while, this can seriously slow down macOS 10.13 as multiple programs will try to launch at the same time.
To check which programs will start when you login, click ‘Apple>System Preferences’. Choose ‘Users & Groups’ and select your user name from the left-hand pane. Next, select the ‘Login items’ tab. Select the programs you want to remove and click ‘-’ for each one. This will not remove the program itself.
5. Remove junkware and adware
If you’ve followed the previous step to remove login items but are still seeing unwanted programs when you login to macOS 10.13, you may have accidentally installed malware.
To fix this, restart your Mac while holding down the left Shift key on your keyboard. A grey loading bar will appear. Your Mac will then display the login screen with the words ‘Safe Boot’ written in the corner. This is a special start-up mode for your machine which launches only default programs.
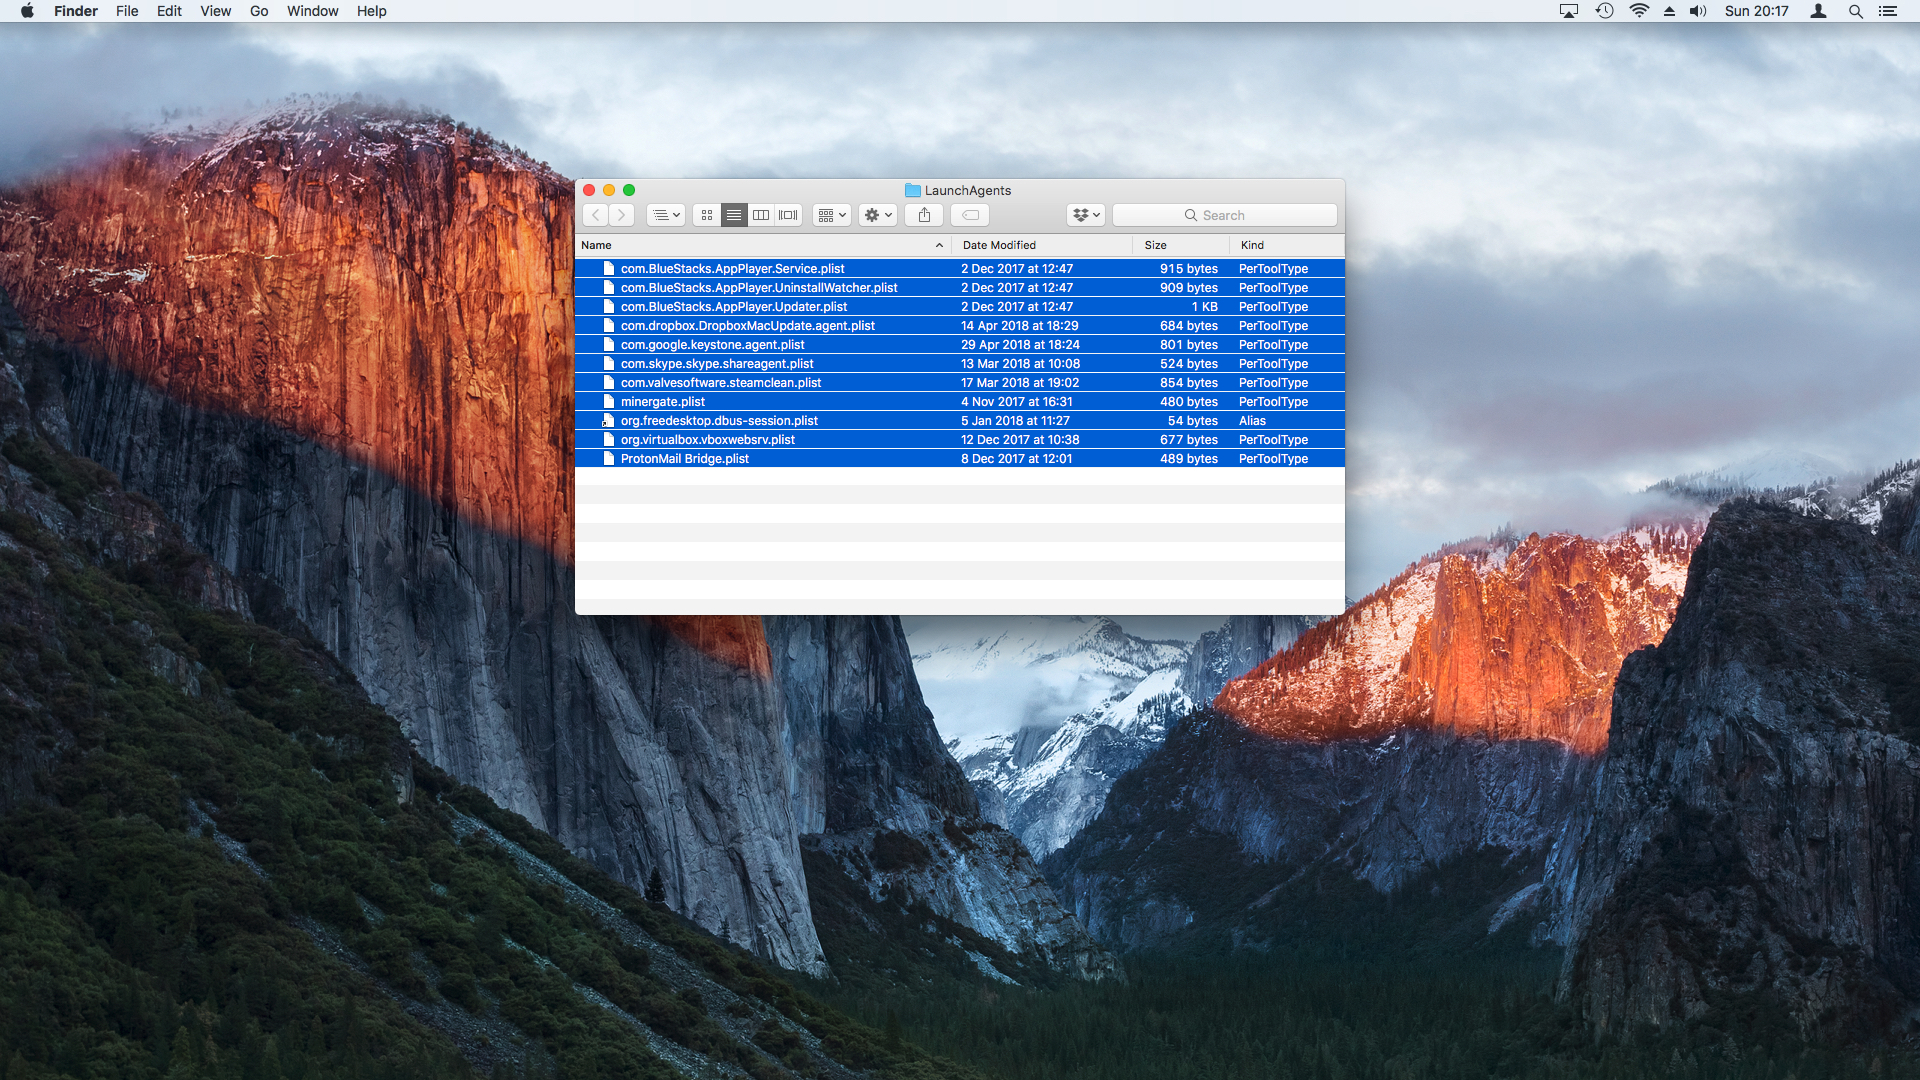
Login as normal, then open Finder. Click the ‘Go’ menu option, choose ‘Go to Folder’ then enter ‘~/Library/LaunchAgents’. Delete the files which contain names of any programs you don’t recognize. This will not uninstall the corresponding app but simply makes sure it doesn’t launch on login. Repeat the above steps in the following locations:
‘/Library/LaunchAgents’
‘/Library/LaunchDaemons’
‘/Library/StartupItems’
Also, check out our list of the best free antivirus for Mac in 2018.
6. Upgrade your RAM
Your computer's overall speed is mostly determined by the amount of virtual memory (RAM) available. The current version of macOS (High Sierra) requires at least 2GB of RAM to run smoothly.
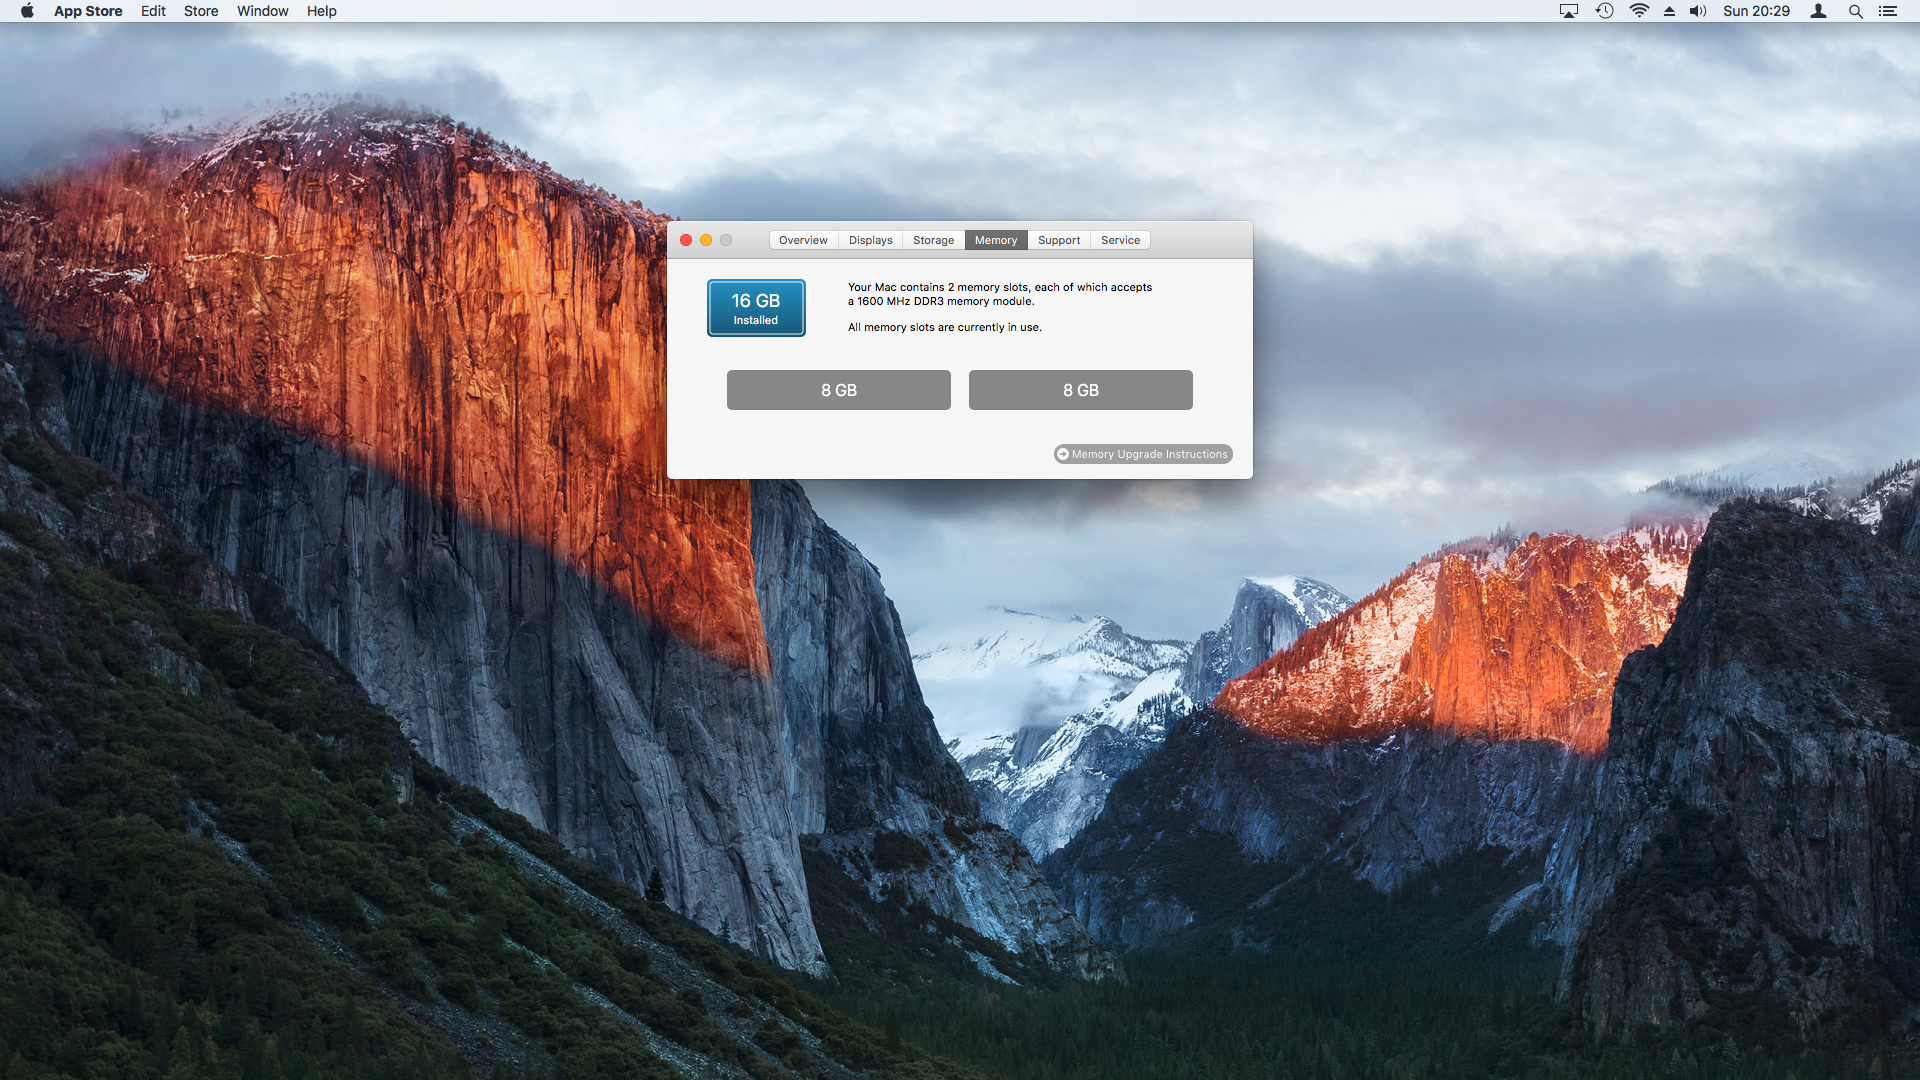
One of the easiest ways to speed up your Mac is to install more RAM. Your machine has a fixed number of RAM ‘slots’ into which chips can be inserted. To check your current usage, click ‘Apple>About this Mac’ then choose the ‘Memory’ tab. From here you can see a graphic of your current number of slots and the exact type of RAM chips used by your Mac.
Click on ‘Memory Upgrade Instructions’. This will load the Apple Support Page, which details steps on how to install RAM for your specific model. If order RAM chips online, make sure they match the exact speed and type used by your Mac e.g. 1600MHz DDR3.
Some models of Mac such as the most recent Mac Mini can’t be upgraded as the RAM chips are hard wired into the logic board.
7. Use an SSD
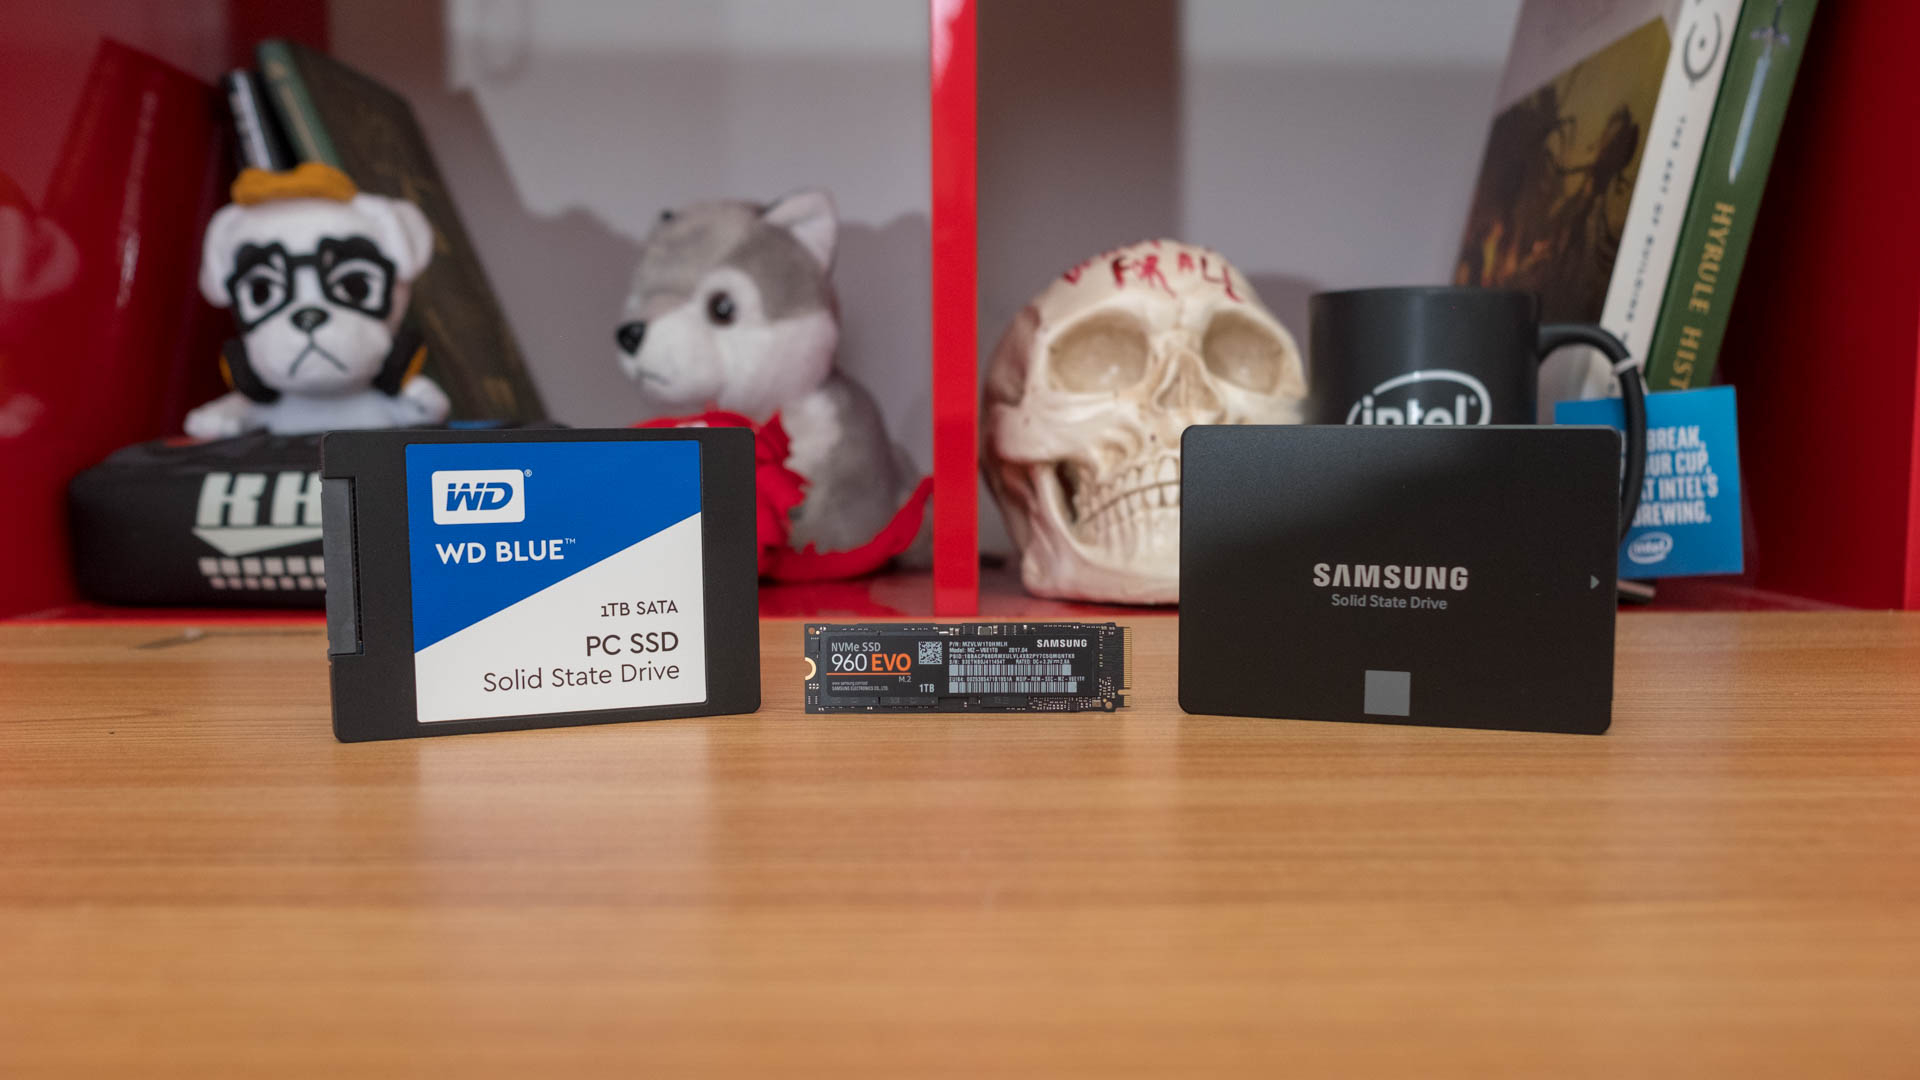
SSDs (Solid State Drives) use Flash Memory-the same kind found in USB sticks. They allow for much faster access times than traditional hard drives which read from a series of magnetized disks.
SSDs cost more per gigabyte than regular hard drives but will make for a much faster system if you’re willing to pay up. Apple has already switched to using SSDs in many of its products such as the latest MacBook, however if you have an older machine you may be able to upgrade.
If you choose to do this and want to copy the contents of your existing hard drive to the new SSD, consider using Migration Assistant to transfer your data from a recent Time Machine backup.
8. Apply first aid
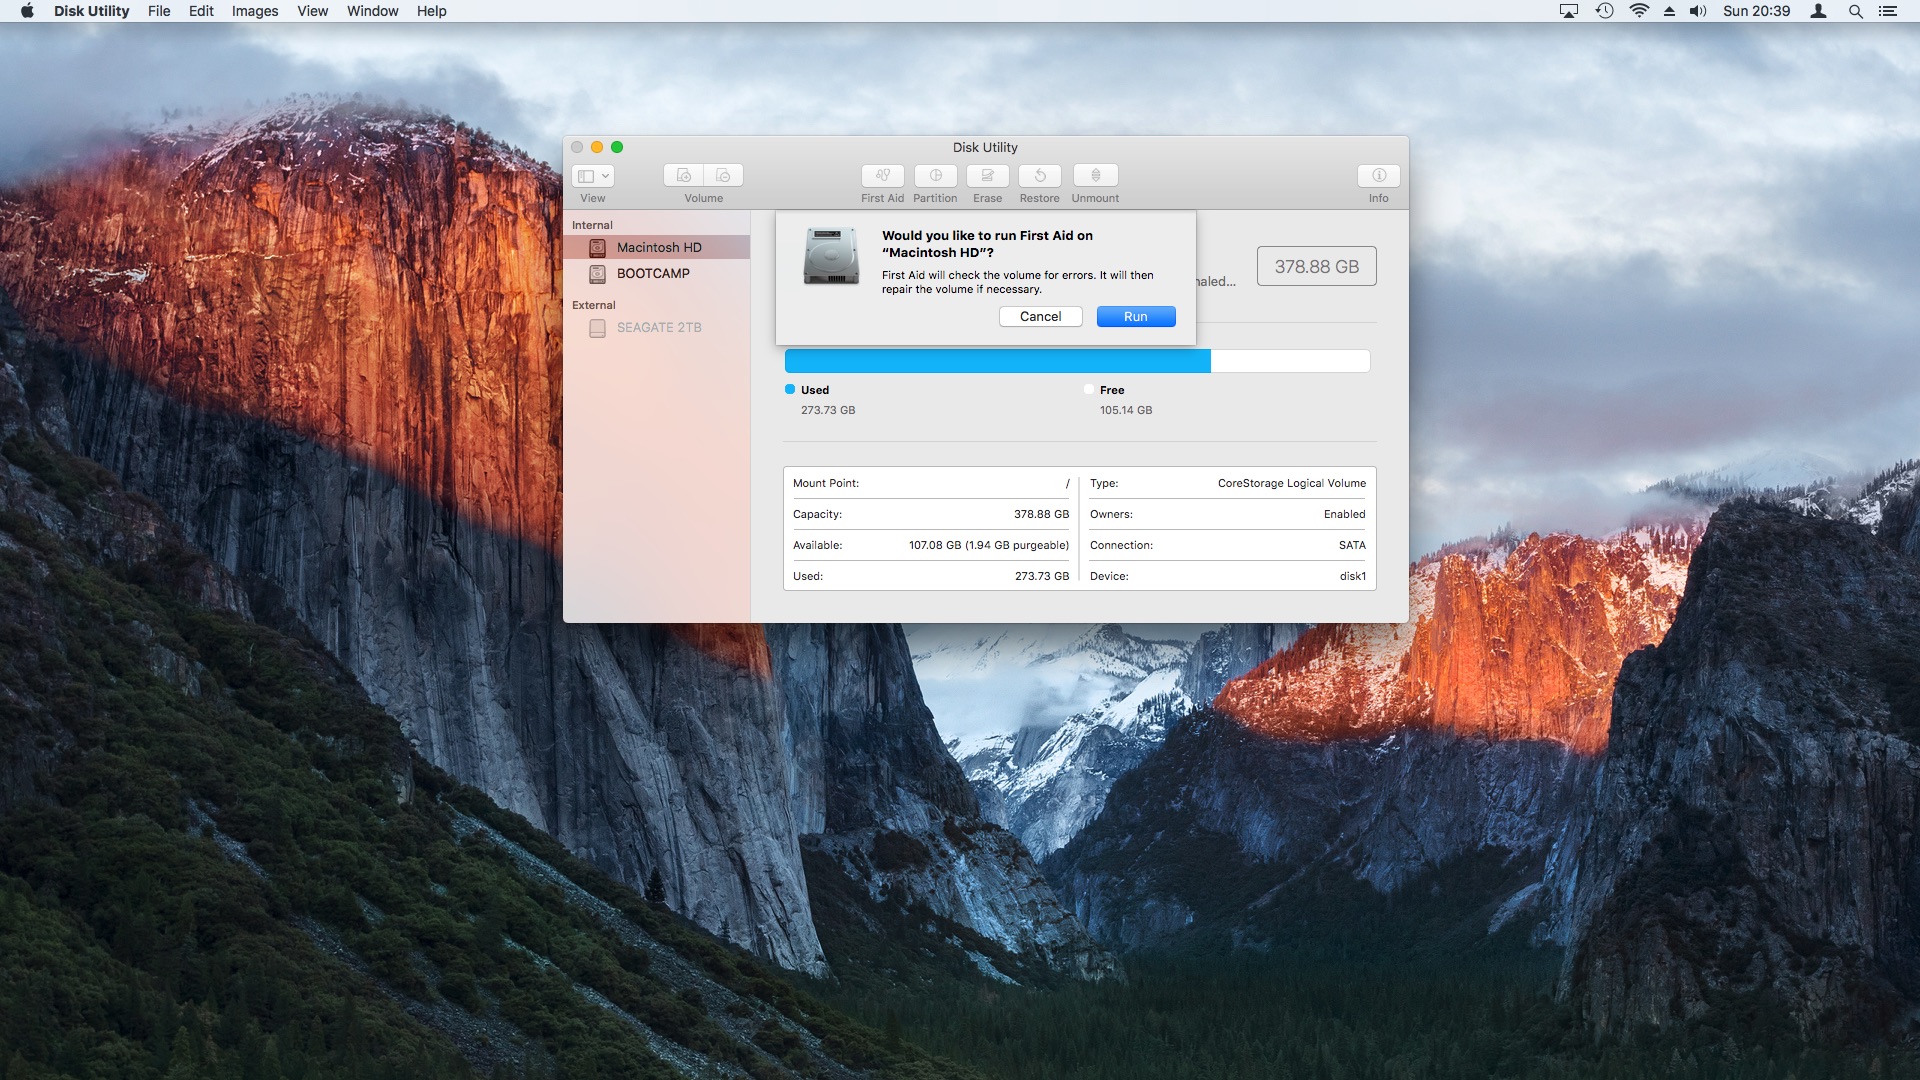
The Mac Operating system has sophisticated error checking routines, but occasionally data can be corrupted which then lowers performance. Luckily Apple have provided a handy utility to check and repair errors with damaged files and disk permissions, which should help speed up macOS 10.13.
First, save and backup your data, then restart your Mac holding ‘Command + r’. Click the arrow to continue then select ‘Disk Utility’. Once the utility loads, select ‘Macintosh HD” from the box on the left, then click the ‘First Aid’ button at the top. If any errors are detected, Disk Utility will try to fix these for you automatically.
9. Optimize storage
Even though macOS 10.13 is very efficient when it comes to using files, as time goes by temporary data and third-party applications can decrease the speed of your machine.
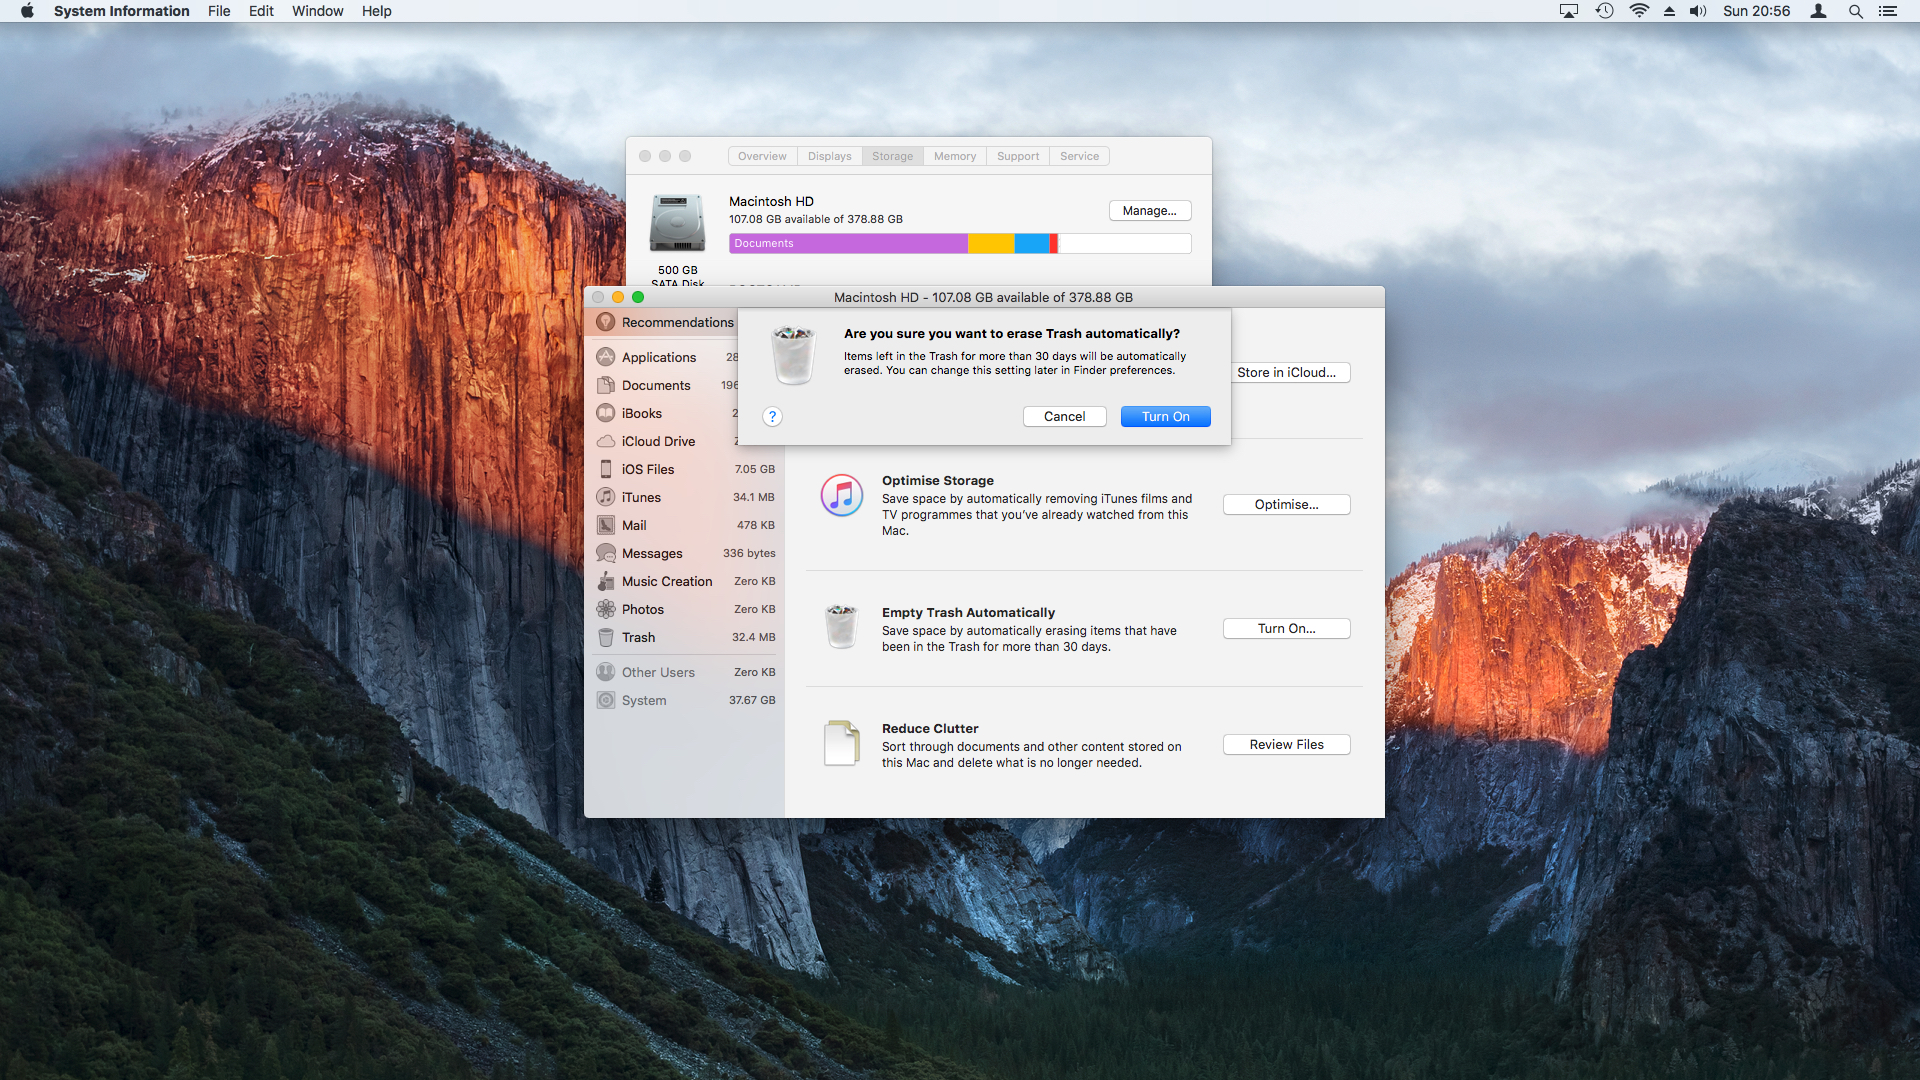
Once of the ways to streamline your file usage is to go to ‘Apple>About this Mac’. Next, click on the ‘Storage’ tab, then select the ‘Manage’ button.
If you have fast and reliable internet connection, choose the ‘Store in iCloud’ button. Any recently used files in your ‘Documents’ and ‘Desktop’ folders will be moved to iCloud.
The second option ‘Optimize Storage’ relates to iTunes or movie files that you have stored on your Mac. From here you can remove any movies you have already watched. These can always be downloaded again at a later stage if needs be.
Use the third option ‘Empty Trash Automatically’ to delete files that have been in the ‘Trash’ for more than 30 days. Finally, the ‘Reduce Clutter’ option identifies any large files that you may no longer be using. You can hover over these to delete or show them in Finder.
10. Reinstall macOS 10.13
If you have followed the previous steps but are still having issues with system speed of macOS 10.13, you can return your Mac to its factory settings. Save any personal data and make a full backup, ideally using Time Machine.
Next, restart your Mac holding ‘Command +r’. Click the arrow to continue, then on 'Disk Utility'. Once the utility loads, select ‘Macintosh HD’ from the box on the left then the ‘Erase’ button at the top.
Quit Disk Utility then choose ‘Reinstall macOS’ from the main menu. Your Mac will download the necessary system files to install a fresh copy of macOS 10.13 on your machine.
Once this is complete, the Setup Assistant will offer to migrate your existing data. Skip past this step for now, as you can launch the Migration Assistant later. Create a new user account and password to test your Mac’s speed.
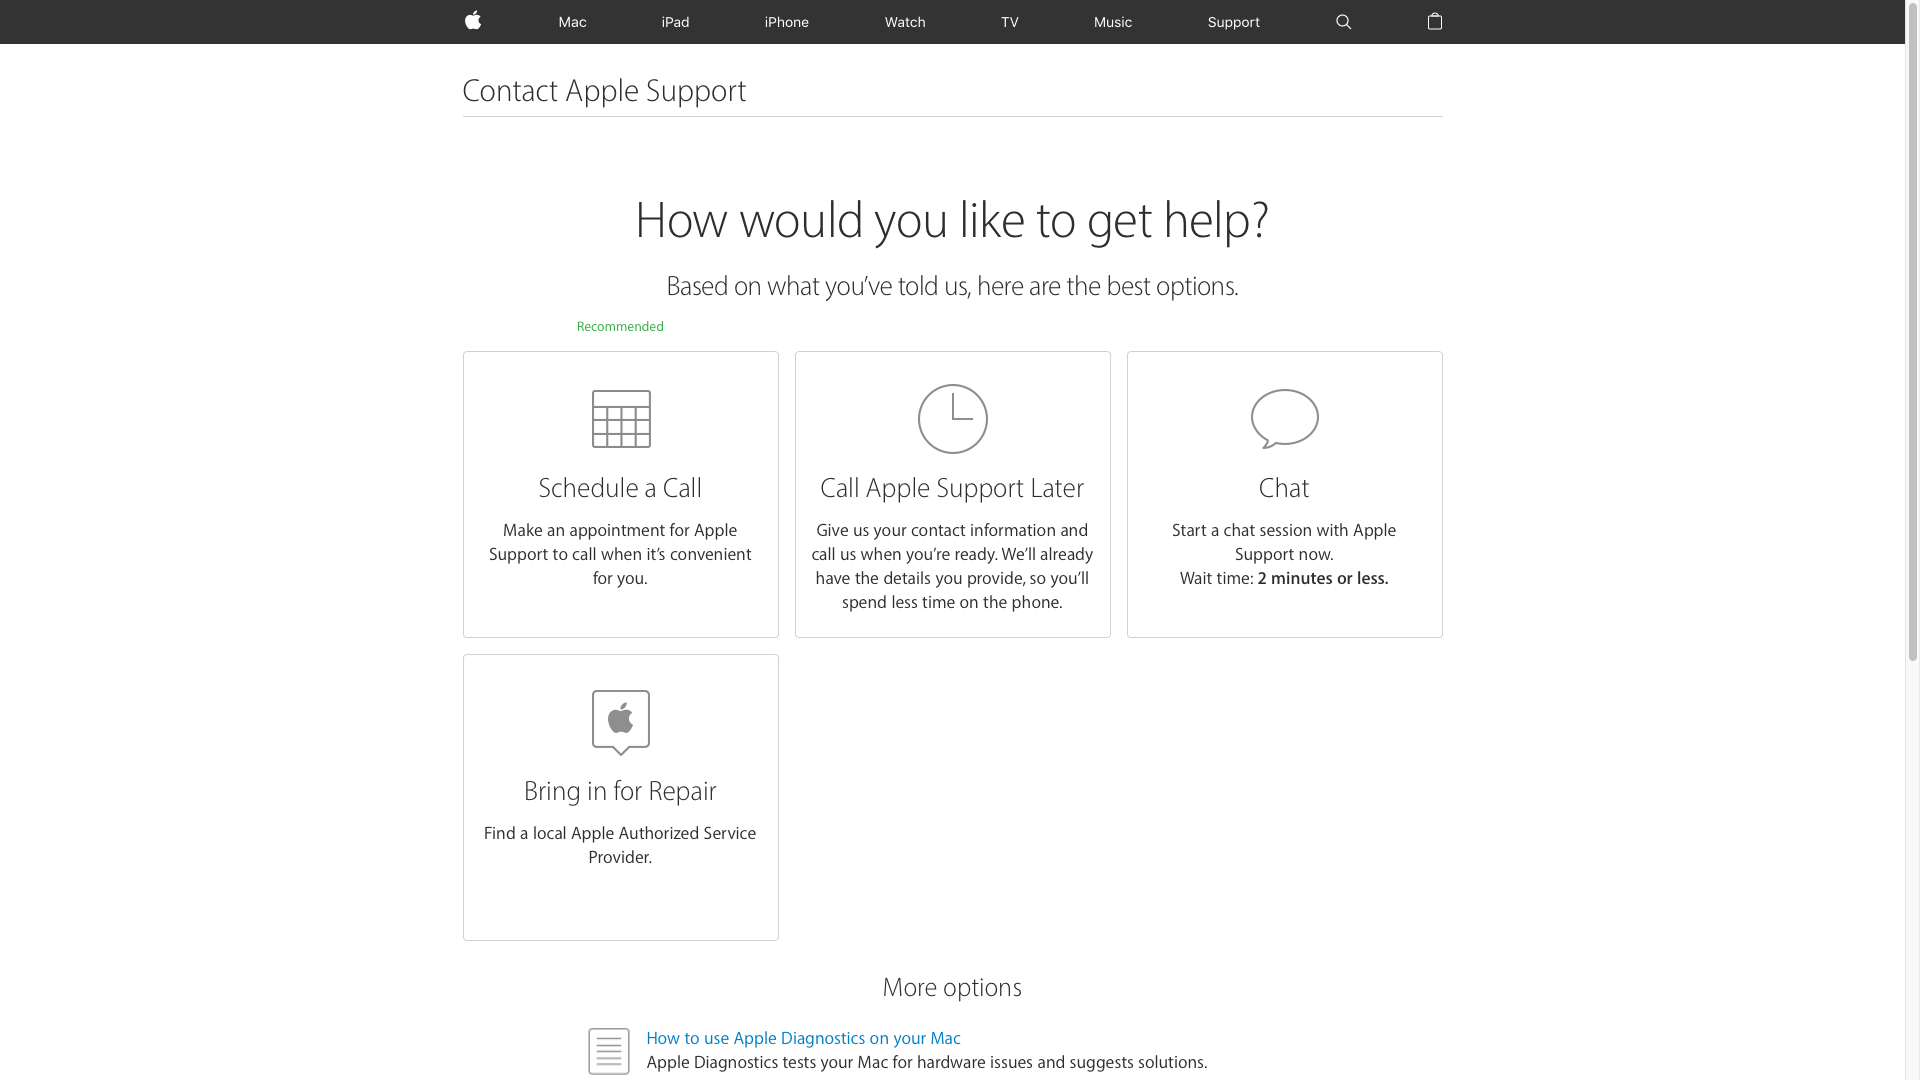
If your machine is still performing slowly, your Mac may have a faulty hard drive or logic board. Visit Apple's Support website to arrange a call-back from an Apple Care representative who will arrange to have your machine examined at your nearest Apple Store or repair centre.
Nate Drake is a tech journalist specializing in cybersecurity and retro tech. He broke out from his cubicle at Apple 6 years ago and now spends his days sipping Earl Grey tea & writing elegant copy.