
 Become a TechRadar Insider


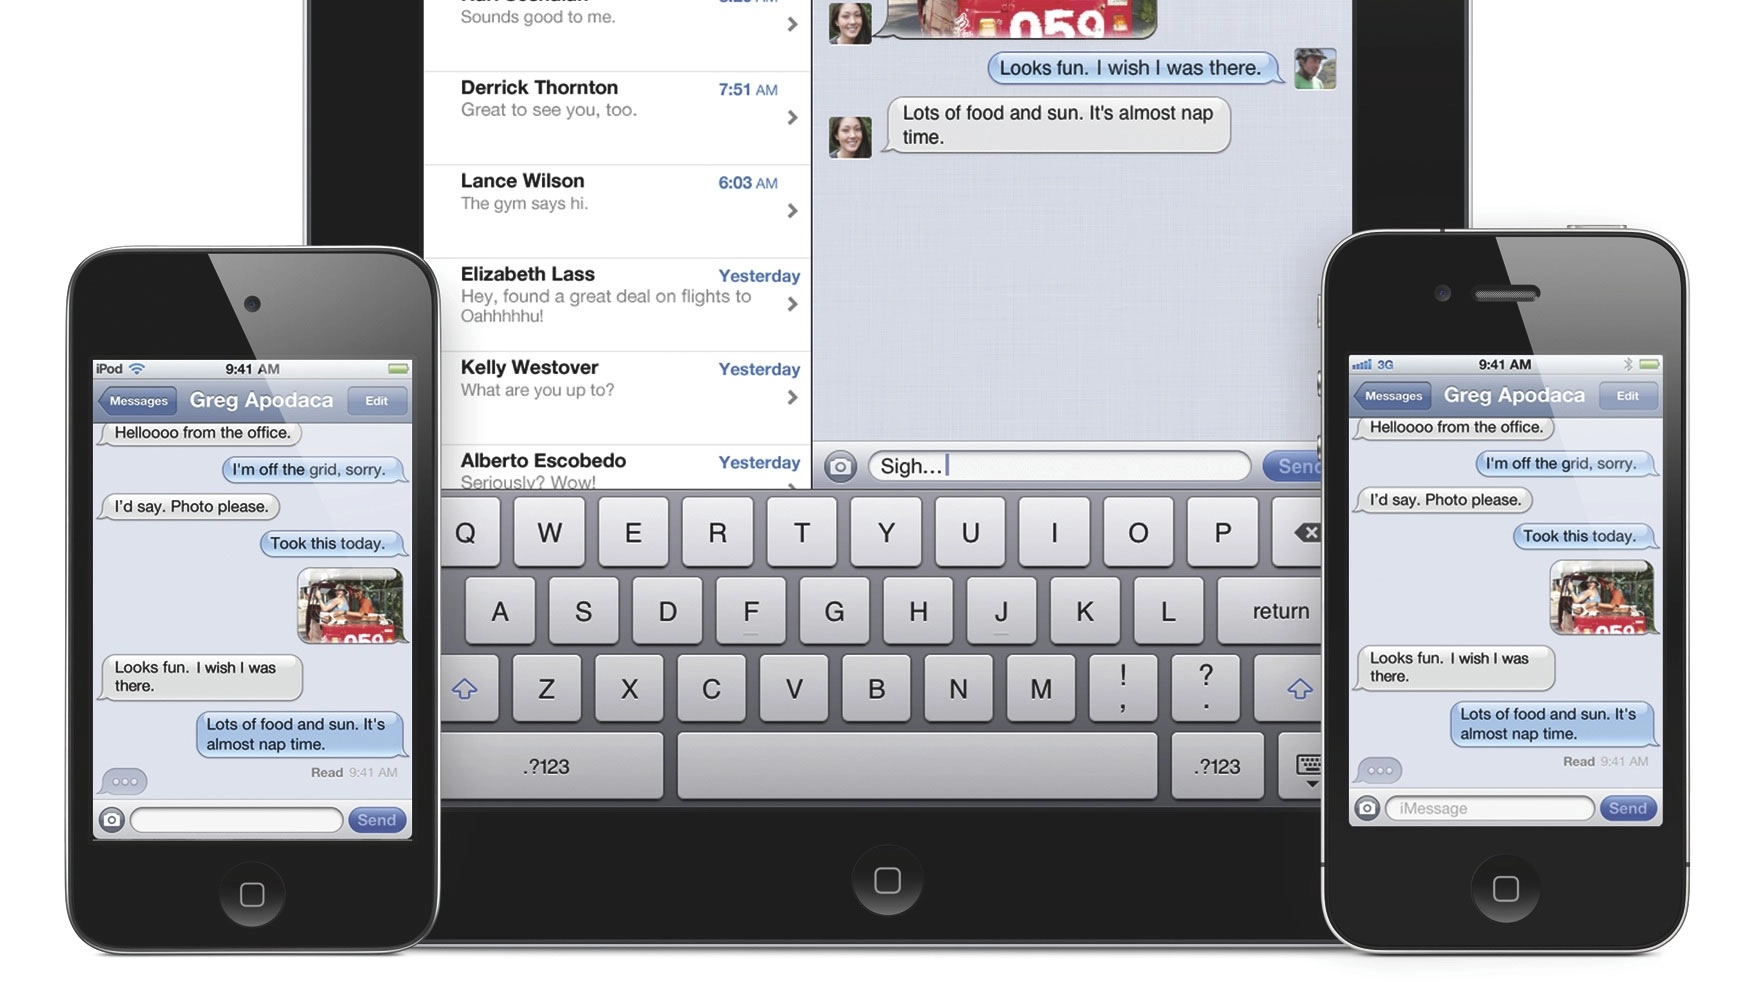
One of the big new features in iOS 5 – the latest update to your iPhone, iPod touch or iPad's operating system – is iMessage, which lets you send free messages to any other iOS 5 device, provided you have a Wi-Fi or 3G connection.
Better still, if you have more than one device, your messages (largely) get synchronised between them.
On the iPhone, iMessage works seamlessly alongside regular SMS and MMS messages.
If you've got a data connection and your recipient has iMessage too, your message will be sent this way, and appears in blue on the screen. If you don't have a data connection, or your friend has a non-Apple phone, your message will be sent as a regular SMS or MMS, appearing in green.
You can receive iMessages using your phone number (if you have an iPhone) or any email addresses that you link to your iMessage account. iMessages use data networks and only work on iOS devices, and SMS messages use the phone networks.
Wi-Fi-only iPads and iPod touches can text iPhones with iMessage-linked phone numbers, but the phone needs a data connection to receive them.
If you're abroad with Data Roaming switched off when not on a Wi-Fi network, you won't receive the message, even though it was directed to your phone number. Furthermore, only iMessages sync between devices: SMS texts remain on your iPhone only, as do any iMessages sent to your phone number.
With this in mind, it's best to tell people to use your iMessage email address instead, which gives you the most flexibility.
Set up your email addresses for iMessage
1. Enable iMessage

If you haven't already, tap Settings > Messages to switch on iMessage. You have to sign in with your Apple ID, but you can later remove this address if, say, you want to set your children up with iMessage on your Apple ID.
2. Add more addresses

Tap Receive At > Add Another Email and tap in the email address you'd like to receive iMessages at. Add as many as you want, so long as they're not already tied to an Apple ID. When you press Return, 'Verifying' will appear.
3. Check your email

Now check your email inbox. You'll receive an email with a link in it to prove you own that address. Click Verify Now, then enter your Apple ID and password on the web page, and you're all set to receive iMessages.
Start sending free messages
1. Change your Caller ID

In Settings > Messages > Receive At is a Caller ID option. It's best to use an email address rather than your phone number, to enable syncing between iPhones and other iOS devices. Use the same Caller ID on all devices.
2. Toggle Read Receipts

In Settings > Messages is a Send Read Receipts toggle. If you set this to On, anyone who sends you an iMessage will see when you've read it. It's marked as read when you tap into the Messages app and view it there.
3. Add your recipient

To send someone an iMessage, you need to know the address they use. The easiest way to send them is to add the recipient to your Contacts app. Tap it, then tap +, and type in the person's details. Tap Done when you're ready.
4. Compose your message

Tap Home, then Messages. Tap the compose message icon to write a message, then start typing the person's name. Their full name and address should appear. Tap it, then tap in the text field below to write your message. Tap Send when ready.
5. iMessage or SMS?

If you sent the message as an iMessage, it appears in blue. If you sent it from an iPhone and it's gone as an SMS, it'll be green – but your iPhone may try to deliver as an iMessage first, then retry as an SMS if it's unsuccessful.
6. Has it got there?

If your message went as an iMessage, you'll be able to see if it's been delivered. Look for confirmation in small writing just below the message bubble. If someone's enabled Read Receipts, you'll see when they read it.
Send MMS messages for free, too!
1. Send a picture

Tap the Camera button next to the text field to add an image to a message. Take a new photo or send one from your Camera Roll. Tap the image, then tap Choose to add it to your message. A thumbnail appears with the text.
2. How it appears

Images take longer to send because of their size, and appear in a separate speech bubble on your and the recipient's devices. They're free to send as iMessages, provided you don't exceed your data allowance.
3. Disable MMS

If iMessage isn't available, your iPhone could attempt to send your picture message as an SMS or costlier MMS. To prevent this, tap Home, then tap Settings > Messages and toggle 'Send As SMS' and/or 'MMS Messaging' to Off.