

Having a great sound system is as important as having the right display when it comes to crafting the perfect home theater. Every month, we have our Blu-ray Bounty feature where we test the latest 4K Blu-ray releases to see which will make great showcases for what your system can do — and we've just installed a new system in our test room for this purpose.
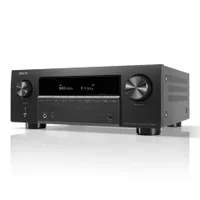
We're using a Denon AVC-X3900H AV receiver, and for speakers we have a Bowers & Wilkins 600 package, consisting of an HTM6 S3 center speaker, a pair of 603 S3 floorstanders, with a pair of 607 S3 bookshelves as surrounds (with another pair to be added in the future for 7.1 support), and an ASW610 subwoofer. We're using QED XT25 cables to connect everything together.
In the past, we've been using a Samsung HW-Q990C soundbar system. It’s an 11.1.4 channel Dolby Atmos soundbar consisting of four units: a main soundbar, handling front, center and height channels, two rears that handle rear surround and height channels, and a subwoofer. It's not the newest model — that's the five-star Samsung HW-Q990H, which we rate as being the best soundbar available for Dolby Atmos immersion — but it's served us well.
We chose a soundbar originally because they're the most popular home theater speakers around, and because our test room isn’t that big, so that system packed more than enough power for an immersive experience.
However, we’ve decided to upgrade to a full home theater surround system, consisting of separate speakers and an AV receiver, so I wanted to talk about how easy it was to set up a system like this using 2026 components, and how this 5.1 system compares to our usual soundbar system using some reference scenes from 4K Blu-ray. In fact, let's start with the audio comparison.
Soundbar vs separates: the sound test

Starting with the Batmobile chase scene from The Batman, the soundbar delivered some strong bass and power, solid height channels and plenty of detail, even from the small rear speakers.
Switching to the full surround sound system, however, a whole new level was unlocked. As the Batmobile’s engine activated, the combo of the front speakers and the subwoofer rattled the room, but crucially maintained the fine detail as the engine revved, making it feel much more physical and mechanical.
As the Batmobile and Penguin’s car swerved to avoid traffic, the sound of the tires and the blaring horns of nearby traffic swept across the front B&W speakers with real accuracy and clarity, following the trajectory of the action on screen. While the wide soundbar also did this well, it didn’t have the same level of power or detail as the floorstanders — overall viewing experience from the separates was more exciting and engaging.


Dolby Atmos sound effects I’d never heard before when using the soundbar were suddenly audible with the full system, such as leaves and rain hitting the underside of the two cars. They stood out even among the bass-y tones of the engine, and the impact of the Batmobile crashing through a barricade.
A later scene where Batman, Penguin and Gordon are speaking demonstrates the clarity from having a big, dedicated center speaker as well. The subtle tonal quirks of each character’s voice, from Batman’s docile gruffness to Penguin’s shrieks were all well defined and clear.
While the soundbar did well with speech, having separate speakers delivered more nuance in each speaker’s dialog, as well as popping out even more from the background.

Moving on to Alien: Romulus, the clacking sound of face-hugger feet had me looking over my shoulder more than a few times. Again, while the soundbar's angled surround drivers did an admirable job, more subtle effects such as sloshing water in the cryo chamber and the creaking of overhead pipes suddenly came into focus when using the full-size system, nicely balanced with the tense, pounding score and raised voices of the group under attack.
In a later scene, as a character sneaks around, there’s a real sense of height just from a 5.1 system, and a demonstration of real Atmos 3D sound as water trickles down from above. Although there were no dedicated height speakers (yet — we'll add some later), the surround and front channels created a sense of height anyway that made the scene sound all the more immersive.
For something more music-based, I went with the time-bending performance scene from Sinners. This was a display of sound-mapping prowess, and the separate speakers and AVR processing really delivered. As the camera pans around the barn, the sound of Sammie’s voice moves around each speaker, giving a full-360 surround effect.
Again, the soundbar does this really well, but the speakers added another level by providing more space for each sound, meaning you can pinpoint where it's coming from even more clearly.
Bass was once again tightly controlled, with plenty of punch and detail. The AWS610 subwoofer accurately rendered the pounding low tones from the DJ system and the eventual drums.
One of the most impressive parts was the expansion of sound. The song starts contained to the centers and fronts, but as the picture itself widens, so does the sound. The subwoofer gets meatier, the fronts deliver more power and the rears offer more detail — the speaker system simply had more headroom for this than the soundbar, unsurprisingly.
Putting a surround sound together

The initial planning stage for setting up a home theater is crucial. We needed to make sure we picked a powerful sound system with a feature-packed AV receiver with enough strength to drive it. We test a lot of different AV equipment and have a few input devices, so having enough well-specced HDMI ports is a big advantage to us, too.
After the equipment was chosen, we needed to consider speaker placement. Thankfully, there’s a general rule for Atmos home theater where placing all speakers (apart from the subwoofer) equal distance from your seat position provides the most optimum sound. For our testing lab, focused on a single seat, that was 140cm (55 inches).
Once the speaker's placement was considered, we needed to make sure we were getting good cables with enough length to them. While we chose to use QED XT25 terminated cables, you can pick up great quality speaker cable at most budgets. You’ll need to think where the wire will run and whether you need specific in-wall or under-floor cables for you own setup, but again there is plenty of choice.
We have soft rugs in our testing room to help reduce echoes, and this gives us an easy way to run the cables to the back of the room with danger of tripping.

Terminated speaker cable means cable that uses ‘banana plugs’ (which look like straight gold-colored points) on the end of the cable for easy installation into the backs of AV equipment. You can use the bare wire, but for us, these terminated plugs make unplugging to swap or move equipment easy, and obviously our test room will have all kinds of equipment moving in and out, so easier is better.
Once cables are connected, it’s about getting the speakers configured correctly. Handily, the Denon AVC-X3900H actually told us how to do it from start to finish using on-screen instructions. We haven’t tested the latest AVR's from the likes of Yamaha or Sony yet, so we haven’t experienced whether they do this as well, but it’ll be part of our reviews testing when we get our hands on them.

On-screen instructions walked us through the whole process on how to connect speaker cable to the relevant points on a speaker, and then how to connect the speakers to the ports on the back of the AV receiver. It then walked us through the speaker configuration, layout and optimization of the speaker’s sound to match the room. The last part was done using the provided setup mic and Audyssey support, though these may not be included with every AV receiver.
One thing that could confuse AVR newbies is that when choosing what speaker configuration we had for this process, the image on-screen shows a 5.1 speaker placement indicating that surround speakers should be at the sides, not behind.
This may surprise people coming from a soundbar system that uses rear speakers, because a lot of people will assume that the 5.1 surround speakers would also go behind you. If you don't have space to the sides and you really need to go more behind, this is unlikely to be a big problem — we just wanted to mention it for anyone following in our footsteps.
The whole process was a big improvement from when I used to work at an AV retailer, where AV receiver setup could often be confusing, and issues hard to diagnose.
All-in-all, the whole process including unboxing the speakers, placing them and getting the system up and running took a couple of hours — and I encountered no real hurdles on the way.
It wasn’t much more complicated than setting up the soundbar, as long as you don’t mind the cable management. In terms of actually getting the sound out, it was almost plug-and-play, and the results were so much more immersive.
Obviously, our specific setup costs a lot more than the soundbar we replaced, so you'd expect that, but you'd still get the same improvement in the scale and detail of sound from a more budget AVR and speakers combo.

Follow TechRadar on Google News and add us as a preferred source to get our expert news, reviews, and opinion in your feeds.
