Dream Machine 2017: we build the ultimate $18,000 gaming PC
The most powerful PC ever to grace TechRadar
We give you an insight into the many troubles that we encountered when putting together this year’s truly titanic Dream Machine.
This is not a build for the faint-hearted.
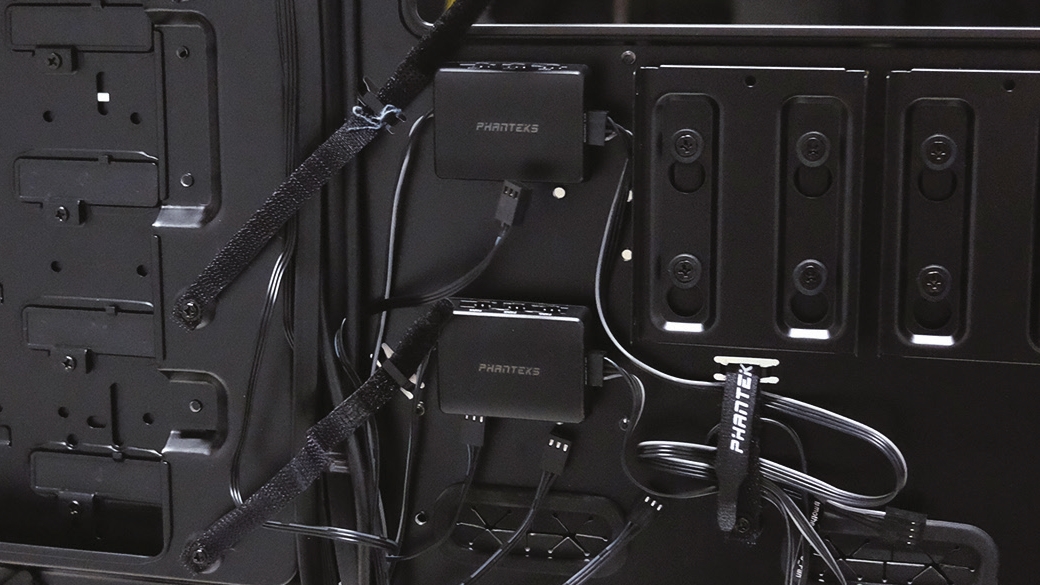
1. Cables galore
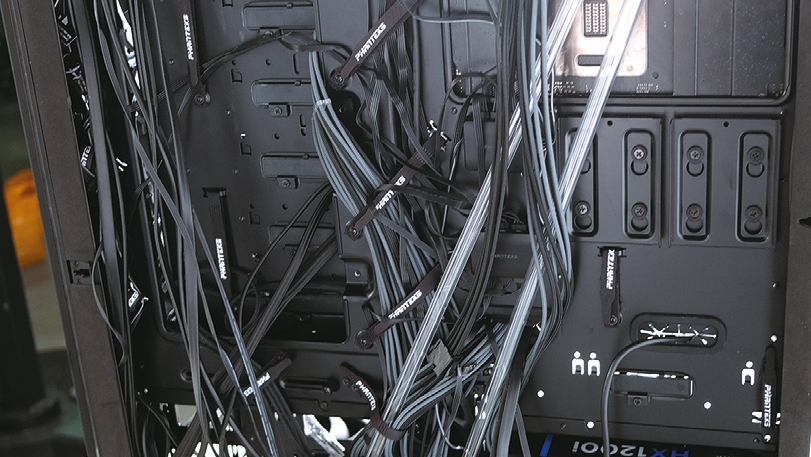
Boy, this case is a monster! The Enthoo Elite can house two systems internally—a full sized XL-ATX and an ITX below—if you fancy it. And because of that, there are two sets of front I/O, meaning excess cables everywhere.
On top of that, due to the phenomenal size of the case, Phanteks has included two of its own PWM fan headers, and a whole plethora of Velcro cable ties, including spares, to help cable-manage your system.
The first thing we did here was strip out those two pump mounts seen above, and remove the left cable cover panel, so we could drill into it and the aluminum covers, to mount our two reservoirs. Speaking of which….
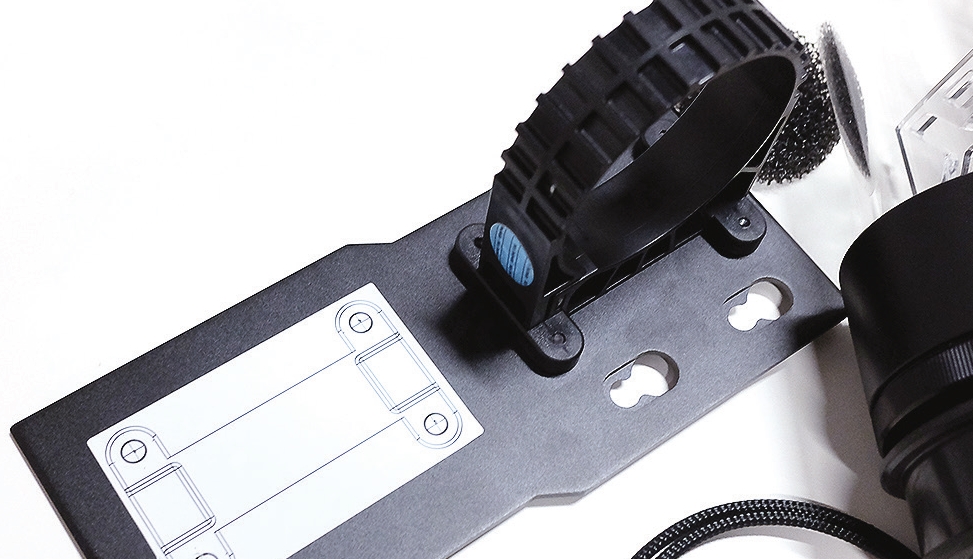
2. Marking up mounting
Mounting the reservoir brackets on the SSD brackets at first seemed like quite a challenge—at least, until we delved into the box and found that EK includes these awesome bracket mounting stickers with its Revo D5 pump models.
Simply line up your stickers, make sure there’s enough space between the two reservoirs, then you can go off and drill through the four mounting points with the appropriate drill bit.
Drilling through this aluminum plate was a dream; it’s one of the few materials that feels both solid and soft when you’re drilling through it.
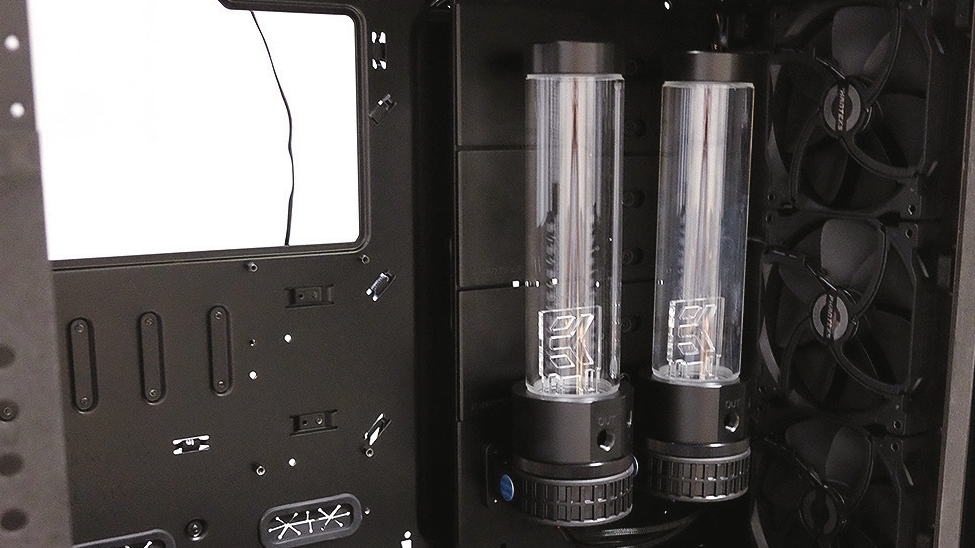
3. Reservoir requirements
Then came the tricky part. Once the holes were drilled through the aluminum bracket, we had to remove the sliding cable cover panel behind it to drill through that as well.
Fortunately, it’s secured in place with simple Phillips head screws, so it’s simply a case of removing the necessary screws, taking the panel out, removing the plastic cable covers and any of the rubber mounting grommets for those aluminum panels, marking up where the holes need to be drilled, and going at it again.
It’s worth noting that this steel panel was far more difficult to drill through than its aluminum counterpart, despite being about a third as thick.
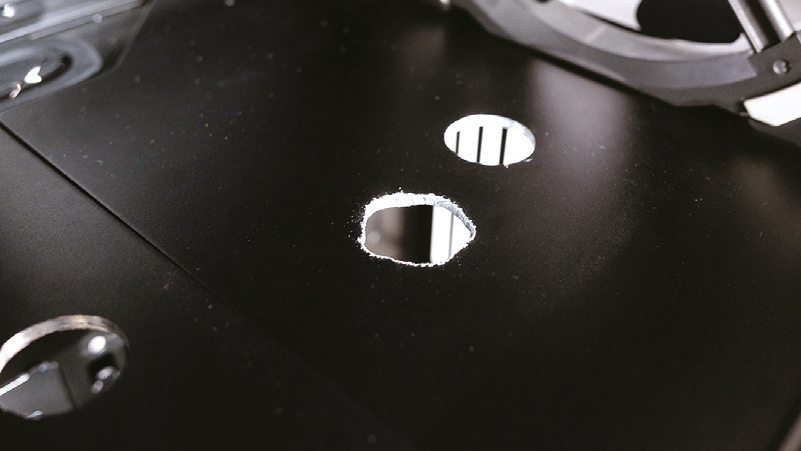
4. The right bit
Once we had our reservoirs fitted, our next job was to mark up our pass-throughs. For this, we cut a few pieces of tube to length, installed the fittings on the reservoir, and marked with a metal punch where we wanted to drill through the panel, using the tubing as guides.
Both of these PSU compartment covers are removable sheets of 4mm aluminum, so we can remove them from the case, clamp them down, and drill through.
The diameter of the hole necessary for the pass-through is 20mm. We ended up needing to use a spiral flute step drill bit to get through the panel, after attempting to use a traditional drill bit.
The one on the left still works effectively, but the one on the right is clearly far cleaner, thanks to using the correct tool.
5. Radiator riots
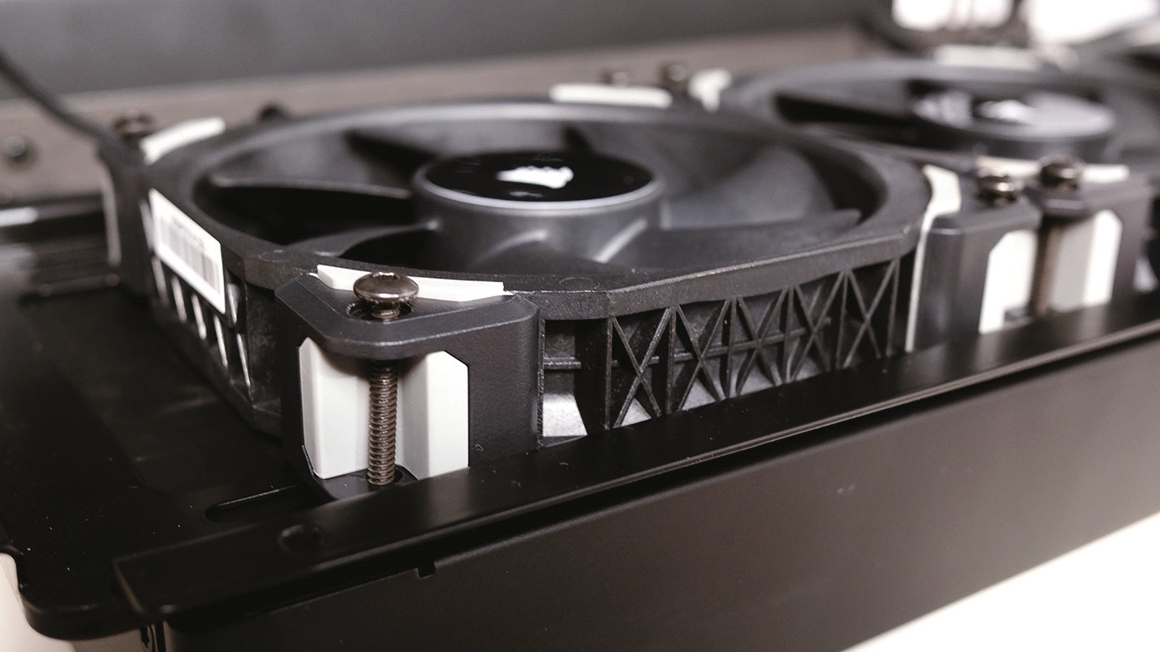
Thanks to Phanteks' intuitive case design, these radiator brackets make installing the meaty 480mm radiators as easy as pie.
Simply remove the bracket from the case by taking out the six attached thumb screws, then place it on top of your radiator, and mount your fans to your radiator, sandwiching the radiator bracket in the middle.
We had to do this twice, though, because on our first attempt we managed to misalign the radiator a fraction, stopping us from securing the bracket in place.
This meant we had to remove each individual Allen-headed screw (all 16 of them), shuffle the fans and radiator along, re-secure them, then reattach it all to the top of the case.
6. Fan cabling
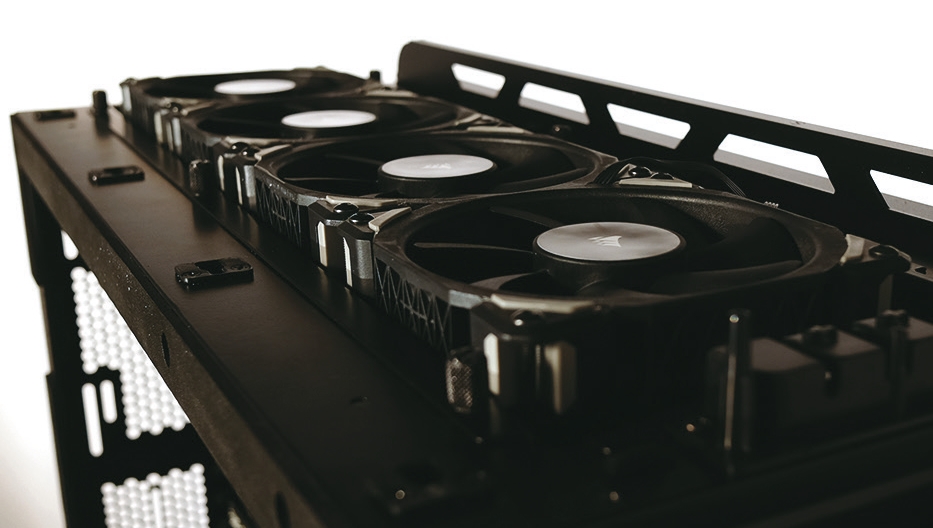
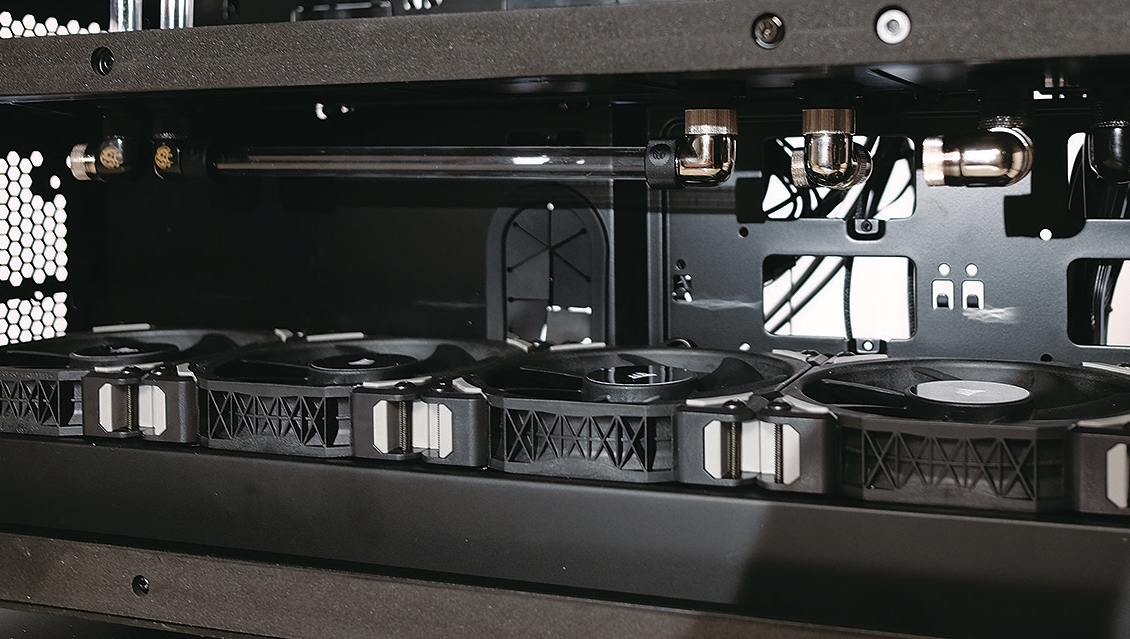
Here's a shot of that top radiator mounted in place, with the four Corsair ML120 Pros securing it. It seems like a moot point, but on a chassis as big as this, correct fan orientation is imperative.
We’re not talking about push versus pull here, but rather cable orientation. Find your cable routing holes, and orient your fans so the cables can reach those holes with ease.
With the Elite being such a stupendously tall case, even with the two PWM fan headers, it’s imperative you get this right, because the fewer cables you have in the back, the better, and using fan splitters or headers is less than desirable.
7. Nightmarish GPU tubing
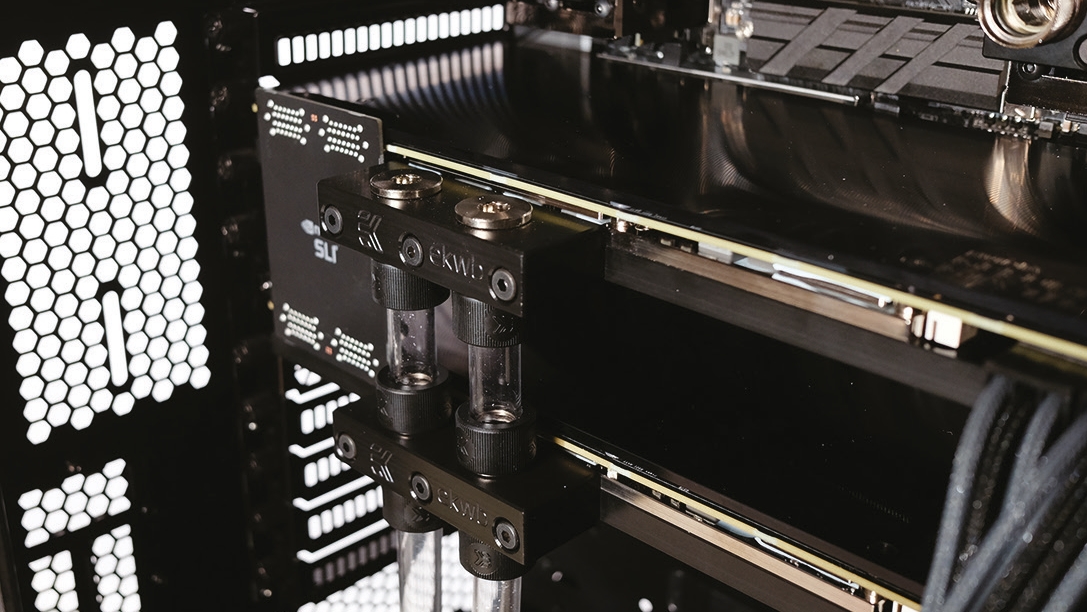
It's funny, but those two tiny pieces of tubing are some of the most difficult parts to create. It took around six attempts to get them the right length.
Too long, and they’ll place too much pressure on the PCIe slots, and stop you from using a fixed HB bridge.
Too short, and you run the risk of a leak. EK can sell you an FC Terminal dual-slot adapter, but you have to know ahead of time which slots you’re using, and it’s another $40 on top. To connect these two pieces of PETG, we took both the cards out of the motherboard, installed the two tubes, then carefully placed them back into the motherboard, before fitting the HB bridge again. It took some wiggling, but it looks great.
8. Dual loops and memory cooling
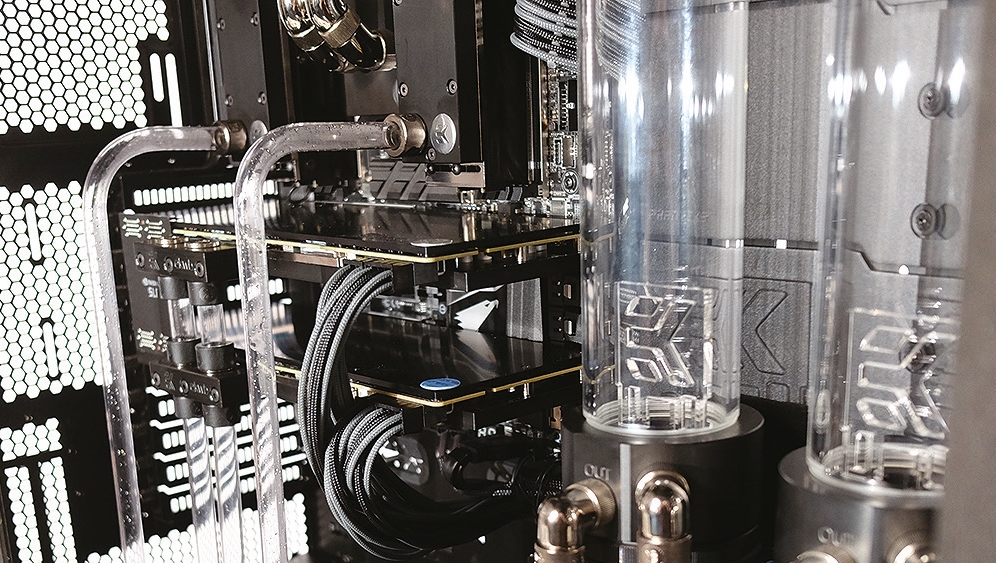
Memory cooling might seem a little excessive, and some would say it’s a lot of hassle and risk for little gain, but there’s no arguing about how good it looks.
We knew from the get-go that we wanted to run two loops, like last year, so next we had to figure out how those loops were going to operate.
We did a simple 90-degree bend on a length of tubing, then replicated that, before lining up the tubes, metal punching the floor, removing the panel (fittings, tubing, and all), and reaming through another two pass-throughs, ready for our tinkering underneath.
9. CPU configuration
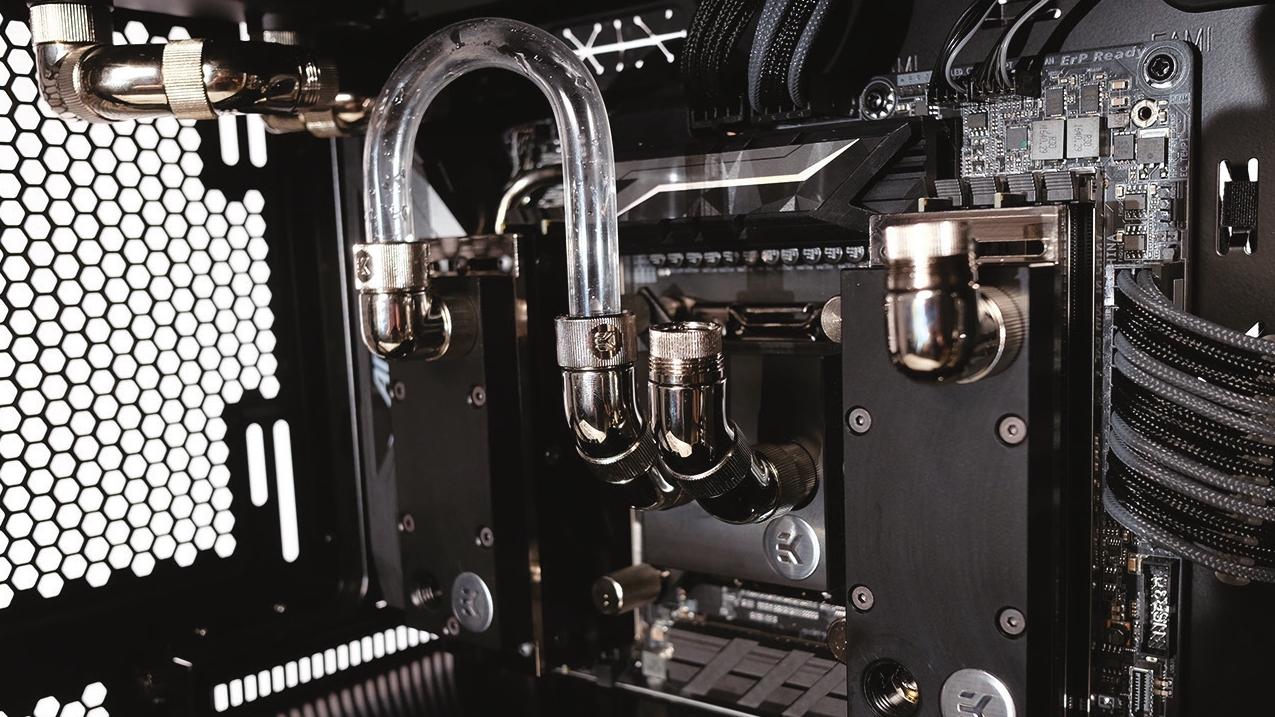
Here's what we mean by being flexible. This is our third setup of CPU tubing. First, we tried an overly complex tubing run from a single flat fitting on the CPU block to the right-angled fitting at the top of the memory block, which proved excruciatingly difficult to both bend and secure.
Next, we used the same number of fittings as pictured, but with a short piece of tubing in between, which was at too tight an angle to secure.
Lastly, we opted for this double U bend style, with all the fittings pointing upward. To do this, we heated up a larger area of the tubing, then slowly bent it around our deburring tool for the left side, and around an empty reservoir for the right.
10. The undercarriage
Here's where things got really tricky: figuring out how both loops would operate under the hood.
The GPU was relatively simple—the bottom radiator connects to the pump, the pump goes to the right-hand tube of the GPU, pushes coolant into the first then the second GPU, then down, and out back to the radiator.
The CPU loop, however, operates in reverse (with the coolant going in through the left), and its 480mm radiator at the top of the chassis required some inventive thinking about tubing runs to get to the right-hand reservoir, but more on that later….
11. Tubing management
Here's what we're talking about. There are two tubing runs going from that top radiator, using two T-blocks, to the loop at the bottom of the chassis.
Amazingly, the D5 pumps coolant from the pump, through the DDR4 on the left side, to the CPU, through the other set of DDR4 on the right, down, then back up to the radiator, using the right-hand side tubing run, where it cools it, goes back into the left tubing run, down, and then back to the pump.
Ideally, we’d have preferred to use soft tubing here, but as it was our last day of shooting, we had no time to order some in, although it’s definitely on the cards for a future upgrade.
This was also prior to our cable management run, which brings new joy to putting on that side panel.
12. Dream Machine 2017
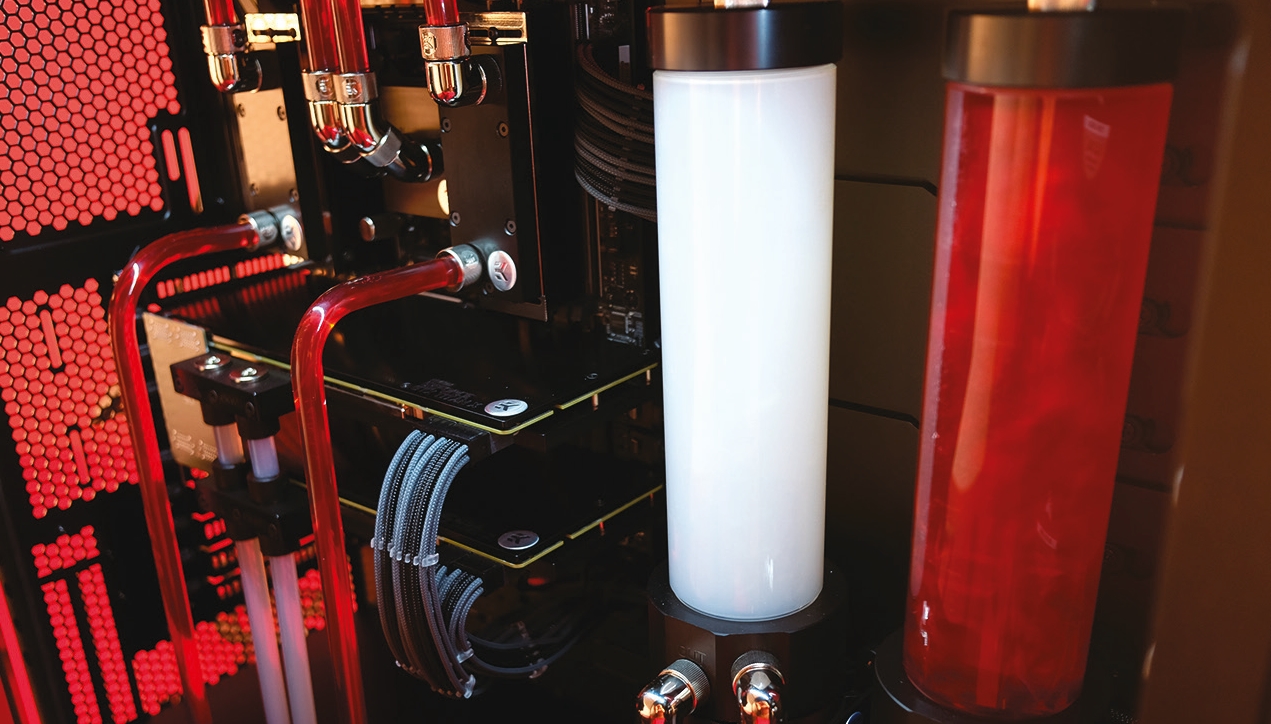
There you have it: ream Machine 2 017, complete and ready to go. We went with red and white coolant: red for the CPU loop, and white for the GPUs.
We mixed the white with Mayhem’s Silver Aurora concentrate to try to replicate the particle effect you see in the red coolant pictured.
It’s great to indicate flow, and looks stunning. As for filling the loop, we disconnected all power from the motherboard and graphics cards, and used a 24-pin bridge on the ATX power.
We also disconnected the pump that wasn’t going to be filled (as you should never run a pump dry). Then it’s simply a case of filling the reservoir until it’s about two-thirds full, and cycling the power supply to prime the loop.
The dream realized
Dream Machine 2017 took a lot out of us. It was a mammoth task that took three months to plan, and over five days to build and shoot, driving everyone involved to the brink of insanity.
Figuring out how the loops were going to operate, in which direction, and how the tubing runs were going to fit together was testing. Couple that with the modding of the panels to allow for the pass-throughs, the careful cable management to ensure the CPU power reached, making sure the fans fell into place, the blocks were installed correctly, and everything else was a success, and it was incredibly draining.
We’re not afraid to admit when we make mistakes, and when it comes to the finer pursuits, such as liquid cooling and case modding—of which there was a lot this year—we still have much to learn.
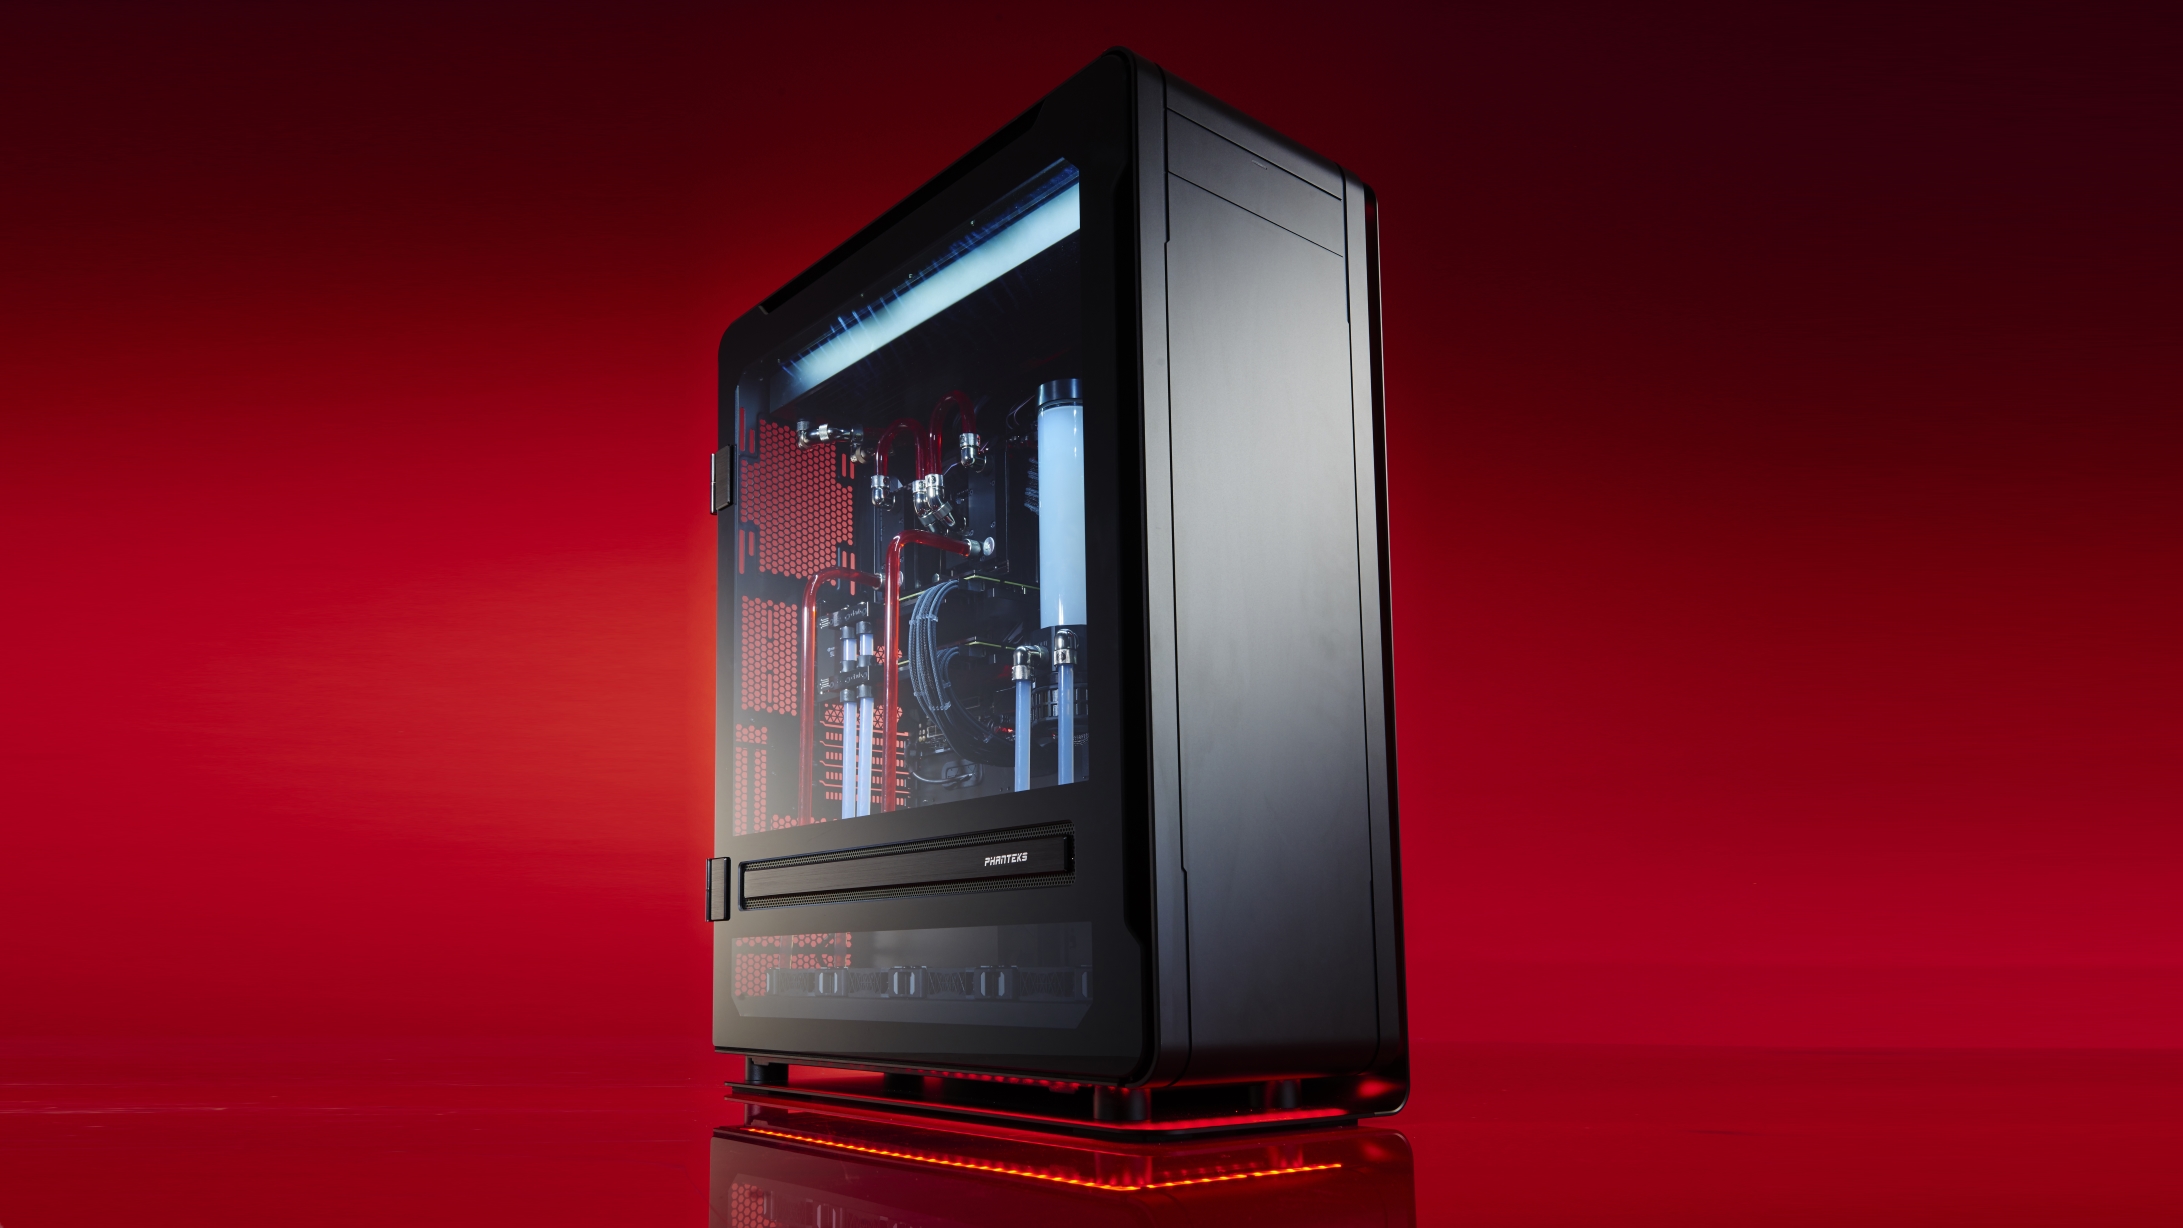
Tubing runs can always be cleaner and tidier, but it was the DIY aspect of the modding that really caught us off guard—mounting the reservoirs and the pass-throughs in particular.
Using the correct drill bit to get through that aluminum is imperative, as is using the right technique. We certainly could have been more precise. Working with the steel panel behind the reservoirs also proved tricky.
Sign up for breaking news, reviews, opinion, top tech deals, and more.
If we did it again, we’d make sure that the pass-throughs below the GPU were better marked and separated, to make them more parallel, that the reservoir mounting in the back of the steel plate was cleaner, and that the tubing runs in the back of the chassis consisted of soft tubing, making it easier to route the tubing, tidy the cables, and be safer to transport.
That said, being flexible helped. There are 86 separate fittings in this build, in all sorts of combinations. The CPU block, for instance, uses two extension fittings at the base of the two G1/4-inch threads, followed by two 45-degree rotary fittings on each side, then a hard compression fitting on the end, to create an extended 90-degree fitting, with a bit more height to give some wiggle room with those top two tubing runs.
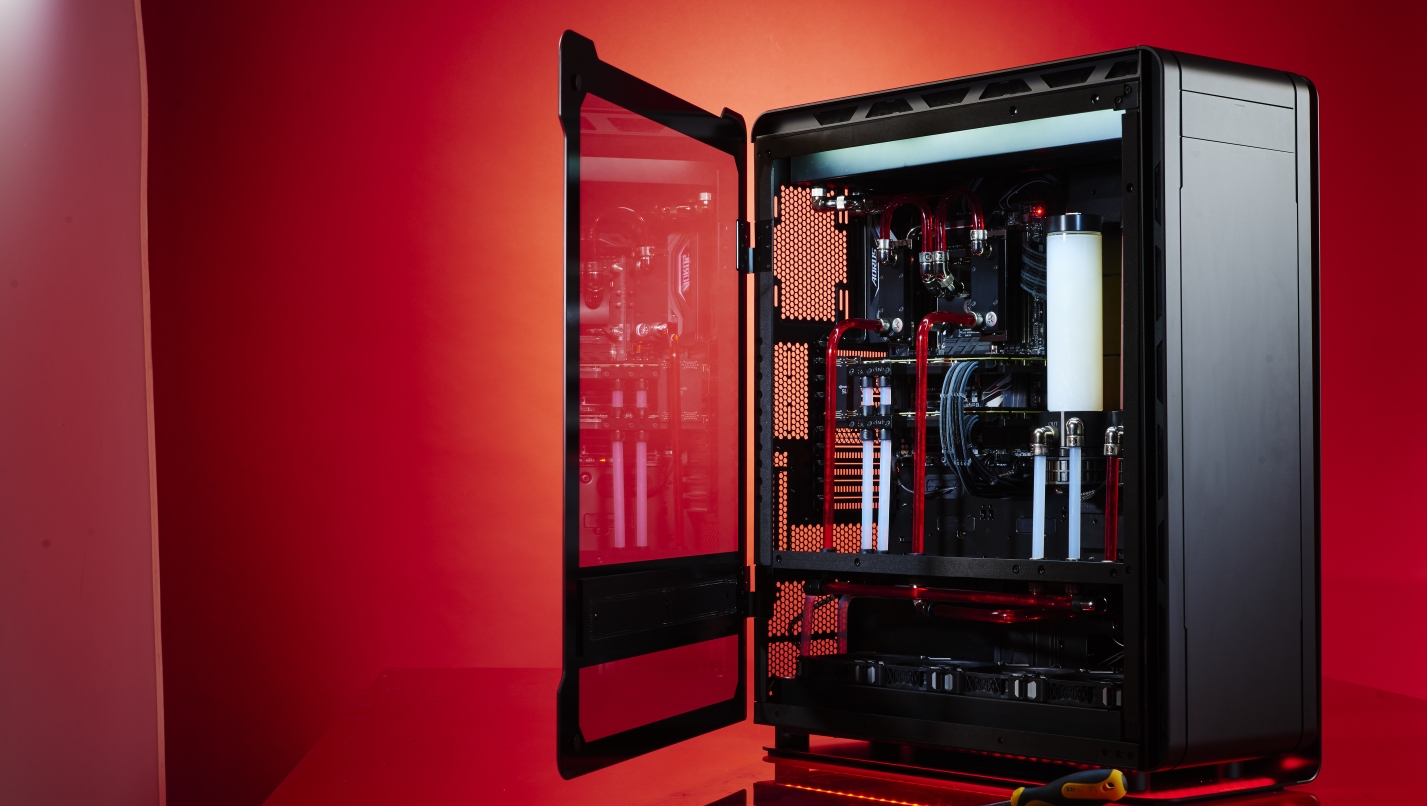
Additionally, we used a combination of 45-degree fittings with unused pass-through fittings to connect two lengths of tube at the back of the motherboard tray, to enable us to run the loop from the uppermost radiator to the CPU pump at the bottom of the chassis.
And, of course, finding some way of mounting the hard drives in the back of the chassis (potentially on the back of the reservoir tray) would have been far nicer than our solution, which was to mount them on the included Phanteks mounting trays, on the right, slightly above the bottom radiator at the front of the case.
We removed them for the photo shoot, but it’s certainly possible to run them like that, forsaking a touch of airflow over that bottom radiator.
Naturally, this isn’t where our story ends. We’d tested the CPU, memory, hard drives, and GPUs outside the chassis, before we liquid-cooled them, but the one thing we hadn’t done was test the motherboard. We just didn’t have the time, as it arrived on the day of the build—so, after all the tinkering, building, and filling of the loops, on first boot we received a memory error, implying that we either needed to change the memory channels, or reseat them.
Less than ideal, given what our setup entails. In short, using the two T-blocks at the top of the chassis, we attached a ball valve, drained off the CPU loop, removed the memory blocks, reseated the memory, and the problem was solved.
Such are the potential setbacks of hardline liquid cooling.
That said, all in all, it’s a phenomenal build. On the next page you'll see our benchmark results that show just how powerful this machine is, and it’s certainly a beauty to behold.
Combine those looks with sub-50 C temperatures and minimal noise, and it’s hard to argue with just how nice a system it is. The big question is, where do we go from here?

Zak is one of TechRadar's multi-faceted freelance tech journalists. He's written for an absolute plethora of tech publications over the years and has worked for Techradar on and off since 2015. Most famously, Zak led Maximum PC as its Editor-in-Chief from 2020 through to the end of 2021, having worked his way up from Staff Writer. Zak currently writes for Maximum PC, TechRadar, PCGamesN, and Trusted Reviews. He also had a stint working as Corsair's Public Relations Specialist in the UK, which has given him a particularly good insight into the inner workings of larger companies in the industry. He left in 2023, coming back to journalism once more. When he's not building PCs, reviewing hardware, or gaming, you can often find Zak working at his local coffee shop as First Barista, or out in the Wye Valley shooting American Flat Bows.