How to turn an old Mac into a server with macOS Server
Add a server to your home
Sign up for breaking news, reviews, opinion, top tech deals, and more.
You are now subscribed
Your newsletter sign-up was successful
Follow the walkthrough below to set your server as Time Machine’s target for Macs on your network.
After that, your next task is to use Server’s caching capabilities; macOS Sierra can put your Desktop and Documents folders in iCloud Drive to make it available on all your devices.
If you have switched this on, you’ll want to use iCloud caching to speed up syncing and cut internet bandwidth usage – crucial if you’re on a metered connection.
The trick is to leave your server switched on 24/7, so whenever your other devices are connected to your network, any changes they make to your iCloud Drive are cached on the server as well as uploaded to iCloud, and other devices on your network retrieve them from the cache rather than downloading them from the internet.
When a device is away from your own network, or if your server isn’t running, files will still sync with iCloud as normal. The benefits should be clear, and the more people who use iCloud Drive across multiple personal devices, the bigger the benefit.
Server is primarily aimed at businesses, yet it has other uses that may interest you at home or in a small business: creating wikis, centralising shared folders, and using a virtual private network (VPN) to provide an encrypted connection to home over the internet.
Even if you only want to back up your Macs wirelessly, and you have a spare one to run the app, the cost of Server and a hard drive saves you lots of money compared to an AirPort Extreme or a Time Capsule.
Sign up for breaking news, reviews, opinion, top tech deals, and more.
How to set up Time Machine backups
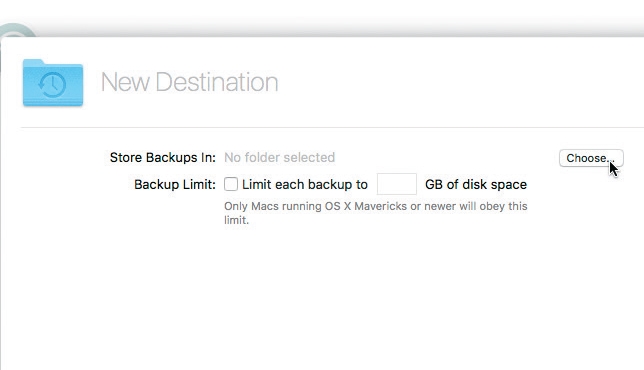
1. Choose backup drive
Select Time Machine in Server’s sidebar and turn on the switch (top right). You’ll be asked to pick a destination in which to store backups of your other Macs.
Click 'Choose' and select a folder on any connected drive.
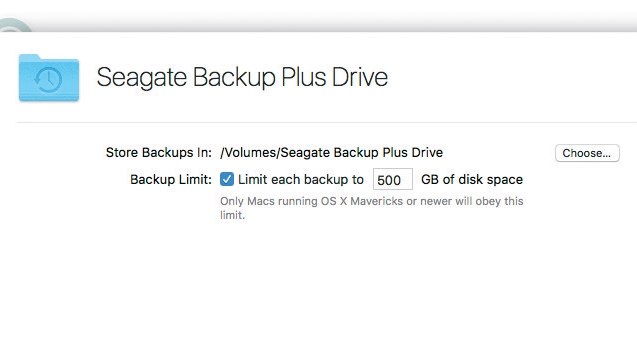
2. Set storage limits
If the server is using OS X 10.9 or higher, you can cap the space available to each user.
Check ‘Limit each backup to’ and enter a value; the lower it is, the fewer backups a Mac can keep before old ones are removed.
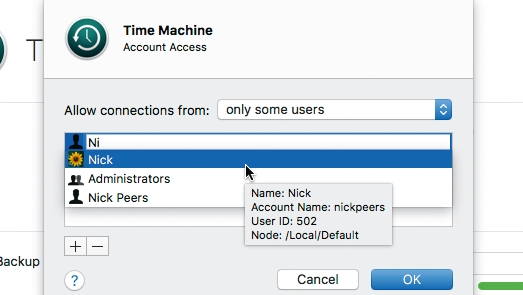
3. Restrict user access
Another way to manage Time Machine is to limit which users can access it. Click Edit Permissions, select ‘only some users’ and click OK.
Click + to add names – start typing, then select a user from the suggestions that appear.
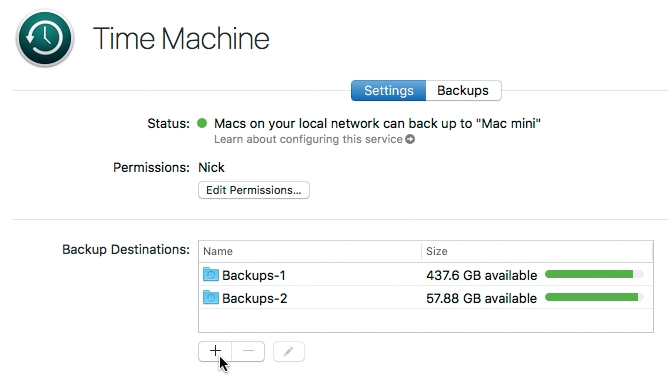
4. Add more storage
Alternatively, if you start to run out of space, purchase another drive, connect it to your server and then click + under Backup Destinations to add its space, which will be used once the original drive is full.
5. Connect from other Macs
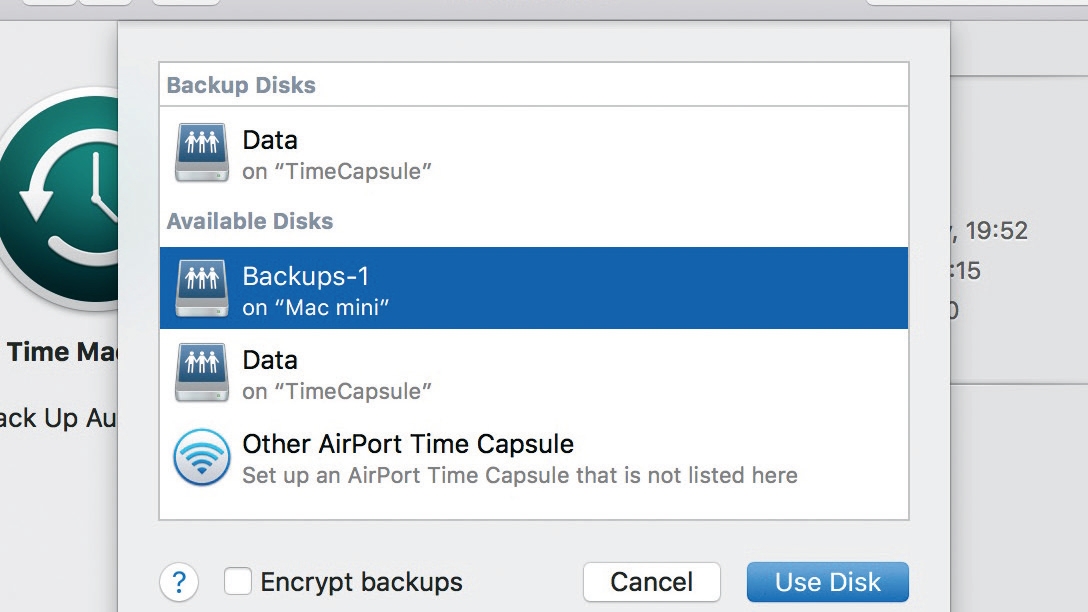
In System Preferences > Time Machine on another Mac, click Select Disk, select your server from the list of destinations, click Use Disk, and enter the username and password of the corresponding person’s account.
6. Monitor backup usage
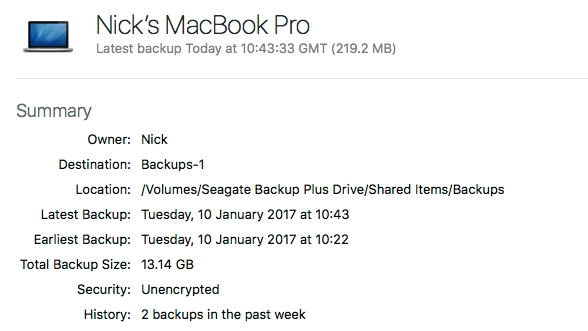
In macOS Server, select Time Machine, then click the Backups tab. A list of connected Macs and any ongoing or completed backups will be listed. Double-click one to reveal details, such as its history, or to delete backups.
- Enjoyed this article? Get more tutorials, guides, and tips on how to get the most from your Apple devices inside MacFormat. Take advantage of an exclusive offer in our sampler today.