
 Become a TechRadar Insider


Smart lighting is one of the best places to start when it comes to building a smart home. There are lots of products to pick from, prices can be fairly low, and adjusting the color, brightness, and temperature of any light, with an app, a switch or a voice command always feels like living in the future.
When it comes to the best smart switches, there are two fundamentally different approaches to take, depending on what you want to achieve. The first route is to replace your existing bulbs with smart ones, then use switches compatible with the new system to control them.
For example, if you buy a Philips Hue smart lighting system you’ll want to pick up a few Hue wireless switches too. These can then be programmed to control your Hue lights exactly how you want and require minimal installation. Meanwhile, your regular light switches can remain in place and, ideally, are left permanently in the on position.
That way, the Hue lights receive a constant source of power to remain connected to the Hue Bridge Hub, while their actual brightness (and whether they are on or off) is controlled with Hue switches or the Hue app.
The other approach is to buy smart light switches that replace your existing wall-mounted switches. These attach to the existing wiring of your home and act as regular switches, but also connect to a smartphone app via your Wi-Fi network for enhanced lighting control. With such devices, you can install a regular-looking switch, but one that has smart functionality baked in.
Continue reading for instructions on how to install a wired smart light switch.
These instructions will focus on the installation of a wired Tapo Smart Switch in a UK home. The installation process for other smart switches may differ slightly, but the fundamentals related to existing electrical wiring remain the same. If you are unsure, please check with a qualified electrician as the wiring may differ depending on the age of your property and where you live.

Steps for how to set up a wired smart switch
- Unbox the switch and check what tools and accessories (like screws) are included
- Turn off the power at the fuse box
- Check the power is off by trying the existing switch or another appliance
- Remove the existing light switch
- Wire up the smart switch
- Fix the smart switch to the wall
- Turn the power back on
- Add the smart switch to your Wi-Fi network
- Add the switch to your smart home system
Tools and requirements
- Smart light switch (wired)
- Strong and reliable home Wi-Fi
- Smartphone (iOS or Android)
- Small, flat-head screwdriver
Step by step guide for how to set up your wired smart switch
1. Unbox and prepare your kit

Many smart switches look similar to the traditional or ‘dumb’ switches already on the walls of your home. A key difference is that they are powered by both the existing wiring, and also with a battery. These batteries are usually included in the box and fit discreetly inside the switch housing. They can also usually be replaced without using tools and without needing to turn off the power.
Screws are often also included, but you can usually use the ones that already hold the existing switch in place. Make sure you understand how light switch wiring works, what color wires do what, and how to switch the mains power on and off at the fuse box.
2. Remove the existing switch

Turn the mains power off at the fuse box. Try the light switch and an appliance in the same room to make absolutely sure the power is off. You could also remove the fuse responsible for the relevant circuit if you know which that is. If you are unsure about dealing with household electrics, please speak to a professional electrician first.
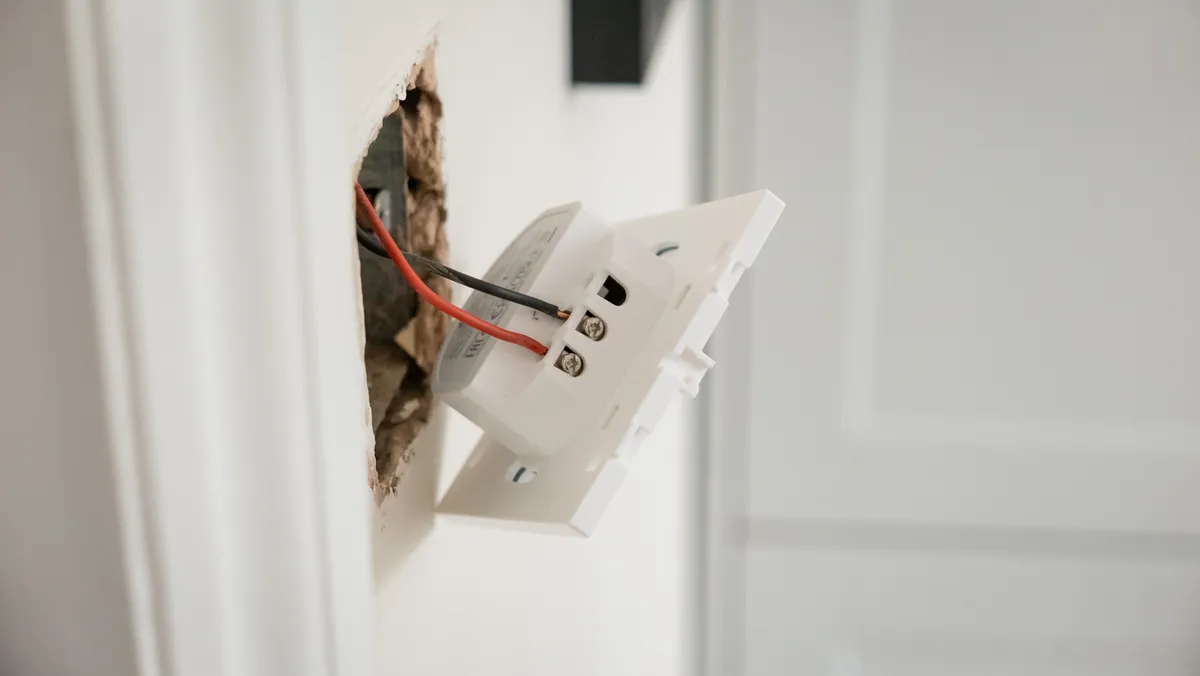
With the power off, remove the screws holding the old switch in place. Then remove the wires from behind the switch. In our case, this included a red live wire and a black neutral wire.
Please note: In the US, you should see four wires; an "in" wire, an "out" wire, as well as a ground wire and neutral wire. Older homes may not feature a neutral wire, so you'll need to buy a specific smart light switch that doesn't require one.
The UK standard for wire colors changed in 2004. After that year, live red wires became brown and neutral black wires became blue, while the green and yellow earth wire was unchanged. Newer properties will have the updated wire colors.
3. Attach the smart switch
Follow the instructions that came with your switch to reconnect your wires. If there are any redundant wires, like the green/yellow neutral wire with the Tap Smart Switch we used (see above), these should be covered with the provided wire nut.
Check the instructions, as you might need to press a sync or reset button under the faceplate to begin the wireless setup process, then screw the switch into the cage and wall mounts previously occupied by the old switch, insert the batteries, attach the faceplate and turn the mains power back on.
4. Add the switch to your smart home system

This will depend on the switch you bought and which systems it is compatible with. Once set up, it should be visible with systems like Alexa, Apple Home, and Google Home, where you can add it to pre-existing groups and control it like other smart home devices.
The beauty here is how the switch works just like the old, physical one – great for members of the household less familiar with asking Alexa to turn the lights on. However, it's also got an app and is both web- and voice assistant-connected. In our case, when we ask Alexa to “turn on the kitchen” the smart switch fires up the non-smart ceiling lights, while a smart strip light beneath the cupboards is also activated.
Lastly, routines, timers, and schedules can be assigned to the smart switch. That way, your non-smart ceiling lights can turn on and off at set times of day and night, or to simulate an occupied home while you’re away.
FAQs
Can I install a smart switch myself?
Yes, absolutely. Just make sure you’re familiar with how regular light switches work in your property first. Be sure to turn the mains power off before starting. This was my first attempt at changing a light switch (or tackling any domestic wiring at all) and after a few minutes of research, I had no problem swapping out my old switch for a smart one.
Do smart switches require a hub?
As with other smart lighting devices, this will depend on the system you have chosen. In this case, the Tapo Smart Switch by TP-Link requires one of the company’s hubs to work. Setting this up was simply a case of plugging the hub into a wall outlet, adding it to our existing Tapo system, and setting up the switch as per its own instructions.
Final thoughts
Installing smart switches is very much like fitting a regular light switch. This usually means a hassle-free ten minutes, at most, and requires nothing more than a small screwdriver.
But, as with any household electrical project, you may encounter some inconsistencies. The first switch I tried to replace appeared to have its live and neutral wires attached differently to other switches, for example, and the short wires of the switch I eventually swapped meant the smart switch and its bulky battery compartment only just fit in the existing back box. In some cases, you might need to hire an electrician to lengthen the existing cables or install a new back box.
You may also need to do some decorating afterward if the switch is a different size from your previous dumb one.
All that said, installing a smart switch is generally painless, aesthetically discreet, and opens up a wide range of new possibilities without altering the fundamentals of how a wall switch works.
