


Got a new robot vacuum but not quite sure where to start? I can help. I've tested many of the best robot vacuums on the market – and some of the worst – so I've done more than my fair share of setting up and using robovacs.
Let's say you've unboxed the bot, attached any side sweepers or mop pads that need to be attached, downloaded the app and connected your robot vacuum up to it. What now? Here are seven things to do to get started with your new automated home helper...
1. Do a mapping run (but tidy up first)
Once you've connected your robot vacuum up to its companion app, you'll typically be prompted to do a 'mapping run'. During this, the robot won't do any cleaning, but it'll explore its new surroundings and create a map. It'll do this by popping into each room, wandering about a bit, and then leaving.
To get your home ready for this, you want to open all the doors and tidy away any clutter on the floors. In fact, I tend to try and lift up anything that's not going to be a permanent fixture – so I'll pop dining chairs onto the table, for instance.
It is possible to skip this step and just launch straight in, asking the robovac to clean and map as it goes, but opting to map first means the bot can be more efficient when it comes to vacuuming. Plus, it typically won't take long at all – less than 10 minutes.
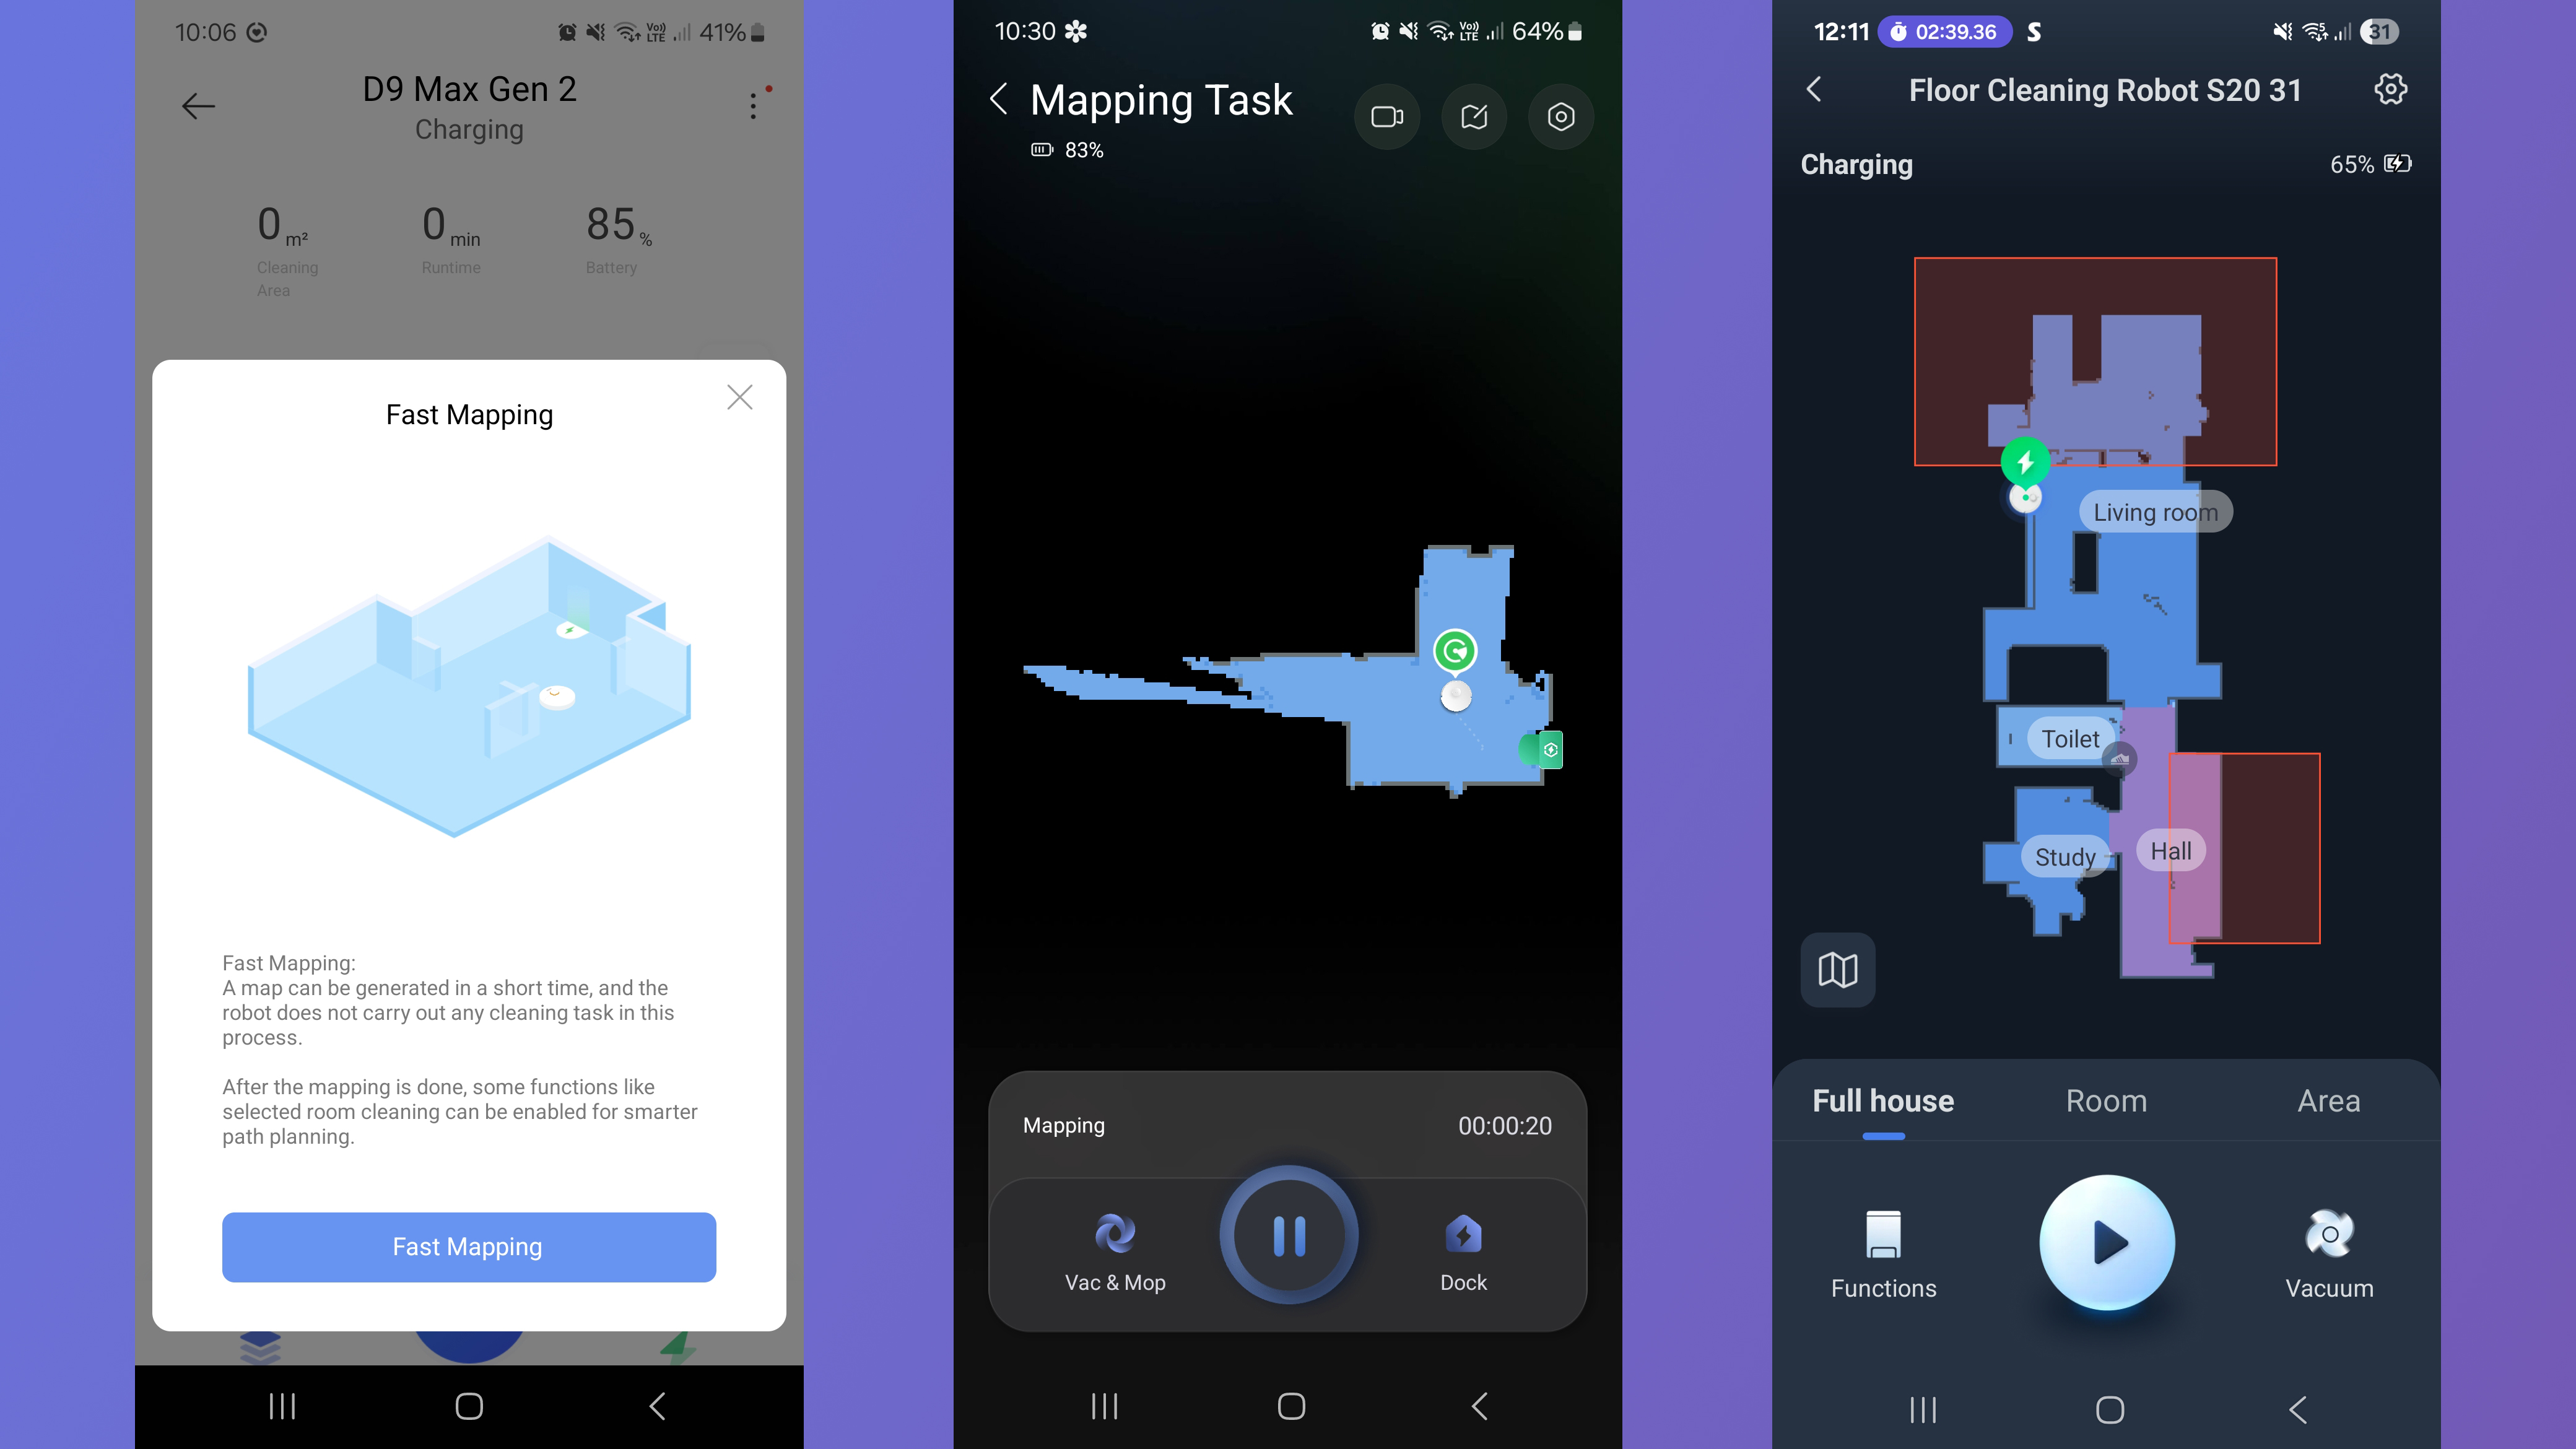
2. Edit the map
Once the robot has finished its mapping run, it'll come back with a rough map of the space it has just scouted. How accurate this is will vary from robovac to robovac, but it's rare even the most advanced model will get it perfect first time around.
You'll probably need to go in and add a name to each room – this is just to help you make sense of the map. It's useful for determining where the robot has been and where it has encountered issues. Plus, it makes it simpler for you to launch single-room cleans. You might also need to split or merge rooms or areas.
It might be the case that the robot vacuum includes areas that it won't actually be able to clean. For instance, when I map my home, the robot will include parts of the garden, which it can 'see' through full-height patio doors. If I map a floor that's not the ground floor, it will also include the stairs going down. Again, it can see it's a space that exists, even though its cliff sensors will (thankfully) prevent it from reaching it.
For areas like this, I'll add a virtual wall or no-go zone. This means the bot won't waste time banging up against the glass door, trying to clean the decking outside.
Again, nothing terrible will happen if you don't complete this step – it just makes your life easier and can help the robot be more efficient in what it's trying to do.
3. Launch a whole-floor vacuum
At this point, I tend to just crack on with a whole-floor clean. I send the robot vacuum off to vacuum everywhere, using its default settings. Everything will be off the floor from the mapping run, so it should be able to achieve a nice, thorough clean.
During this run, I will be able to identify any problem areas where the robot might get stuck or lost, or any places where it can't currently reach. I can then make adjustments where possible to solve the problems.
I can also get an idea of the robot vacuum's navigation capabilities. More advanced robot vacuums will learn as they go, so even if the navigation is a little dodgy at this point, it'll get smarter the more you use it. Typically, I find most robot vacuums these days do a good job of finding their way about, though.

4. Explore the mopping
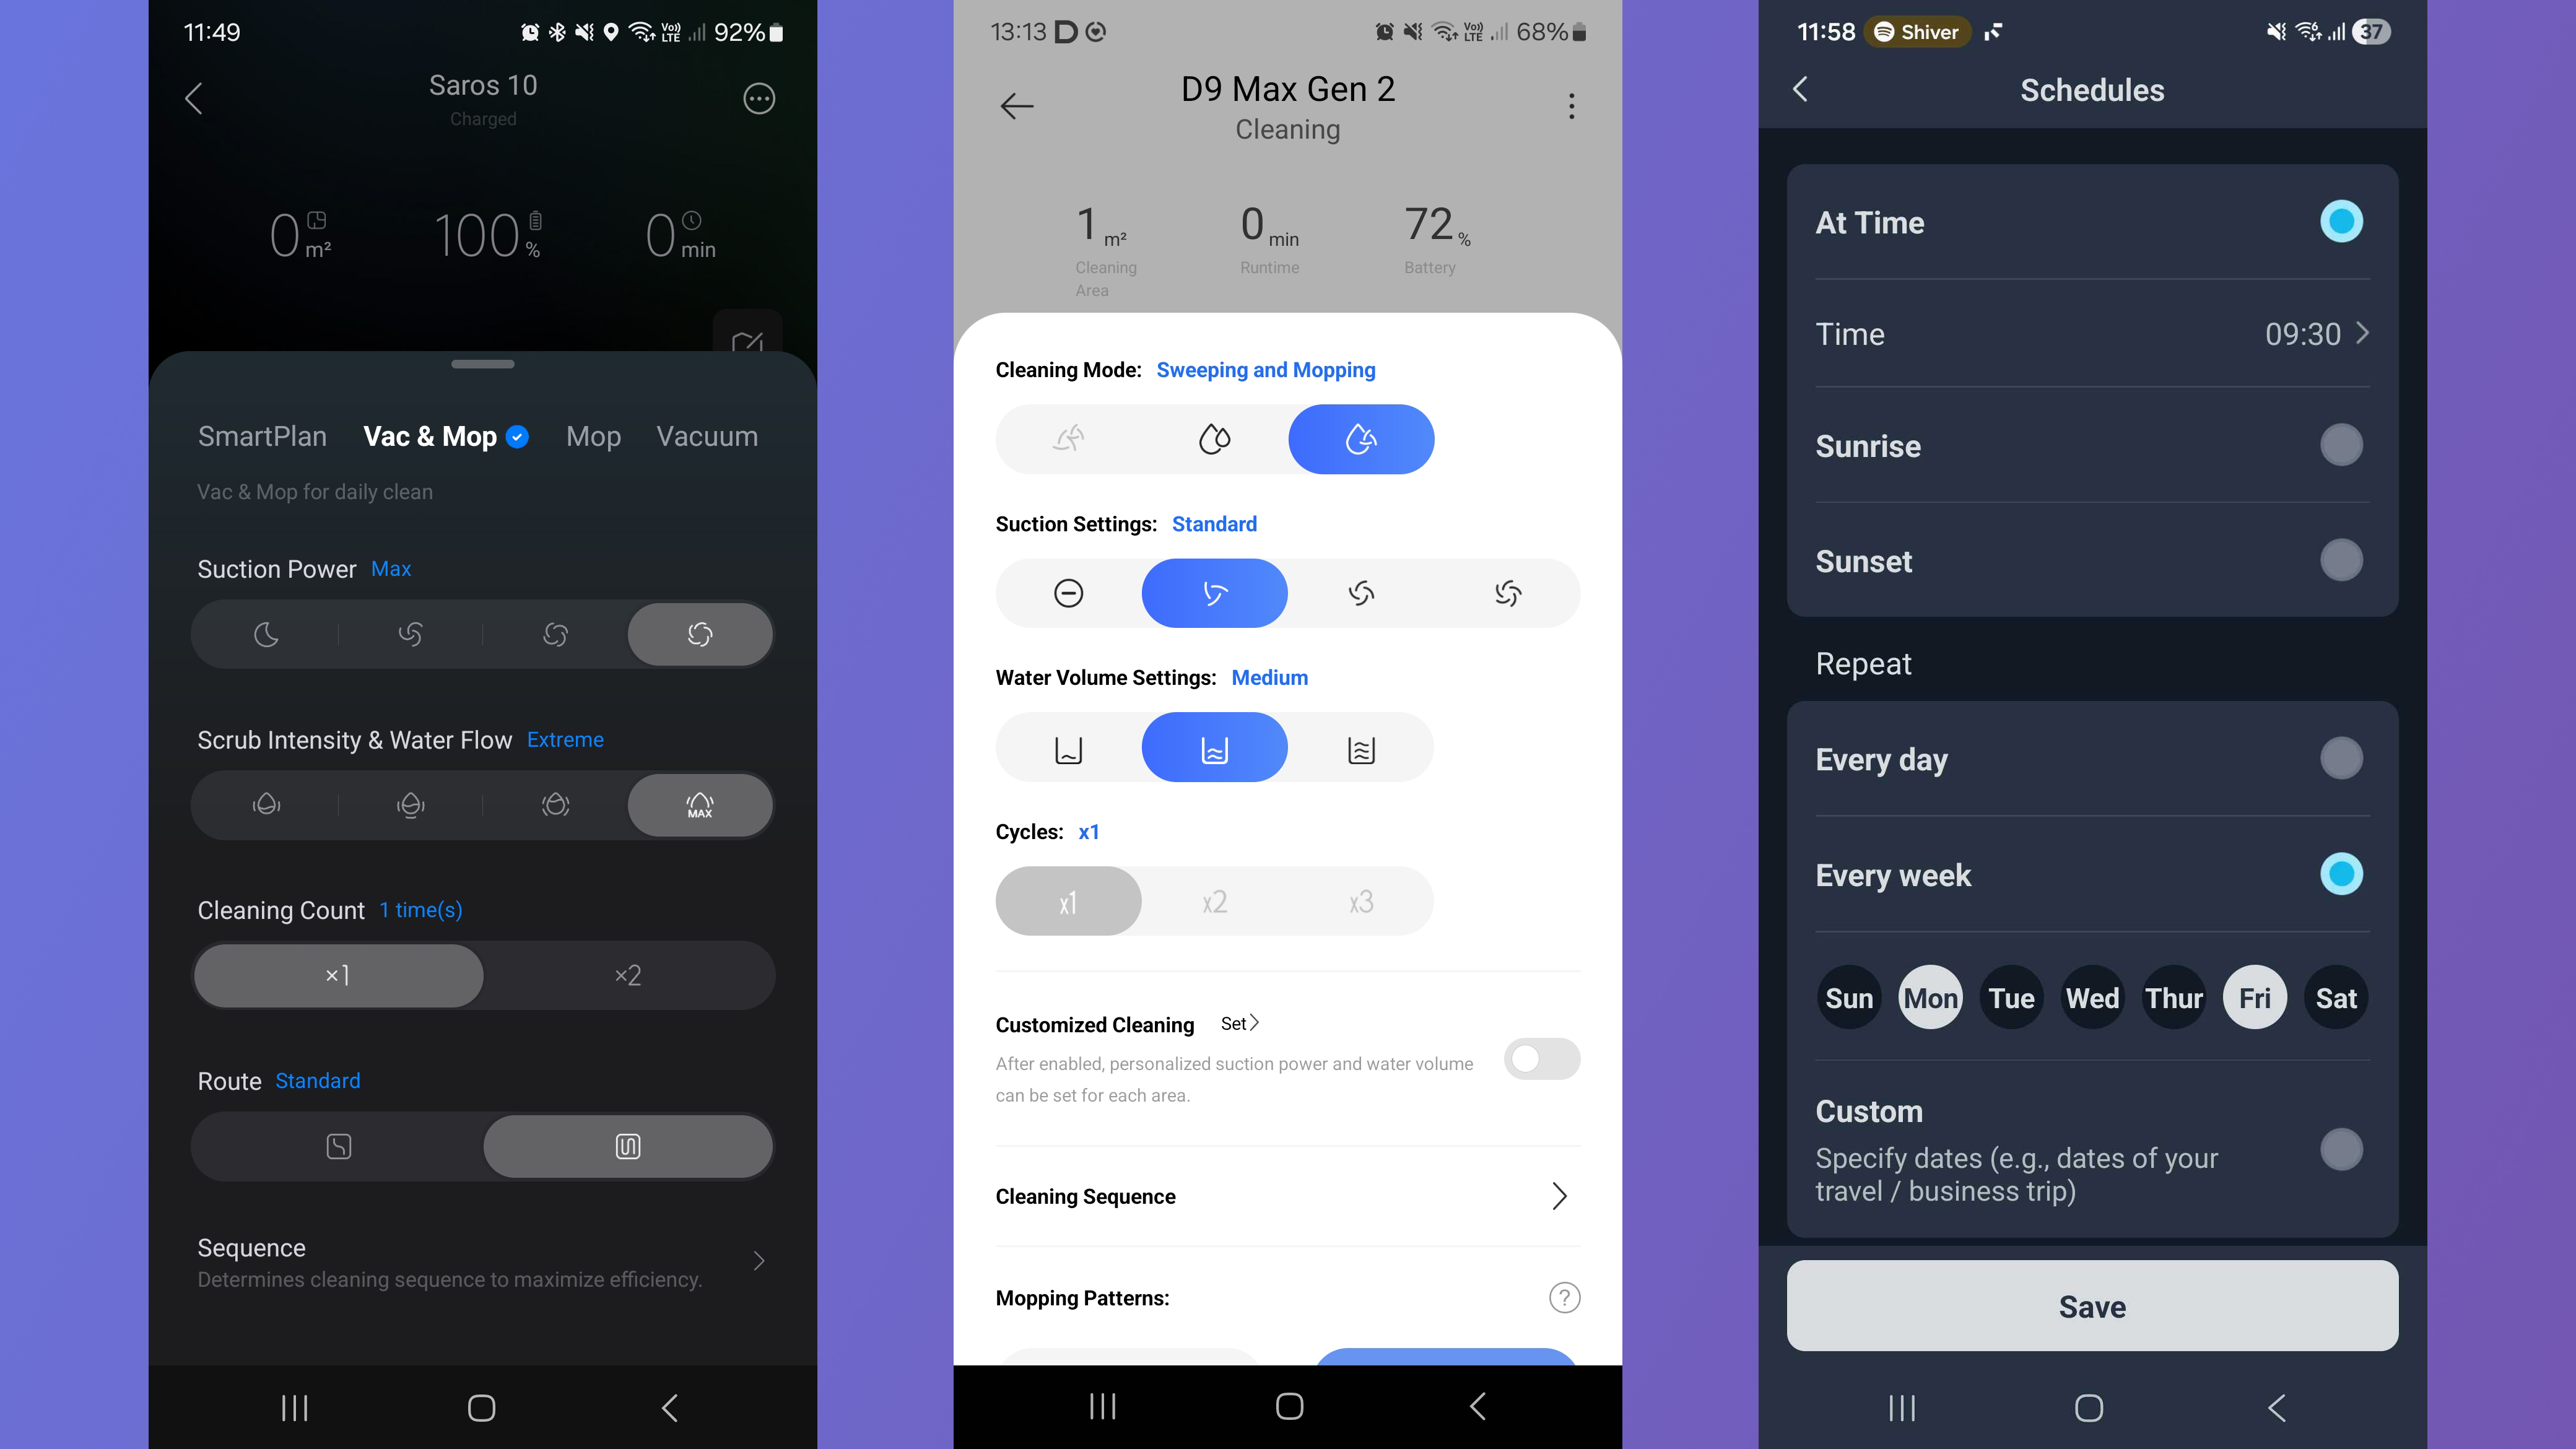
Most modern robot vacuums can mop as well as vacuuming, and early on I like to explore the bot's mopping capabilities. Setups vary considerably from robot to robot. On a basic option like the Dreame D9 Max Gen 2, you'll have to fill the water tank and attach the mop pad, carry the robot vacuum to the room you want mopping, close the door and ask it to mop. If the robot can't sense carpet, or if there are hard floor areas you don't want mopping, you'll want to set no-mop zones in your app.
More advanced options will be able to sense carpet and lift their mop pads up to avoid getting it damp. They'll also have a dock that refills the onboard water tank for them, so you won't need to do that bit manually. If I have a hi-tech model like this, I'll just include mopping as part of the first whole-floor clean.
Typically, you'll have the option to just vacuum and mop simultaneously, or vacuum then mop. I'll always go for the last option, so any dust and debris is clear before the water enters the picture.
5. Create a schedule
Once I've done my initial, exploratory cleans, I'll set up a schedule for cleaning going forward. The majority of robot vacuums have this option. The beauty of a robot vacuum is that it can operate autonomously, with very little input required from you. I'll ask it to clean two or three times a week, at times when I know I'm going to be out. As part of that, I might include one 'deep' clean, on higher intensity settings.
It is possible for a robot vacuum to clean at night. Almost all modern robot vacuums use LiDAR as their primary navigation technology, and this doesn't rely on the space being lit (many bots supplement this with headlamps to allow their object-detecting cameras to work in a dark room, too). If your bedrooms are near the areas being vacuumed, you might want to avoid this option, because the noise of cleaning may disturb your sleep.
6. Tweak settings
As you get acquainted with your robot vacuum, you'll notice things you might want to be a bit different. On a fancier robot vacuum, you'll likely be able to tweak almost anything, from how much water the bot uses for mopping to how often it'll auto-empty its dust cups, so dig into the app and have a look around.
If you find your robot vacuum is regularly running into things you don't want it to, look for a 'pet mode' in the settings – this will generally increase the sensitivity of the bot's object avoidance. If you're not sure what your options are, here are more settings you might want to change on your robot vacuum.
7. Map other floors
At time of writing, stair-climbing is out of a robot vacuum's capabilities. That doesn't have to mean your robovac is bound to a single floor, though. Pretty much all companion apps will enable you to map multiple levels – you'll just have to commit to carrying your bot to the new floor, and back again once it's finished cleaning.
Lack of access to the dock is the only other potential sticking point. It's rare that a robovac would need to recharge or empty its dust cup half-way through cleaning a floor, but it is possible it could run out of water if it's doing a lot of mopping.
To supplement my scheduled clean of the floor with the dock, I'll often map other floors in my home. I'll then just carry the robot up to do a clean every now and then – it's still less effort than going around with a stick vacuum.

➡️ Read our full guide to the best robovacs
1. Best overall:
Roborock Qrevo Curv
2. Runner up:
Eufy X10 Pro Omni
3. Best budget:
Roborock Q7 M5
4. Best for pet hair:
Dreame L40 Ultra
Follow TechRadar on Google News and add us as a preferred source to get our expert news, reviews, and opinion in your feeds. Make sure to click the Follow button!
And of course, you can also follow TechRadar on YouTube and TikTok for news, reviews, unboxings in video form, and get regular updates from us on WhatsApp too.
