How to remove a VPN extension in Google Chrome
We guide you step-by-step through the process to make it painless

Getting a Chrome VPN up and running is something many people choose to do. But what happens if you’re not happy with your VPN (Virtual Private Network) service and want to remove it?
While enabling a VPN for Chrome is generally a good idea for privacy-conscious internet users, there are a number of reasons you might want to get rid of the extension you’re using. Maybe you've seen a better option on our best VPN guide, for example? Perhaps you’ve tried a free VPN and realised you want to upgrade to one that’s more reliable and offers additional features. Or you might have simply decided that using a VPN isn’t really for you.
We’re pleased to tell that removing a VPN extension in Chrome is simple – and in this guide, we’ll show you the absolute easiest way to complete the process.
- Discover the very best VPN service
- Use this checklist to find a VPN you can trust
- See how to enable a VPN extension in the first place
Whatever your reasons, we’re here to help show you how to remove a VPN extension in Google Chrome in a few simple steps.
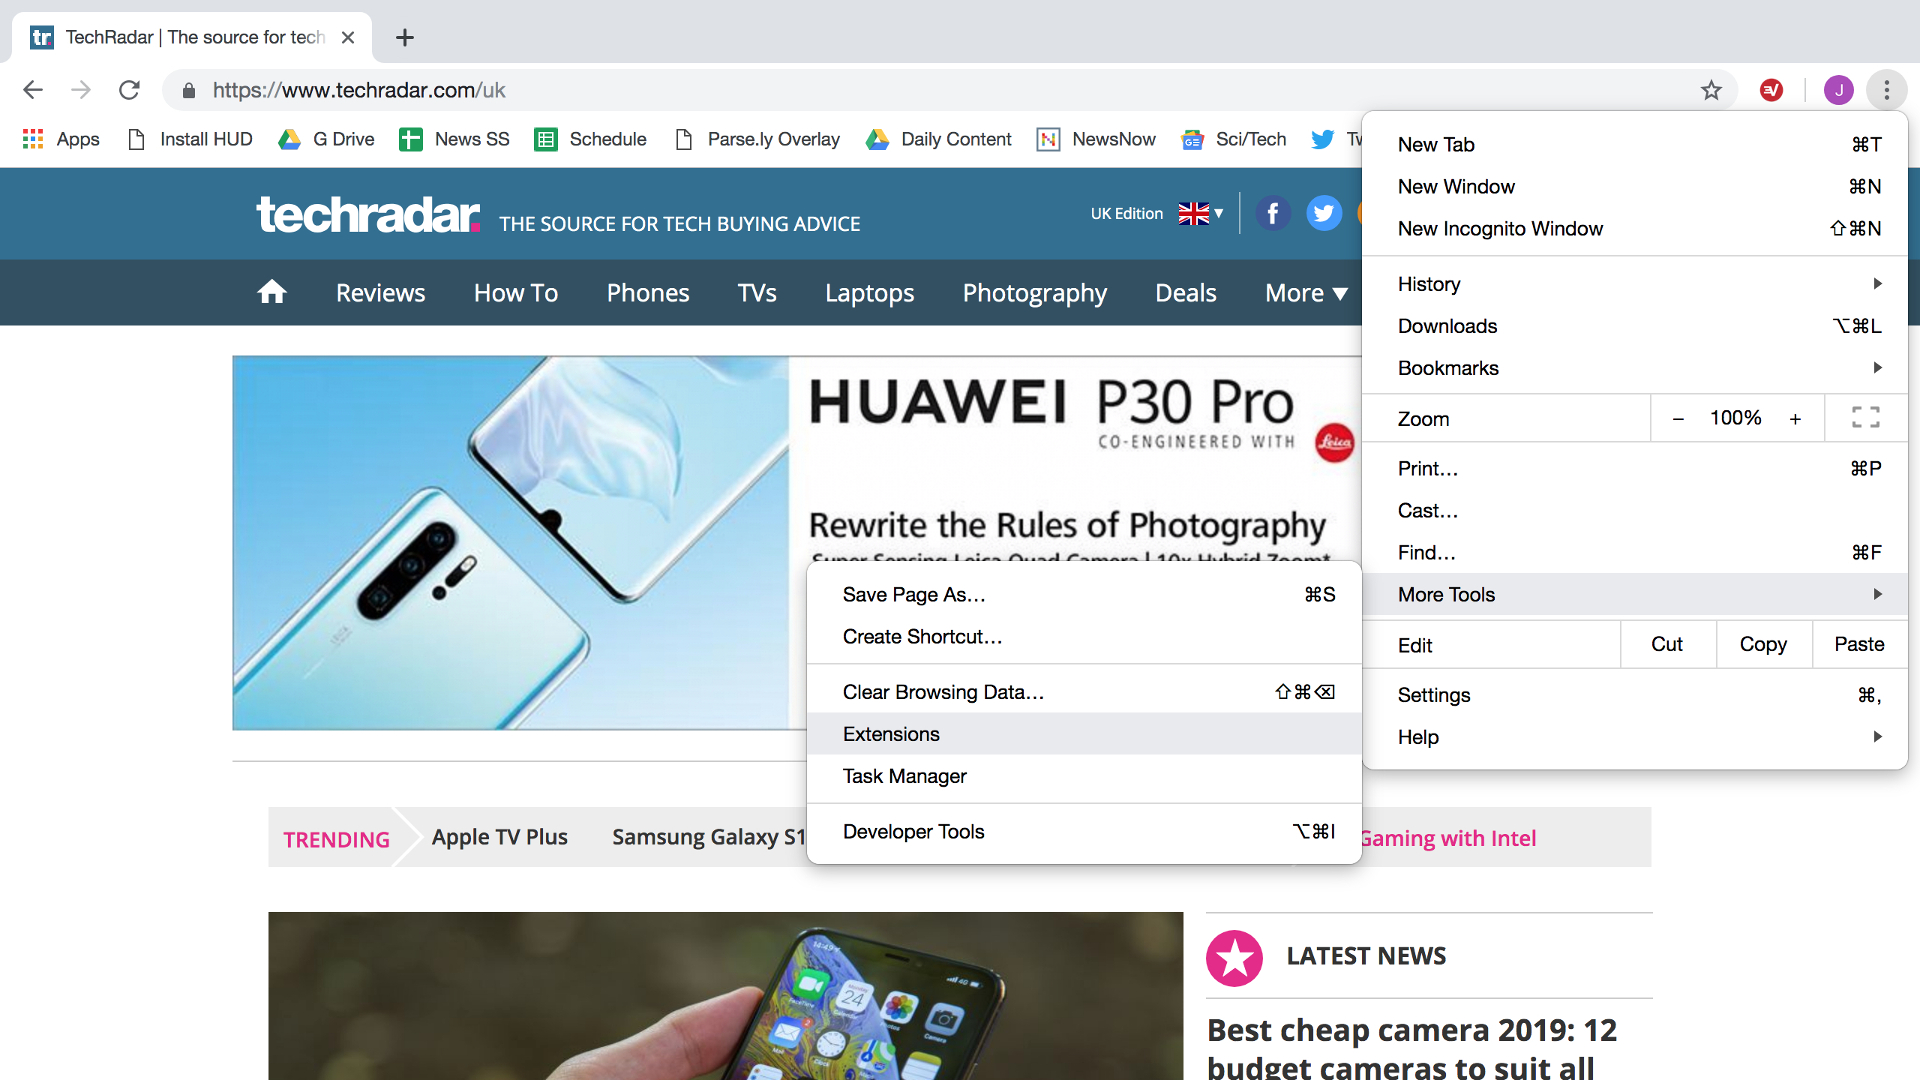
First, find the Chrome menu icon, which is indicated by three small, vertically aligned dots to the far right of the URL bar. Click it, then scroll down to ‘More Tools’ and hover over that. To your left you’ll now see a sub-menu with ‘Extensions’ plumped right into the middle of the small list of options – you can’t miss it.

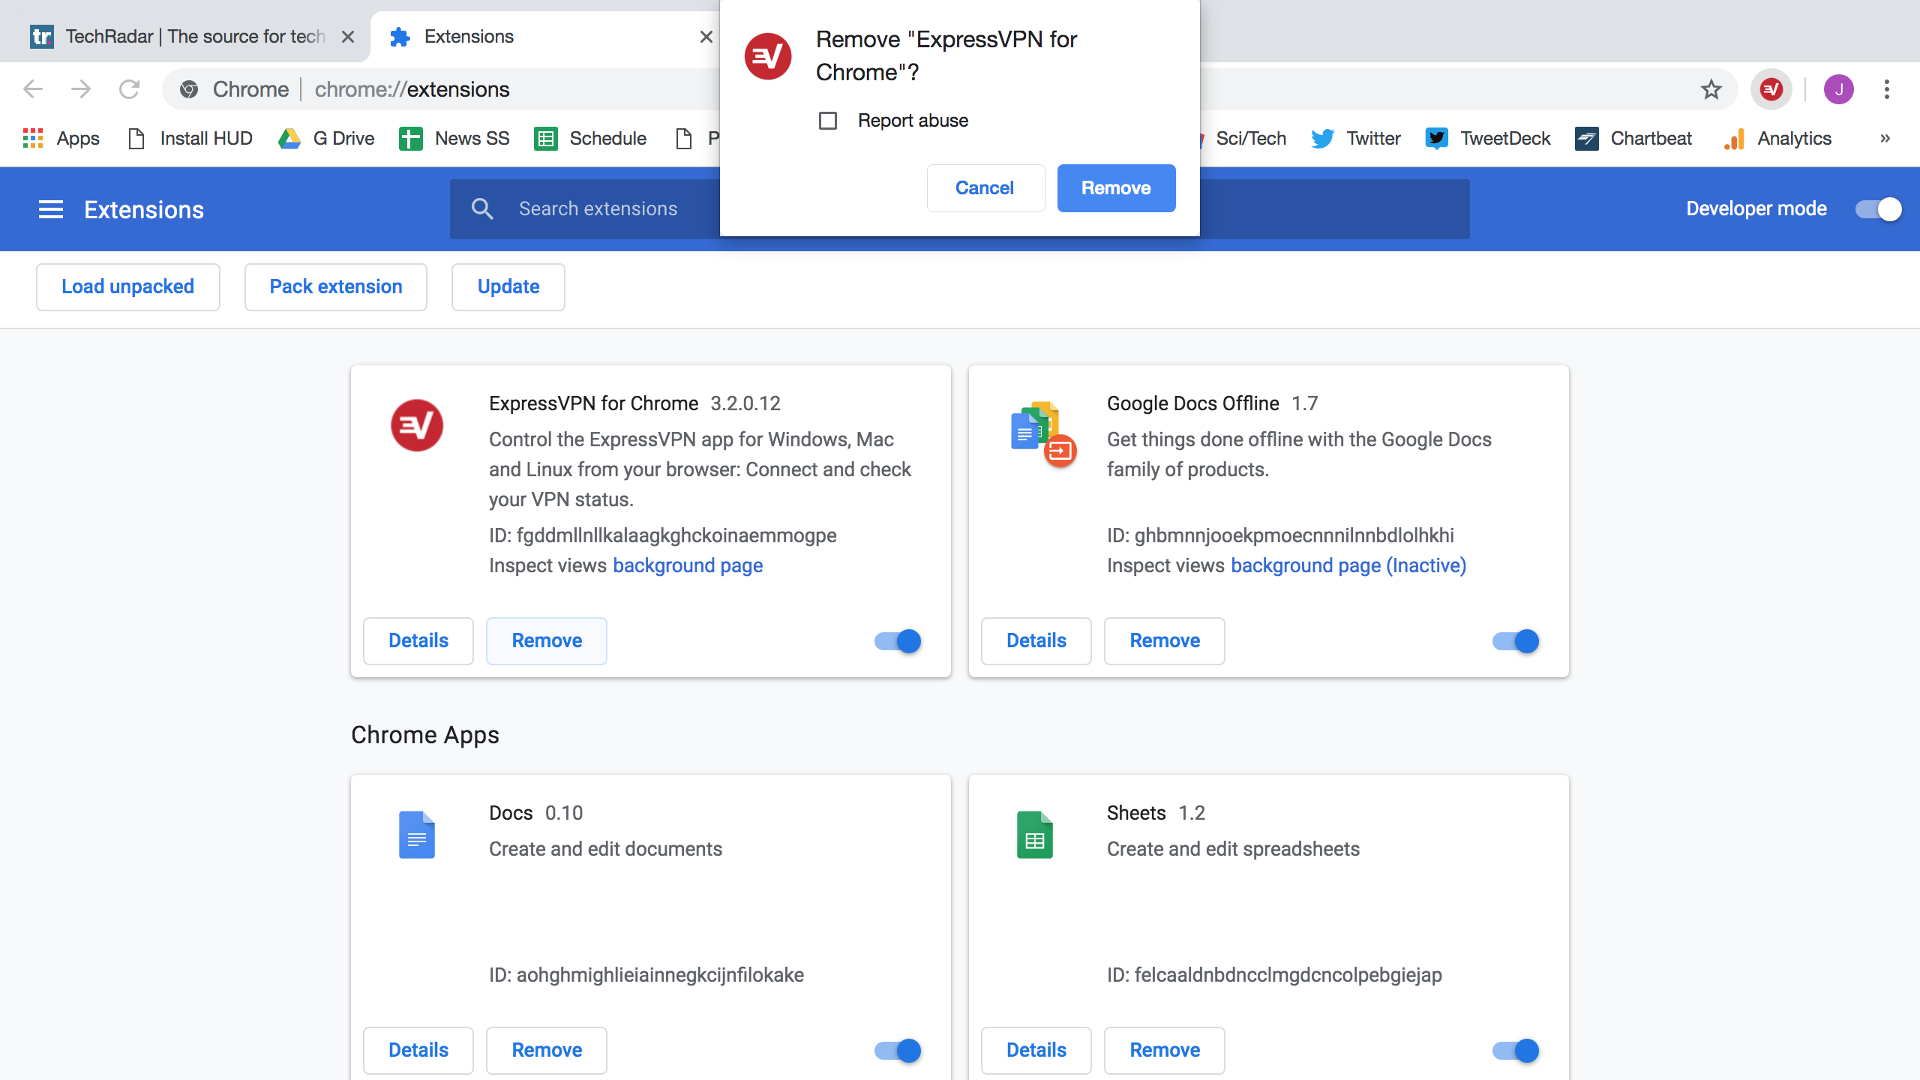
Click on this and you’ll be taken to Google’s Chrome extension management page. Here you’ll see all of the extensions you have installed. At the bottom of each extension’s box lies a sizeable ‘Remove’ button, so simply find your the VPN you want to dump and click the button.

Don’t worry if you change your mind in that millisecond. Google will double-check you really want to remove the extension by serving you with a confirmation pop-up. Click remove again and Google will take care of the rest – the plugin you no longer want will be smited from browser for good.

Alternatively, you can simply type chrome://extensions into the Google URL bar and you’ll be taken directly to the same page where you manage your Chrome extensions.
Follow the same process outlined above and you will successfully remove the extension you no longer want.
That’s the easy part. Finding a Chrome VPN you do want – and want to keep – can be harder.
That’s why we always recommend stumping up for a VPN subscription. While free options certainly seem tempting, they can also present a range of problems – from unwanted pop-up ads and unreliable connections to troublesome setup processes and even in extremis passing on your details to third-parties to help fund their operation.
Nobody wants that.
The good news is there are a number of paid VPNs that absolutely justify your hard-earned cash. As we’ve said, our favorite right now is ExpressVPN. This is because it offers a consistently reliable, secure connection and is an absolute dawdle to get started with.
Read our ExpressVPN review to find out why we rate it as the top Virtual Private Network service going right now.
VPNs are no longer be the preserve of hardcore techies, so if you want to browse the internet with anonymity, it’s never been this easy.
- Read more: our guide to find the world's best VPN
Sign up for breaking news, reviews, opinion, top tech deals, and more.

James is a technology journalist with nearly 10 years experience and currently Sports and TV Streaming Editor at Future, where he works across TechRadar, T3 and Tom's Guide. He is here to help you find the best ways to watch sports, TV shows and movies online. Previously, he was News and Features Editor at Trusted Reviews, Editor of Lifehacker UK, and Senior Staff Writer at ITProPortal.