80 handy iPhoto tips and tricks
iPhoto hints: organise, improve, manipulate and share
Sign up for breaking news, reviews, opinion, top tech deals, and more.
You are now subscribed
Your newsletter sign-up was successful
Share your photos in iPhoto
61. Email your photos
If you don't want to set up an online album you can always email a photo gallery. iPhoto '11 has some terrific email templates that are simple to use, and display in any HTML-compatible email program. It only takes a few moments, and because the email capability is built in, you don't need to use Apple Mail.
62. iCloud galleries
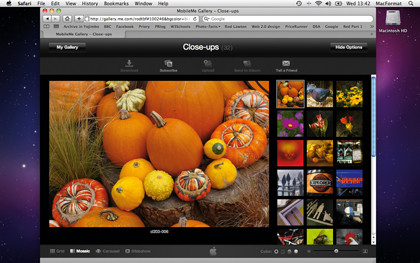
There are many free ways to get your photos online, so why pay for Apple's MobileMe service? Well, it's going free with iCloud, and there's plenty of image features there.
63. Picasa Web Albums
iPhoto doesn't support Picasa Web Albums directly, but you can download a Google plug-in, which adds a Picasa Web Albums tab to iPhoto's File > Export dialog. You can create a web album from an existing iPhoto album or create a new one.
64. Export to iWeb
Sign up for breaking news, reviews, opinion, top tech deals, and more.
If you have your own web host, you can send photos to iWeb to produce a Photo Page using one of iWeb's built-in design themes. The latest version of iWeb also supports FTP uploads to any web host, so you can then publish your web album directly.
65. Facebook albums
Simply put, iPhoto's Facebook integration is brilliant. Upload photos as albums via the Share menu, and the Description you add in iPhoto will become the captions displayed in Facebook. iPhoto will even display your friend's comments.
66. Set slideshows to music
iPhoto slideshows look great, but they can sound great too when you add a soundtrack from your iTunes library. However, what you really want is for the slideshow to last for the same time as the track – click the Settings button and check 'Fit slideshow to music'.
67. Animated Places slideshows
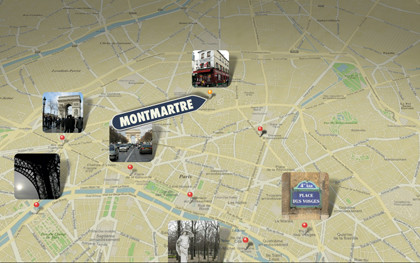
iPhoto '11 has new animated slideshows, including a Places theme that uses the Places information you add to your photos to present an animated map, with push-pins identifying the places you've visited. It comes with its own soundtrack, but you can add one of your own from your iTunes library.
68. QuickTime movies
There's an even quicker way to turn your photos into a slideshow. Select the ones you want, then use the File > Export command and select the QuickTime tab. Choose the movie dimensions, select a background colour and you're done. Your photos will be exported as a QuickTime movie, with a subtle fade between each picture.
69. iPhone slideshows
Once you've created a slideshow, use the File > Export command and select Slideshow. Choose a size, and check 'Automatically send slideshow to iTunes'. When you sync in iTunes, make sure 'Include videos' is checked in the Photos tab. Press the Videos button on your iPhone to see your slideshows.
70. Take your photos with you
Wouldn't you like to carry round your photo library with you on your iPhone or iPad? it couldn't be easier – plug it in, then select the Photos tab. You can now choose to synchronise all your photos or selected albums only. Worried about the amount of space that will take up? Don't be, because your photos will be optimised for the smaller display and won't take up anywhere near the space they do on your Mac.
71. Print your own books?
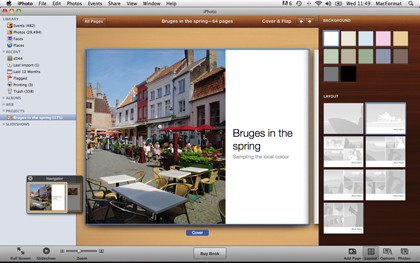
iPhoto books don't match standard printer paper sizes, so there's no easy way to print photo books yourself, unless you pick smaller sizes and trim the sheets manually (though you can still print pages for proofing purposes). But you could produce a PDF version – most printers let you set up custom paper sizes, and you can then use the PDF option in the Print dialog.
72. Custom calendars
iPhoto's Calendars have to be ordered from Apple, and they're pretty pricey (£14.39 when we checked), but there's more to them than you might imagine. They're populated automatically using the photos you choose, but they can also include public holidays for different territories, events in your iCal calendars and birthdays in your Address Book. Once you get one, you'll never look back.
73. Frame your photos
Print photos directly from iPhoto using a variety of preset layouts and templates, including 'digital mats', which can look quite convincing when combined with a real-life photo frame. 'Mats' are the cardboard inner frames with bevelled edges that professional framers use, but the iPhoto versions look convincing enough to pass casual inspection, especially when framed under glass.
74. Printed contact sheets
If you ever need to print off the contents of an album or Event to look at on one sheet, select all the photos, hit Command+p and choose the Contact Sheet print theme. You can change the number of columns to get more pictures on a sheet, change the background colour (white will use less ink!) and even the font used for the titles.
75. Print multiple photos
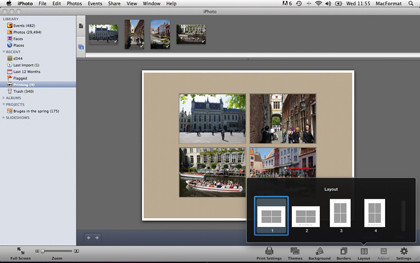
It looks like iPhoto can only print one picture on a sheet, but that's not the case. If you pick the Simple Border theme and hit the Customize button, you can open the Layout menu and choose 1, 2, 3 or 4 pictures. You also get a choice of how the pictures are arranged on the sheet and whether or not you want a caption.
76. Media browser
Use your photos in your iWork documents, spreadsheets and presentations. Pages, Numbers and Keynote have a Media button on the toolbar that displays a panel containing the contents of your iPhoto library, complete with all your Events and albums and a search box. To use a picture, drag it across.
77. Beautiful books
Why print photos when you can print books, using the superb book-creation tools in iPhoto '11? You can even print full-bleed spreads – perfect for panoramic photos. Keep an eye on the page count though as you will get charged extra for going over.
78. Desktops and screensavers
Select a photo as a screensaver in the Share menu then select Set Desktop. Or create your own – go to File > Export to save copies of your photos to a new folder. Then open the Mac's Desktop & Screensaver panel, click the '+' button and add your folder of images.
79. Make your photos a movie
The Photo Browser in iMovie lists the contents of iPhoto albums so you can drag photos into your movie projects, either mixing video and stills or making a movie out of stills alone.
80. Saving slideshows
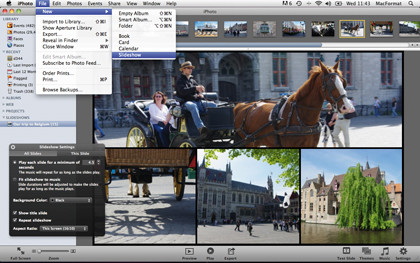
There are two ways to create slideshows in iPhoto, with two slightly different outcomes. If you select an album and click the Slideshow button at the bottom, you'll be able to choose a theme and settings, but they won't be saved.
You can opt to have your settings saved as the defaults for future slideshows, but that's not the same thing. To create a slideshow, use the File > New > Slideshow command. The new slideshow will be added to the Slideshow section at the bottom of the panel, and each slideshow created in this way retains its own unique settings.
Current page: iPhoto tips 61-80: Show and share your photos
Prev Page iPhoto tips 41-60: Organise your photos
Rod is an independent photographer and photography journalist with more than 30 years' experience. He's previously worked as Head of Testing for Future’s photography magazines, including Digital Camera, N-Photo, PhotoPlus, Professional Photography, Photography Week and Practical Photoshop, and as Reviews Editor on Digital Camera World.