80 handy iPhoto tips and tricks
iPhoto hints: organise, improve, manipulate and share
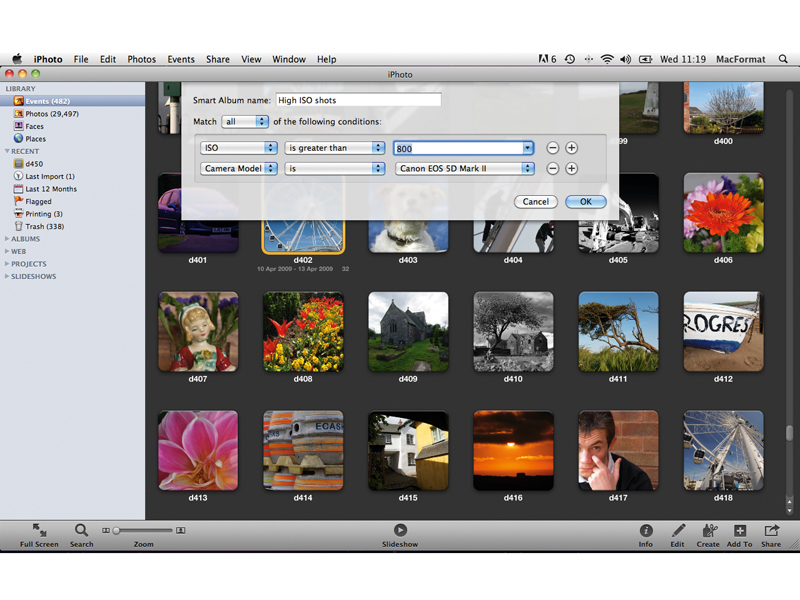
Probably the best tip we can give you for a happy iPhoto life, is to try and take good pictures in the first place.
So we'll kick off with 20 top tips for better photos. And the great news is you don't need anything fancy. Even an everyday compact camera can take great shots when you know how to get the most from it. And if your photos still aren't quite right, iPhoto has the tools to fix them.
It might not be as advanced as Photoshop, but what it does, it does quickly and simply, and underneath that simple-looking surface is an impressive image-editor.
Before long, of course, your photo library will be growing to epic proportions, but luckily this is what iPhoto was designed for – managing and displaying thousands of digital photos in a way that lets you find and organise your pictures as easily as possible. Even here, though, there are tips and secrets that can make your life easier.
Finally, photos are meant to be shared, not hoarded away on your hard disk. And iPhoto's slideshows, web albums, prints and books are the perfect way to do it. We finish off, then, with 20 top tips for things to do with your photos. Some you have to pay for, but there's plenty of great things you can do without having to fork out a penny, too.
iPhoto isn't just a photo browser. It's central to getting more out of photography with your Mac, from enhancing them to organising them and sharing them with other people. Let's get to work!
Take better photos
1. Brace yourself!
Sign up for breaking news, reviews, opinion, top tech deals, and more.
Most blur is caused by camera shake. In bad light, the camera uses a slow shutter speed, and unless the speed is displayed on the LCD, you might not realise it. Brace your camera hand against a wall or rest your camera on a steady surface to take the shot.
2. Check the ISO
Cameras have an auto ISO setting that increases the sensitivity in low light, but this also reduces the picture quality. You'll need this if you're shooting handheld, but if the camera's braced you won't. Instead, manually set the ISO to its minimum value.
3. Manual white balance
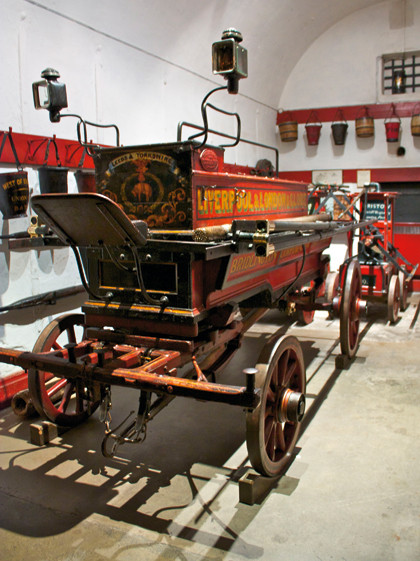
The camera's auto white balance setting will do a good job in most conditions, but not all. When you're shooting in artificial light, choose the nearest manual white balance preset ('tungsten' or 'fluorescent') for better colours.
4. Check the histogram
You can't always rely on the camera's automatic exposure system to get it right. Many cameras display a histogram, though, so use this with the EV compensation control to make sure the shadows and the highlights in your photo aren't being clipped.
5. Use the focus lock
Even now, you will find cameras that still suffer badly from shutter lag. This is caused by the amount of time it takes for the camera to focus when you press the shutter button. However, the trick is to half-press the shutter button to make the camera focus; you should then wait for exactly the right moment to press it the rest of the way and take the picture.
6. Don't rely on your zoom
Zoom lenses can make you lazy, so don't just stand in one spot and zoom in and out to frame your picture. Walk up to your subject, past it and around it to see a wider range of viewpoints, angles and perspectives. The direction and the quality of the light will change, and have a big effect on the picture.
7. Experiment with viewpoints
If you're photographing kids or pets, get down to their level. Lying on the ground can lend everyday subjects monumental proportions, and finding high viewpoints and shooting downwards will produce unusual perspectives and compositions. It's easy to get into the habit of shooting every picture at eye level, missing out on lots of interesting pictures.
8. Use natural frames
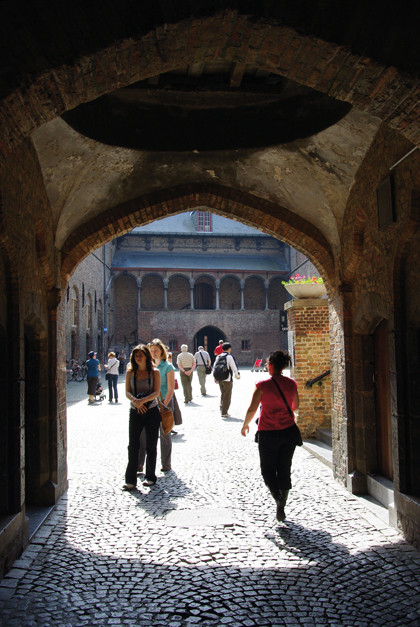
Doorways, windows, overhanging branches and even buildings can make effective 'natural frames', and often you only have to move a few paces to find them. This will focus attention on your subject more effectively, and give a sense of place to your picture.
9. Use a tripod
Tripods are a cumbersome nuisance, right? But they do three very important things. First, they let you shoot in light that's too dim for regular handheld photography. Second, they let you frame set-up shots like still-lifes and macros very precisely. Third, they leave your hands free to adjust props, move people around for group shots and get stuff out of your bag such as filters and memory cards.
10. Check the background
We've all seen those shots where the subject has a telegraph pole sticking out of their head, but backgrounds can clash in subtler ways than that. Inappropriate signs, leering passers-by, graffiti and overflowing wheelie bins can all spoil your shots; a few moments' thought and a shift in position may be all you need to fix it.
11. Turn off the flash

In full auto mode, the camera will fire its flash automatically in dim lighting. Sometimes it's useful, but it can kill the natural lighting and atmosphere.
In theatres or museums, make sure you switch it off, even if it means bracing the camera or using high ISOs. And leave it off for night scenes or indoor stadiums, too. Flash power drops off with distance – there's no way it could illuminate objects more than a few metres away anyway.
When the flash is enabled, the camera won't make any attempt to extend the exposure to capture any natural lighting.
12. Choose your moment
Timing is everything: getting the right expression, waiting for passers-by to get out of the way, even seizing the moment when the sun breaks through the clouds. So grab a shot straight away by all means, but then wait a few moments if you can, to see if an even better one is going to come along.
13. Fill the frame/move in close
Try to fill the frame with your subject by zooming in or moving closer. Many pictures lose impact because the subject isn't prominent enough and there's too much clutter or empty space around it.
14. Fill-flash for portraits
Portrait shots taken in bright sunlight often look harsh or, if you're shooting into the light, can be lost in shadow completely. This is where the camera's built-in flash is useful. If you set it to 'fill flash' or 'slow flash' mode, it will light up your subject's face but the effect will be balanced against the natural lighting.
15. Rule of Thirds
It's tempting to place your subject right in the centre of the frame, but this can produce some rather static-looking shots. Instead, place it a third in from the edge, or a third of the way in from the top or the bottom of the frame. You don't have to stick to this 'Rule of Thirds' for every shot, but it's worth keeping in mind.
16. Converging verticals
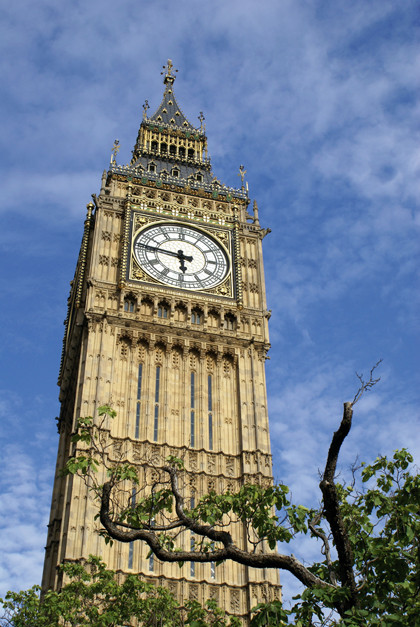
When you shoot tall buildings, the tops tend to converge, which gives the picture an amateurish look. It happens because you're tilting the camera upwards. The solution is (where possible) to move further back so you don't have to tilt the camera. Also, try and find an interesting subject in the foreground to fill the bottom part of the frame.
17. Jog-free shutter release
How do you avoid jogging the camera when you press the shutter release for long-exposure night shots, or when you're shooting close-ups with the camera on a tripod? You could invest in an expensive wireless remote, but it's much simpler just to use the self-timer on your camera. Most have an adjustable delay, too – typically two seconds or 10 seconds.
18. Shoot panoramas

Many cameras these days come with wideangle zooms – however this may still not be enough to capture the full width of the scene. Instead, find out if your camera has a panoramic mode. Some shoot panoramas in a single 'sweep', others shoot single frames for stitching together later. Don't go mad, though. Two or three overlapping frames can be enough to produce a great extra-wide shot.
19. Check your settings
Digital cameras allow you to change the ISO, white balance, picture style and more besides, but it's all too easy to forget you've done it and carry on shooting with the 'wrong' settings next time you use the camera. It's best to get into the habit of resetting the camera to its default settings either when you've finished using it or before you start shooting.
20. Don't use the digital zoom
However much the camera makers try to dress it up, 'digital zoom' is just cropping and interpolation carried out inside the camera. If you can't get close enough to your subject, use the maximum optical zoom instead and then crop the picture in Photoshop or Elements – this means you'll be able to choose the area you crop in on.
Current page: iPhoto tips 1-20: Take better photos
Next Page iPhoto tips 21-40: Tweak your images
Rod is an independent photographer and photography journalist with more than 30 years' experience. He's previously worked as Head of Testing for Future’s photography magazines, including Digital Camera, N-Photo, PhotoPlus, Professional Photography, Photography Week and Practical Photoshop, and as Reviews Editor on Digital Camera World.