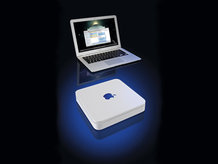
How to create a Mac powered digital home

One of the best things about owning a Mac is that Apple has always put it at the heart of your entertainment needs – from iTunes and iLife through to products like Apple TV and AirPort Express.
It's all about getting your music, movies and photos where you want them, how you want them, when you want them. It's all about placing your Mac at the centre of your digital life and home.
We're going to look at how you put all these options together, what the benefits and pitfalls are and even some next steps you might consider to really get the best from your Mac-centric digital home.
The obvious place to start is with the Mac itself. The latest generation iMac is perfect digital home material – it comes with a large widescreen display and even the £799 20-inch version ships with a 250GB hard disk drive – enough for a decent-sized iTunes library, with plenty of room left over for your photos and home movies.
That 20-inch widescreen could be used as a substitute study or bedroom TV – provided you're prepared to watch programmes or films online, or to invest in a TV tuner – you can find out more in the box titled Watch And Record TV On Your Mac, page 73.
The best home-oriented Mac is the top-of-the range iMac (from £1,389). Not only does it boast 1TB of storage, but it also comes with a gorgeous 24-inch widescreen display. For the ultimate digital home solution though, something from Apple's Mac Pro line is the way to go. True, they're less living room friendly, but the Mac Pros have four hard drive bays for massive storage. They're also impossibly quick – perfect for multimedia use.
In reality, almost any Mac you own is suitable for a digital hub, provided you're running a recent copy of Mac OS X, plus iPhoto and iTunes. All you really need is a decent amount of storage and some flavour of Wi-Fi – with 802.11n networking via AirPort Express (£65), AirPort Extreme (£119) or Time Capsule (£199-£329) being the preferred option.
Sign up for breaking news, reviews, opinion, top tech deals, and more.
Let's say your needs are relatively modest. You have a Mac in your study or bedroom, but would like to be able to listen to your iTunes library in the lounge – a pretty common requirement. There are four different ways to approach this…
1. Streaming your iTunes library to another mac
The simplest solution is to turn sharing on in iTunes. You can do that by going to iTunes > Preferences > Sharing. Make sure the box marked Share My Library On My Local Network is checked and then pick exactly what you'd like to share – your entire library or specific playlists.
You should now be able to discover that shared library on another Mac – a lounge-based MacBook, say – by also firing up its version of iTunes and selecting iTunes > Preferences > Sharing > Look For Shared Libraries. What you should see now is a streaming version of the contents of your iTunes library, listing either playlists or the whole shebang.
2. Stream your iTunes library to your Hi-Fi
If your interests are purely musical then you can stream suitable content to an old school hi-fi system using AirPort Express. Whether you own the older 802.11g version or the newer 802.11n one, the results are largely the same.
To make it work, plug the AirPort Express into a power socket next to your hi-fi, hook it up to the back of your amp using a suitable analogue or digital audio cable and then stream your audio using the relevant AirTunes option that appears in iTunes.
The only downside is that you won't be able to control what your hi-fi is playing – you'll still need access to your iTunes library. That could be a problem if your Mac is upstairs rather than right in front of you. However, you can pick up third-party products such as Keyspan Express Remote (£31 online), which works with AirPort Express and AirTunes to overcome this.