How to set up and install a VPN on Windows 10
VPNs have become an essential tool for PCs

There are plenty of good reasons to have a VPN running on your PC, ranging from bypassing geo-restrictions, keeping data more private from your ISP that wants to go data mining, or increasing overall security by keeping your IP Address concealed- to name a few.
Therefore, it really makes sense to have each device connected to the internet protected by transmitting its data through an encrypted tunnel on a private network, rather than straight away on to the ‘Wild West’ of the public internet. While each device that you access the internet should be protected, perhaps the most important device to start with is your home computer.
You may have bad memories of hours spent manually configuring VPN software, that too often ended in screwed up settings and no VPN connection. Thankfully those days are long gone. These days, the software is really quite simple and even a newbie can go through the process of getting a Windows 10 VPN for PC in five esy steps.
1. Choose your VPN
In all honesty, one of the more challenging steps to getting a VPN up and running is the choice of VPN provider. This is because there are such a wide range of choices, all claiming to suit different needs.
Some focus on ease of use, while others cater to power users or the privacy minded. And then there those that just boast thousands of servers.
We'd recommend that you remain wary of free VPN downloads, which tend to be a bit of a ‘Fool’s Gold’ offering as they are insecure and security nightmares. And pay attention to differentiating points of the various VPNs, such as the number of devices supported, the locations of servers, and the logging policy.
Getting overwhelmed? No worries, as you can simply check out TechRadar’s best VPN recommendations for some solid VPN choices and where ExpressVPN tops the lot.
Get the best Windows VPN with 3 months FREE
The awesome ExpressVPN tops the lot when it comes to getting a VPN for Windows. It's super secure, boasts fast connections to 3,000+ servers across over 90 countries, and fantastic at unblocking streaming services like Netflix and Amazon prime - plus, you can try it out for 30 days with its money back guarantee.
2. Download the Windows 10 app
For the rest of this guide, we’ll work with ExpressVPN, but the sentiments and process will extend to pretty much every VPN out there.
To get started, navigate over to the Windows download section of the ExpressVPN website, and select “Get ExpressVPN.”

3. Open up the Windows client
Once logged into your account, you can see all the devices that the VPN supports - navigate over to the page for Windows and hit “Download” to get the software.
If using ExpressVPN then take note of the activation code that you will need. Then just install the software and enter the activation code when prompted.
These services are so straightforward that you're now basically ready to go...
4. Choose a server
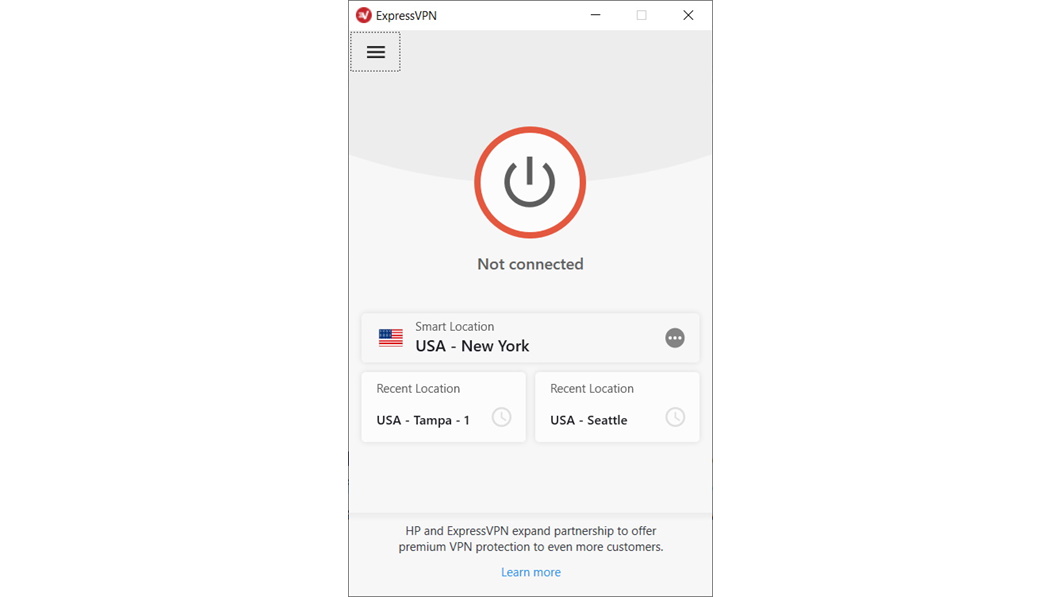
Now you have the software installed on your computer. The next step is to choose a server to connect to. Thankfully, ExpressVPN (and other top VPNs) does this for you with the ‘Smart Location’ feature by figuring out your location, and then connecting you to the closest server for your VPN experience.

5. Turn your VPN on
All that's left to do is hit the On/Off button (as seen in the screenshot above when it comes to ExpressVPN). Once on, you'll be surfing the internet through the VPN for ultimate online anonymity and all your geo-spoofing needs.
Yes, it is really that simple!

Sign up for breaking news, reviews, opinion, top tech deals, and more.
Jonas P. DeMuro is a freelance reviewer covering wireless networking hardware.
