How to use Home Sharing in iTunes 9
Share content and sync music and movies to multiple devices
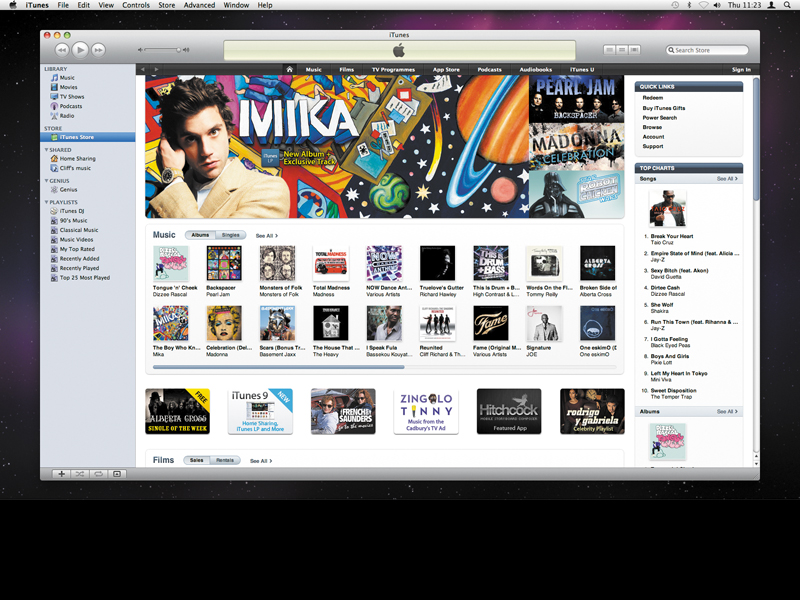
Through maturation, iTunes has become the hub for all things digital and entertainment related, both on Macs and PCs.
Now, as well as buying music, you can rent and buy movies through it and manage your iPhone or iPod touch and their many applications.
One area in which iTunes has perhaps not been quite as flexible as it could be is in the sharing of content. One workaround is to use Library Sharing, which lets you share and browse iTunes libraries on a local network, though only for streaming.
Now, iTunes 9 introduces Home Sharing, which lets you authorise up to five Macs or PCs running iTunes on your local network. It also enables you to stream music and video, and drag and drop content between them.
If you consider that an iPod or iPhone needs to be synced with a single Mac, you'll see the benefit of Home Sharing. If you rip a CD on one Mac, someone else in the house can play it on their Mac and also now drag the files to their Mac and sync the tracks to their iPod or iPhone.
Previously, this involved locating files in the Finder and copying them manually. Now, it's all done from within iTunes. The same applies to apps and videos, so you can rip or buy content on one Mac then sync it to different devices by copying it easily between computers.
The catch is that you have to use the same iTunes account details to authorise each machine, but you can have multiple authorisations on the same local network.
Sign up for breaking news, reviews, opinion, top tech deals, and more.
There's also a handy new feature that enables you to transfer iTunes purchased content to all authorised Macs. So if you buy an album, it can be pushed to other Macs and made available for listening and syncing from them too. This only works with purchased iTunes content, but may be expanded in future.
1. Activate Home Sharing
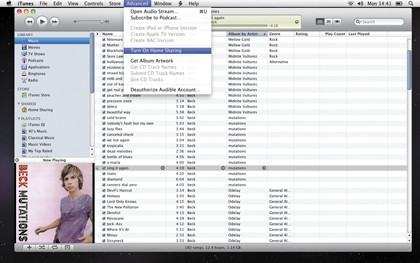
Open iTunes 9 and go to Advanced > Turn On Home Sharing. You'll need to do this on each Mac or PC that you want to authorise, up to a total of five. You only have to turn it on once per machine and iTunes will remember. Of course, you'll need a network connection first!
2. Enter account details
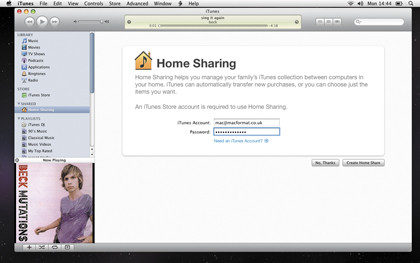
To authorise the sharing feature enter the details of the iTunes Store account you want to use. (You'll have to do this on every Mac or PC). Under the Shared tab in iTunes' lefthand column you should see any active libraries appear. Click to expand the tab if necessary.
3. Set the library names
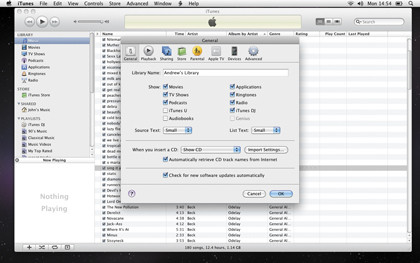
If you go into iTunes' Preferences > General tab, you can enter a name for the library and this will be broadcast over the network and appear in each copy of iTunes. This is handy when you're using more than a couple of machines.
4. Browse a library
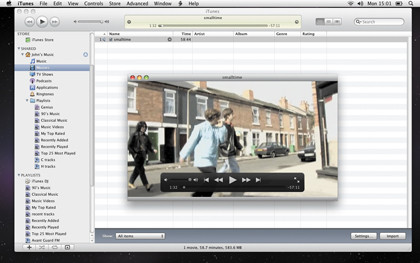
Select a shared library and click its triangular button to expand it. To stream any music, just select it either from the Music tab or from a playlist. The same also applies to movies. Dropping content into a library on one Mac will make it immediately available on all other Macs.
5. Choose view options
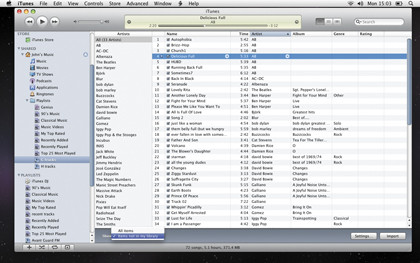
As shown above, there's an option at the bottom of the iTunes window that enables you to have on display either all items or just the items not already in your library. Choose this and you can be fairly sure you won't be needlessly filling space when you copy.
6. Copy some music
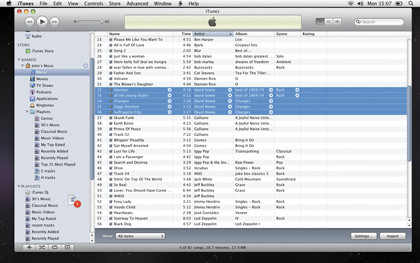
If you want a copy of one or more tracks from the target library, select them and drag and drop them into your library or a playlist. You can also use the Import button at the bottom right of the window to copy files across the network. Videos might take a while to transfer.
7. Automate sharing
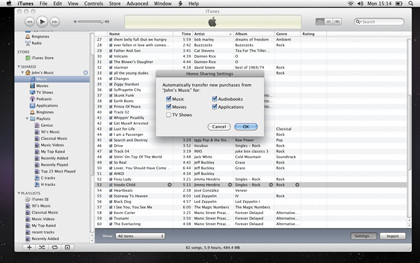
If you click on the Settings button at the bottom, you can choose to automatically 'push' newly purchased iTunes Store content from the remote library to your library. So if you buy something, it will be copied automatically to your Macs to then be synced to your devices.
8. Try it from a second Mac
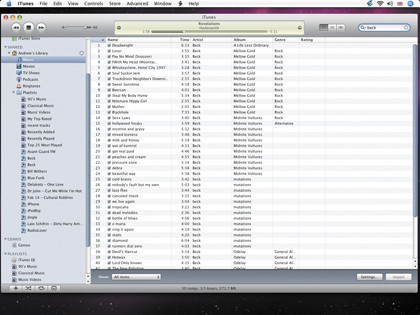
You can access from another Mac all the content from the Mac you were just working on. By selecting the Music tab and then using iTunes' search field, you can quickly identify tracks you want and drag them across to your local library.