
 Become a TechRadar Insider


Knowing how to transfer your data from iPhone to iPhone is a skill that's bound to come in handy. While it's tempting to want to use your shiny new iPhone the minute you get your hands on it, it's important you don't rush through the initial setup process as the last thing you want is to lose any important files or photos.
Whether you've just purchased an iPhone 14 or another of the best iPhones that are currently available, you'll need to transfer data from your old iPhone to your new iPhone. While you have the option of starting from scratch and setting up your iPhone in a brand-new state, most of us will want to transfer our data over.
When it comes to how to set up a new iPhone it's true that Apple does ask you whether or not you want to transfer data from iPhone to iPhone, but, depending on whether or not you use iCloud, have the right iPhone transfer cables, or you want to use one of the best MacBooks and Macs as an intermediary, there are different iPhone data transfer methods you can employ.
There's also the issue of how much of your data you're wanting to transfer over. While some of us find it easier to just move the whole lot across and sort it out later, for others, it may be that we only want specific data to be transferred over.
No matter what route you want to go down, we're here to walk you through the best methods available to transfer data from iPhone to iPhone. For other situations, you can check out our guides on how to switch from Android to iPhone or how to switch from iPhone to Android.
How to transfer iPhone data via iCloud

The simplest method for preserving your iPhone data is to first learn how to back up an iPhone to iCloud. Go to Settings > Your Name (the first option) > iCloud. You'll see how much iCloud storage you've used and which apps you're backing up.
You can see a summary of how much storage space is currently being used by Photos, backups, apps and other data. Scroll down to see a list of apps using iCloud, with the option to toggle each app on or off – so they will or won't appear on your new iPhone automatically.
You only get 5GB of storage for free. Considering most iPhones these days have 64GB of storage or more, that won't be enough for most people. You can follow our guide on how to free up space on an iPhone, but that likely won't be enough.
To back up everything on your phone, you'll probably need to upgrade to a paid plan. It costs $0.99 / £0.79 / AU$1.49 per month for 50GB or $2.99 / £2.49 / AU$4.49 per month for 200GB.
If you don't mind a small fee, you can sign up, back up your entire phone to iCloud, download the data to your new iPhone, and then cancel iCloud before the month is out. In the iCloud Settings, choose Manage Storage and hit Upgrade to select your paid plan.

Once you've settled what you want to transfer to your new iPhone, go to Settings > Your Name > iCloud > iCloud Backup. You'll find the option at the bottom of the 'Apps Using iCloud' section.
Toggle iCloud Backup on if it isn't already, then select Back Up Now. Your iPhone will upload all of your most recent data to the cloud.
Now, begin setting up your new iPhone. Go through the on-screen steps, including connecting your phone to Wi-Fi; you can skip past the Quick Start screen, which appears in the next section. Once you hit the Apps & Data screen, choose Restore from iCloud backup.
You must sign in to your Apple ID account; if you have 2FA active, you'll likely need to approve the login on your old iPhone or Mac. Then, choose the most recent iCloud backup from the list of options that shows today's date.
Apple will transfer all of the backed-up data directly to your new iPhone. Just make certain that the phone is connected to Wi-Fi so you're not using cellular data, and that it's plugged in so that the phone doesn't die mid-transfer.
How to transfer iPhone data with Quick Start
The best free method for transferring data to your new iPhone is via Quick Start, Apple's own iPhone-to-iPhone transfer system.
To use it, your current iPhone must run iOS 16.2 or later and have Bluetooth enabled. Any iPhone from the 5S onwards should be capable of this. However, we recommend updating to iOS 16 (or the latest available iOS version on older phones) for the easiest transfer process. Check out our guide to How to get iOS 16 on your iPhone for more information.
Turn on both your old and new iPhones and place them next to one another. On the new iPhone, choose your language. The next screen should be the Quick Start screen.
On your old iPhone – assuming Bluetooth is enabled – you should see a pop-up screen asking if you want to 'Use your Apple ID [email@domain.com] to set up your new iPhone'. Hit Continue, then pick up your old iPhone and position the camera view so it overlaps with the circular pattern that appears on your new iPhone.
Your old iPhone is now synced. Place it nearby, and plug it in if the battery is low so that it doesn't die mid-transfer.

On your new iPhone, follow the on-screen steps until you hit the Transfer Your Data screen. Choose Transfer from iPhone, agree to the Terms and Conditions (assuming you do agree to the terms and conditions, of course), and confirm what Settings or other data you want to transfer over. You may also need to update the new iPhone to the latest OS.
Once the new iPhone finishes preparing the transfer, the old iPhone will show a 'Transferring Data' screen with a progress bar, while the new iPhone will have a 'Transferring Data from X's iPhone' screen with the same progress. How long it takes will depend on how many gigabytes of data you're transferring and whether the two phones are wired.
Eventually, the transfer will complete! On your new iPhone, tap through the menus that appear until you reach the home screen. Ensure that your Apple Photos, Calendar, Mail, Contacts, and other apps all have your old data.
On your old iPhone, hit Continue to go back to the home screen. Now that you've confirmed that everything moved over, you can safely factory reset your iPhone (if you're not sure how to do this, check out our guide to how to reset an iPhone).
How to transfer data to an iPhone using a wired connection

You can also choose to connect the two iPhones using a cable and adapter before using the Quick Start method. While this will speed up the transfer, it frankly may not be worth the price.
You need a Lightning to USB Camera Adapter ($29 / £29 / AU$49) to go with your standard Lightning-to-USB cable that comes with your iPhone. The Adapter's Lightning connector goes into one iPhone, the USB charger inserts into the Adapter, and the charger's Lightning connector slots into the other iPhone.
This adapter is mainly used to transfer data from USB-compatible accessories to iPhones and iPads. If you don't see yourself using it in any other context, you're probably safe to skip it and just transfer wirelessly. The small amount of time saved most likely doesn't justify the cost.
How to transfer data from iPhone to iPhone using Mac or PC
Backing up your iPhone to your computer has some benefits when transferring data to a new iPhone. It lets you transfer the data using a cable instead of over Wi-Fi, without paying for iCloud. Plus, it stores the backed-up data in case your iPhone ever becomes lost or damaged.
To connect your iPhone to your Mac or PC, you'll either need a USB-C to Lightning cable or a USB-C to USB adapter to go with the USB-to-Lightning charging cable.
With the latest macOS version, Apple now backs up your iPhone to Finder instead of iTunes. Connect your old iPhone and find it under Locations in Finder. Choose Trust this device on both the iPhone and Mac. You'll see an option to Back up all of the data on your iPhone to your Mac. Select it and choose Back up now.
With your new iPhone, turn it on, plug it into your computer, and go through the on-screen steps. Skip past Quick Start and progress until you reach Apps & Data. Choose Restore from Mac or PC. You'll follow the on-screen steps to install your latest backup onto your new iPhone.
Transfer select data from one iPhone to another
Sometimes you need to transfer data from iPhone to iPhone en masse without completely overwriting the other phone. You can always use traditional methods – email or text messages, for instance – but there are other methods you can use, either from Apple tools or via third parties.
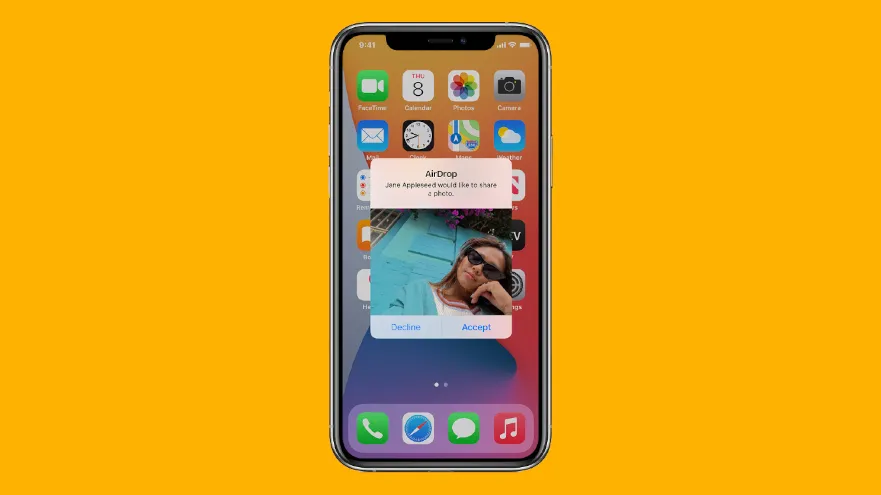
AirDrop: You can easily send Apple Photos, Files, or other content from one iPhone to another using AirDrop. We have a guide on how to use AirDrop on iPhones if you need help figuring out how to make both iPhones find one another. But this tool makes it simple to share content from most iOS apps to another iPhone.
Transfer specific files to Mac or PC: When you connect your iPhone to your Mac via Finder (or PC via iTunes for Windows), instead of backing up your entire phone, you can drag and drop specific files from your iPhone to your computer desktop. You can then connect the second iPhone to that same computer and drag the files from your desktop onto that new phone. This method works well for a larger transfer of files.
Cloud storage: iCloud isn't the only storage service in town. You can use any of the best cloud storage solutions available to back up specific files from your iPhone to the cloud. Assuming the service has an app, you can then download it on the second iPhone, log into that account, and download the necessary files from the cloud to that device.
