Sign up for breaking news, reviews, opinion, top tech deals, and more.
You are now subscribed
Your newsletter sign-up was successful
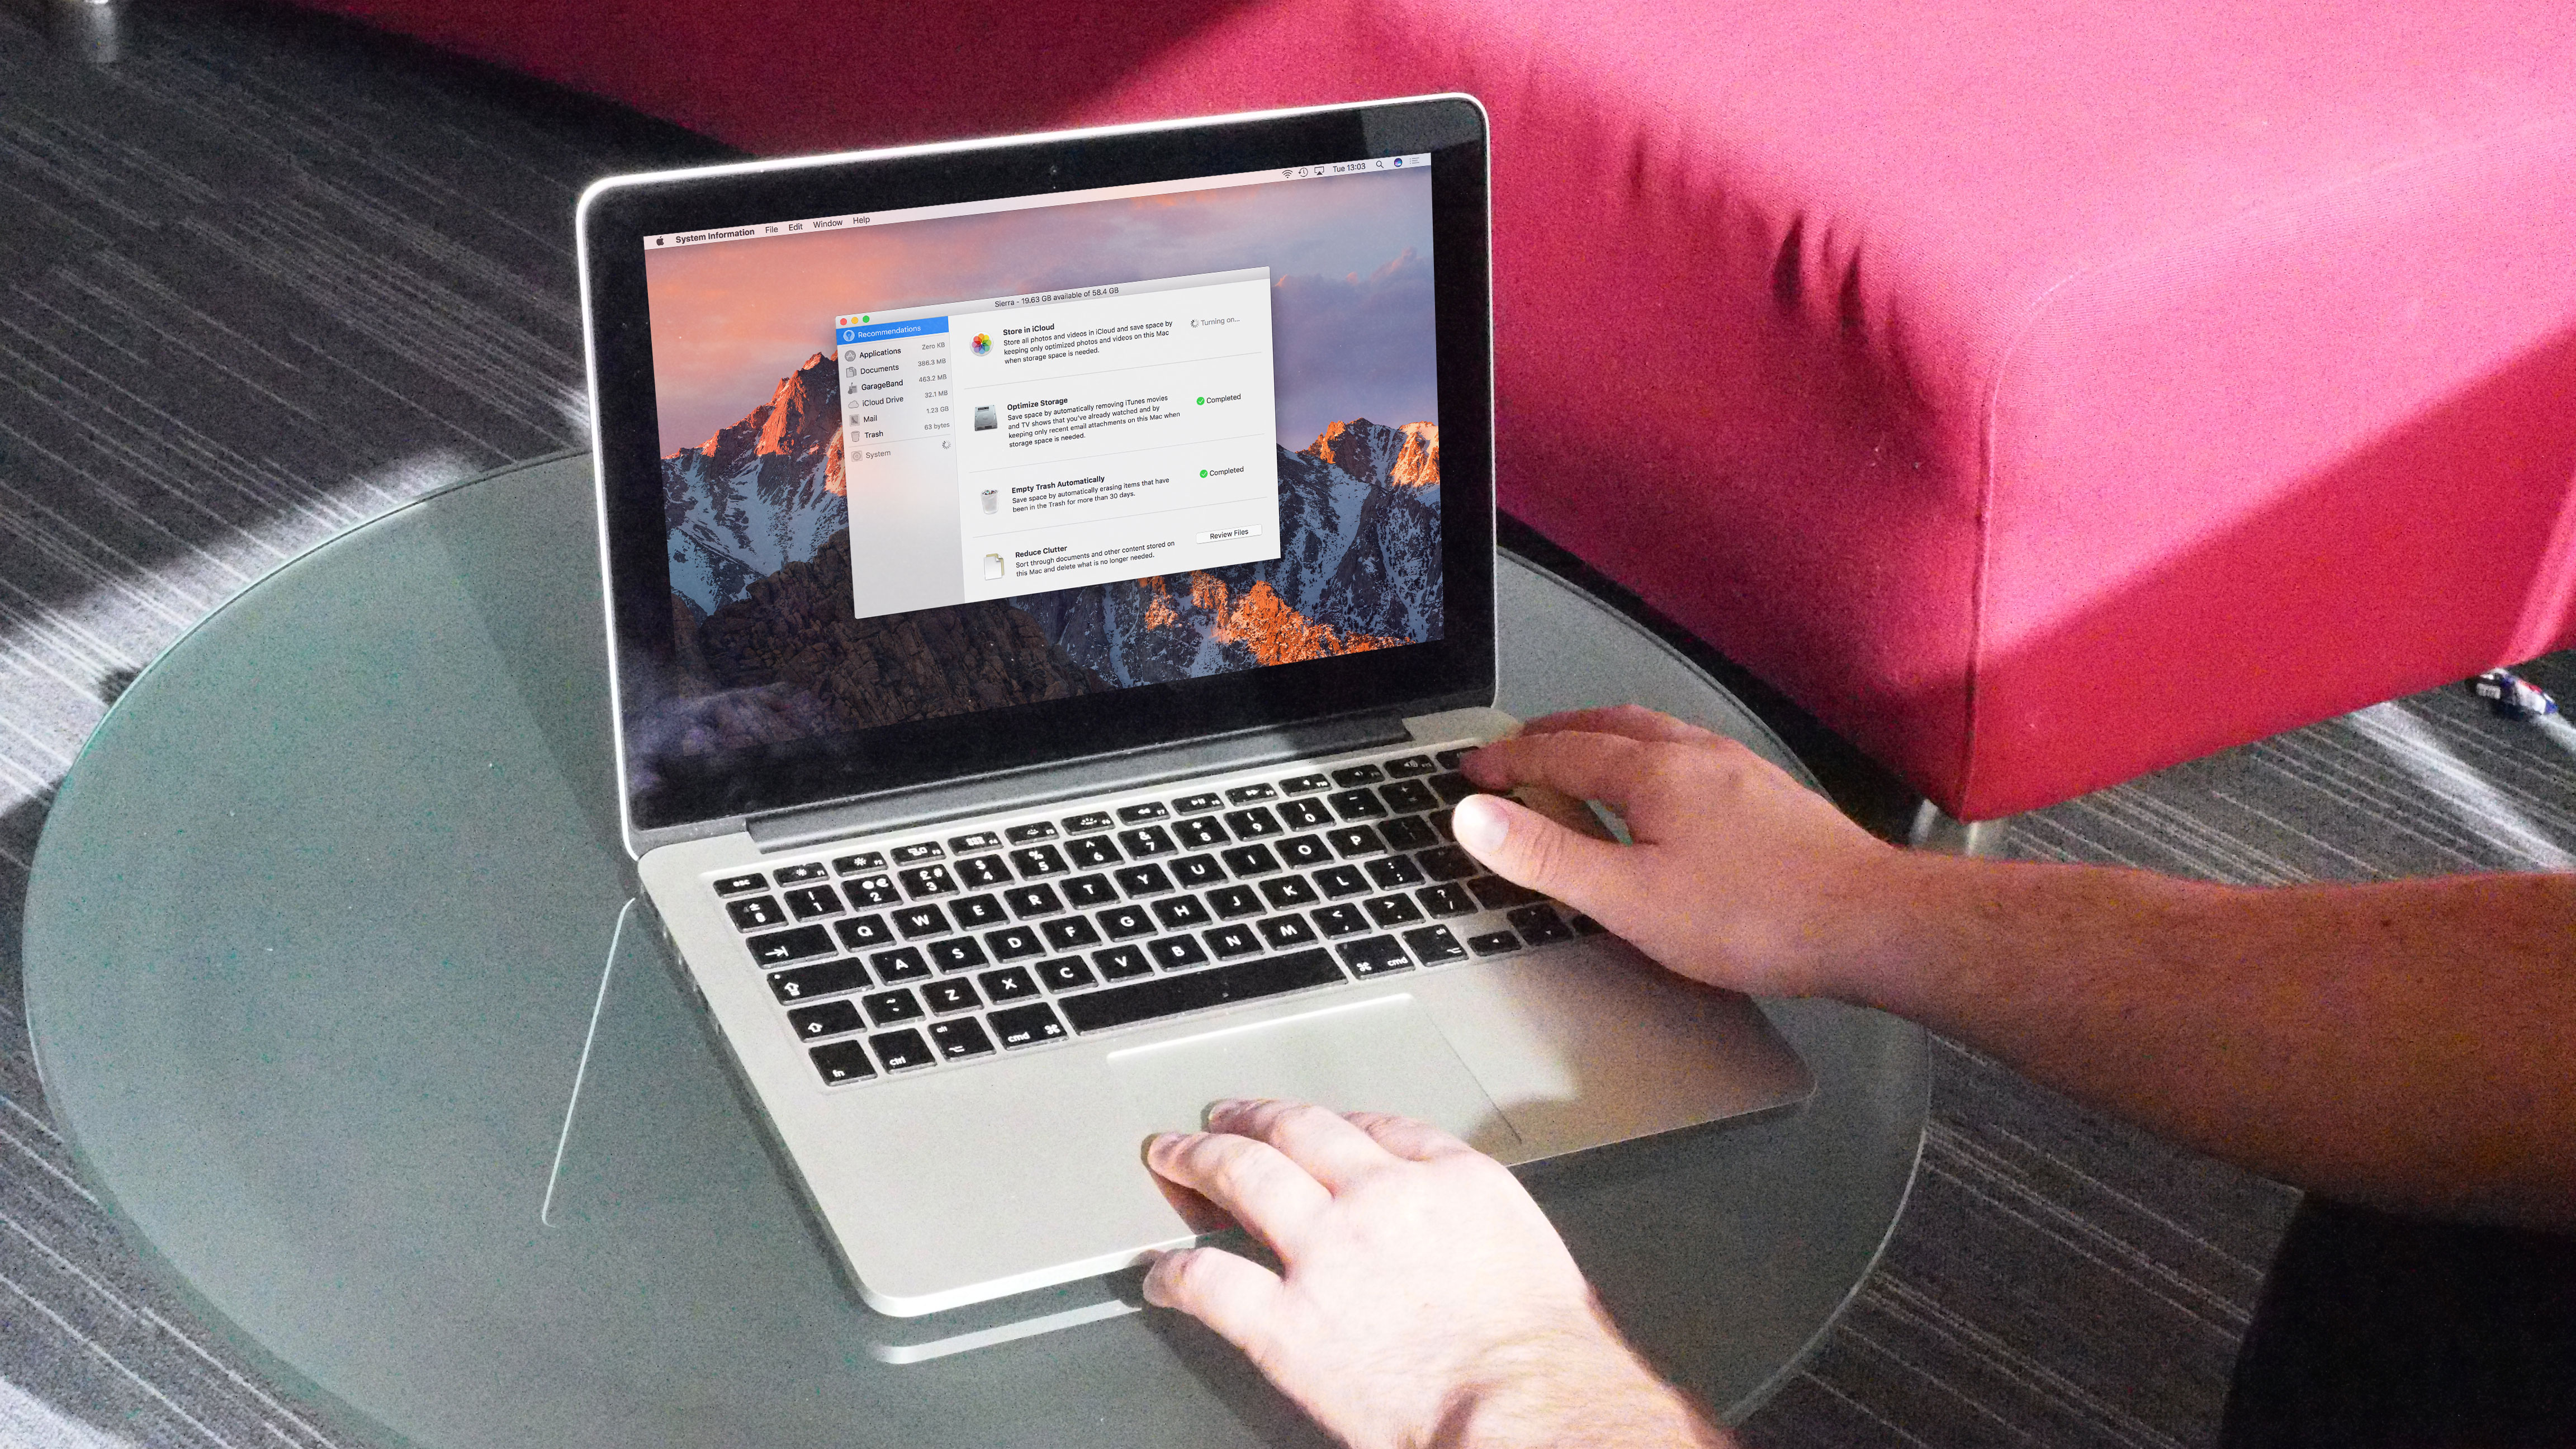
One of the conveniences Apple has added in macOS Sierra is Optimized Storage, which helps you to keep plenty of space free for whatever task you take on next.
The feature is tucked away in the About This Mac dialog's Storage tab, where there's a new button labelled Manage next to the breakdown of how your startup disk is being used. Clicking this button opens a new storage management window (which is actually part of the System Information app, located in the Utilities folder; in it, choose Window > Storage Management).
Many of the things you can accomplish in this window can be done elsewhere in macOS Sierra and its bundled apps, as long as you know where to look and are comfortable making alterations.
However, this window consolidates prime methods for saving space in one place, and provides advice on things you might have overlooked (or be unaware of) and how much space you might be able to reclaim. Even if you consider yourself to be fairly in control of your Mac, we urge you to at least open the app and check its recommendations, some of which may relate to older preferences you've already discounted, and some that are new in macOS Sierra.
This article is part of TechRadar's Mac Week. This year marks not only the 10th anniversary of Apple's MacBook, but the triumphant return of macOS. So, TechRadar looks to celebrate with a week's worth of original features delving back into the Mac's past, predicting the Mac's future and exploring the Mac as it is today.
Shared benefits
Changes you make in the window (except for apps you trash) apply only to the current user account, but your choices will affect others who share your Mac. You might save even more space by asking them to follow suit.
Beyond the 10 minutes this process will take you, you'll need to allow some extra time for your Mac to do its part – to process photos, say, which depends on other factors such as library size, whether you've already enabled iCloud Photo Library, and your upload speed.
Sign up for breaking news, reviews, opinion, top tech deals, and more.
If you turn on iCloud Drive's ability to keep only recently used files on your Mac as space gets low, files appear in Finder where you left them, but with a cloud and arrow icon you can click to redownload them ahead of time and guarantee their availability when you are offline – or you can double-click one to get and open it immediately.
1. Find the feature
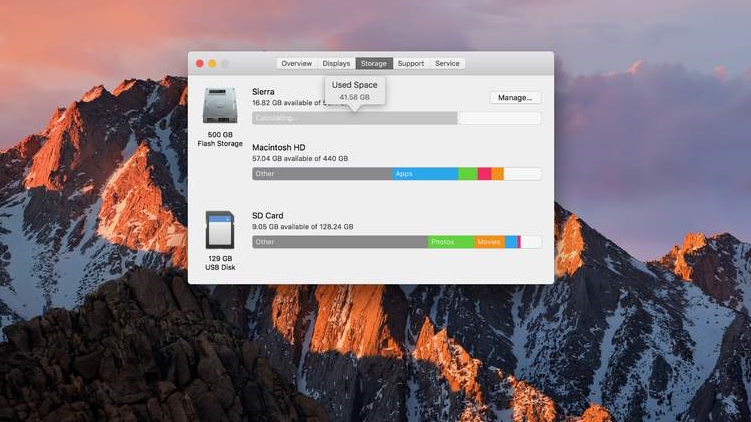
Click on the Apple icon then About This Mac, and then click the new window's Storage tab. This shows categorised breakdowns of used space on your Mac's directly attached storage.
There's a Manage button next to only the current startup disk. Click it.
2. Review its suggestions
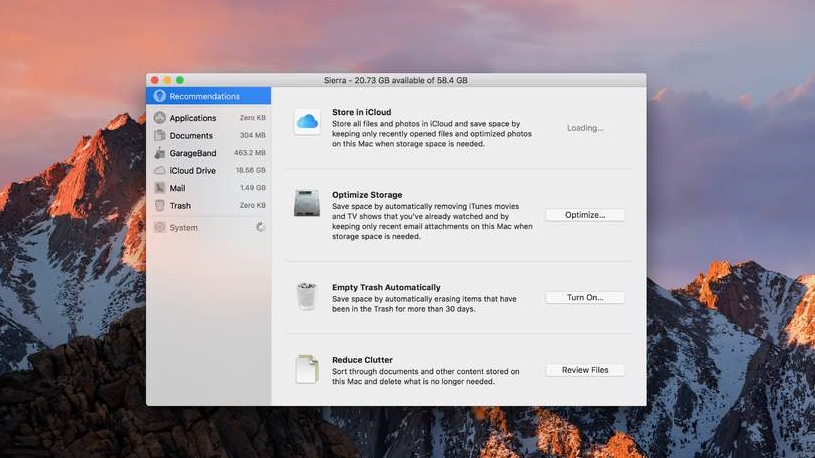
The Storage Management window opens, with Recommendations selected in its left pane. On the right, ideas of how you can save space are described, with a button next to each item. Click one for more info, then accept or ignore it.
3. Store in the cloud
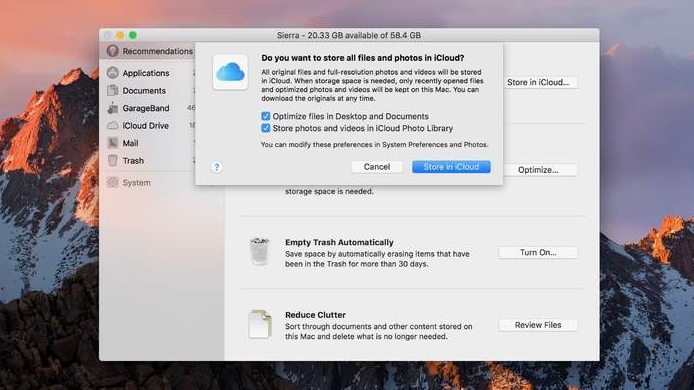
The first item's wording will suggest storing files and full-quality photos in iCloud, depending on whether you've already set iCloud Photo Library to keep optimised versions on your Mac if space is low (this was possible before Sierra).
4. Files in iCloud Drive
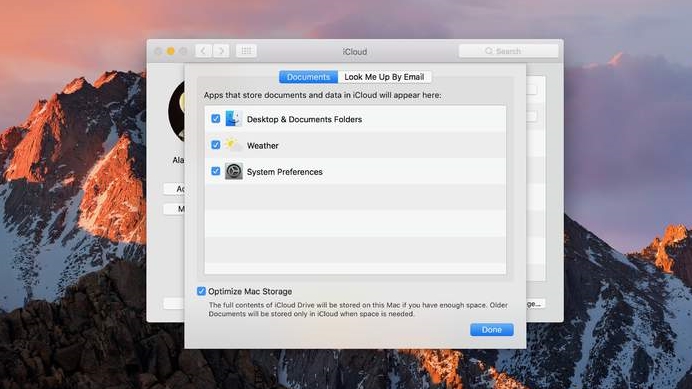
Photos obtains a full-quality copy from iCloud when you edit a picture. As for files in Drive, accepting that idea turns on a new item in iCloud Drive's preferences that keeps only recently used files on your Mac if space gets low.
5. Movies and TV shows
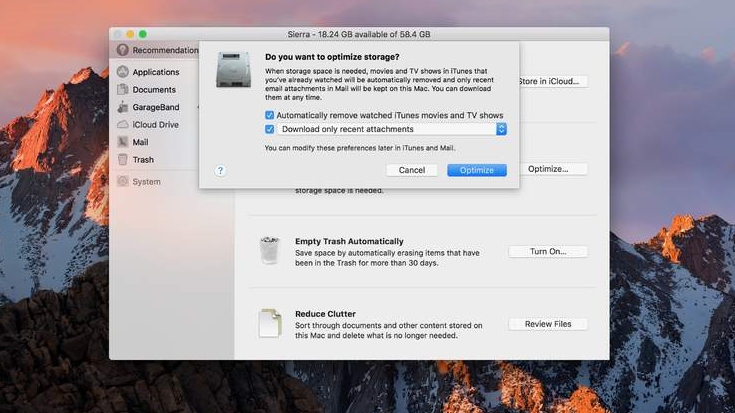
The next suggestion is equivalent to turning on an item in iTunes' Advanced preferences. It instructs iTunes to remove movies and TV episodes from your Mac after you've watched them, potentially saving you lots of space due to their size.
6. Auto-empty the Trash
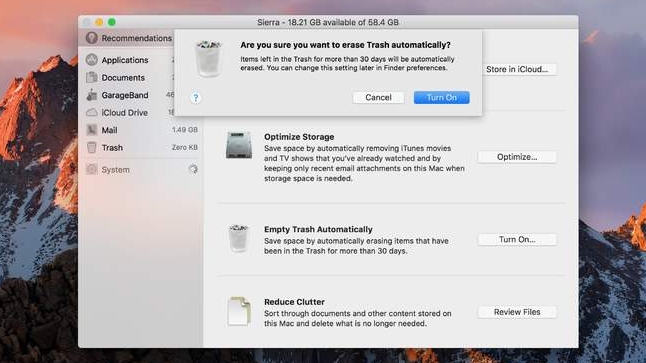
Sierra can be set to automatically remove items that have been in the Trash for longer than 30 days. This is the same as enabling an item in Finder's Advanced preferences. Past the grace period, items can still be recovered from Time Machine.
7. Recover lost files
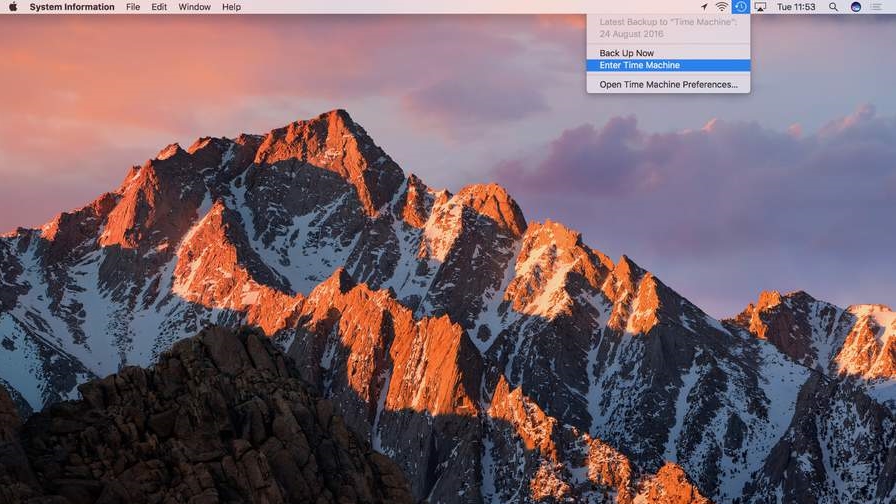
As long as you haven't excluded the Trash from Time Machine backups, open a window on the Trash in Finder and then choose Enter Time Machine from the service's menu bar icon. Browse back in time and restore the file, like any other.
8. Reduce clutter
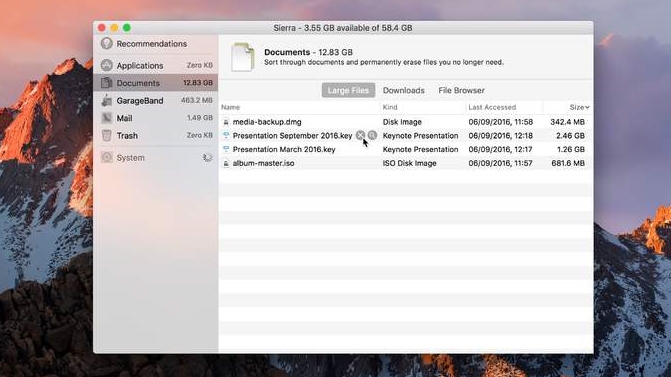
The fourth recommendation is the same as clicking Documents in the left pane. It can take a while for your drive's contents to be analysed before big items appear under Large Files, where they're listed with when they were last accessed.
9. Trash unwanted files
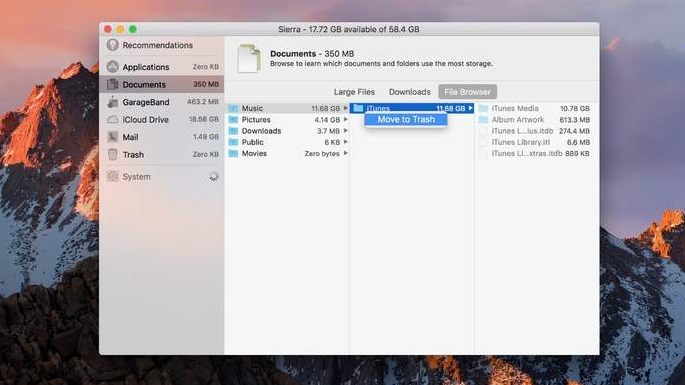
Select an item under Large Files, Downloads or File Browser and press the Spacebar to preview it, or Command + Backspace to trash it.
Be careful as File Browser is less safe than you might think; you can trash the folder that holds your iTunes library, say.
- Get MacFormat from as little as £6 every 3 months and save up to 54% when you subscribe!
- Get Mac|Life from as little as $18 per year and save up to 72% when you subscribe!