



“Sometimes I find I get to thinking of the past,” sang (or croaked) Leonard Cohen, and I’ve found myself recently doing the same. However, while Cohen was lamenting the death of a relationship, my early-onset nostalgia has been triggered by something far more tragic and poetic: the death of affordable computer components.
I’ve spent the majority of 2026 marvelling and despairing, in equal measure, at how components, especially memory-based ones, such as SSDs, RAM and graphics cards, have skyrocketed in price. As you probably know by now, this mainly due to pressures on the supply chain from a seemingly endless procession of AI services that have been gobbling up memory.
Not only has this made upgrading your PC extremely expensive (upgrading the RAM was once one of the most cost-effective upgrades you could make), it’s also made products such as laptops, games consoles, and phones more expensive too. It’s upended decades of the tradition of technology getting cheaper over time.
Watching the tech I write about (and love) get increasingly expensive and inaccessible for a lot of people is getting pretty depressing.
Take both the PS5 and Xbox Series consoles. In previous generations, six years after launch, consoles should have had numerous price cuts, making them almost impulse buys at this stage; along with a healthy second-hand game market, this traditionally meant that waiting until late into a generation to get a console was a great way to save some serious cash.
However, both the PS5 and Xbox Series have had several price rises this generation, which means buying a six-year-old bit of hardware is now more expensive. This is far from an ideal situation (and one of the reasons why the PS5 will likely be the first PlayStation console I don’t buy), and it’s not unique to consoles. Apple recently hiked the prices of its Macs and MacBooks (including the budget MacBook Neo, which launched at $599 / £599 / AU$899, but has since risen to $699 / £699 / AU$1,059 and which in turn quite drastically undermines the Neo’s value proposition).
Watching the tech I write about (and love) get increasingly expensive and inaccessible for a lot of people is getting pretty depressing. Take the Steam Deck: recently, it was announced that Steam Deck sales have dropped by a whopping 80% after Valve increased the price of the gaming handheld to $789 / £649 / AU$1,199, a $240 / £170 / AU$300 rise.
Now, I've loved the Steam Deck since day one, and would always recommend it to most people thinking about buying a new gaming laptop or handheld, simply due to its excellent value.
Now? Not so much. I simply can't justify the idea that people should buy an old, underpowered bit of kit that’s almost as expensive as the budget gaming laptops I used to tell people to avoid.
For many of us PC gamers, it also means upgrading or building a new gaming PC is now out of the question, and the hardware we currently have will need to tide us over for a few more years.
But, does that mean you can’t upgrade your PC at all for the moment? Thankfully, there are still plenty of ways to boost your computer without spending a fortune, such as upgrading parts that aren’t memory-dependant (for instance getting yourself a new monitor), or tweaking the software.
As for me, I decided to transplant one of my existing gaming PCs into a new case, while also taking the opportunity to upgrade the cooling. One of the most fun things about building PCs is coming up with a theme or design, and because of my disillusionment with the current state of computing, I thought it would be fun to turn my PC into a retro device that harkened back to a time when computing really was fun: the 1990s.
Cut to the case
Because I’m updating my current PC, I have most of the hardware already (which is just as well considering the prices of many components). Here is the starting spec:
Motherboard: MSI MPG Z690 Carbon WiFi
CPU Cooler: Corsair iCUE H150i RGB ELITE Liquid CPU Cooler
Case fans: Noctua NF-A14 PWM Chromax 140mm
Processor: Intel Core i9-12900K, 16 Cores / 24 Threads
GPU: PNY Nvidia GeForce RTX 5070 Slim
RAM: Corsair Dominator Platinum RGB 32GB DDR5 5200MHz
Storage: 500GB Samsung 970 EVO Plus M.2 PCIe
Secondary Storage: 2TB WD_BLACK AN1500 1TB NVMe SSD
Power: Corsair HX1500i 80 PLUS Platinum 1500W PSU
Case: Fractal Design Vector RS Tempered Glass
I've been feeling for a while that this is a bit of a mid-range setup that is (outside of the RTX 5070) showing its age, which is why I mainly use it for working, with a spot of image and video editing and the occasional game.
For pretty much all of my gaming needs, I have a far more powerful gaming PC with newer components (and an RTX 5090), but looking at the specs at this point in 2026 during the midst of the RAM crisis, I think I was being rather harsh on this PC. For a start, the 32GB of DDR5 RAM and 2.5TB of storage feels positively decadent these days.
So, my main goal was to swap the (perfectly fine, if a little dull) Fractal Design Vector RS case for something with a bit of retro style. Enter the Thermaltake Retro 360 TG Mid Tower Chassis.
This is a case built for modern PCs, but with a pleasingly retro look. Of course, it’s a wonderful shade of beige that will instantly give flashbacks (the good kind) to anyone who used a PC in the 1990s. It also has sections for a CD-ROM drive and floppy disk drive, though those aren’t usable and are really more of a gimmick.
Still, it looks like it could have come straight from the '90s, while still supporting modern hardware, including space for all-in-one CPU coolers, and a front panel that includes a USB-C port. It also has a tempered glass window to show off the components inside, something that’s common these days, but wasn’t really a thing back then. This combination of retro looks and modern capabilities was perfect for my needs.
Cooling off
To make things easier when transporting the motherboard and installed components into the new case, I was planning on removing the existing Corsair iCUE H150i RGB ELITE Liquid CPU cooler, giving me an excuse to install a new one.
To make the most out of the glass window of the Retro 360 TG case, I picked the Thermaltake TH360 V3 Ultra ARGB Sync AIO Liquid Cooler, which — as well as having powerful cooling — comes with a 3.95-inch LCD display that looks (to my mind, at least) like an old CRT monitor.
This screen can display system info (such as the temperature of your CPU), as well as custom animations, and I thought it would help liven up the inside of the PC, while still keeping with the retro-modern theme.
I also had a spare pack of Corsair RX120 RGB fans (the perks of being a tech journalist) that I wanted to use. For a start, they're white, which would fit the beige aesthetic, and it also meant I wouldn’t have to remove the case fans in the older chassis, potentially saving me some time and annoyance (the Thermaltake Retro 360 TG Mid Tower Chassis doesn’t come with fans, and they are essential for keeping the PC cool when in use).
Prepping for surgery
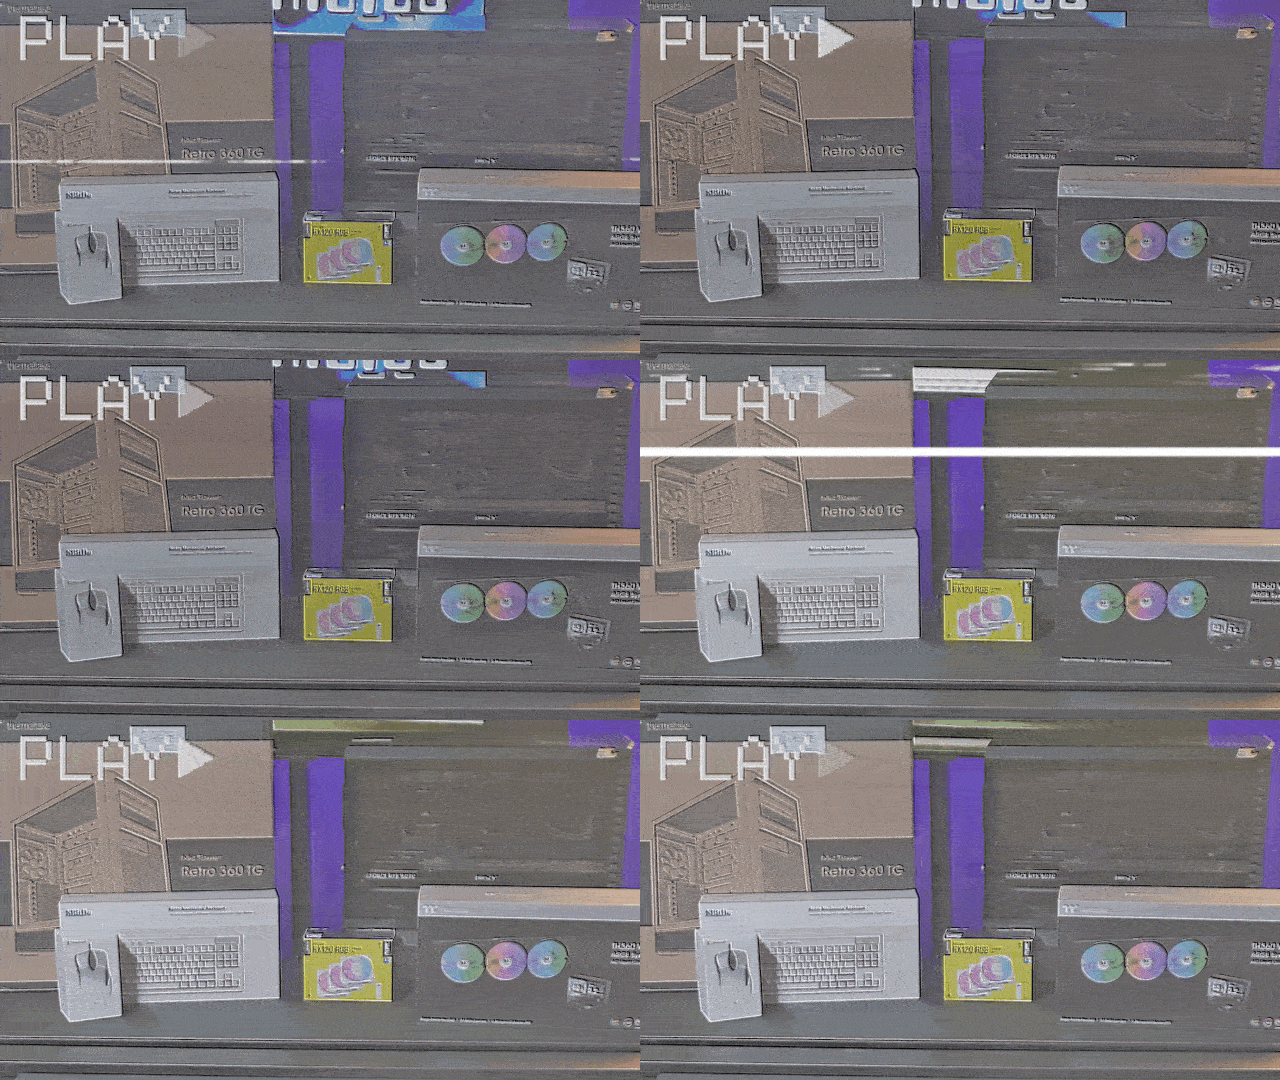
Once I’d assembled everything I needed to transform my PC into a retro powerhouse, I prepared to make the switch. Because I was swapping an already-built PC into a new case, the prep work differed slightly than if I was building a new PC from scratch.
The first step was to remove the bulk of the PC from the old case. To make things easier, I wanted to keep as much as I could in the motherboard, but there were some components that needed to be removed.
So, I started by unscrewing the large CPU cooler from the top of the processor. I then removed the GPU and WD_BLACK AN1500 SSD, which like the GPU, slots into a PCI-e lane of the motherboard. The other SSD is screwed directly into the motherboard via the M.2 port, so I didn’t need to worry about that.
I then carefully disconnected the case fans and I/O connectors (which allow you to turn the PC on and off using the buttons on the case, use USB ports, etc), then unscrewed the motherboard and lifted it out of the case.
It wasn’t a major inconvenience, but a good example of how moving cases can require tools that you’d not usually need when building a PC.
Once the motherboard was out, one of the first major hurdles that you wouldn’t encounter if building a PC from scratch presented itself. I noticed when I tried placing the motherboard in the new case that it wouldn’t sit properly. Taking it out, I realized that when unscrewing the motherboard from the old case, some of the standoffs (which screw into the case to lift the motherboard off the chassis) had been unscrewed as well, and were still attached to the motherboard.
So, I needed to hunt down some pliers, which allowed me to hold the standoffs and unscrew the motherboard from them.
Once off, I was able to screw the motherboard into the new case (which already had its own standoffs installed) without an issue. It wasn’t a major inconvenience, but a good example of how moving cases can require tools (in this case pliers) that you’d not usually need when building a PC.
Plugging in
With the motherboard installed, I then plugged in the new cases’ I/O connectors. One thing I loved about the Thermaltake Retro 360 TG Mid Tower case is that front panel’s wires, which are often individual wires that can be extremely fiddly to attach to a motherboard, came as a block, which made installation much easier and faster.
While the larger components were still laying on my desk, I also connected up the PSU cables. The Corsair HX1500i 80 PLUS Platinum, which again I transported from the old PC, is a modular PSU, which means the cables aren’t permanently attached to the PSU — instead you can just plug in the cables you need to both the motherboard and PSU.
This makes installation a lot easier, and cable management much neater, and it meant I could plug the cables into the motherboard without having to install the PSU until later (a decision I made to make things easier, but I’m not sure it worked!).
I also took the opportunity to install the three Corsair RX120 RGB fans, adding two to the front of the chassis to pull in cooler air, and one at the rear that pushes hot air generated by the PC’s components out of the case.
These fans are more advanced than the previous ones I used for the PC: rather than being plugged into the motherboard and controlled that way, they daisy chain to each other, then connect to an iCUE LINK system hub, which then connects to the motherboard via a microUSB cable, all powered by the PSU.
This made the installation harder, as it meant I needed to route the proprietary cables to connect each fan to the hub, and some of those cables weren’t that long. It also meant having to hunt down an extra PSU cable, which caused issues later. While the iCUE LINK system hub meant I had greater control over the fan’s RGB lighting and temperature control, I don’t really think it was worth the extra effort. If I did this again, I’d stick to standard, easier-to-install case fans.
Finally, I installed the TH360 V3 Ultra ARGB Sync AIO CPU cooler. I removed the existing thermal paste from the CPU and reapplied a small blob. I had ordered extra thermal paste as I wasn’t sure if the CPU cooler would include some, as not all do. As it turns out, the cooler does come with a small tube of thermal paste, so I now have a spare tube, but it’s always handy to have extra.
It was important to reapply the thermal paste, as the existing paste on the CPU was now several years old, and some of it remained on the cooler when I removed it. To ensure maximum cooling efficiency, removing the old paste and applying new paste was the best, and safest, option.
Installation was easy: I screwed the radiator and fans to the top of the case, attached the fan controls to the CPU Pump header on the motherboard, then placed the screen (which attached via magnets) on the cooler.
Always keep hold of cables and any other extras that come with your components, even if you don’t initially need to use them
With that in place, I then put the GPU and SSD back in their PCIe slots, connected (almost) everything up to the PSU, then secured the PSU in the case.
I say ‘almost’, as I didn’t have a cable to attach the iCUE LINK hub to the PSU. As I mentioned earlier, the PSU is modular, so I had only plugged in the cables I needed during the original build, but now I needed an extra cable. The PC wouldn’t boot without the hub powered on, nor would it boot when I tried a cable from a different PSU (this is likely a safety feature — you should never use cables from a different PSU, but I wanted to check).
Thankfully, after some rummaging around, I found the extra cables from the PSU, installed the correct cable to the hub and the PC booted fine. This wouldn’t have been an issue if I’d used a more basic fan, but at least I was now up and running. It also highlighted an important lesson: always keep hold of cables and any other extras that come with your components, even if you don’t initially need to use them.
Finishing touches
With the PC booting without issue, I then added the finishing touches. For instance, I ordered some retro stickers from Geekenspiel, a website that makes the kind of stickers you used to find on PCs, but for modern hardware (such as a sticker with the old Nvidia logo, but referencing the modern RTX graphics card).
I also paired the PC with the 8BitDo Retro Mechanical Keyboard, a wonderful-feeling keyboard that offers modern features but with an old-fashioned look and beige colorway that perfectly complements the PC.
I also ordered a Microsoft ProIntelli Wired mouse, which is a modern mouse inspired by Microsoft’s iconic IntelliMouse peripherals. Again, it combines retro looks with modern tech, which makes it a perfect choice for this build.
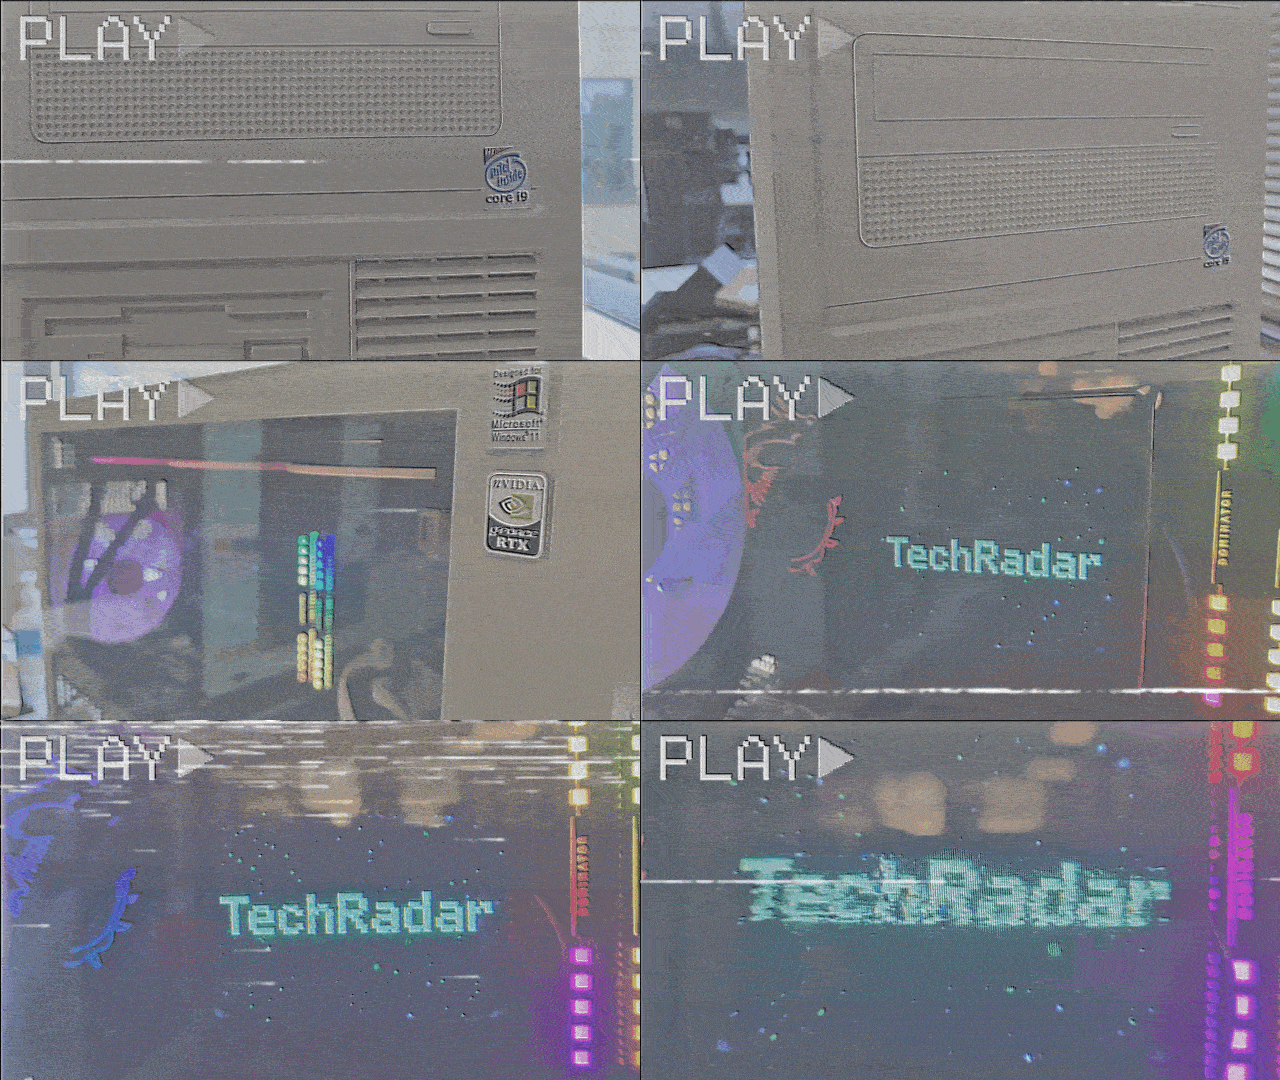
With the peripherals attached, I logged into Windows 11 and set up the TT RGB PLUS 3.0 software, which allows me to tweak the settings of the TH360 V3 Ultra ARGB Sync AIO CPU cooler, and configure the screen. I made a short retro-inspired gif of the TechRadar logo, and used the software to display it on the LCD screen of the cooler.
I was very pleased with the results, and it instantly made the PC more interesting visually while still feeling retro. However, I have to say the TT RGB PLUS 3.0 software seemed quite flakey, with some options simply not working. The software also needs to load in Windows 11 before the animation plays on the screen.
The fans of the cooler were also very loud, and setting them to ‘Quiet’ in the software didn’t seem to make a difference. So, I restarted the PC and went into its BIOS and tweaked the fan speeds there, which worked. Suddenly, the PC was whisper-quiet.
Turning Windows 11 into Windows 95
I wasn’t quite done, however. While the hardware now certainly looked the part, I wanted the software to match. At first, I considered ditching Windows 11 altogether and instead using a Linux distro skinned to look like Windows 95.
The benefits of this is that I’d be free of all the bloat that Windows 11 comes with, especially the AI stuff I have no interest in, and also that Linux is far more customizable; with a bit of time, I could make an operating system that looked and acted a lot more like Windows 95.
However, there were also plenty of downsides. For one, it would be time-consuming to install and configure a distro, and many PC games and software won’t run natively on Linux. The TT RGB PLUS 3.0 software, for instance, won't work on Linux, and while there are workarounds, they are again time-consuming and fiddly. Plus, this approach would mean things like adding gifs to the screen wouldn’t work — and I wanted my gifs.
So, I decided to stick with Windows 11, but heavily mod it to look like Windows 95. This involved using WindowBlinds 11 and Start11 by Stardock. The first piece of software lets you drastically change the look of Windows 11, and has a ‘classic’ theme that’s perfect for my needs.
For a little while, I was able to pretend the tech world wasn’t a dumpster fire, but a more fun, perhaps more innocent, place to be
Start11, as you might have guessed from the name, focuses on the Start menu, and allows you to tweak it so that it looks, and works, like the classic Start menus of Windows 95 and Windows 98.

Each of these bits of software took a bit of configuring, but before long I had Windows 11 looking, and feeling, like Windows 95. Changing the desktop icons through Windows 11’s settings to feature classic Windows icons (I downloaded them from DeviantArt), and changing the desktop wallpaper to a solid teal color completed the look.

While not perfect (Windows Explorer still tries to show Windows 11-era tabs, and the taskbar clock can be a bit funny), I now had a retro-inspired modern operating system to complement my retro PC.

Overall, I was pretty happy, and a comforting sense of nostalgia washed over me as I used my big beige box. For a little while, I was able to pretend the tech world wasn’t a dumpster fire, but a more fun, perhaps more innocent, place to be.

Final thoughts
Overall, I’m so glad I tried this out: it feels, ironically, as if I’ve given my aging PC a new lease of life. It looks great, and the mouse and keyboard feel fantastic — and familiar. Windows 11 also feels more sprightly, as I turned off a lot of the unnecessary animations and visual effects that usually run when using the operating system.
Strangely, I have also managed to fix a weird startup bug the PC used to have where sometimes the GPU didn’t power on. Since moving the PC into its new case, this has not happened once, so I must have inadvertently changed something during the move (not just by removing the GPU, as I had tried that before, and even swapped GPUs, and the problem persisted), so that’s a nice side effect.
The process was a lot faster with an existing PC than if I’d built one from scratch, though that has meant I needed to make some compromises. The motherboard and components don’t really complement the beige case, for instance; if I’d been building a new PC, I’d have probably tried to get white components instead, and cables to match.
Even in 2026, building, tweaking and upgrading your PC can be fun and creative, and you don’t have to spend a fortune if you can repurpose a lot of the components
I’m also glad that I’m a bit of a hoarder when it comes to tech, and I hadn’t thrown away the PSU cables I didn’t originally use. Okay, so I might have felt a bit daft holding on to cables for almost half a decade that I would likely never use, but it meant that I had the correct one when I needed it.
Finally, it proved that even in 2026, building, tweaking and upgrading your PC can be fun and creative, and you don’t have to spend a fortune if you can repurpose a lot of the components.
The retro theme of both the PC itself and the software it runs looks and feels great as well. It was hard work, but well worth it. If this article has inspired you to do something similar, let me know in the comments below!

Follow TechRadar on Google News and add us as a preferred source to get our expert news, reviews, and opinion in your feeds.
