TechRadar Verdict
Pros
- +
Drag, drop and click a preset – easy
- +
Good results with Exposure Fusion
- +
Good value for money
- +
Saves HDR files for re-editing
- +
Good help system, ideal for novices
Cons
- -
No zoom function for fine details
Why you can trust TechRadar
HDR photography is a tricky technique to master because you're attempting to combine separate exposures of a super-high contrast scene into a single image. You need a tripod or an exceptionally steady hand to get a series of shots that line up in the first place, and then special software to combine them and compress the extra-wide range of brightness levels into a viewable image.
Most HDR apps assume you already know to shoot a series of suitable images in the first place, which isn't particularly helpful if you're just starting out.
HDRtist starts as it means to carry on, though, offering beginner-friendly tips on how to get those images in the first place. Just click 'How to take HDR Photos' on the Welcome screen, and it'll walk you through everything you need to know according to the sort of camera you've got (compact, super-zoom, SLR) or the method you want to use (single image, exposure series, tripod or not).
This is the thing about HDR – you don't always have to shoot a whole series of images. That's only for subjects with a wider brightness range than the camera can capture. If the camera can cope with the scene in front of it without clipping important shadow or highlight detail, you can still create an 'HDR' image because the other part of the process is balancing up the dark and light areas so that they have similar brightness levels.
RAW support
Like other HDR programs, HDRtist can work with both single images and exposure series, and you can use it to exploit the extra latent dynamic range in RAW files; as long as the Mac OS supports the RAW file format, HDRtist can open them.
HDRtist offers two methods, or 'Generators': Exposure Fusion and HDR. Exposure Fusion is often the most effective at producing natural-looking images, and it works by blending the best-exposed parts of each of the images in the series.
Sign up for breaking news, reviews, opinion, top tech deals, and more.
The HDR Generator, however, uses the classic HDR technique of combining and processing the brightness values mathematically. It's all really easy to do. Just select the photos you want to combine in the Finder and drag them onto the HDRtist icon.
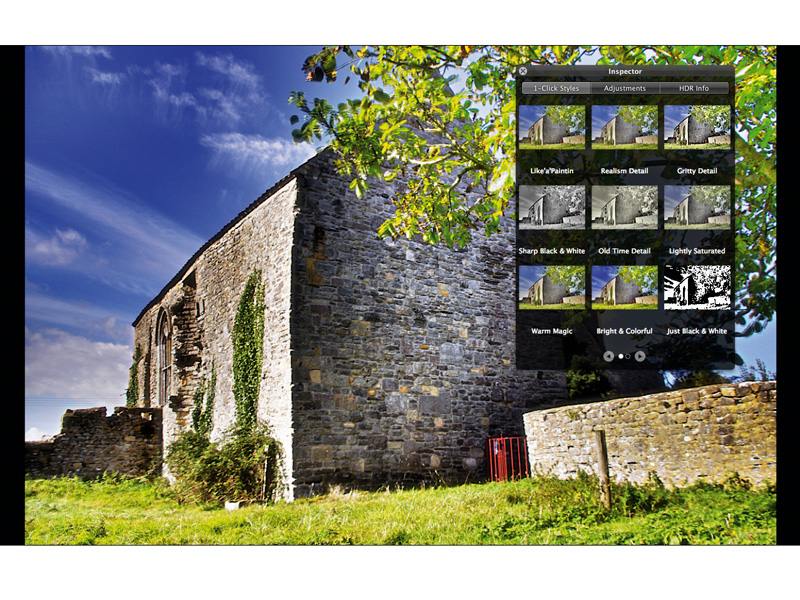
It creates a new HDR document, imports the photos and displays them in the source bar to the left of the picture, and then blends them automatically. If you don't like what you see, you can choose one of the 15 '1-Click Styles' in the Inspector.
If it's still not right, you can use the Inspector's Adjustments tab to tweak the settings and save a preset.
Your source photos aren't aligned by default, but there is an Align Images button on the toolbar. It can take a minute or so to complete the process, but you'll need to do this if you shot handheld, because the camera will have moved slightly between exposures.
It's a shame there's no zoom function, though, because it means you can't check the image detail for alignment or noise.
HDRtist Pro is simple, cheap and effective, especially when you compare it to the alternatives. For example, Photoshop CS5 has its own HDR tools, but you have to work pretty hard to get good results.
HDR experts might be able to squeeze a little more out of expensive alternatives, but for sheer ease of use, simplicity and value for money, HDRtist is brilliant.
Follow TechRadar Reviews on Twitter: http://twitter.com/techradarreview

Rod is an independent photographer and photography journalist with more than 30 years' experience. He's previously worked as Head of Testing for Future’s photography magazines, including Digital Camera, N-Photo, PhotoPlus, Professional Photography, Photography Week and Practical Photoshop, and as Reviews Editor on Digital Camera World.
