How to make Linux Mint look like OS X

You might be wondering why we'd spend time morphing elements of the Linux Mint desktop into the shape of OS X, but there are several great reasons.
Firstly, while recent Linux desktops like Unity and Gnome Shell take many of their cues from OS X, they don't give you the option of only changing what you want to. Our piecemeal modifications will let you add only the features you want, while getting some of that OS X eye candy and usability. This isn't a betrayal – it's an example of Linux's adaptability.
Secondly, OS X is rapidly gaining share in the PC market, despite tough conditions. This is partly because of its user focus, and anything Linux can do to assimilate any of OS X's features will help adoption, as well as the general usability of the desktop.
We've chosen the Gnome version of the Mint 11 desktop because it's now the most popular Linux distribution and because it uses the classic Gnome desktop. This makes it more configurable.
As revolutionary as Gnome Shell and Unity are, neither uses a desktop paradigm and neither can be modified particularly easily, which has given Gnome 2.x a boost in popularity. Mint is also a good candidate because its default configuration could be said to be more like Windows than other desktops, giving any OS X-like additions great impact.
Updating the desktop

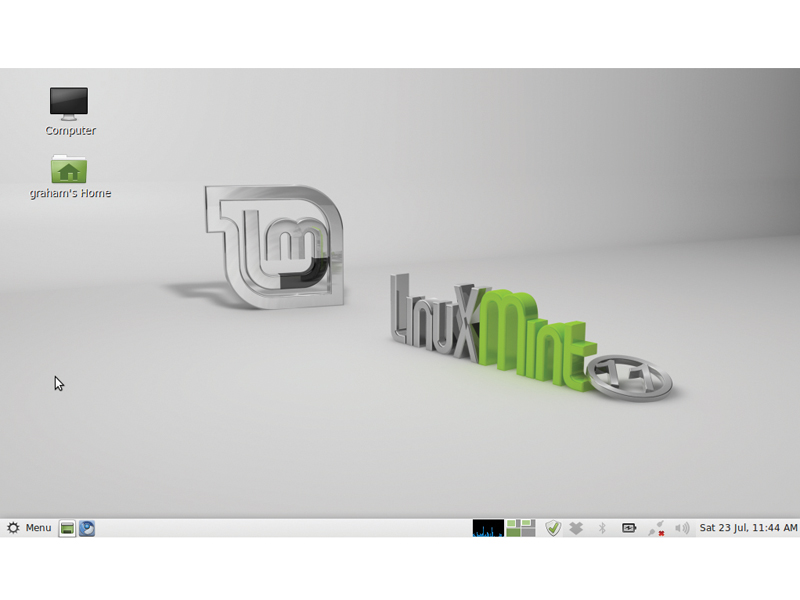
With a mind to making the Mint desktop more like OS X, there are a few obvious targets. The first are the colour and theme, because they look nothing like OS X. The latest version of Mint has a bright, light grey background and window decorations.
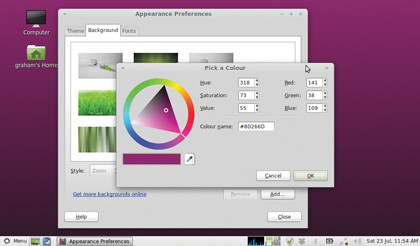
Changing the desktop background is easy – just right-click it, select 'Change desktop background' and choose an image you prefer. You might even want to hunt around online, because the default selection that comes with Mint keeps to the house colours of green, green and green. Alternatively, choose the 'Colours' background type, change it to a vertical gradient, and make the two colours purple and black.
Sign up for breaking news, reviews, opinion, top tech deals, and more.
If you've gone for a space-type background, you'll notice that this doesn't sit particularly well with the green of the default icons, so your next task will be to change them. There are lots to choose from, but we've found that the 'Elementary' set, which can be installed from the Synaptic Package Manager, to be a good match.
Don't select the Mint-specific variety, because these have been changed to the official Mint colours. You can change the icons via the Appearance panel, which can be found by clicking 'Control centre' in the launch menu.

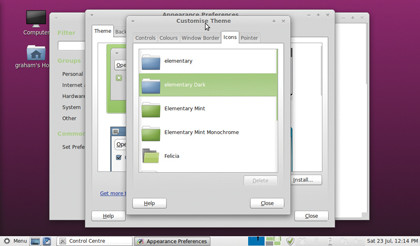
The Appearance panel lets you choose between whichever themes you have installed, and change the icons within them. We think the default Mint theme is quite Mac-like (it's called 'Mint-X-Metal'), so to change the icons, make sure this theme is selected and click the 'Customise' button.
Switch to the Icons tab in the new panel and select the icon set you prefer. If you've installed the 'Elementary' package, its blue icons will be at the top of the list.
Before closing this panel, click on the 'Colours' tab and replace the Mint green with something more Cupertino-friendly. We'd recommend a neutral blue with a web value of #8A92CD.
Desktop usability

The OS X desktop also behaves differently from Mint's, especially if you're a power user. You might want to move the default Mint panel, for instance. This resides on the lower border of the screen, whereas the OS X equivalent sits on the top border, much like older versions of Ubuntu.
You can move this easily by right-clicking on a blank section of the panel, selecting the 'Properties' menu option and in the window that appears, changing 'Bottom' in the Orientation field to 'Top'. You can also change its transparency to an OS X equivalent using the slider on the same window, but this is slightly problematic because not all of the widgets within the panel become transparent.
One of Mint's best features is also one that will make a few more of OS X's features easier to achieve, and that's Compiz. Compiz is the graphics effects layer for the desktop. In the past it was used to make wobbly windows and desktop cubes, but has since matured into a neat accelerated layer for graphical frippery.
Mint even pre-configures Compiz to use the same virtual desktop transitions as OS X spaces, but you can't see this because neither are keyboard shortcuts nor the panel applet to make the desktops visible enabled. The latter can be added by right-clicking the panel, selecting the 'Add to panel' option and looking for the workspace switcher.
Once you've added this, you'll be able to switch between four virtual desktops by clicking on their quadrants in this applet. To complete this experience, open the Keyboard Shortcuts panel from the launch menu. This will let you assign keys to the virtual desktop transitions just as you can with OS X. We recommend [Alt] plus the cursors for navigating between desktops, and [Alt] plus a number for switching to a desktop directly. These shortcuts are very close to the OS X equivalent.
You can use the Compiz Config Setting Manager to change the transition effects for virtual desktops, but you can also use it to add other OS X desktop modes like Exposé. This effect will zoom out of all your virtual desktops to give you a panoramic overview of what's on them. You can then select the desktop to return to. You can find this listed as 'Expo' under the 'Desktop' category.
By default, pressing [Windows] followed by [S] enables the Exposé mode, but as with OS X, you can also activate Expose by moving the cursor into a corner of the display. You can set this up in the Exposé configuration panel by clicking on the 'Expo edge' option and changing it to the corner you find easiest to use.
- 1
- 2
Current page: Mint into OS X: Updating the desktop
Next Page Mint into OS X: Dock and file manager