22 common Windows 7 problems solved
How to fix those Windows 7 annoyances
Sign up for breaking news, reviews, opinion, top tech deals, and more.
You are now subscribed
Your newsletter sign-up was successful
13. DVD audio issues
Windows 7 runs well even on old notebooks, say reviewers, and in general they're right. But we have seen reports of problems, for example with DVD audio, where movie sound is either completely unintelligible or doesn't appear at all.
Should anything similar happen to you then head off to Control Panel, click Hardware and Sound > Sound, right-click your current default playback device (it'll have a green tick displayed) and select Properties.
Then click Advanced, clear any settings in the Exclusive Mode box and click OK. You've now ensured that older or badly-behaved drivers can't take complete control of the speakers any more, and this alone will often be enough to get your system working again. (But if it doesn't, installing new audio drivers is your next best option.)
14. Windows Live MovieMaker
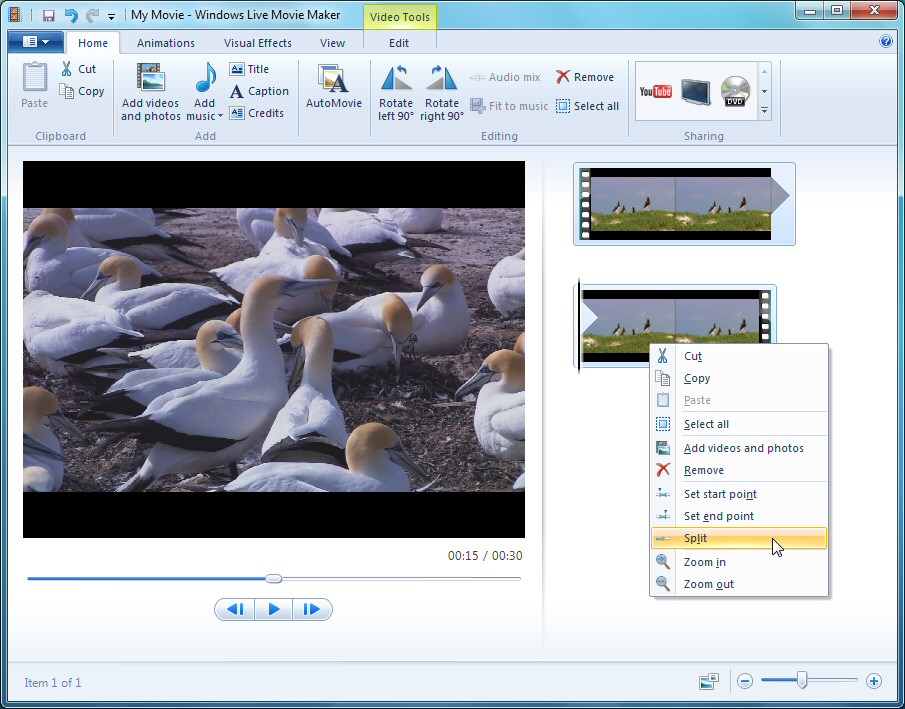
For some bizarre reason Windows Live MovieMaker won't let you import network files by default. Okay, so they'll be large and may monopolise network traffic for a while, but shouldn't that be your choice?
Anyway, a quick Registry tweak will solve this annoying problem. Simply run REGEDIT, browse to HKEY_CURRENT_USER\Software\Microsoft\Windows Live\Movie Maker, add a DWORD value called AllowNetworkFiles and set it to 1: job done.
Sign up for breaking news, reviews, opinion, top tech deals, and more.

IMPORT NETWORK FILES: Network access is only a Registry tweak away
15. XP Mode doesn't work
If you've ancient software that won't work under Windows 7 then in theory you can use XP Mode, a virtual machine with an installation of Windows XP that should be more successful. In practice, however, it doesn't always work out that way.
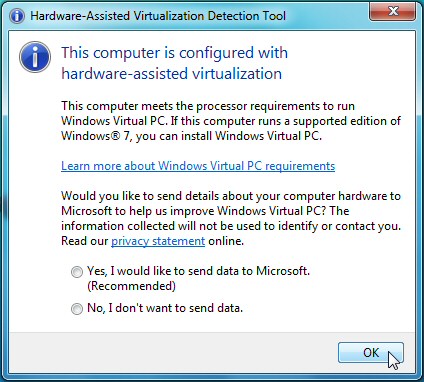
Problem 1 is XP Mode requires hardware support from the CPU. The Microsoft Hardware-Assisted Virtualization Detection Tool can check your system to see if it's compatible.
Problem 2 is the feature must be enabled in the BIOS. Microsoft has some instructions, but essentially you just need to browse your BIOS setup program looking for an AMD-V, Intel VT or VIA VT virtualisation setting and ensure it's turned on.
Unfortunately problem number 3 is that some laptop manufacturers have previously disabled this setting for "security" reasons. Sony Vaios had the feature turned off for a while, for instance, prompting some to recommend ways in which you can edit their firmware to restore the setting, although Sony seems to have restored it recently. If hardware virtualisation is turned off on your system then check with the manufacturer - a BIOS upgrade may fix the problem.
And if all else fails, just use a package like VirtualBox that doesn't insist on hardware support. You will need to provide a licenced copy of XP (or whatever other version you want to use) to install on it, though.

WINDOWS 7 XP MODE: Good news - this CPU is up to the task of running XP Mode
16. Add Windows Media Center to AutoPlay options
Windows 7 includes Media Center, but for some strange reason you can't choose it as an AutoPlay handler. The only standard program that can be launched to play DVD-Video discs, say, is Media Player, which seems an odd limitation.
Fortunately there's no fundamental change that's preventing this from working, it's just that Windows 7 doesn't contain the required Registry entries. If you've a Windows Vista PC to hand then you could export these yourself: just go to HKEY_LOCAL_MACHINE\SOFTWARE\Microsoft\Windows\CurrentVersion\Explorer\AutoplayHandlers and save all the keys and values beginning with EHome.
Windows expert Ramesh Srinivasan has done the hard work already, though, so it's probably easier to download the .REG file from him. Take a look at Srinivasan's Winhelponline to find out more.
17. Missing crash dump files
Impressive though Windows 7 is, it'll crash sometimes, and if you've installed diagnostic software like the Windows debugging tools then you'll want the crash dump file to hand for further investigations. And yet in some situations you'll find the memory.dmp file never appears. So what's going on?
First, click Start, right-click Computer and select Properties > Advanced System Settings > Startup and Recovery Settings. Make sure that "Write debugging information" is set to something other than "none", and that "Dump file" is the default "%SystemRoot%\MEMORY.DMP".
If that's all correct then check your free hard drive space. If your system isn't on a domain, and has less than 25GB free, then Windows 7 will no longer keep a crash dump file. If you'd like to change that, launch REGEDIT, browse to HKEY_LOCAL_MACHINE\SYSTEM\CurrentControlSet\Control\CrashControl, create a new DWORD value called AlwaysKeepMemoryDump, set it to 1, and in future the crash dump file will always be preserved.
Current page: 13-17: Fixing XP mode and audio issues
Prev Page 7-12: Finding missing applets, folders and extensions Next Page 18-22: Disabling hibernation and more
Mike is a lead security reviewer at Future, where he stress-tests VPNs, antivirus and more to find out which services are sure to keep you safe, and which are best avoided. Mike began his career as a lead software developer in the engineering world, where his creations were used by big-name companies from Rolls Royce to British Nuclear Fuels and British Aerospace. The early PC viruses caught Mike's attention, and he developed an interest in analyzing malware, and learning the low-level technical details of how Windows and network security work under the hood.