Instagram on iOS: the complete guide
Everything you need to know about the photo-sharing app
Sign up for breaking news, reviews, opinion, top tech deals, and more.
You are now subscribed
Your newsletter sign-up was successful
4. Comments and more
Tap here to see activity about you and your photos; when people follow you, or comment on or like your photos, tapping this button will tell you who's done what. Instagram supports Push notifications too for this kind of information, and you can define in the app's settings what you get notified about. You'll also see some information about the people you follow here too, such as when they add their photos to the new maps feature.
5. Your profile
Tap this button to see all the photos you've uploaded as a grid, list or, if you allow it, pinned to a map, stats about how many people are following you and more, plus the option for editing your profile. There's also a cog at the top right of the profile page; tap this to configure more settings.
6. A photo in your stream
Photos in your stream, whether they're ones you took or from those you're following, are shown nice and big on your screen. Below each one you see comments and buttons to comment or like the shot, and above it is the name of the account that posted it, plus, if the poster added a specific geotag, the name of where it was taken. (Tip: tap this to see more photos taken there!)
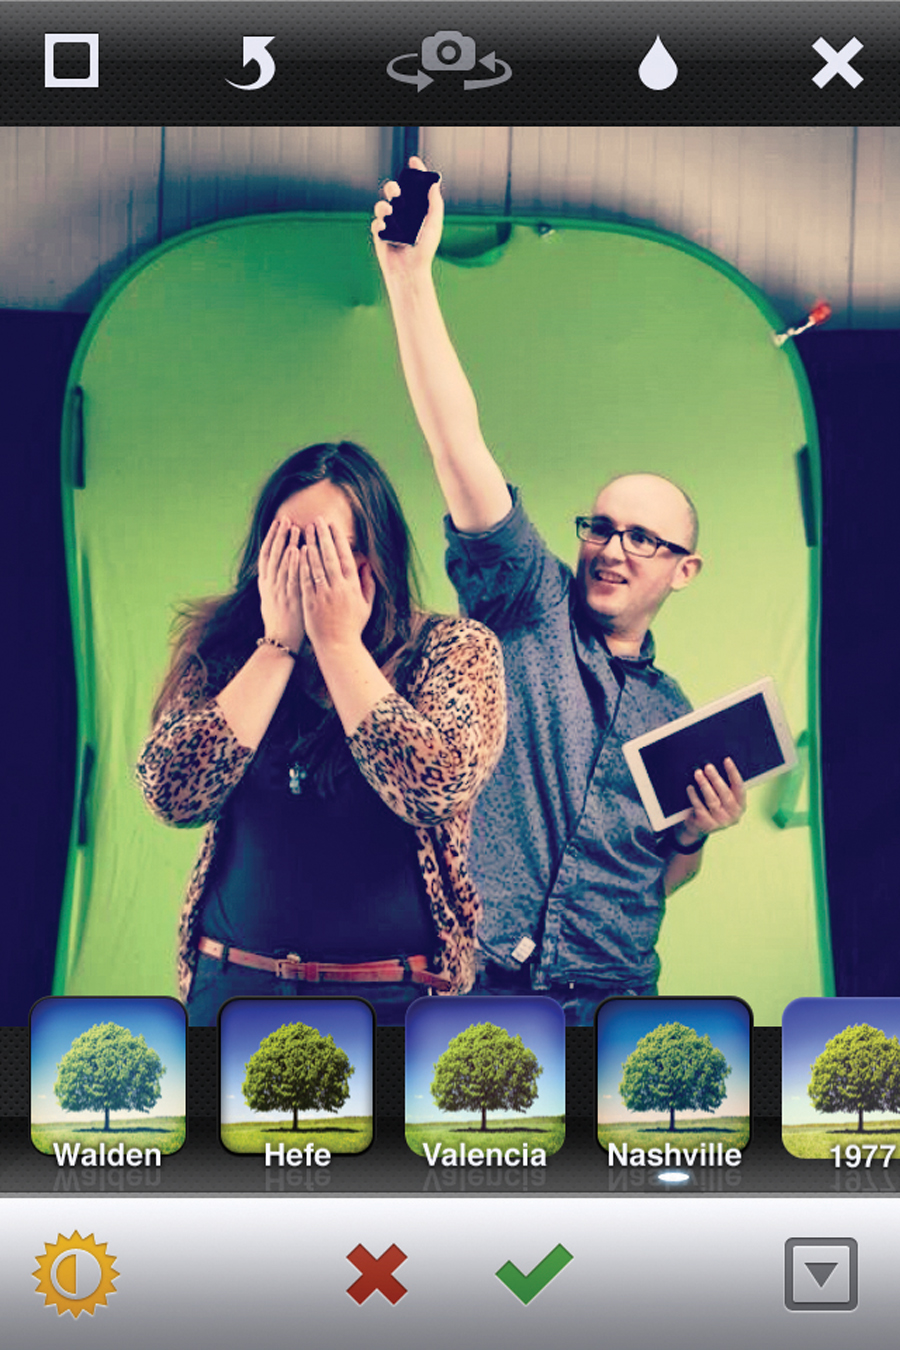
7. Filters
Once you've taken a photo or chosen one from your library, you can apply one of Instagram's filters to it before uploading. Scroll horizontally through this list and tap one to see it applied instantly to your shot. Also experiment with tapping the Lux button at the bottom left - though in our experience this only works well on landscapes.
8. Image options

From left to right, this top bar offers you the option to add a border; rotate your photo 90° anti-clockwise (tap more than once if you need to); toggle between your device's front and back camera if appropriate; add focus blur or remove it if you don't like it; and cancel editing and uploading this photo.
Never used Instagram before
Right, let's get you started with Instagram. Since you've never used it before, we'd recommend that you just focus on this section, work your way through it then go off and do some Instagramming; don't worry about trying to take everything in from our more advanced tutorials, or having to buy extra kit and apps.
If all you do is install the app on your iPhone, iPad or iPod touch, and then sign up, that's fine for today; you'll gradually get an idea of how the community works, and even if you don't feel confident in taking and sharing photos now, you soon will!
Sign up for breaking news, reviews, opinion, top tech deals, and more.
Get the app

The first step, then, is to download the app from the App Store. It's designed for iPhone and iPod touch, but it will work on an iPad as well - you can always tap the 2× icon in the bottom-right corner to make it bigger on the iPad's screen.
Of course, while it's best to have a device with a camera so that you can snap and upload wherever you are, you can still install the app on camera-less devices, either just so you can interact with the community of Instagrammers, or so that you can upload photos that are already stored in your Photos app.
Sign up
Once you've installed the app, tap the icon to launch it, and you'll be presented with a screen inviting you to login or sign up. Assuming you've never used it before, tap Sign up and fill in your details. The Instagram app will then present you with some suggested users that you might like to follow just to get you started.
Be selective, though; popular accounts are all well and good, but for our money nothing beats following real-life friends, and you don't want their posts to be drowned out.